Multiclass application - softmax regression
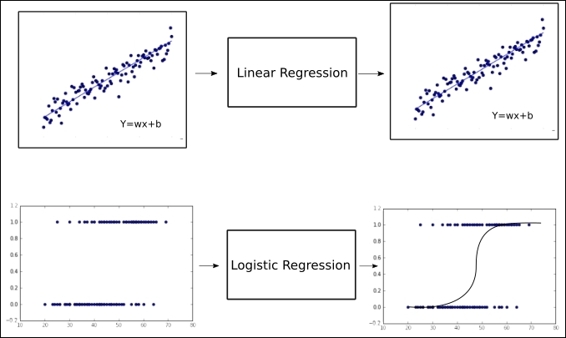
Up until now, we have been classifying for the case of only two classes, or in probabilistic language, event occurrence probabilities, p.
In the case of having more than two classes to decide from, there are two main approaches; one versus one, and one versus all.
- The first technique consists of calculating many models that represent the probability of every class against all the other ones.
- The second one consists of one set of probabilities, in which we represent the probability of one class against all the others.
- This second approach is the output format of the
softmax regression, a generalization of the logistic regression for n classes.
So we will be changing, for training samples, from binary labels ( y(i)ε{0,1}), to vector labels, using the handle y(i)ε{1,...,K}, where K is the number of classes, and the label Y can take on K different values, rather than only two.
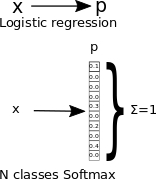
So for this particular technique, given a test input X, we want to estimate the probability that P(y=k|x) for each value of k=1,...,K. The softmax regression will output a K-dimensional vector (whose elements sum to 1), giving us our K estimated probabilities.
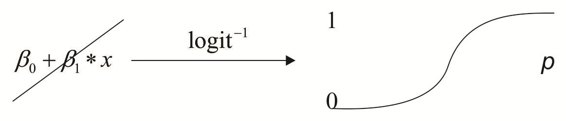
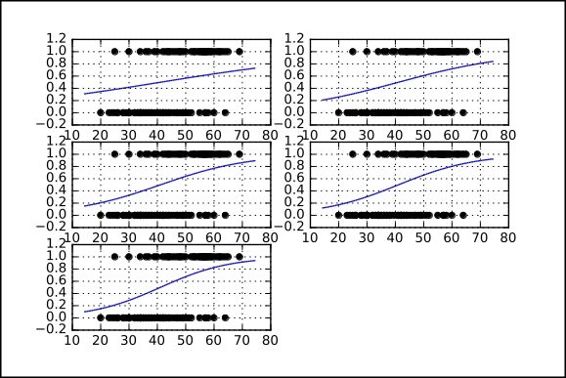
In the following diagram, we represent the mapping that occurs on the probability mappings of the uniclass and multiclass logistic regression:
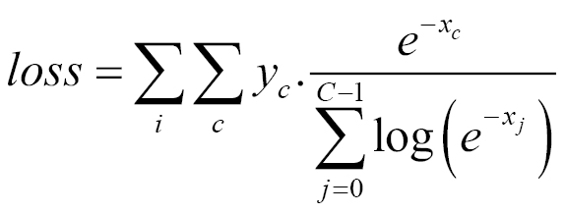
The cost function of the softmax function is an adapted cross entropy function, which is not linear, and thus penalizes the big order function differences much more than the very small ones.
Here, c is the class number and I the individual train sample index, and yc is 1 for the expected class and 0 for the rest.
Expanding this equation, we get the following:
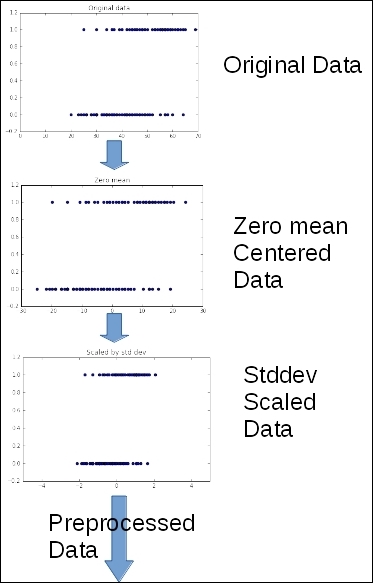
Data normalization for iterative methods
As we will see in the following sections, for logistic regression we will be using the gradient descent method for minimizing a cost function.
This method is very sensitive to the form and the distribution of the feature data.
For this reason, we will be doing some preprocessing in order to get better and faster converging results.
We will leave the theoretical reasons for this method to other books, but we will summarize the reason saying that with normalization, we are smoothing the error surface, allowing the iterative gradient descent to reach the minimum error faster.
One hot representation of outputs
In order to use the softmax function as the regression function, we must use a type of encoding known as one hot. This form of encoding simply transforms the numerical integer value of a variable into an array, where a list of values is transformed into a list of arrays, each with a length of as many elements as the maximum value of the list, and the value of each elements is represented by adding a one on the index of the value, and leaving the others at zero.
For example, this will be the representation of the list [1, 3, 2, 4] in one hot encoding:
[[0 1 0 0 0]
[0 0 0 1 0]
[0 0 1 0 0]
[0 0 0 0 1]]