Welcome to Wagtail’s documentation
Wagtail is an open source CMS written in Python and built on the Django web framework.
Below are some useful links to help you get started with Wagtail.
- First steps
- Using Wagtail
- For editors
Index
Getting started
Wagtail is built on the Django web framework, so this document assumes you’ve already got the essentials installed. But if not, those essentials are:
We’d also recommend Virtualenv, which provides isolated Python environments:
Important
Before installing Wagtail, it is necessary to install the libjpeg and zlib libraries, which provide support for working with JPEG, PNG and GIF images (via the Python Pillow library). The way to do this varies by platform - see Pillow’s platform-specific installation instructions.
With the above installed, the quickest way to install Wagtail is:
$ pip install wagtail
(sudo may be required if installing system-wide or without virtualenv)
Once installed, Wagtail provides a command similar to Django’s django-admin startproject which stubs out a new site/project:
$ wagtail start mysite
This will create a new folder mysite, based on a template containing all you need to get started. More information on that template is available here.
Inside your mysite folder, we now just run the setup steps necessary for any Django project:
$ pip install -r requirements.txt
$ ./manage.py migrate
$ ./manage.py createsuperuser
$ ./manage.py runserver
Your site is now accessible at http://localhost:8000, with the admin backend available at http://localhost:8000/admin/.
This will set you up with a new standalone Wagtail project. If you’d like to add Wagtail to an existing Django project instead, see Integrating Wagtail into a Django project.
There are a few optional packages which are not installed by default but are recommended to improve performance or add features to Wagtail, including:
Your first Wagtail site
Note
This tutorial covers setting up a brand new Wagtail project. If you’d like to add Wagtail to an existing Django project instead, see Integrating Wagtail into a Django project.
Install Wagtail and its dependencies:
$ pip install wagtailStart your site:
$ wagtail start mysite
$ cd mysite
Wagtail provides a
startcommand similar todjango-admin.py startproject. Runningwagtail start mysitein your project will generate a newmysitefolder with a few Wagtail-specific extras, including the required project settings, a “home” app with a blankHomePagemodel and basic templates and a sample “search” app.Install project dependencies:
$ pip install -r requirements.txtThis ensures that you have the relevant version of Django for the project you’ve just created.
Create the database:
$ python manage.py migrateIf you haven’t updated the project settings, this will be a SQLite database file in the project directory.
Create an admin user:
$ python manage.py createsuperuserpython manage.py runserverIf everything worked, http://127.0.0.1:8000 will show you a welcome page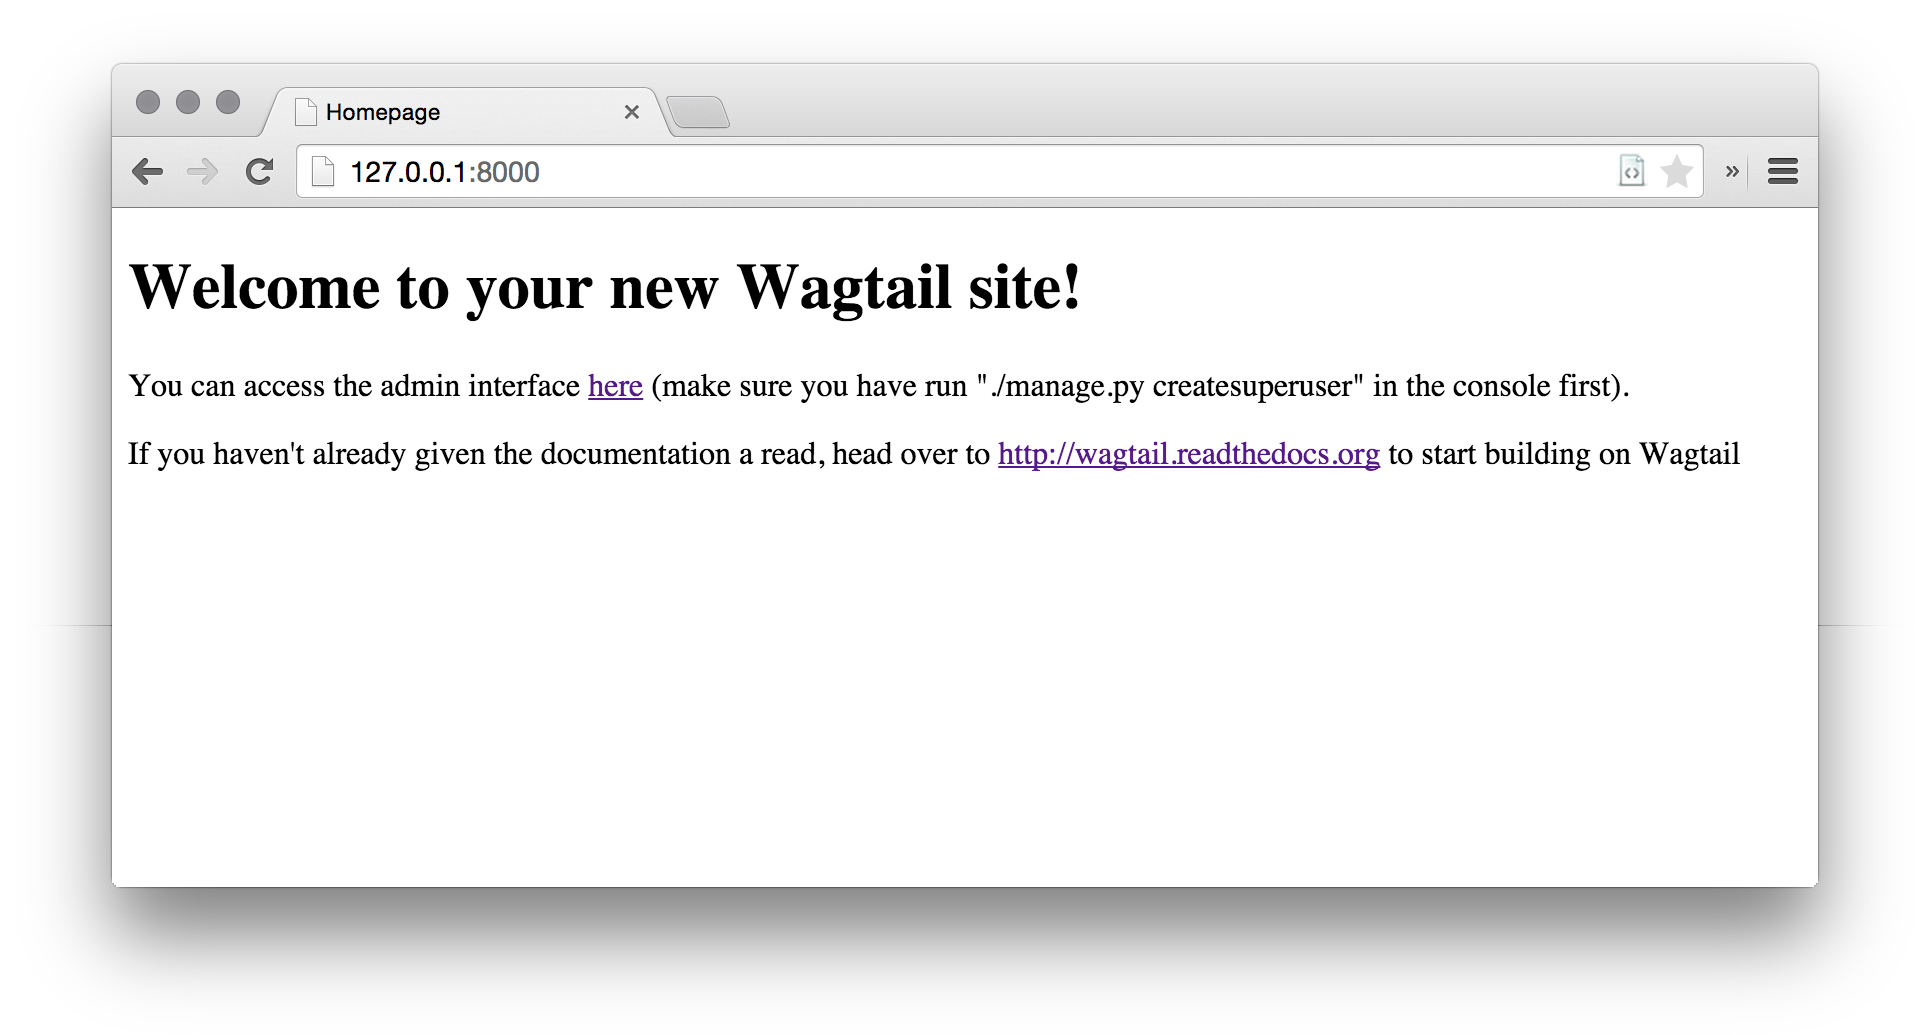
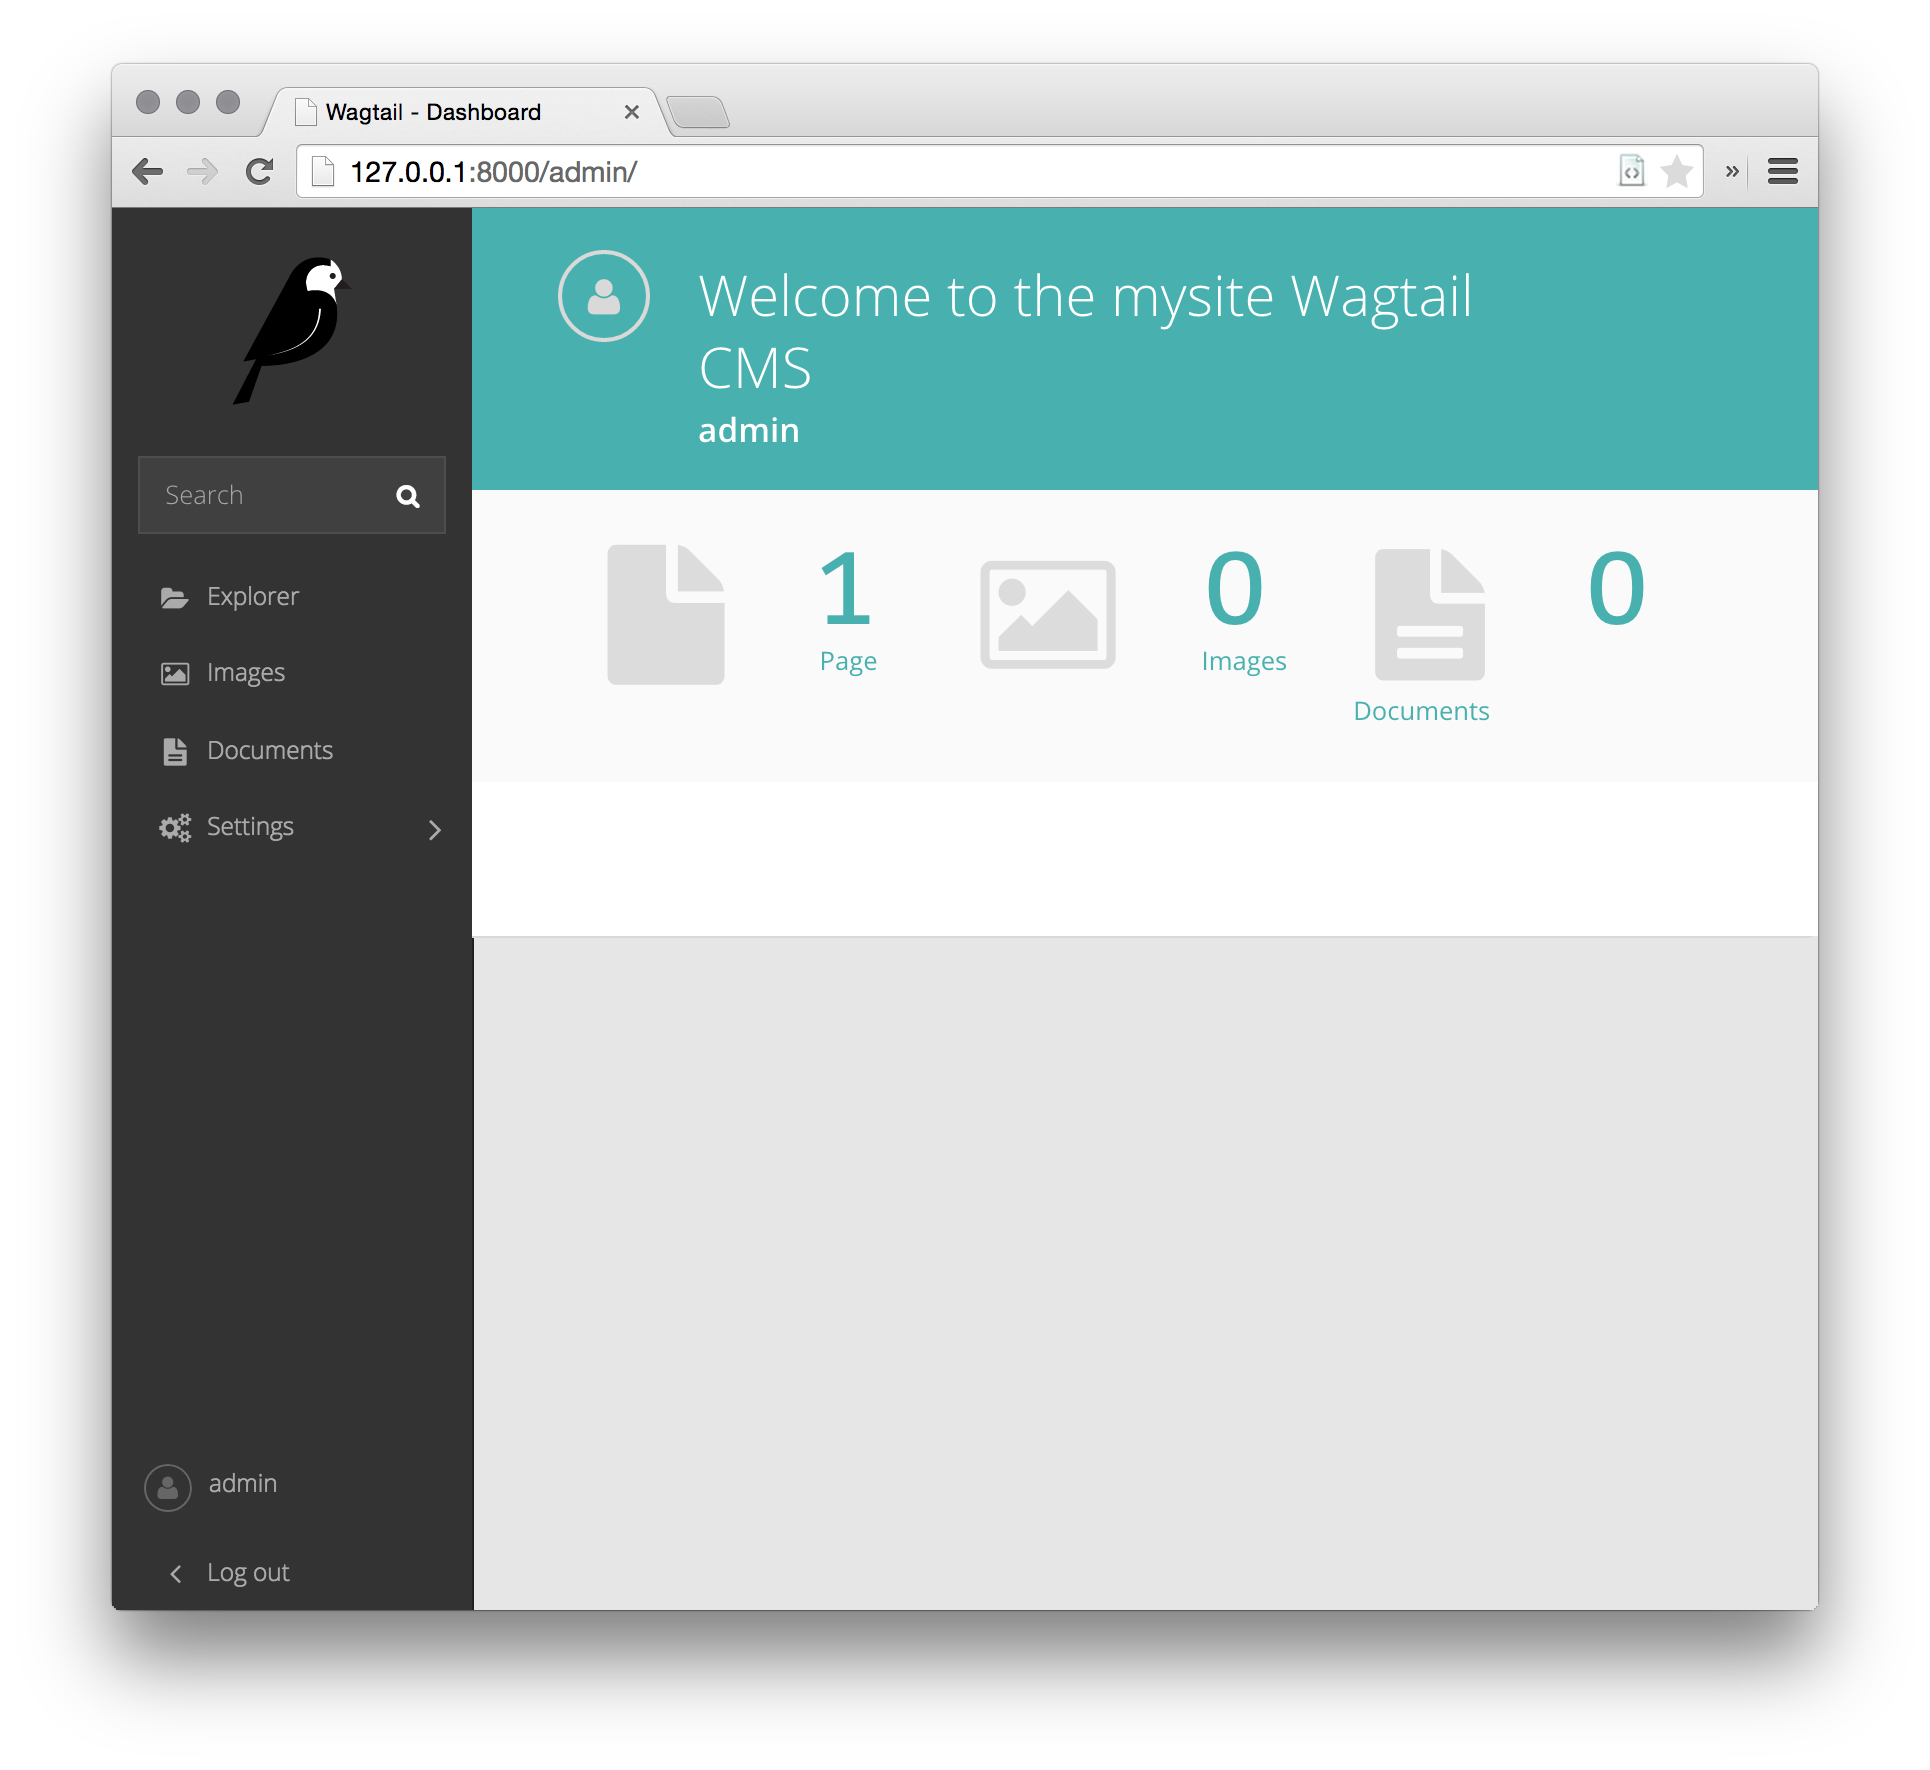
You can now access the administrative area at http://127.0.0.1:8000/admin
Extend the HomePage model
Out of the box, the “home” app defines a blank HomePage model in models.py, along with a migration that creates a homepage and configures Wagtail to use it.
Edit home/models.py as follows, to add a body field to the model:
from __future__ import unicode_literals

from django.db import models

from wagtail.wagtailcore.models import Page
from wagtail.wagtailcore.fields import RichTextField
from wagtail.wagtailadmin.edit_handlers import FieldPanel


class HomePage(Page):
    body = RichTextField(blank=True)

    content_panels = Page.content_panels + [
        FieldPanel('body', classname="full"),
    ]
body is defined as RichTextField, a special Wagtail field. You can use any of the Django core fields. content_panels define the capabilities and the layout of the editing interface. More on creating Page models.
Run python manage.py makemigrations, then python manage.py migrate to update the database with your model changes. You must run the above commands each time you make changes to the model definition.
You can now edit the homepage within the Wagtail admin area (go to Explorer, Homepage, then Edit) to see the new body field. Enter some text into the body field, and publish the page.
The page template now needs to be updated to reflect the changes made to the model. Wagtail uses normal Django templates to render each page type. By default, it will look for a template filename formed from the app and model name, separating capital letters with underscores (e.g. HomePage within the ‘home’ app becomes home/home_page.html). This template file can exist in any location recognised by Django’s template rules; conventionally it is placed under a templates folder within the app.
Edit home/templates/home/home_page.html to contain the following:
{% extends "base.html" %}

{% load wagtailcore_tags %}

{% block body_class %}template-homepage{% endblock %}

{% block content %}
    {{ page.body|richtext }}
{% endblock %}
Wagtail template tags
Wagtail provides a number of template tags & filters which can be loaded by including {% load wagtailcore_tags %} at the top of your template file.
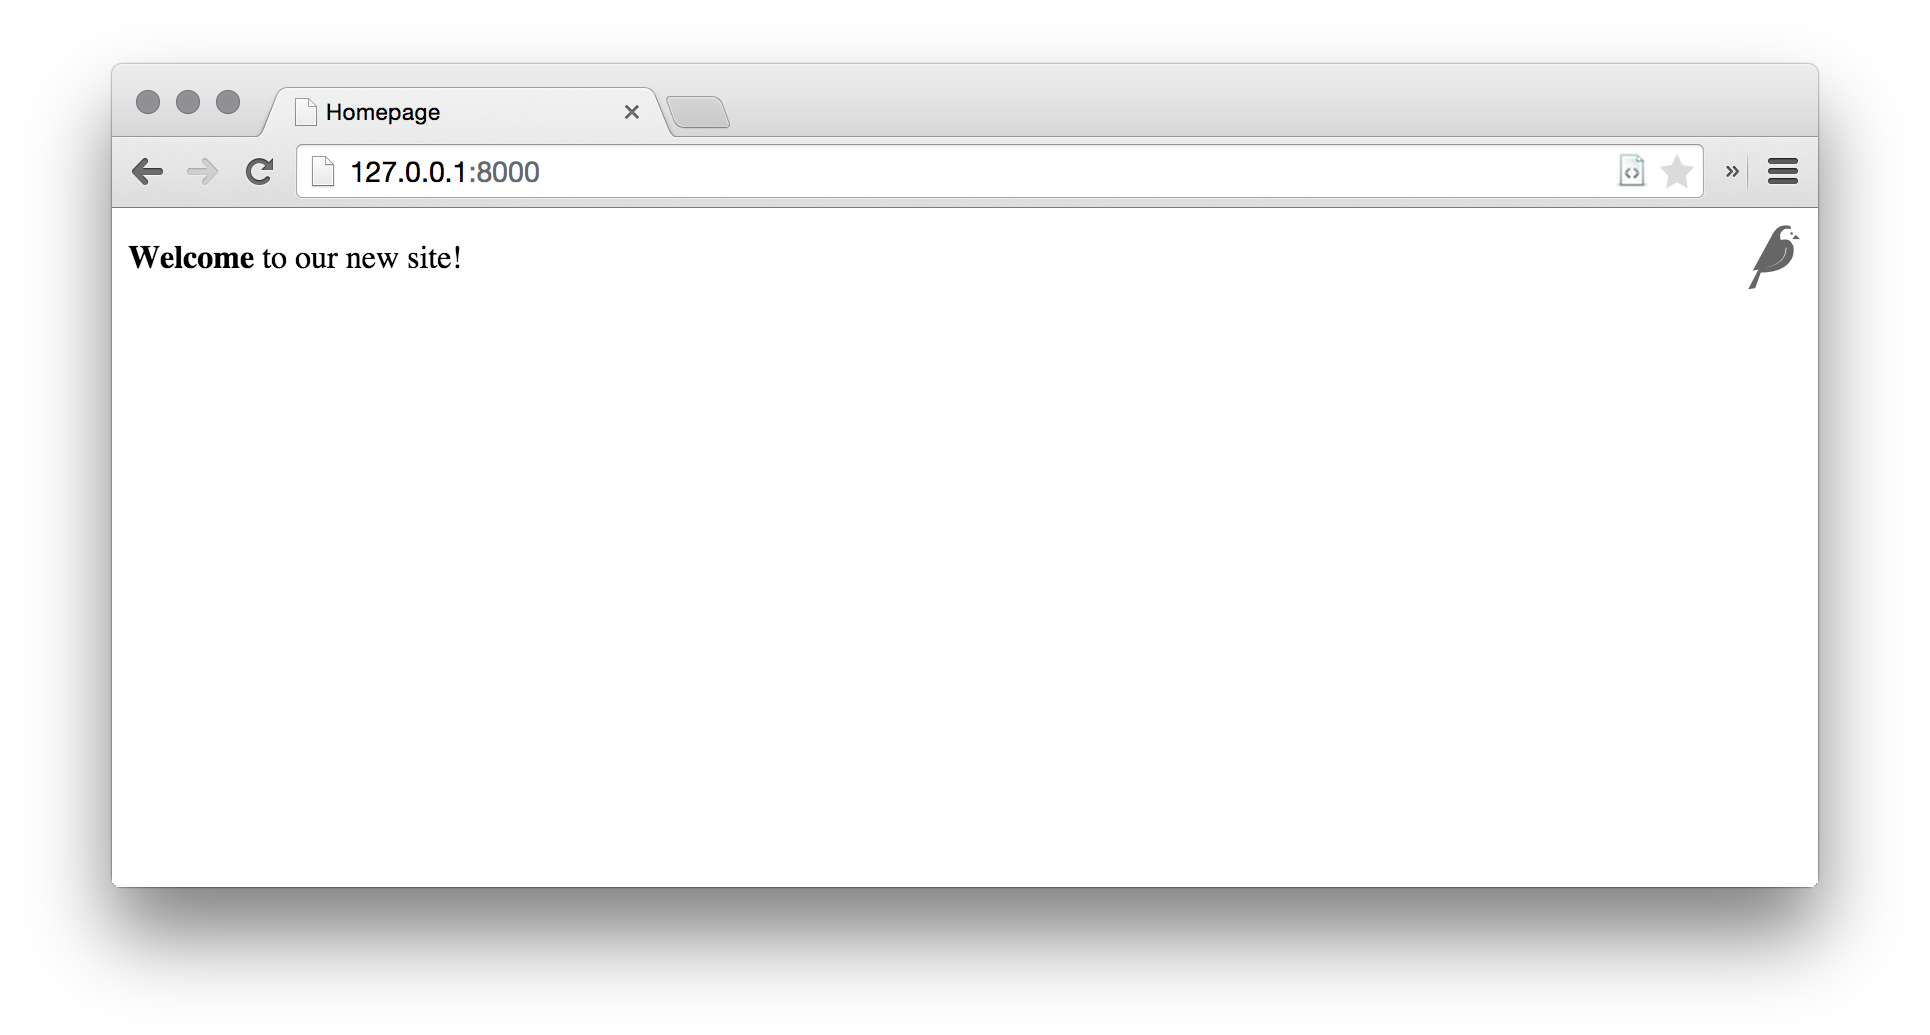
In this tutorial, we use the richtext filter to escape and print the contents of a RichTextField:
{% load wagtailcore_tags %}
{{ page.body|richtext }}
Produces:
<div class="rich-text">
    <p>
        <b>Welcome</b> to our new site!
    </p>
</div>
Note: You’ll need to include {% load wagtailcore_tags %} in each template that uses Wagtail’s tags. Django will throw a TemplateSyntaxError if the tags aren’t loaded.
A basic blog
We are now ready to create a blog. To do so, run python manage.py startapp blog to create a new app in your Wagtail site.
Add the new blog app to INSTALLED_APPS in mysite/settings/base.py.
Blog Index and Posts
Lets start with a simple index page for our blog. In blog/models.py:
from wagtail.wagtailcore.models import Page
from wagtail.wagtailcore.fields import RichTextField
from wagtail.wagtailadmin.edit_handlers import FieldPanel


class BlogIndexPage(Page):
    intro = RichTextField(blank=True)

    content_panels = Page.content_panels + [
        FieldPanel('intro', classname="full")
    ]
Run python manage.py makemigrations and python manage.py migrate.
Since the model is called BlogIndexPage, the default template name (unless we override it) will be blog/templates/blog/blog_index_page.html. Create this file with the following content:
{% extends "base.html" %}

{% load wagtailcore_tags %}

{% block body_class %}template-blogindexpage{% endblock %}

{% block content %}
    <h1>{{ page.title }}</h1>

    <div class="intro">{{ page.intro|richtext }}</div>

    {% for post in page.get_children %}
        <h2><a href="{% pageurl post %}">{{ post.title }}</a></h2>
        {{ post.specific.intro }}
        {{ post.specific.body|richtext }}
    {% endfor %}

{% endblock %}
Most of this should be familiar, but we’ll explain get_children a bit later. Note the pageurl tag, which is similar to Django’s url tag but takes a Wagtail Page object as an argument.
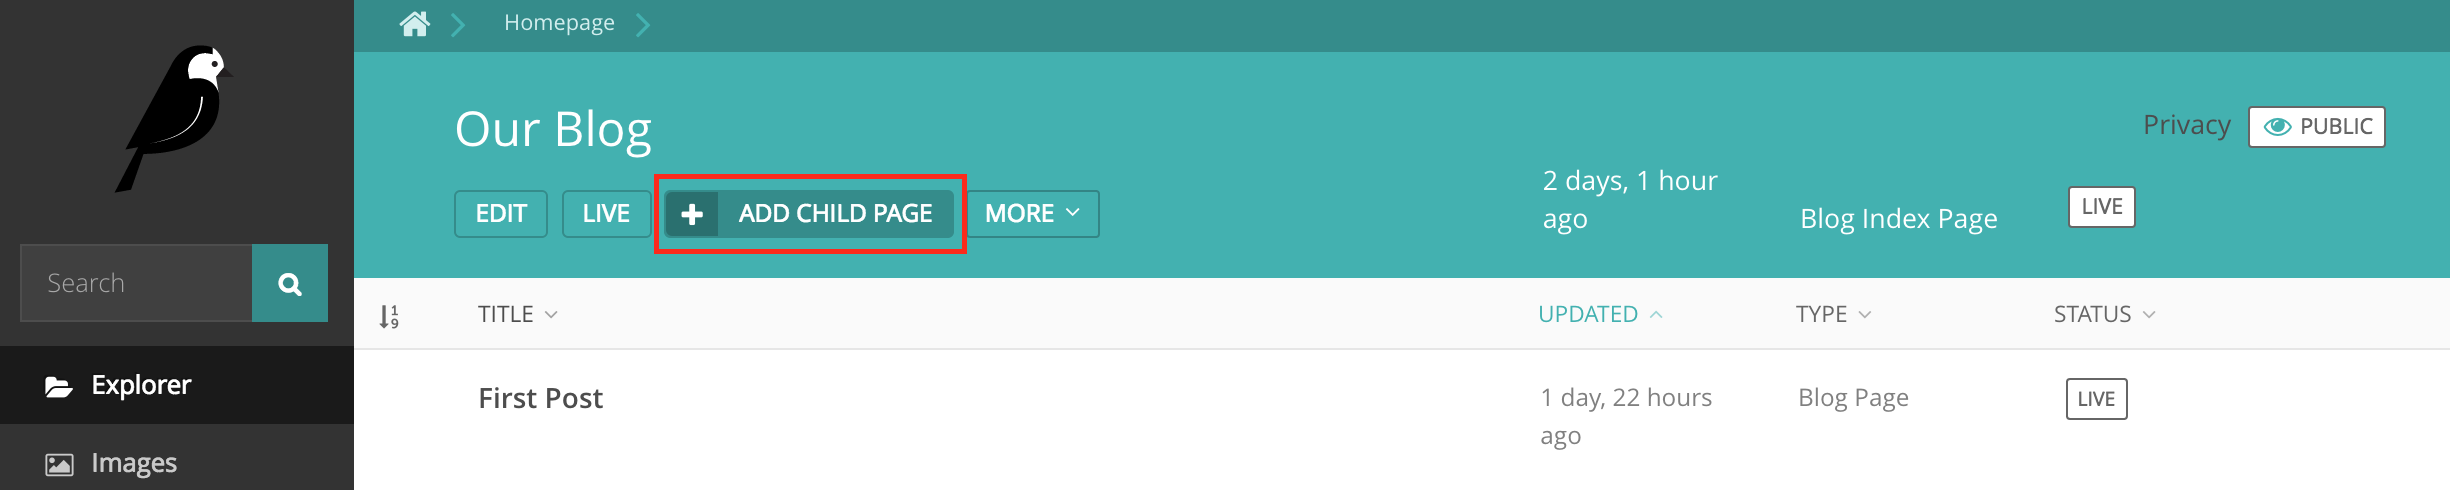
In the Wagtail admin, create a BlogIndexPage under the Homepage, make sure it has the slug “blog” on the Promote tab, and publish it. You should now be able to access the url /blog on your site (note how the slug from the Promote tab defines the page URL).
Now we need a model and template for our blog posts. In blog/models.py:
from django.db import models

from wagtail.wagtailcore.models import Page
from wagtail.wagtailcore.fields import RichTextField
from wagtail.wagtailadmin.edit_handlers import FieldPanel
from wagtail.wagtailsearch import index


# Keep the definition of BlogIndexPage, and add:


class BlogPage(Page):
    date = models.DateField("Post date")
    intro = models.CharField(max_length=250)
    body = RichTextField(blank=True)

    search_fields = Page.search_fields + [
        index.SearchField('intro'),
        index.SearchField('body'),
    ]

    content_panels = Page.content_panels + [
        FieldPanel('date'),
        FieldPanel('intro'),
        FieldPanel('body', classname="full"),
    ]
Run python manage.py makemigrations and python manage.py migrate.
Create a template at blog/templates/blog/blog_page.html:
{% extends "base.html" %}

{% load wagtailcore_tags %}

{% block body_class %}template-blogpage{% endblock %}

{% block content %}
    <h1>{{ page.title }}</h1>
    <p class="meta">{{ page.date }}</p>

    <div class="intro">{{ page.intro }}</div>

    {{ page.body|richtext }}

    <p><a href="{{ page.get_parent.url }}">Return to blog</a></p>

{% endblock %}
Note the use of Wagtail’s built-in get_parent() method to obtain the URL of the blog this post is a part of.
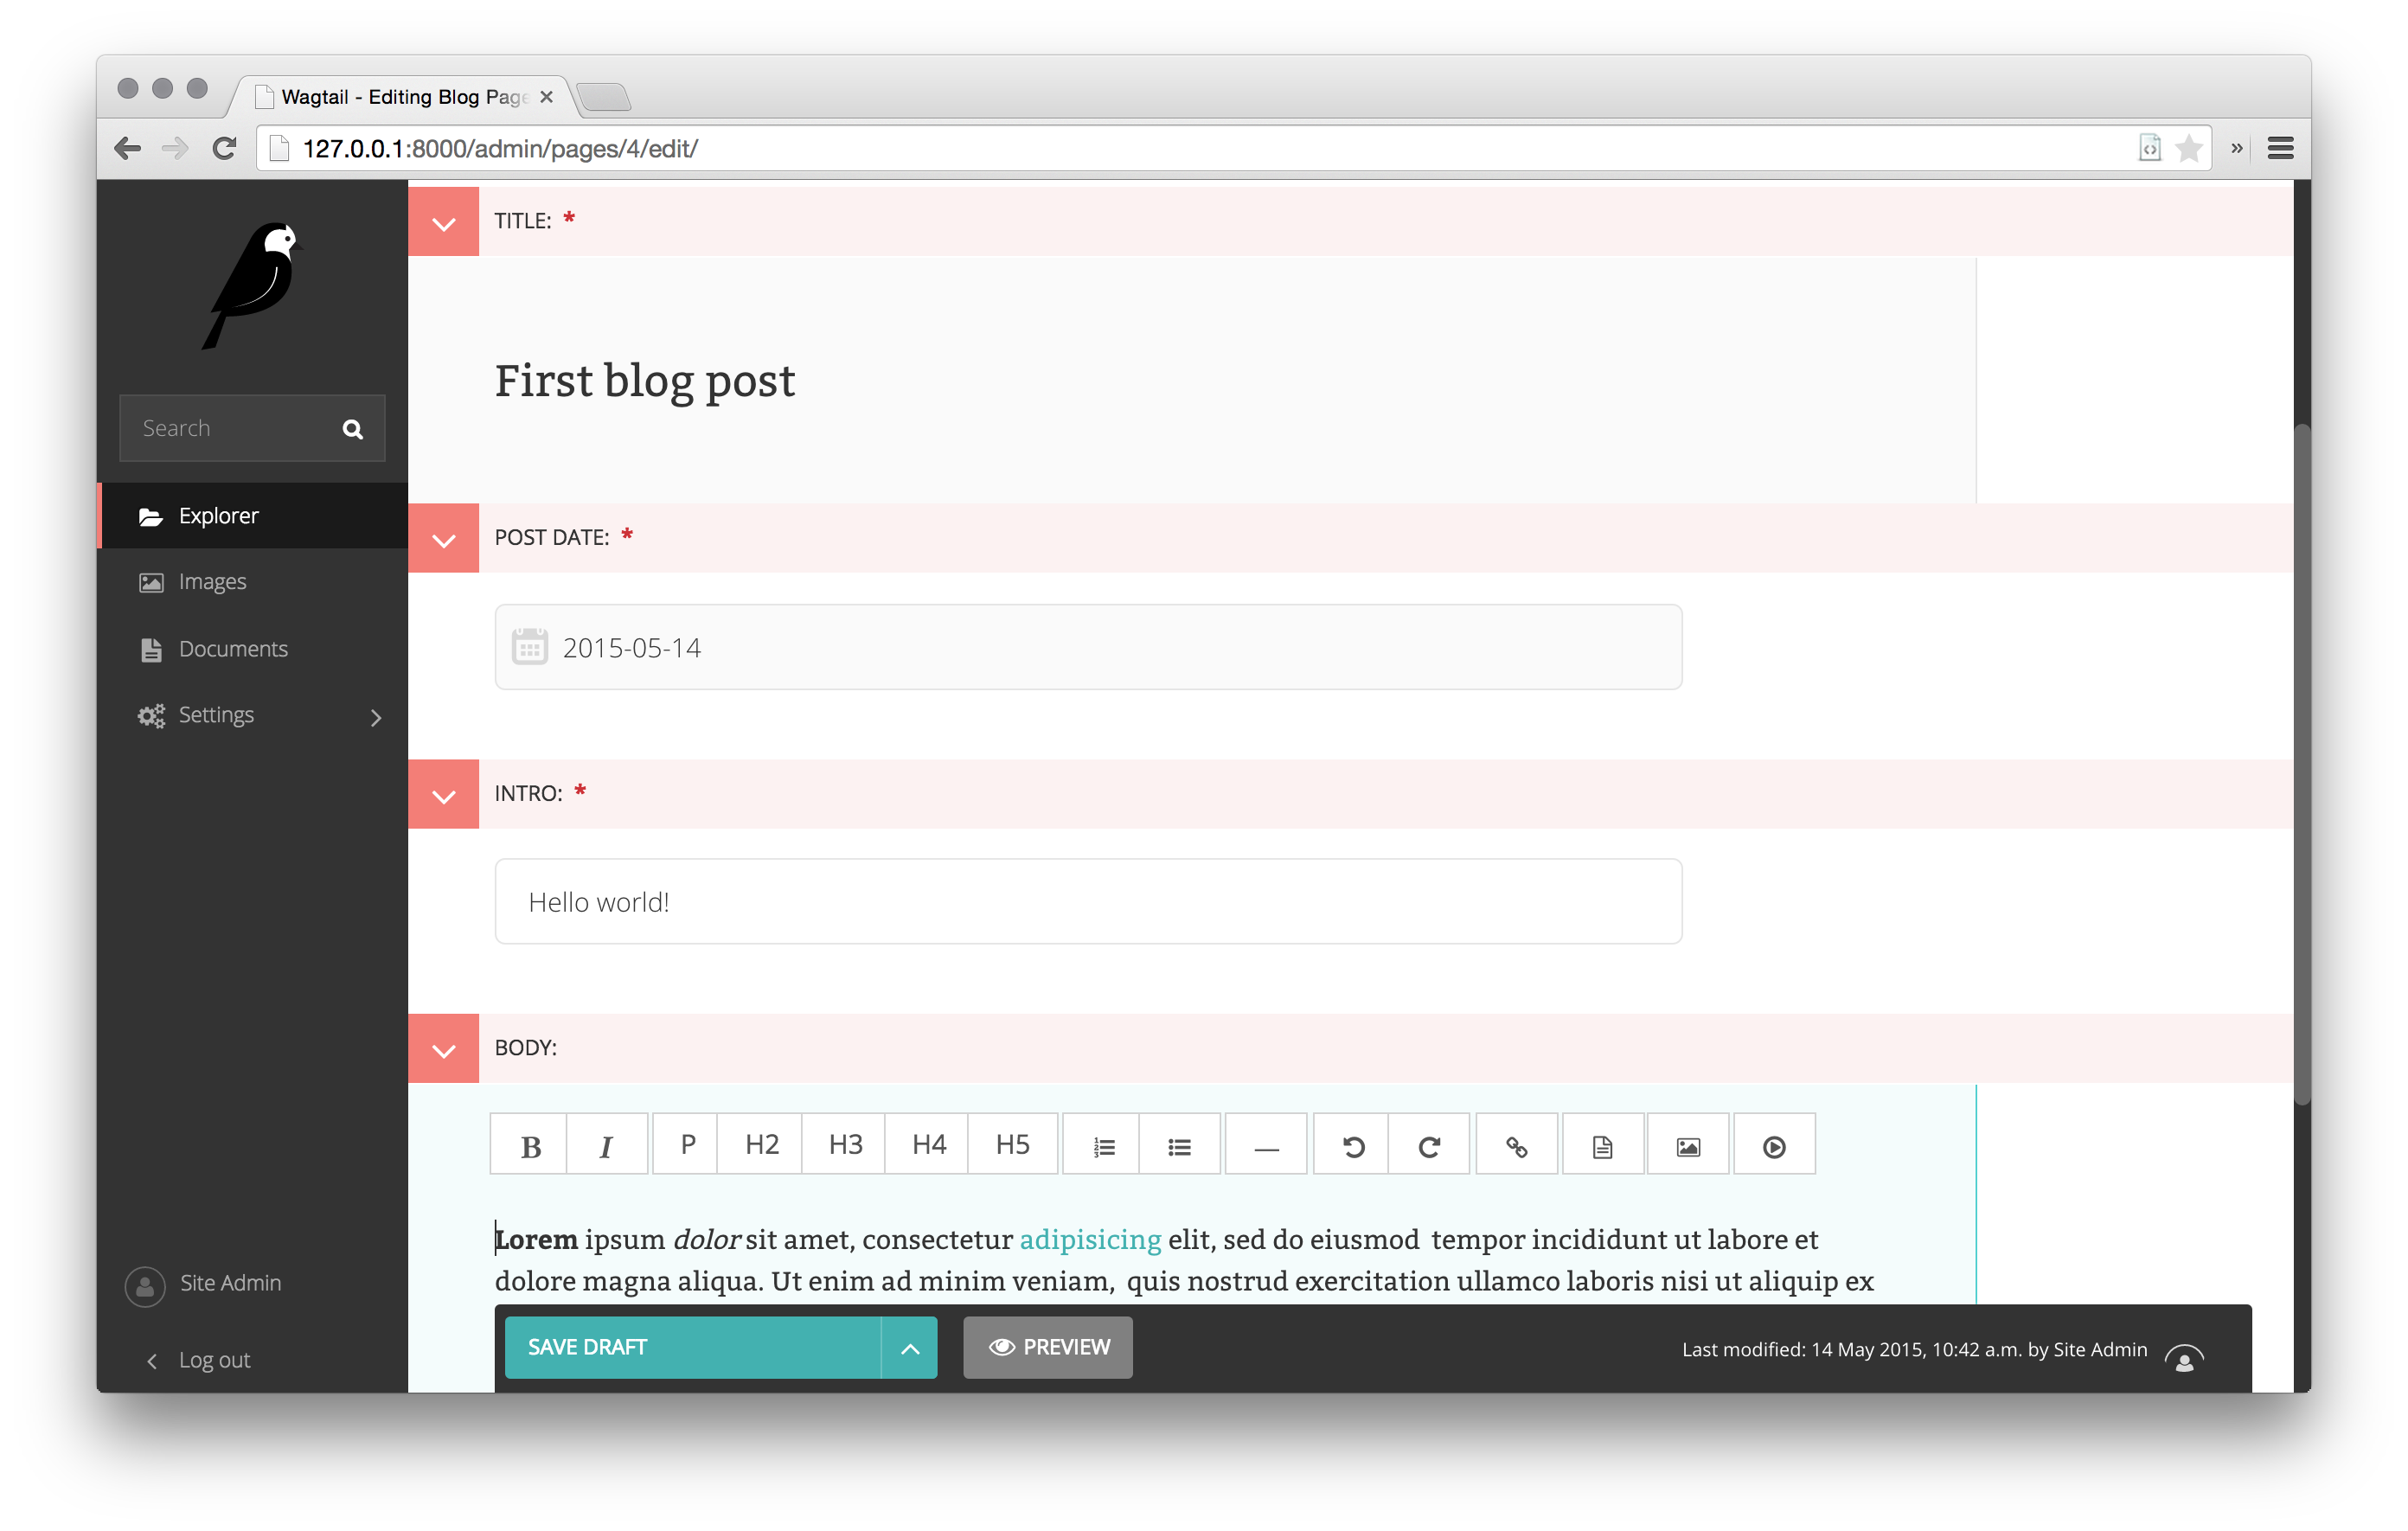
Now create a few blog posts as children of BlogIndexPage. Be sure to select type “Blog Page” when creating your posts.
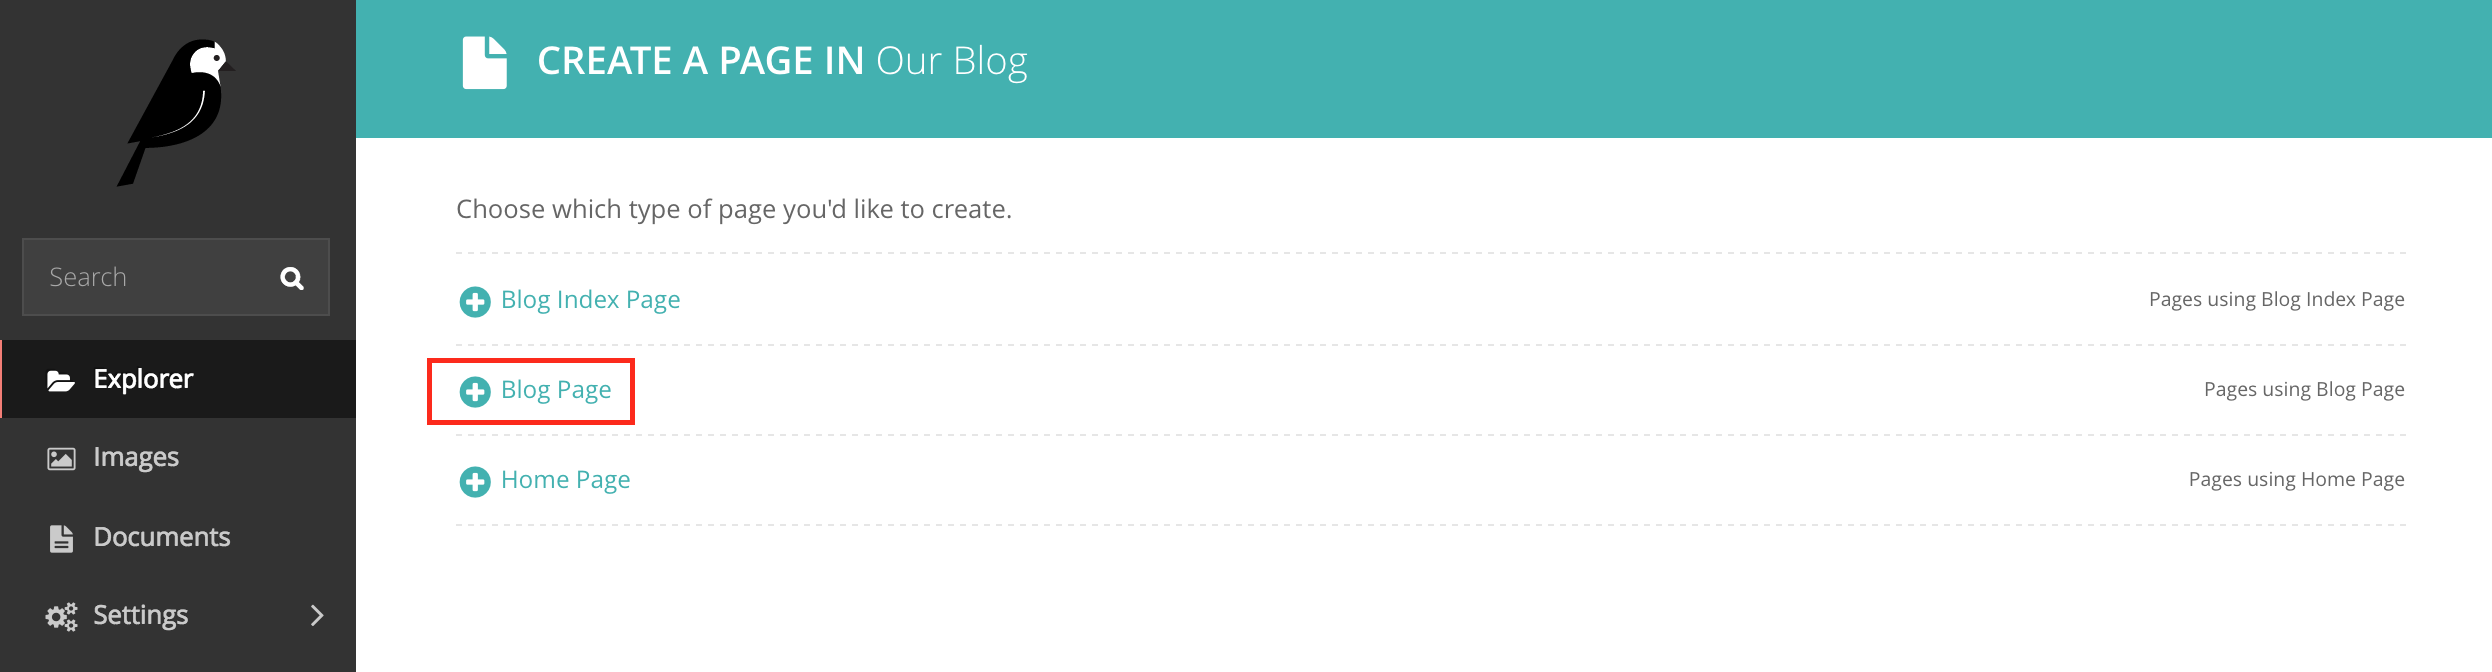
Wagtail gives you full control over what kinds of content can be created under various parent content types. By default, any page type can be a child of any other page type.
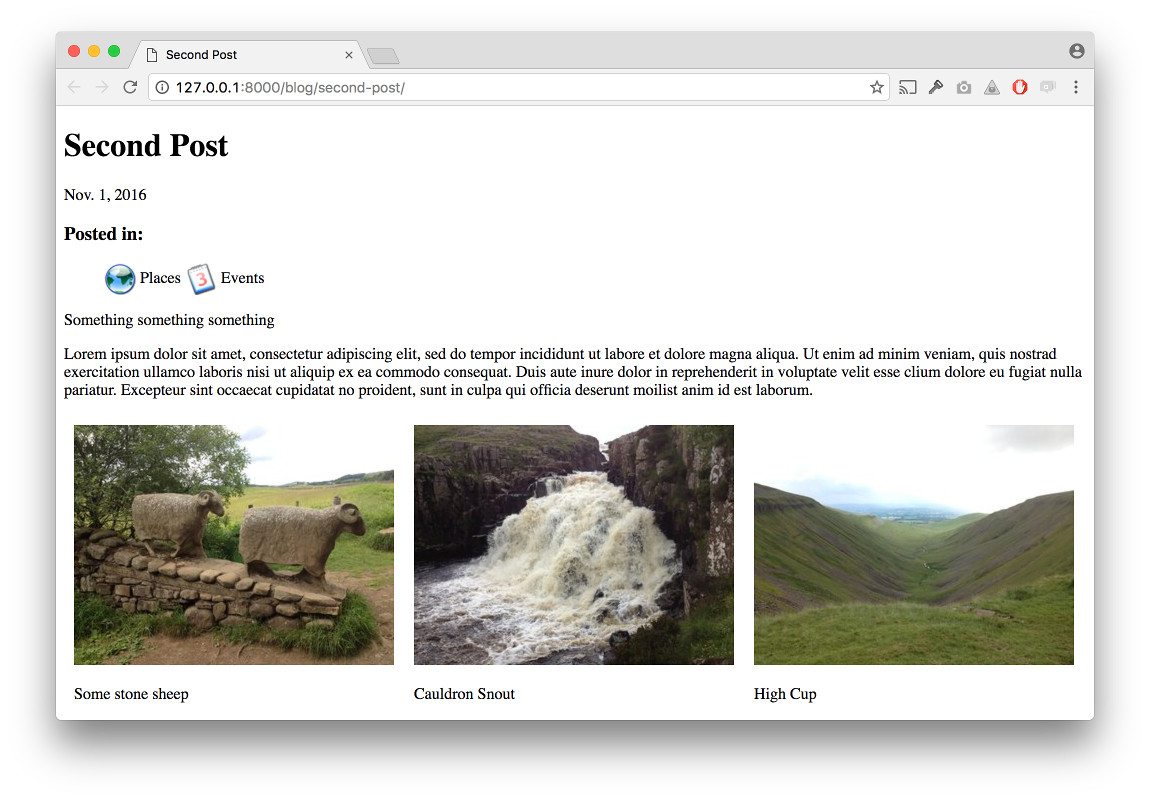
You should now have the very beginnings of a working blog. Access the /blog URL and you should see something like this:
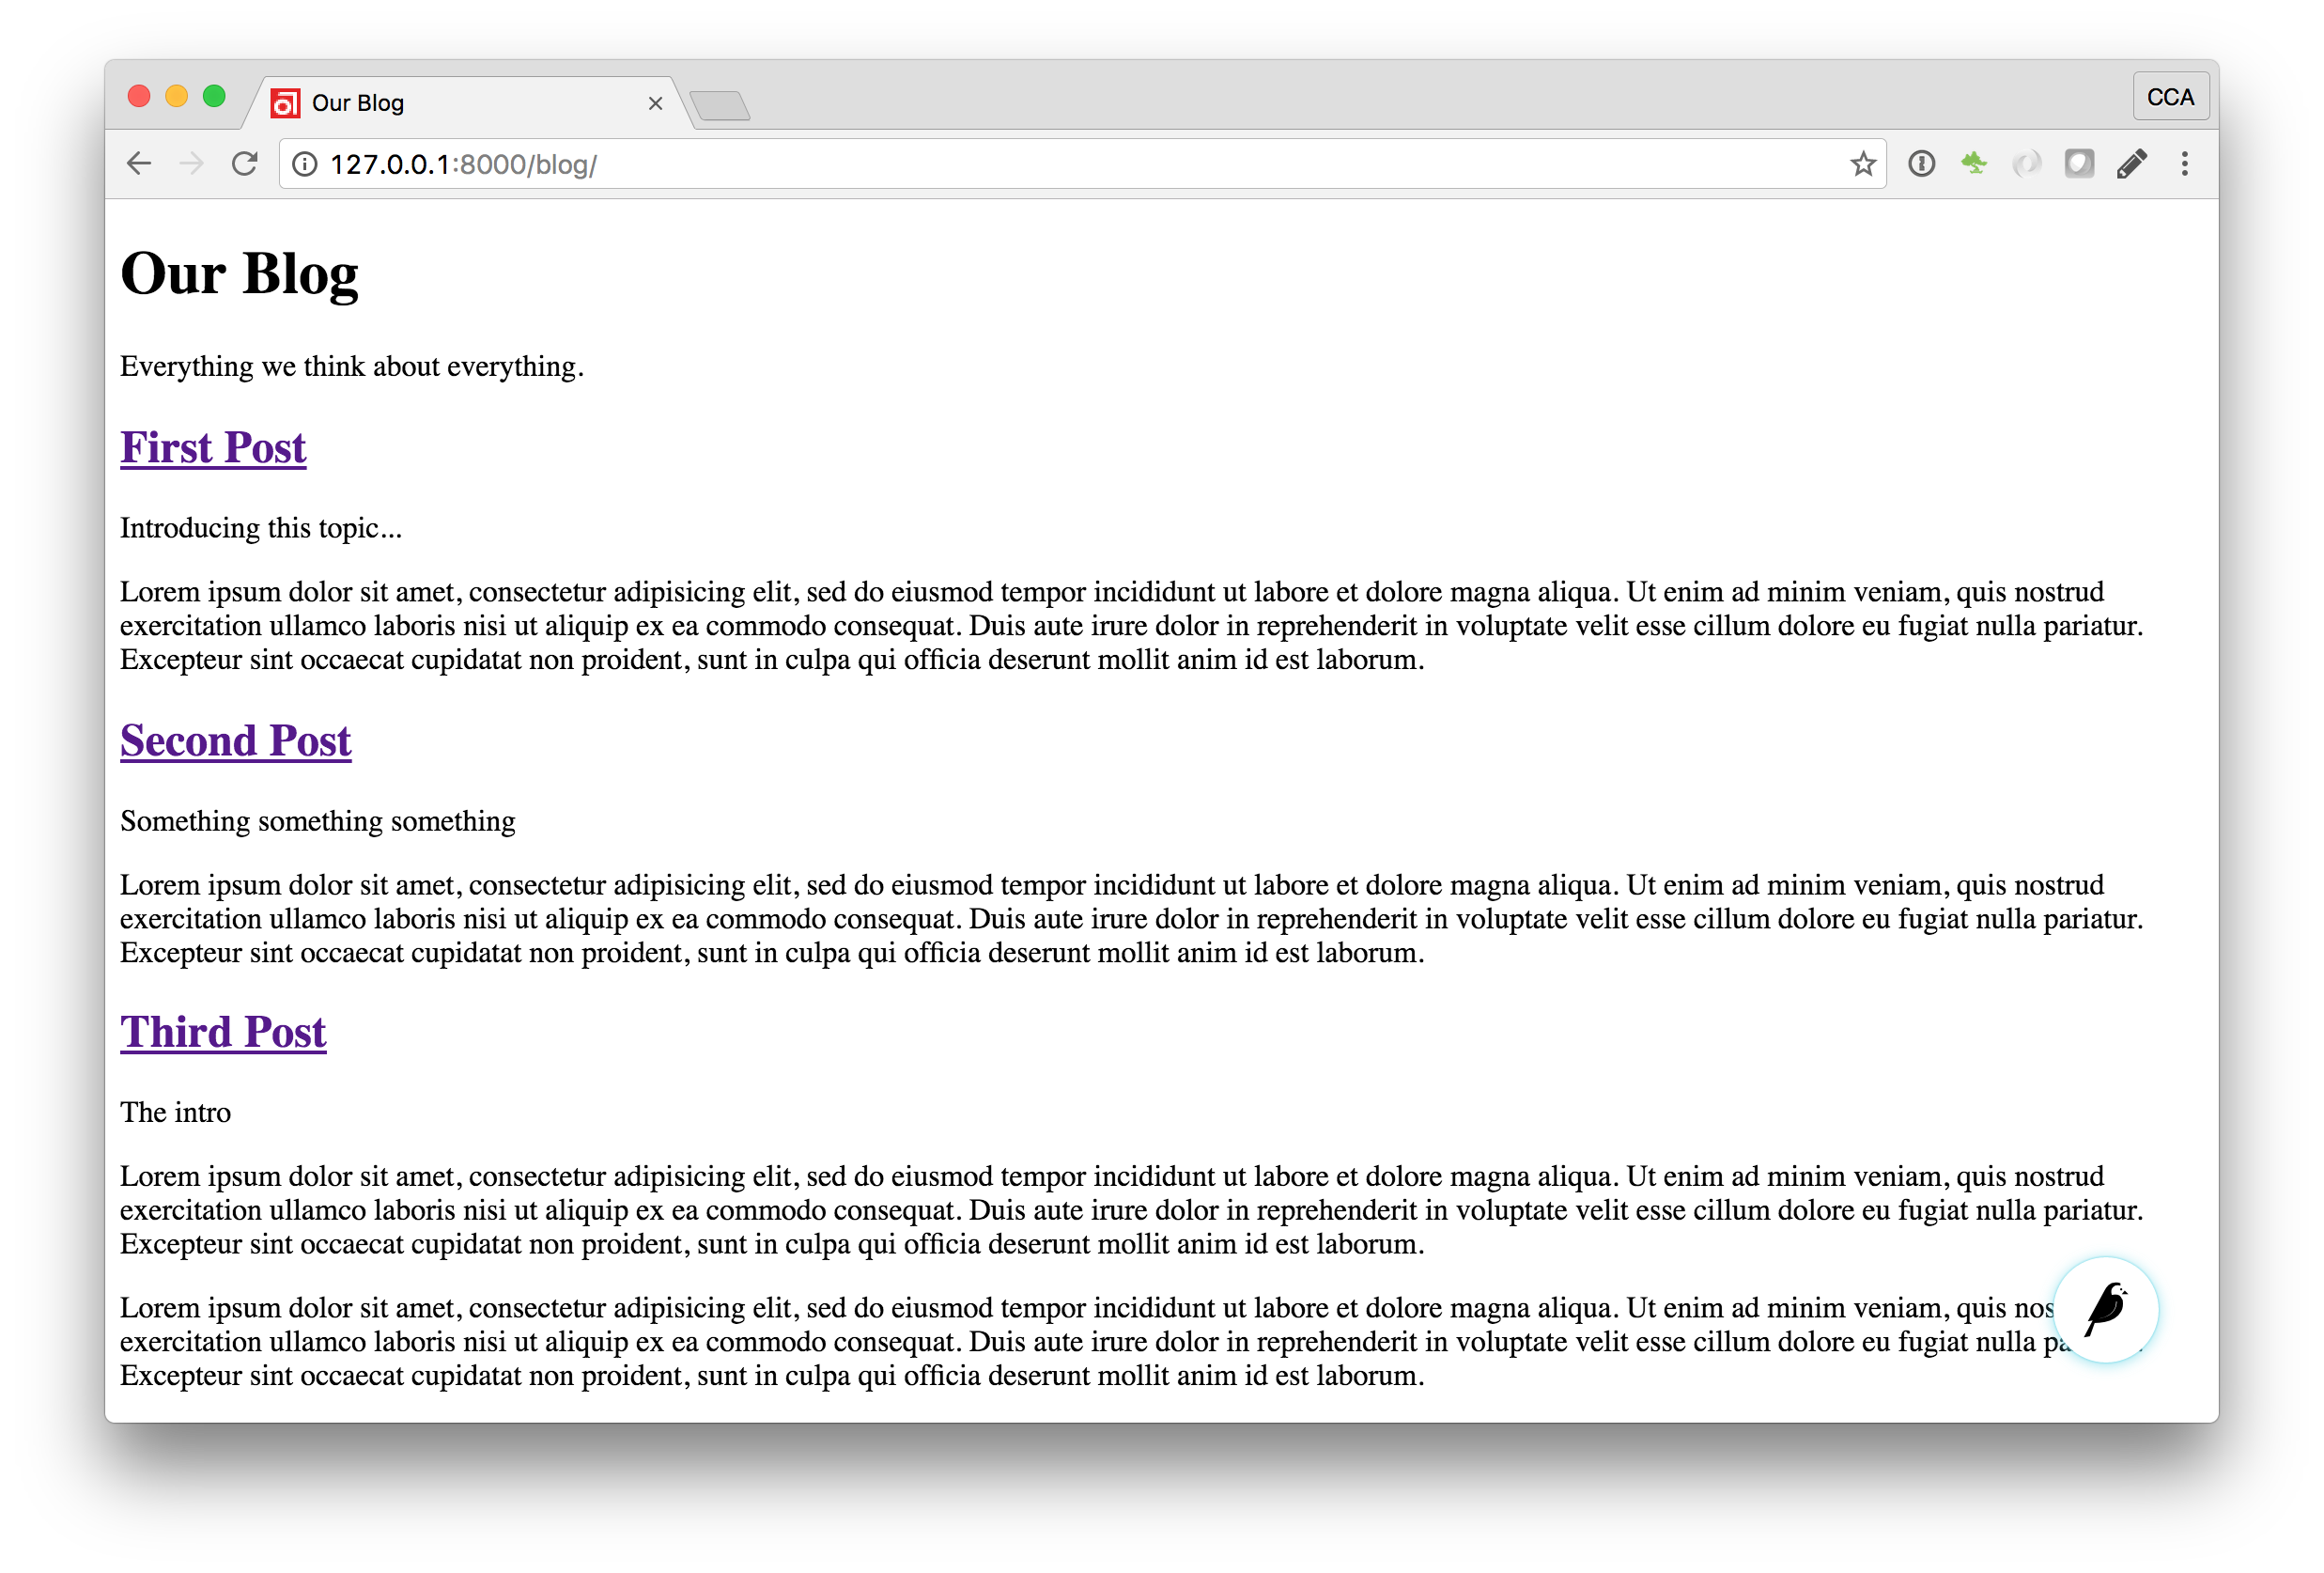
Titles should link to post pages, and a link back to the blog’s homepage should appear in the footer of each post page.
Parents and Children
Much of the work you’ll be doing in Wagtail revolves around the concept of hierarchical “tree” structures consisting of nodes and leaves (see Theory). In this case, the BlogIndexPage is a “node” and individual BlogPage instances are the “leaves”.
Take another look at the guts of blog_index_page.html:
{% for post in page.get_children %}
    <h2><a href="{% pageurl post %}">{{ post.title }}</a></h2>
    {{ post.specific.intro }}
    {{ post.specific.body|richtext }}
{% endfor %}
Every “page” in Wagtail can call out to its parent or children from its own position in the hierarchy. But why do we have to specify post.specific.intro rather than post.intro? This has to do with the way we defined our model:
class BlogPage(Page):
The get_children() method gets us a list of instances of the Page base class. When we want to reference properties of the instances that inherit from the base class, Wagtail provides the specific method that retrieves the actual BlogPage record. While the “title” field is present on the base Page model, “intro” is only present on the BlogPage model, so we need .specific to access it.
To tighten up template code like this, we could use Django’s with tag:
{% for post in page.get_children %}
    {% with post=post.specific %}
        <h2><a href="{% pageurl post %}">{{ post.title }}</a></h2>
        <p>{{ post.intro }}</p>
        {{ post.body|richtext }}
    {% endwith %}
{% endfor %}
When you start writing more customized Wagtail code, you’ll find a whole set of QuerySet modifiers to help you navigate the hierarchy.
# Given a page object 'somepage':
MyModel.objects.descendant_of(somepage)
child_of(page) / not_child_of(somepage)
ancestor_of(somepage) / not_ancestor_of(somepage)
parent_of(somepage) / not_parent_of(somepage)
sibling_of(somepage) / not_sibling_of(somepage)
# ... and ...
somepage.get_children()
somepage.get_ancestors()
somepage.get_descendants()
somepage.get_siblings()
For more information, see: Page QuerySet reference
Overriding Context
There are a couple of problems with our blog index view:
- Blogs generally display content in reverse chronological order
- We want to make sure we’re only displaying published content.
To accomplish these things, we need to do more than just grab the index page’s children in the template. Instead, we’ll want to modify the QuerySet in the model definition. Wagtail makes this possible via the overridable get_context() method. Modify your BlogIndexPage model like this:
class BlogIndexPage(Page):
    intro = RichTextField(blank=True)

    def get_context(self, request):
        # Update context to include only published posts, ordered by reverse-chron
        context = super(BlogIndexPage, self).get_context(request)
        blogpages = self.get_children().live().order_by('-first_published_at')
        context['blogpages'] = blogpages
        return context
All we’ve done here is retrieve the original context, create a custom queryset, add it to the retrieved context, and return the modified context back to the view. You’ll also need to modify your blog_index_page.html template slightly. Change:
{% for post in page.get_children %} to {% for post in blogpages %}
Now try unpublishing one of your posts - it should disappear from the blog index page. The remaining posts should now be sorted with the most recently modified posts first.
Images
Let’s add the ability to attach an image gallery to our blog posts. While it’s possible to simply insert images into the body rich text field, there are several advantages to setting up our gallery images as a new dedicated object type within the database - this way, you have full control of the layout and styling of the images on the template, rather than having to lay them out in a particular way within the rich text field. It also makes it possible for the images to be used elsewhere, independently of the blog text - for example, displaying a thumbnail on the blog index page.
Add a new BlogPageGalleryImage model to models.py:
from django.db import models

# New imports added for ParentalKey, Orderable, InlinePanel, ImageChooserPanel

from modelcluster.fields import ParentalKey

from wagtail.wagtailcore.models import Page, Orderable
from wagtail.wagtailcore.fields import RichTextField
from wagtail.wagtailadmin.edit_handlers import FieldPanel, InlinePanel
from wagtail.wagtailimages.edit_handlers import ImageChooserPanel
from wagtail.wagtailsearch import index


# ... (Keep the definition of BlogIndexPage, and update BlogPage:)


class BlogPage(Page):
    date = models.DateField("Post date")
    intro = models.CharField(max_length=250)
    body = RichTextField(blank=True)

    search_fields = Page.search_fields + [
        index.SearchField('intro'),
        index.SearchField('body'),
    ]

    content_panels = Page.content_panels + [
        FieldPanel('date'),
        FieldPanel('intro'),
        FieldPanel('body', classname="full"),
        InlinePanel('gallery_images', label="Gallery images"),
    ]


class BlogPageGalleryImage(Orderable):
    page = ParentalKey(BlogPage, related_name='gallery_images')
    image = models.ForeignKey(
        'wagtailimages.Image', on_delete=models.CASCADE, related_name='+'
    )
    caption = models.CharField(blank=True, max_length=250)

    panels = [
        ImageChooserPanel('image'),
        FieldPanel('caption'),
    ]
Run python manage.py makemigrations and python manage.py migrate.
There are a few new concepts here, so let’s take them one at a time:
Inheriting from Orderable adds a sort_order field to the model, to keep track of the ordering of images in the gallery.
The ParentalKey to BlogPage is what attaches the gallery images to a specific page. A ParentalKey works similarly to a ForeignKey, but also defines BlogPageGalleryImage as a “child” of the BlogPage model, so that it’s treated as a fundamental part of the page in operations like submitting for moderation, and tracking revision history.
image is a ForeignKey to Wagtail’s built-in Image model, where the images themselves are stored. This comes with a dedicated panel type, ImageChooserPanel, which provides a pop-up interface for choosing an existing image or uploading a new one. This way, we allow an image to exist in multiple galleries - effectively, we’ve created a many-to-many relationship between pages and images.
Specifying on_delete=models.CASCADE on the foreign key means that if the image is deleted from the system, the gallery entry is deleted as well. (In other situations, it might be appropriate to leave the entry in place - for example, if an “our staff” page included a list of people with headshots, and one of those photos was deleted, we’d rather leave the person in place on the page without a photo. In this case, we’d set the foreign key to blank=True, null=True, on_delete=models.SET_NULL.)
Finally, adding the InlinePanel to BlogPage.content_panels makes the gallery images available on the editing interface for BlogPage.
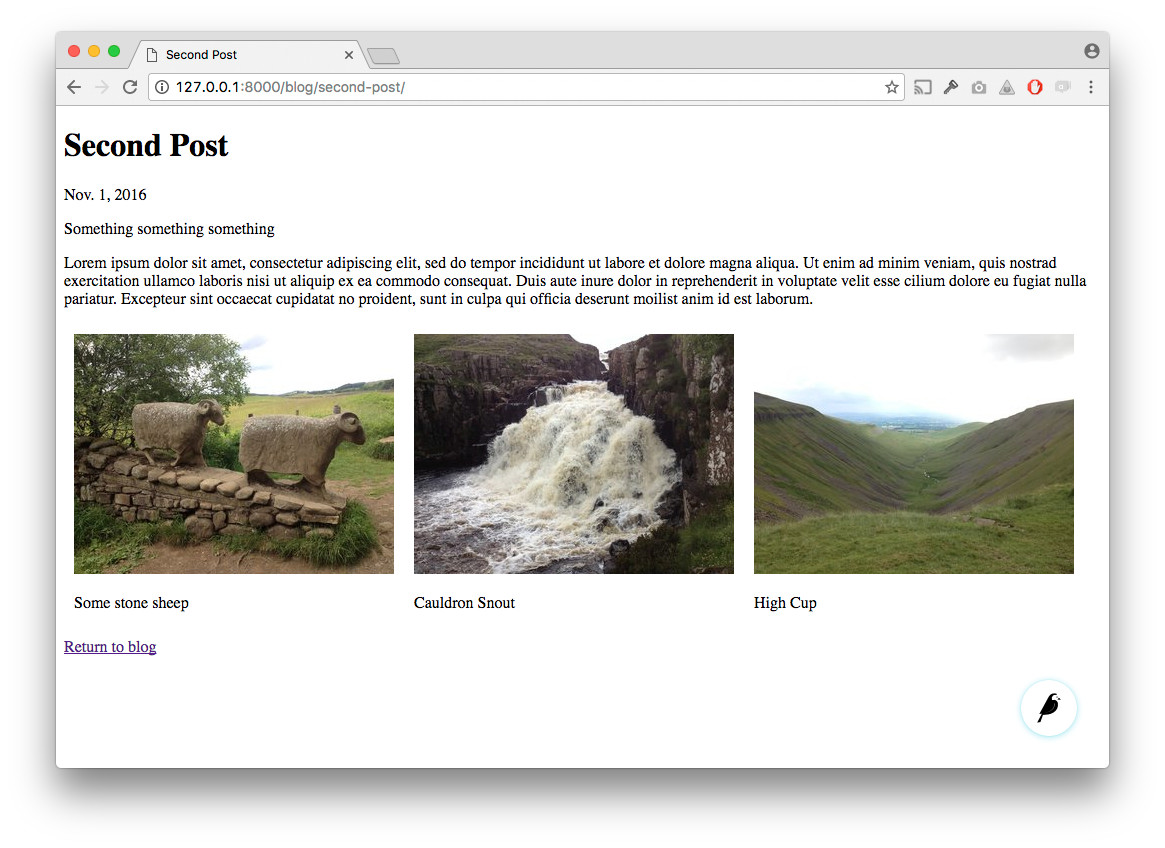
Adjust your blog page template to include the images:
{% extends "base.html" %}

{% load wagtailcore_tags wagtailimages_tags %}

{% block body_class %}template-blogpage{% endblock %}

{% block content %}
    <h1>{{ page.title }}</h1>
    <p class="meta">{{ page.date }}</p>

    <div class="intro">{{ page.intro }}</div>

    {{ page.body|richtext }}

    {% for item in page.gallery_images.all %}
        <div style="float: left; margin: 10px">
            {% image item.image fill-320x240 %}
            <p>{{ item.caption }}</p>
        </div>
    {% endfor %}

    <p><a href="{{ page.get_parent.url }}">Return to blog</a></p>

{% endblock %}
Here we use the {% image %} tag (which exists in the wagtailimages_tags library, imported at the top of the template) to insert an <img> element, with a fill-320x240 parameter to indicate that the image should be resized and cropped to fill a 320x240 rectangle. You can read more about using images in templates in the docs.
Since our gallery images are database objects in their own right, we can now query and re-use them independently of the blog post body. Let’s define a main_image method, which returns the image from the first gallery item (or None if no gallery items exist):
class BlogPage(Page):
    date = models.DateField("Post date")
    intro = models.CharField(max_length=250)
    body = RichTextField(blank=True)

    def main_image(self):
        gallery_item = self.gallery_images.first()
        if gallery_item:
            return gallery_item.image
        else:
            return None

    search_fields = Page.search_fields + [
        index.SearchField('intro'),
        index.SearchField('body'),
    ]

    content_panels = Page.content_panels + [
        FieldPanel('date'),
        FieldPanel('intro'),
        FieldPanel('body', classname="full"),
        InlinePanel('gallery_images', label="Gallery images"),
    ]
This method is now available from our templates. Update blog_index_page.html to include the main image as a thumbnail alongside each post:
{% load wagtailcore_tags wagtailimages_tags %}

...

{% for post in blogpages %}
    {% with post=post.specific %}
        <h2><a href="{% pageurl post %}">{{ post.title }}</a></h2>

        {% with post.main_image as main_image %}
            {% if main_image %}{% image main_image fill-160x100 %}{% endif %}
        {% endwith %}

        <p>{{ post.intro }}</p>
        {{ post.body|richtext }}
    {% endwith %}
{% endfor %}
Tagging Posts
Let’s say we want to let editors “tag” their posts, so that readers can, e.g., view all bicycle-related content together. For this, we’ll need to invoke the tagging system bundled with Wagtail, attach it to the BlogPage model and content panels, and render linked tags on the blog post template. Of course, we’ll need a working tag-specific URL view as well.
First, alter models.py once more:
from django.db import models

# New imports added for ClusterTaggableManager, TaggedItemBase, MultiFieldPanel

from modelcluster.fields import ParentalKey
from modelcluster.contrib.taggit import ClusterTaggableManager
from taggit.models import TaggedItemBase

from wagtail.wagtailcore.models import Page, Orderable
from wagtail.wagtailcore.fields import RichTextField
from wagtail.wagtailadmin.edit_handlers import FieldPanel, InlinePanel, MultiFieldPanel
from wagtail.wagtailimages.edit_handlers import ImageChooserPanel
from wagtail.wagtailsearch import index


# ... (Keep the definition of BlogIndexPage)


class BlogPageTag(TaggedItemBase):
    content_object = ParentalKey('BlogPage', related_name='tagged_items')


class BlogPage(Page):
    date = models.DateField("Post date")
    intro = models.CharField(max_length=250)
    body = RichTextField(blank=True)
    tags = ClusterTaggableManager(through=BlogPageTag, blank=True)

    # ... (Keep the main_image method and search_fields definition)

    content_panels = Page.content_panels + [
        MultiFieldPanel([
            FieldPanel('date'),
            FieldPanel('tags'),
        ], heading="Blog information"),
        FieldPanel('intro'),
        FieldPanel('body'),
        InlinePanel('gallery_images', label="Gallery images"),
    ]
Run python manage.py makemigrations and python manage.py migrate.
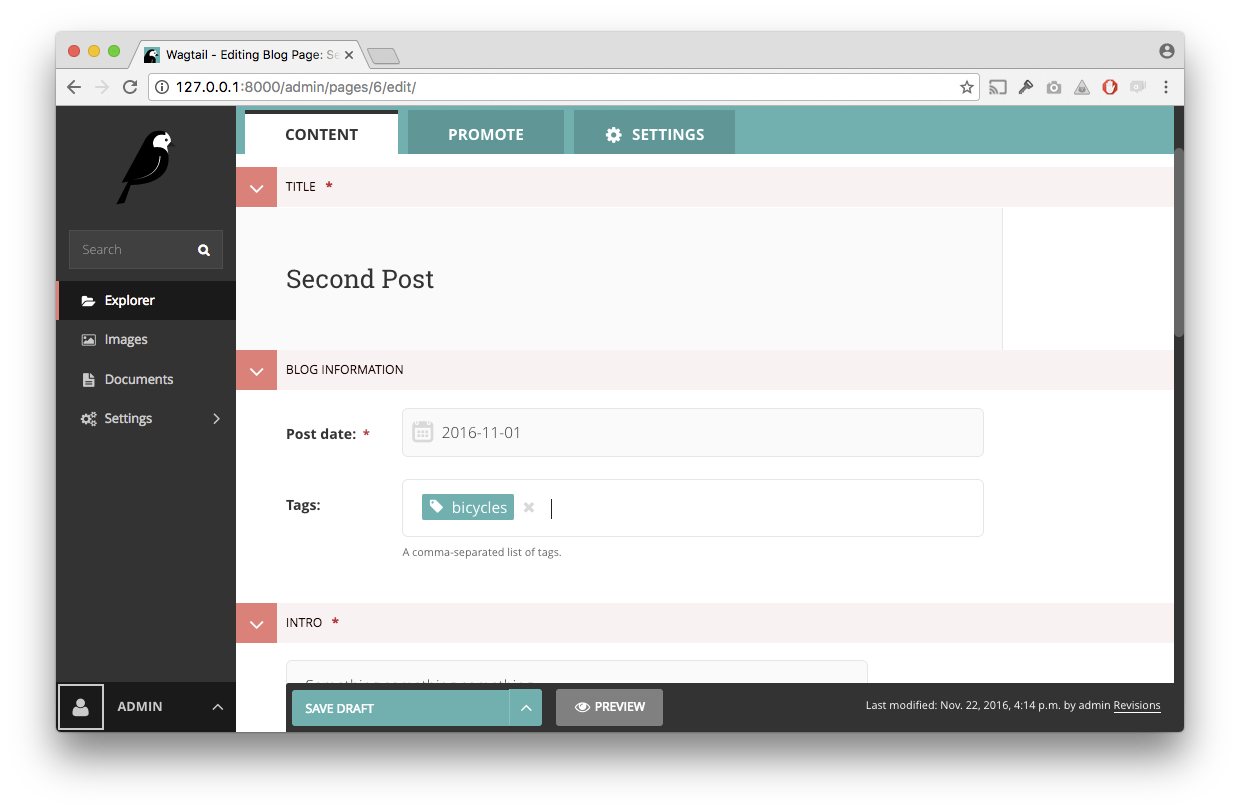
Note the new modelcluster and taggit imports, the addition of a new BlogPageTag model, and the addition of a tags field on BlogPage. We’ve also taken the opportunity to use a MultiFieldPanel in content_panels to group the date and tags fields together for readability.
Edit one of your BlogPage instances, and you should now be able to tag posts:
To render tags on a BlogPage, add this to blog_page.html:
{% if page.tags.all.count %}
    <div class="tags">
        <h3>Tags</h3>
        {% for tag in page.tags.all %}
            <a href="{% slugurl 'tags' %}?tag={{ tag }}"><button type="button">{{ tag }}</button></a>
        {% endfor %}
    </div>
{% endif %}
Notice that we’re linking to pages here with the builtin slugurl tag rather than pageurl, which we used earlier. The difference is that slugurl takes a Page slug (from the Promote tab) as an argument. pageurl is more commonly used because it is unambiguous and avoids extra database lookups. But in the case of this loop, the Page object isn’t readily available, so we fall back on the less-preferred slugurl tag.
Visiting a blog post with tags should now show a set of linked buttons at the bottom - one for each tag. However, clicking a button will get you a 404, since we haven’t yet defined a “tags” view. Add to models.py:
class BlogTagIndexPage(Page):

    def get_context(self, request):

        # Filter by tag
        tag = request.GET.get('tag')
        blogpages = BlogPage.objects.filter(tags__name=tag)

        # Update template context
        context = super(BlogTagIndexPage, self).get_context(request)
        context['blogpages'] = blogpages
        return context
Note that this Page-based model defines no fields of its own. Even without fields, subclassing Page makes it a part of the Wagtail ecosystem, so that you can give it a title and URL in the admin, and so that you can manipulate its contents by returning a queryset from its get_context() method.
Migrate this in, then create a new BlogTagIndexPage in the admin. You’ll probably want to create the new page/view under Homepage, parallel to your Blog index. Give it the slug “tags” on the Promote tab.
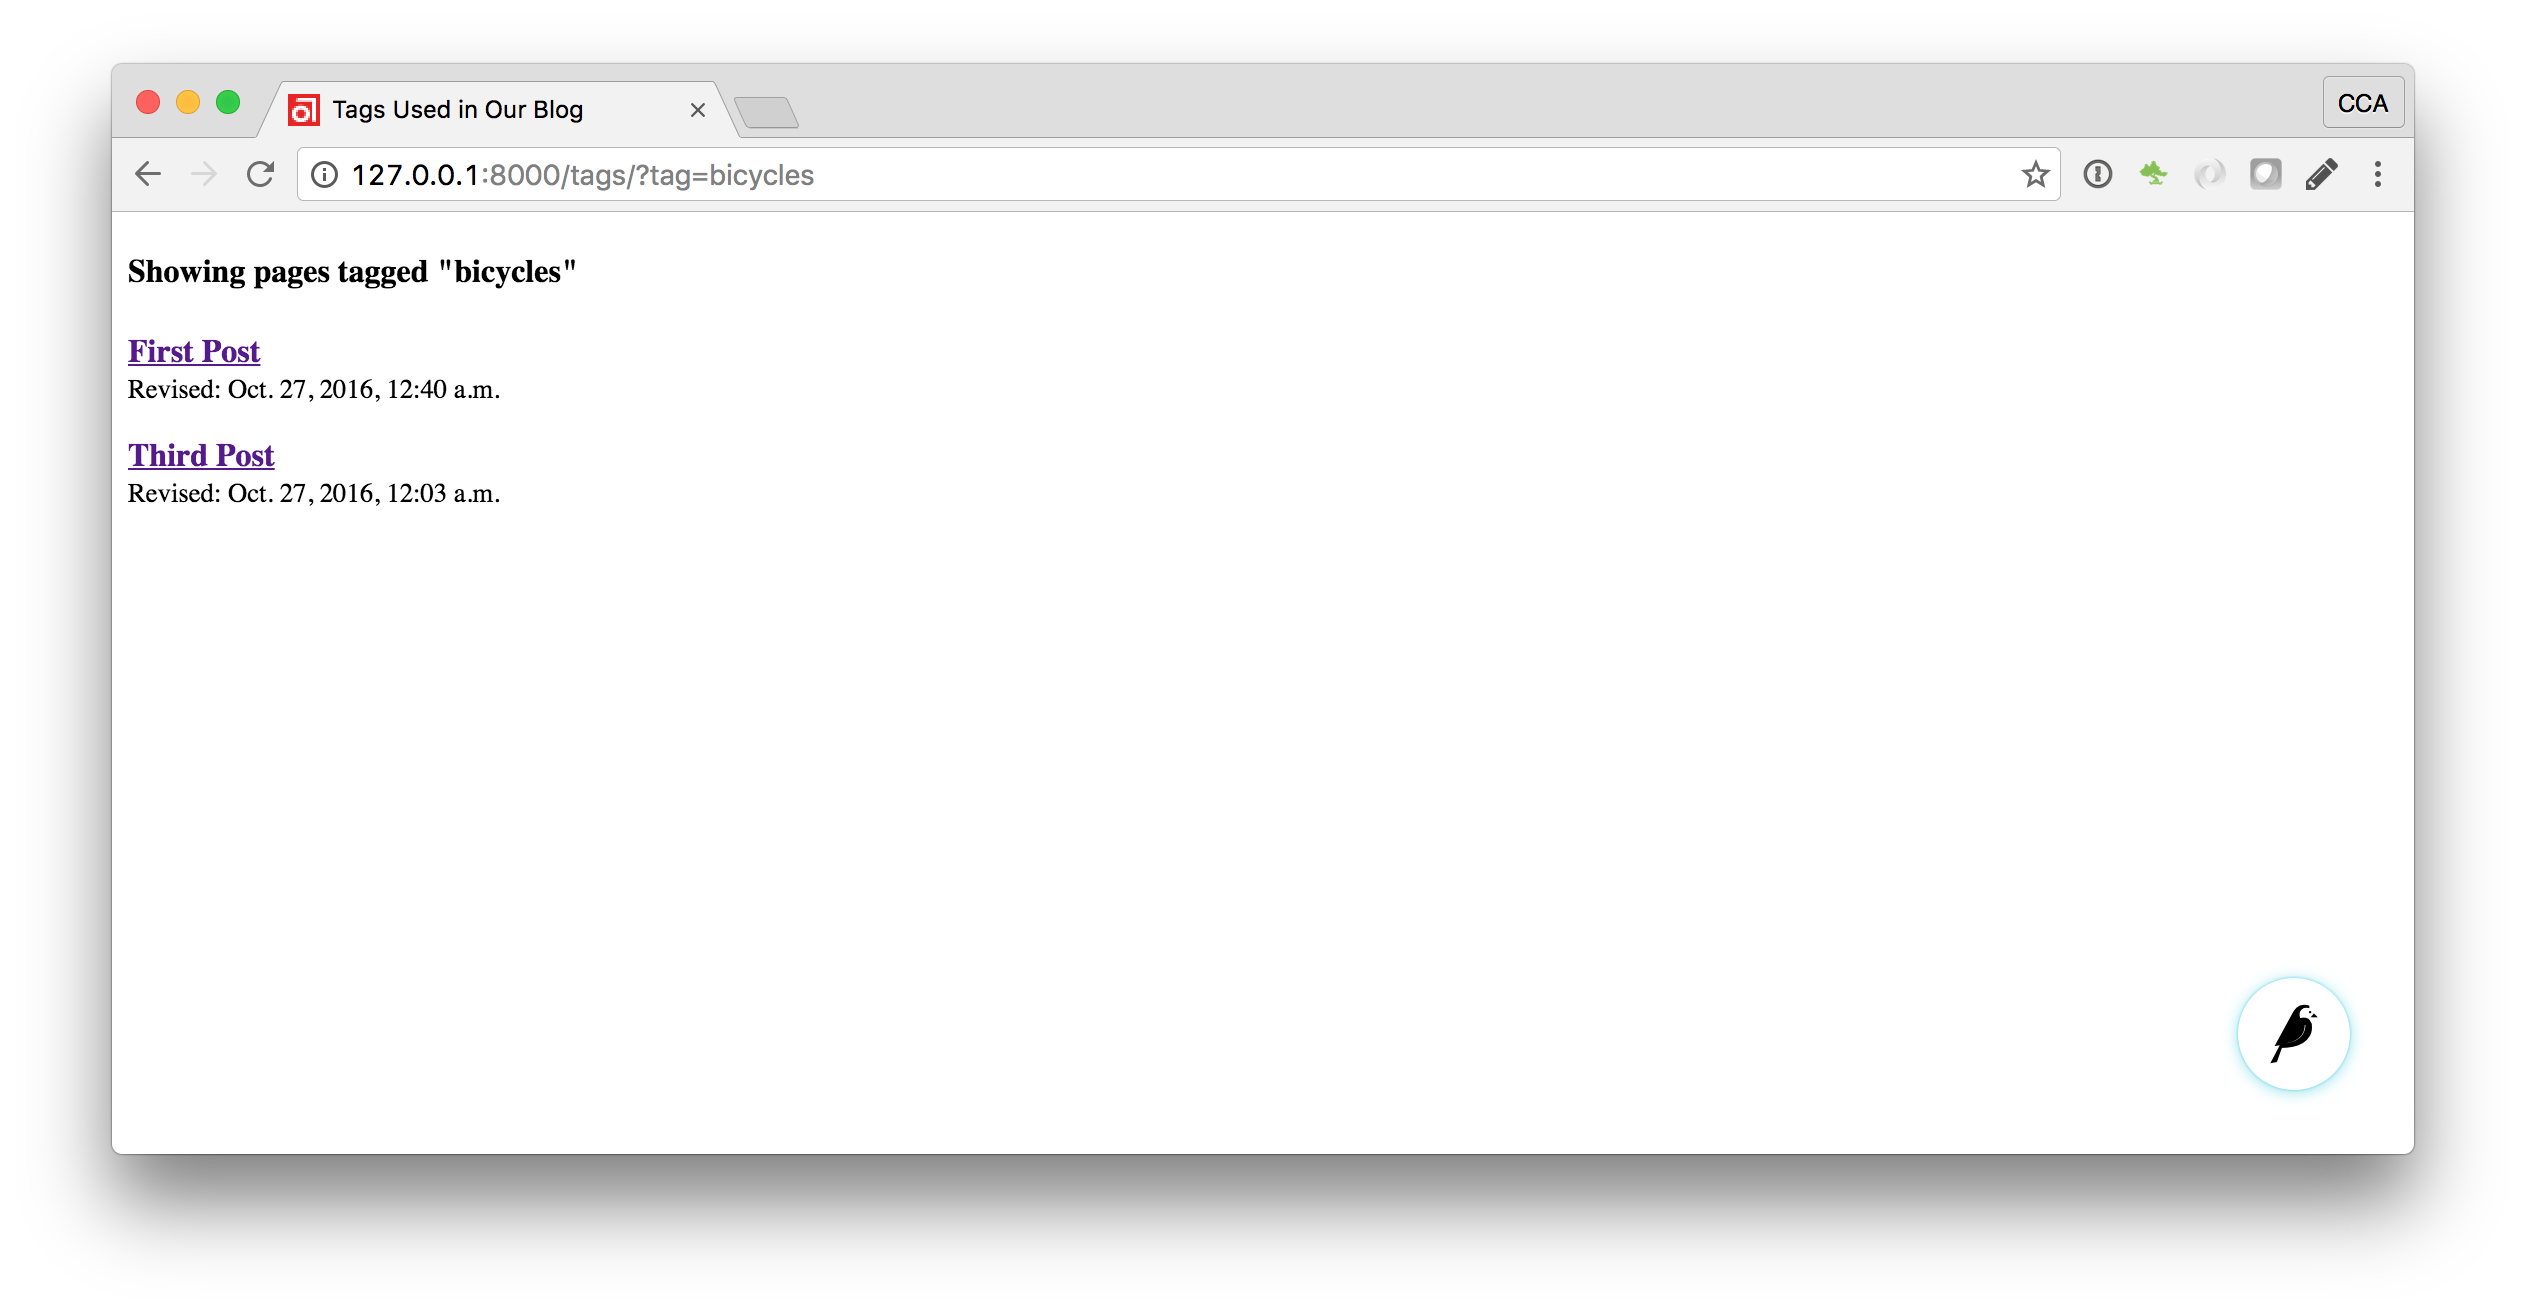
Access /tags and Django will tell you what you probably already knew: you need to create a template blog/blog_tag_index_page.html:
{% extends "base.html" %}
{% load wagtailcore_tags %}

{% block content %}

    {% if request.GET.tag|length %}
        <h4>Showing pages tagged "{{ request.GET.tag }}"</h4>
    {% endif %}

    {% for blogpage in blogpages %}

          <p>
              <strong><a href="{% pageurl blogpage %}">{{ blogpage.title }}</a></strong><br />
              <small>Revised: {{ blogpage.latest_revision_created_at }}</small><br />
              {% if blogpage.author %}
                <p>By {{ blogpage.author.profile }}</p>
              {% endif %}
          </p>

    {% empty %}
        No pages found with that tag.
    {% endfor %}

{% endblock %}
We’re calling the built-in latest_revision_created_at field on the Page model - handy to know this is always available.
We haven’t yet added an “author” field to our BlogPage model, nor do we have a Profile model for authors - we’ll leave those as an exercise for the reader.
Clicking the tag button at the bottom of a BlogPost should now render a page something like this:
Categories
Let’s add a category system to our blog. Unlike tags, where a page author can bring a tag into existence simply by using it on a page, our categories will be a fixed list, managed by the site owner through a separate area of the admin interface.
First, we define a BlogCategory model. A category is not a page in its own right, and so we define it as a standard Django models.Model rather than inheriting from Page. Wagtail introduces the concept of “snippets” for reusable pieces of content that need to be managed through the admin interface, but do not exist as part of the page tree themselves; a model can be registered as a snippet by adding the @register_snippet decorator. All the field types we’ve used so far on pages can be used on snippets too - here we’ll give each category an icon image as well as a name. Add to blog/models.py:
from wagtail.wagtailsnippets.models import register_snippet


@register_snippet
class BlogCategory(models.Model):
    name = models.CharField(max_length=255)
    icon = models.ForeignKey(
        'wagtailimages.Image', null=True, blank=True,
        on_delete=models.SET_NULL, related_name='+'
    )

    panels = [
        FieldPanel('name'),
        ImageChooserPanel('icon'),
    ]

    def __str__(self):
        return self.name

    class Meta:
        verbose_name_plural = 'blog categories'
Note
Note that we are using panels rather than content_panels here - since snippets generally have no need for fields such as slug or publish date, the editing interface for them is not split into separate ‘content’ / ‘promote’ / ‘settings’ tabs as standard, and so there is no need to distinguish between ‘content panels’ and ‘promote panels’.
Migrate this change in, and create a few categories through the Snippets area which now appears in the admin menu.
We can now add categories to the BlogPage model, as a many-to-many field. The field type we use for this is ParentalManyToManyField - this is a variant of the standard Django ManyToManyField which ensures that the chosen objects are correctly stored against the page record in the revision history, in much the same way that ParentalKey replaces ForeignKey for one-to-many relations.
# New imports added for forms and ParentalManyToManyField
from django import forms
from django.db import models

from modelcluster.fields import ParentalKey, ParentalManyToManyField
from modelcluster.contrib.taggit import ClusterTaggableManager
from taggit.models import TaggedItemBase

# ...

class BlogPage(Page):
    date = models.DateField("Post date")
    intro = models.CharField(max_length=250)
    body = RichTextField(blank=True)
    tags = ClusterTaggableManager(through=BlogPageTag, blank=True)
    categories = ParentalManyToManyField('blog.BlogCategory', blank=True)

    # ... (Keep the main_image method and search_fields definition)

    content_panels = Page.content_panels + [
        MultiFieldPanel([
            FieldPanel('date'),
            FieldPanel('tags'),
            FieldPanel('categories', widget=forms.CheckboxSelectMultiple),
        ], heading="Blog information"),
        FieldPanel('intro'),
        FieldPanel('body'),
        InlinePanel('gallery_images', label="Gallery images"),
    ]
Here we’re making use of the widget keyword argument on the FieldPanel definition to specify a checkbox-based widget instead of the default multiple select box, as this is often considered more user-friendly.
Finally, we can update the blog_page.html template to display the categories:
<h1>{{ page.title }}</h1>
<p class="meta">{{ page.date }}</p>

{% with categories=page.categories.all %}
    {% if categories %}
        <h3>Posted in:</h3>
        <ul>
            {% for category in categories %}
                <li style="display: inline">
                    {% image category.icon fill-32x32 style="vertical-align: middle" %}
                    {{ category.name }}
                </li>
            {% endfor %}
        </ul>
    {% endif %}
{% endwith %}
Where next
- Read the Wagtail topics and reference documentation
- Learn how to implement StreamField for freeform page content
- Browse through the advanced topics section and read third-party tutorials
Demo site
To create a new site on Wagtail we recommend the wagtail start command in Getting started, however a demo site exists containing example page types and models. We also recommend you use the demo site for testing during development of Wagtail itself.
The repo and installation instructions can be found here: https://github.com/wagtail/wagtaildemo
Integrating Wagtail into a Django project
Wagtail provides the wagtail start command and project template to get you started with a new Wagtail project as quickly as possible, but it’s easy to integrate Wagtail into an existing Django project too.
Wagtail is currently compatible with Django 1.8, 1.10 and 1.11. First, install the wagtail package from PyPI:
$ pip install wagtail
or add the package to your existing requirements file. This will also install the Pillow library as a dependency, which requires libjpeg and zlib - see Pillow’s platform-specific installation instructions.
Settings
In your settings file, add the following apps to INSTALLED_APPS:
'wagtail.wagtailforms',
'wagtail.wagtailredirects',
'wagtail.wagtailembeds',
'wagtail.wagtailsites',
'wagtail.wagtailusers',
'wagtail.wagtailsnippets',
'wagtail.wagtaildocs',
'wagtail.wagtailimages',
'wagtail.wagtailsearch',
'wagtail.wagtailadmin',
'wagtail.wagtailcore',

'modelcluster',
'taggit',
Add the following entries to MIDDLEWARE_CLASSES:
'wagtail.wagtailcore.middleware.SiteMiddleware',
'wagtail.wagtailredirects.middleware.RedirectMiddleware',
Add a STATIC_ROOT setting, if your project does not have one already:
STATIC_ROOT = os.path.join(BASE_DIR, 'static')
Add a WAGTAIL_SITE_NAME - this will be displayed on the main dashboard of the Wagtail admin backend:
WAGTAIL_SITE_NAME = 'My Example Site'
Various other settings are available to configure Wagtail’s behaviour - see Configuring Django for Wagtail.
URL configuration
Now make the following additions to your urls.py file:
from wagtail.wagtailadmin import urls as wagtailadmin_urls
from wagtail.wagtaildocs import urls as wagtaildocs_urls
from wagtail.wagtailcore import urls as wagtail_urls

urlpatterns = [
    ...
    url(r'^cms/', include(wagtailadmin_urls)),
    url(r'^documents/', include(wagtaildocs_urls)),
    url(r'^pages/', include(wagtail_urls)),
    ...
]
The URL paths here can be altered as necessary to fit your project’s URL scheme.
wagtailadmin_urls provides the admin interface for Wagtail. This is separate from the Django admin interface (django.contrib.admin); Wagtail-only projects typically host the Wagtail admin at /admin/, but if this would clash with your project’s existing admin backend then an alternative path can be used, such as /cms/ here.
wagtaildocs_urls is the location from where document files will be served. This can be omitted if you do not intend to use Wagtail’s document management features.
wagtail_urls is the base location from where the pages of your Wagtail site will be served. In the above example, Wagtail will handle URLs under /pages/, leaving the root URL and other paths to be handled as normal by your Django project. If you want Wagtail to handle the entire URL space including the root URL, this can be replaced with:
url(r'', include(wagtail_urls)),
In this case, this should be placed at the end of the urlpatterns list, so that it does not override more specific URL patterns.
Finally, your project needs to be set up to serve user-uploaded files from MEDIA_ROOT. Your Django project may already have this in place, but if not, add the following snippet to urls.py:
from django.conf import settings
from django.conf.urls.static import static

urlpatterns = [
    # ... the rest of your URLconf goes here ...
] + static(settings.MEDIA_URL, document_root=settings.MEDIA_ROOT)
Note that this only works in development mode (DEBUG = True); in production, you will need to configure your web server to serve files from MEDIA_ROOT. For further details, see the Django documentation: Serving files uploaded by a user during development and Deploying static files.
With this configuration in place, you are ready to run ./manage.py migrate to create the database tables used by Wagtail.
User accounts
Superuser accounts receive automatic access to the Wagtail admin interface; use ./manage.py createsuperuser if you don’t already have one. Custom user models are supported, with some restrictions; Wagtail uses an extension of Django’s permissions framework, so your user model must at minimum inherit from AbstractBaseUser and PermissionsMixin.
Start developing
You’re now ready to add a new app to your Django project (via ./manage.py startapp - remember to add it to INSTALLED_APPS) and set up page models, as described in Your first Wagtail site.
Note that there’s one small difference when not using the Wagtail project template: Wagtail creates an initial homepage of the basic type Page, which does not include any content fields beyond the title. You’ll probably want to replace this with your own HomePage class - when you do so, ensure that you set up a site record (under Settings / Sites in the Wagtail admin) to point to the new homepage.
Usage guide
Page models
Each page type (a.k.a. content type) in Wagtail is represented by a Django model. All page models must inherit from the wagtail.wagtailcore.models.Page class.
As all page types are Django models, you can use any field type that Django provides. See Model field reference for a complete list of field types you can use. Wagtail also provides RichTextField which provides a WYSIWYG editor for editing rich-text content.
Django models
If you’re not yet familiar with Django models, have a quick look at the following links to get you started:
An example Wagtail page model
This example represents a typical blog post:
from django.db import models

from modelcluster.fields import ParentalKey

from wagtail.wagtailcore.models import Page, Orderable
from wagtail.wagtailcore.fields import RichTextField
from wagtail.wagtailadmin.edit_handlers import FieldPanel, MultiFieldPanel, InlinePanel
from wagtail.wagtailimages.edit_handlers import ImageChooserPanel
from wagtail.wagtailsearch import index


class BlogPage(Page):

    # Database fields

    body = RichTextField()
    date = models.DateField("Post date")
    feed_image = models.ForeignKey(
        'wagtailimages.Image',
        null=True,
        blank=True,
        on_delete=models.SET_NULL,
        related_name='+'
    )


    # Search index configuration

    search_fields = Page.search_fields + [
        index.SearchField('body'),
        index.FilterField('date'),
    ]


    # Editor panels configuration

    content_panels = Page.content_panels + [
        FieldPanel('date'),
        FieldPanel('body', classname="full"),
        InlinePanel('related_links', label="Related links"),
    ]

    promote_panels = [
        MultiFieldPanel(Page.promote_panels, "Common page configuration"),
        ImageChooserPanel('feed_image'),
    ]


    # Parent page / subpage type rules

    parent_page_types = ['blog.BlogIndex']
    subpage_types = []


class BlogPageRelatedLink(Orderable):
    page = ParentalKey(BlogPage, related_name='related_links')
    name = models.CharField(max_length=255)
    url = models.URLField()

    panels = [
        FieldPanel('name'),
        FieldPanel('url'),
    ]
Important
Ensure that none of your field names are the same as your class names. This will cause errors due to the way Django handles relations (read more). In our examples we have avoided this by appending “Page” to each model name.
Writing page models
Here we’ll describe each section of the above example to help you create your own page models.
Database fields
Each Wagtail page type is a Django model, represented in the database as a separate table.
Each page type can have its own set of fields. For example, a news article may have body text and a published date, whereas an event page may need separate fields for venue and start/finish times.
In Wagtail, you can use any Django field class. Most field classes provided by third party apps should work as well.
Wagtail also provides a couple of field classes of its own:
RichTextField- For rich text contentStreamField- A block-based content field (see: Freeform page content using StreamField)
For tagging, Wagtail fully supports django-taggit so we recommend using that.
Search
The search_fields attribute defines which fields are added to the search index and how they are indexed.
This should be a list of SearchField and FilterField objects. SearchField adds a field for full-text search. FilterField adds a field for filtering the results. A field can be indexed with both SearchField and FilterField at the same time (but only one instance of each).
In the above example, we’ve indexed body for full-text search and date for filtering.
The arguments that these field types accept are documented in Indexing extra fields.
Editor panels
There are a few attributes for defining how the page’s fields will be arranged in the page editor interface:
content_panels- For content, such as main body textpromote_panels- For metadata, such as tags, thumbnail image and SEO titlesettings_panels- For settings, such as publish date
Each of these attributes is set to a list of EditHandler objects, which defines which fields appear on which tabs and how they are structured on each tab.
Here’s a summary of the EditHandler classes that Wagtail provides out of the box. See Available panel types for full descriptions.
Basic
These allow editing of model fields. The FieldPanel class will choose the correct widget based on the type of the field, though StreamField fields need to use a specialised panel class.
FieldPanelStreamFieldPanel
Structural
These are used for structuring fields in the interface.
MultiFieldPanel- For grouping similar fields togetherInlinePanel- For inlining child modelsFieldRowPanel- For organising multiple fields into a single row
Chooser
ForeignKey fields to certain models can use one of the below ChooserPanel classes. These add a nice modal chooser interface, and the image/document choosers also allow uploading new files without leaving the page editor.
Note
In order to use one of these choosers, the model being linked to must either be a page, image, document or snippet.
To link to any other model type, you should use FieldPanel, which will create a dropdown box.
The page editor can be customised further. See Customising the editing interface.
Parent page / subpage type rules
These two attributes allow you to control where page types may be used in your site. It allows you to define rules like “blog entries may only be created under a blog index”.
Both take a list of model classes or model names. Model names are of the format app_label.ModelName. If the app_label is omitted, the same app is assumed.
parent_page_typeslimits which page types this type can be created undersubpage_typeslimits which page types can be created under this type
By default, any page type can be created under any page type and it is not necessary to set these attributes if that’s the desired behaviour.
Setting parent_page_types to an empty list is a good way of preventing a particular page type from being created in the editor interface.
Page URLs
The most common method of retrieving page URLs is by using the {% pageurl %} template tag. Since it’s called from a template, pageurl automatically includes the optimizations mentioned below. For more information, see pageurl.
Page models also include several low-level methods for overriding or accessing page URLs.
The Page.get_url_parts(request) method will not typically be called directly, but may be overriden to define custom URL routing for a given page model. It should return a tuple of (site_id, root_url, page_path), which are used by get_url and get_full_url (see below) to construct the given type of page URL.
When overriding get_url_parts(), you should accept *args, **kwargs:
def get_url_parts(self, *args, **kwargs):
and pass those through at the point where you are calling get_url_parts on super (if applicable), e.g.:
super(MyPageModel, self).get_url_parts(*args, **kwargs)
While you could pass only the request keyword argument, passing all arguments as-is ensures compatibility with any future changes to these method signatures.
For more information, please see wagtail.wagtailcore.models.Page.get_url_parts().
The Page.get_url(request) method can be called whenever a page URL is needed. It defaults to returning local URLs (not including the protocol or domain) if it can detect that the page is on current site (via request.site); otherwise, a full URL including the protocol and domain is returned. Whenever possible, the optional request argument should be included to enable per-request caching of site-level URL information and facilitate the generation of local URLs.
A common use case for get_url(request) is in any custom template tag your project may include for generating navigation menus. When writing a such a custom template tag, ensure it includes takes_context=True and use context.get('request') to safely pass the request or None if no request exists in the context.
For more information, please see wagtail.wagtailcore.models.Page.get_url().
In the event a full URL (including the protocol and domain) is needed, Page.get_full_url(request) can be used instead. Whenever possible, the optional request argument should be included to enable per-request caching of site-level URL information. For more information, please see wagtail.wagtailcore.models.Page.get_full_url().
Template rendering
Each page model can be given an HTML template which is rendered when a user browses to a page on the site frontend. This is the simplest and most common way to get Wagtail content to end users (but not the only way).
Adding a template for a page model
Wagtail automatically chooses a name for the template based on the app label and model class name.
Format: <app_label>/<model_name (snake cased)>.html
For example, the template for the above blog page will be: blog/blog_page.html
You just need to create a template in a location where it can be accessed with this name.
Template context
Wagtail renders templates with the page variable bound to the page instance being rendered. Use this to access the content of the page. For example, to get the title of the current page, use {{ page.title }}. All variables provided by context processors are also available.
All pages have a get_context method that is called whenever the template is rendered and returns a dictionary of variables to bind into the template.
To add more variables to the template context, you can override this method:
class BlogIndexPage(Page):
    ...

    def get_context(self, request):
        context = super(BlogIndexPage, self).get_context(request)

        # Add extra variables and return the updated context
        context['blog_entries'] = BlogPage.objects.child_of(self).live()
        return context
The variables can then be used in the template:
{{ page.title }}

{% for entry in blog_entries %}
    {{ entry.title }}
{% endfor %}
Changing the template
Set the template attribute on the class to use a different template file:
class BlogPage(Page):
    ...

    template = 'other_template.html'
The template can be changed on a per-instance basis by defining a get_template method on the page class. This method is called every time the page is rendered:
class BlogPage(Page):
    ...

    use_other_template = models.BooleanField()

    def get_template(self, request):
        if self.use_other_template:
            return 'blog/other_blog_page.html'

        return 'blog/blog_page.html'
In this example, pages that have the use_other_template boolean field set will use the blog/other_blog_page.html template. All other pages will use the default blog/blog_page.html.
More control over page rendering
All page classes have a serve() method that internally calls the get_context and get_template methods and renders the template. This method is similar to a Django view function, taking a Django Request object and returning a Django Response object.
This method can also be overridden for complete control over page rendering.
For example, here’s a way to make a page respond with a JSON representation of itself:
from django.http import JsonResponse


class BlogPage(Page):
    ...

    def serve(self, request):
        return JsonResponse({
            'title': self.title,
            'body': self.body,
            'date': self.date,

            # Resizes the image to 300px width and gets a URL to it
            'feed_image': self.feed_image.get_rendition('width-300').url,
        })
Inline models
Wagtail can nest the content of other models within the page. This is useful for creating repeated fields, such as related links or items to display in a carousel. Inline model content is also versioned with the rest of the page content.
Each inline model requires the following:
- It must inherit from
wagtail.wagtailcore.models.Orderable- It must have a
ParentalKeyto the parent model
Note
django-modelcluster and ParentalKey
The model inlining feature is provided by django-modelcluster and the ParentalKey field type must be imported from there:
from modelcluster.fields import ParentalKey
ParentalKey is a subclass of Django’s ForeignKey, and takes the same arguments.
For example, the following inline model can be used to add related links (a list of name, url pairs) to the BlogPage model:
from django.db import models
from modelcluster.fields import ParentalKey
from wagtail.wagtailcore.models import Orderable


class BlogPageRelatedLink(Orderable):
    page = ParentalKey(BlogPage, related_name='related_links')
    name = models.CharField(max_length=255)
    url = models.URLField()

    panels = [
        FieldPanel('name'),
        FieldPanel('url'),
    ]
To add this to the admin interface, use the InlinePanel edit panel class:
content_panels = [
    ...

    InlinePanel('related_links', label="Related links"),
]
The first argument must match the value of the related_name attribute of the ParentalKey.
Working with pages
Wagtail uses Django’s multi-table inheritance feature to allow multiple page models to be used in the same tree.
Each page is added to both Wagtail’s builtin Page model as well as its user-defined model (such as the BlogPage model created earlier).
Pages can exist in Python code in two forms, an instance of Page or an instance of the page model.
When working with multiple page types together, you will typically use instances of Wagtail’sPagemodel, which don’t give you access to any fields specific to their type.
# Get all pages in the database
>>> from wagtail.wagtailcore.models import Page
>>> Page.objects.all()
[<Page: Homepage>, <Page: About us>, <Page: Blog>, <Page: A Blog post>, <Page: Another Blog post>]
When working with a single page type, you can work with instances of the user-defined model. These give access to all the fields available in Page, along with any user-defined fields for that type.
# Get all blog entries in the database
>>> BlogPage.objects.all()
[<BlogPage: A Blog post>, <BlogPage: Another Blog post>]
You can convert a Page object to its more specific user-defined equivalent using the .specific property. This may cause an additional database lookup.
>>> page = Page.objects.get(title="A Blog post")
>>> page
<Page: A Blog post>

# Note: the blog post is an instance of Page so we cannot access body, date or feed_image

>>> page.specific
<BlogPage: A Blog post>
Tips
Friendly model names
You can make your model names more friendly to users of Wagtail by using Django’s internal Meta class with a verbose_name, e.g.:
class HomePage(Page):
    ...

    class Meta:
        verbose_name = "homepage"
When users are given a choice of pages to create, the list of page types is generated by splitting your model names on each of their capital letters. Thus a HomePage model would be named “Home Page” which is a little clumsy. Defining verbose_name as in the example above would change this to read “Homepage”, which is slightly more conventional.
Page QuerySet ordering
Page-derived models cannot be given a default ordering by using the standard Django approach of adding an ordering attribute to the internal Meta class.
class NewsItemPage(Page):
    publication_date = models.DateField()
    ...

    class Meta:
        ordering = ('-publication_date', )  # will not work
This is because Page enforces ordering QuerySets by path. Instead, you must apply the ordering explicitly when constructing a QuerySet:
news_items = NewsItemPage.objects.live().order_by('-publication_date')
Custom Page managers
You can add a custom Manager to your Page class. Any custom Managers should inherit from wagtail.wagtailcore.models.PageManager:
from django.db import models
from wagtail.wagtailcore.models import Page, PageManager

class EventPageManager(PageManager):
    """ Custom manager for Event pages """

class EventPage(Page):
    start_date = models.DateField()

    objects = EventPageManager()
Alternately, if you only need to add extra QuerySet methods, you can inherit from wagtail.wagtailcore.models.PageQuerySet, and call from_queryset() to build a custom Manager:
from django.db import models
from django.utils import timezone
from wagtail.wagtailcore.models import Page, PageManager, PageQuerySet

class EventPageQuerySet(PageQuerySet):
    def future(self):
        today = timezone.localtime(timezone.now()).date()
        return self.filter(start_date__gte=today)

EventPageManager = PageManager.from_queryset(EventPageQuerySet)

class EventPage(Page):
    start_date = models.DateField()

    objects = EventPageManager()
Writing templates
Wagtail uses Django’s templating language. For developers new to Django, start with Django’s own template documentation: https://docs.djangoproject.com/en/dev/topics/templates/
Python programmers new to Django/Wagtail may prefer more technical documentation: https://docs.djangoproject.com/en/dev/ref/templates/api/
You should be familiar with Django templating basics before continuing with this documentation.
Templates
Every type of page or “content type” in Wagtail is defined as a “model” in a file called models.py. If your site has a blog, you might have a BlogPage model and another called BlogPageListing. The names of the models are up to the Django developer.
For each page model in models.py, Wagtail assumes an HTML template file exists of (almost) the same name. The Front End developer may need to create these templates themselves by refering to models.py to infer template names from the models defined therein.
To find a suitable template, Wagtail converts CamelCase names to snake_case. So for a BlogPage, a template blog_page.html will be expected. The name of the template file can be overridden per model if necessary.
Template files are assumed to exist here:
name_of_project/
    name_of_app/
        templates/
            name_of_app/
                blog_page.html
        models.py
For more information, see the Django documentation for the application directories template loader.
Page content
The data/content entered into each page is accessed/output through Django’s {{ double-brace }} notation. Each field from the model must be accessed by prefixing page.. e.g the page title {{ page.title }} or another field {{ page.author }}.
Additionally request. is available and contains Django’s request object.
Static assets
Static files e.g CSS, JS and images are typically stored here:
name_of_project/
    name_of_app/
        static/
            name_of_app/
                css/
                js/
                images/
        models.py
(The names “css”, “js” etc aren’t important, only their position within the tree.)
Any file within the static folder should be inserted into your HTML using the {% static %} tag. More about it: Static files (tag).
User images
Images uploaded to a Wagtail site by its users (as opposed to a developer’s static files, mentioned above) go into the image library and from there are added to pages via the page editor interface.
Unlike other CMSs, adding images to a page does not involve choosing a “version” of the image to use. Wagtail has no predefined image “formats” or “sizes”. Instead the template developer defines image manipulation to occur on the fly when the image is requested, via a special syntax within the template.
Images from the library must be requested using this syntax, but a developer’s static images can be added via conventional means e.g img tags. Only images from the library can be manipulated on the fly.
Read more about the image manipulation syntax here Using images in templates.
Template tags & filters
In addition to Django’s standard tags and filters, Wagtail provides some of its own, which can be load-ed just like any other.
Images (tag)
The image tag inserts an XHTML-compatible img element into the page, setting its src, width, height and alt. See also More control over the img tag.
The syntax for the image tag is thus:
{% image [image] [resize-rule] %}
For example:
{% load wagtailimages_tags %}
...

{% image page.photo width-400 %}

<!-- or a square thumbnail: -->
{% image page.photo fill-80x80 %}
See Using images in templates for full documentation.
Rich text (filter)
This filter takes a chunk of HTML content and renders it as safe HTML in the page. Importantly, it also expands internal shorthand references to embedded images, and links made in the Wagtail editor, into fully-baked HTML ready for display.
Only fields using RichTextField need this applied in the template.
{% load wagtailcore_tags %}
...
{{ page.body|richtext }}
Wagtail includes embeds and images at their full width, which may overflow the bounds of the content container you’ve defined in your templates. To make images and embeds responsive – meaning they’ll resize to fit their container – include the following CSS.
.rich-text img {
    max-width: 100%;
    height: auto;
}

.responsive-object {
    position: relative;
}

.responsive-object iframe,
.responsive-object object,
.responsive-object embed {
    position: absolute;
    top: 0;
    left: 0;
    width: 100%;
    height: 100%;
}
Internal links (tag)
pageurl¶Takes a Page object and returns a relative URL (/foo/bar/) if within the same Site as the current page, or absolute (http://example.com/foo/bar/) if not.
{% load wagtailcore_tags %}
...
<a href="{% pageurl page.blog_page %}">
slugurl¶Takes any slug as defined in a page’s “Promote” tab and returns the URL for the matching Page. Like pageurl, this will try to provide a relative link if possible, but will default to an absolute link if the Page is on a different Site. This is most useful when creating shared page furniture, e.g. top level navigation or site-wide links.
{% load wagtailcore_tags %}
...
<a href="{% slugurl page.your_slug %}">
Static files (tag)
Used to load anything from your static files directory. Use of this tag avoids rewriting all static paths if hosting arrangements change, as they might between development and live environments.
{% load static %}
...
<img src="{% static "name_of_app/myimage.jpg" %}" alt="My image"/>
Notice that the full path name is not required and the path snippet you enter only need begin with the parent app’s directory name.
Wagtail User Bar
This tag provides a contextual flyout menu for logged-in users. The menu gives editors the ability to edit the current page or add a child page, besides the options to show the page in the Wagtail page explorer or jump to the Wagtail admin dashboard. Moderators are also given the ability to accept or reject a page being previewed as part of content moderation.
{% load wagtailuserbar %}
...
{% wagtailuserbar %}
By default the User Bar appears in the bottom right of the browser window, inset from the edge. If this conflicts with your design it can be moved by passing a parameter to the template tag. These examples show you how to position the userbar in each corner of the screen:
...
{% wagtailuserbar 'top-left' %}
{% wagtailuserbar 'top-right' %}
{% wagtailuserbar 'bottom-left' %}
{% wagtailuserbar 'bottom-right' %}
...
The userbar can be positioned where it works best with your design. Alternatively, you can position it with a css rule in your own CSS files, for example:
.wagtail-userbar {
     top: 200px !important;
     left: 10px !important;
}
Varying output between preview and live
Sometimes you may wish to vary the template output depending on whether the page is being previewed or viewed live. For example, if you have visitor tracking code such as Google Analytics in place on your site, it’s a good idea to leave this out when previewing, so that editor activity doesn’t appear in your analytics reports. Wagtail provides a request.is_preview variable to distinguish between preview and live:
{% if not request.is_preview %}
    <script>
      (function(i,s,o,g,r,a,m){i['GoogleAnalyticsObject']=r;i[r]=i[r]||function(){
      ...
    </script>
{% endif %}
Using images in templates
The image tag inserts an XHTML-compatible img element into the page, setting its src, width, height and alt. See also More control over the img tag.
The syntax for the tag is thus:
{% image [image] [resize-rule] %}
For example:
{% load wagtailimages_tags %}
...

<!-- Display the image scaled to a width of 400 pixels: -->
{% image page.photo width-400 %}

<!-- Display it again, but this time as a square thumbnail: -->
{% image page.photo fill-80x80 %}
In the above syntax example [image] is the Django object refering to the image. If your page model defined a field called “photo” then [image] would probably be page.photo. The [resize-rule] defines how the image is to be resized when inserted into the page. Various resizing methods are supported, to cater to different use cases (e.g. lead images that span the whole width of the page, or thumbnails to be cropped to a fixed size).
Note that a space separates [image] and [resize-rule], but the resize rule must not contain spaces. The width is always specified before the height. Resized images will maintain their original aspect ratio unless the fill rule is used, which may result in some pixels being cropped.
The available resizing methods are as follows:
max(takes two dimensions)
{% image page.photo max-1000x500 %}
Fit within the given dimensions.
The longest edge will be reduced to the matching dimension specified. For example, a portrait image of width 1000 and height 2000, treated with the
max-1000x500rule (a landscape layout) would result in the image being shrunk so the height was 500 pixels and the width was 250.min(takes two dimensions)
{% image page.photo min-500x200 %}
Cover the given dimensions.
This may result in an image slightly larger than the dimensions you specify. A square image of width 2000 and height 2000, treated with the
min-500x200rule would have its height and width changed to 500, i.e matching the width of the resize-rule, but greater than the height.width(takes one dimension)
{% image page.photo width-640 %}
Reduces the width of the image to the dimension specified.
height(takes one dimension)
{% image page.photo height-480 %}
Resize the height of the image to the dimension specified.
fill(takes two dimensions and an optional
-cparameter){% image page.photo fill-200x200 %}
Resize and crop to fill the exact dimensions specified.
This can be particularly useful for websites requiring square thumbnails of arbitrary images. For example, a landscape image of width 2000 and height 1000 treated with the
fill200x200rule would have its height reduced to 200, then its width (ordinarily 400) cropped to 200.This resize-rule will crop to the image’s focal point if it has been set. If not, it will crop to the centre of the image.
On images that won’t upscale
It’s possible to request an image with
filldimensions that the image can’t support without upscaling. e.g. an image of width 400 and height 200 requested withfill-400x400. In this situation the ratio of the requested fill will be matched, but the dimension will not. So that example 400x200 image (a 2:1 ratio) could become 200x200 (a 1:1 ratio, matching the resize-rule).Cropping closer to the focal point
By default, Wagtail will only crop enough to change the aspect ratio of the image to match the ratio in the resize-rule.
In some cases (e.g. thumbnails), it may be preferable to crop closer to the focal point, so that the subject of the image is more prominent.
You can do this by appending
-c<percentage>at the end of the resize-rule. For example, if you would like the image to be cropped as closely as possible to its focal point, add-c100:{% image page.photo fill-200x200-c100 %}
This will crop the image as much as it can, without cropping into the focal point.
If you find that
-c100is too close, you can try-c75or-c50. Any whole number from 0 to 100 is accepted.original(takes no dimensions)
{% image page.photo original %}
Renders the image at its original size.
Note
Wagtail does not allow deforming or stretching images. Image dimension ratios will always be kept. Wagtail also does not support upscaling. Small images forced to appear at larger sizes will “max out” at their native dimensions.
More control over the img tag
Wagtail provides two shortcuts to give greater control over the img element:
1. Adding attributes to the {% image %} tag
Extra attributes can be specified with the syntax attribute="value":
{% image page.photo width-400 class="foo" id="bar" %}
You can set a more relevant alt attribute this way, overriding the one automatically generated from the title of the image. The src, width, and height attributes can also be overridden, if necessary.
2. Generating the image “as foo” to access individual properties
Wagtail can assign the image data to another variable using Django’s as syntax:
{% image page.photo width-400 as tmp_photo %}

<img src="{{ tmp_photo.url }}" width="{{ tmp_photo.width }}"
    height="{{ tmp_photo.height }}" alt="{{ tmp_photo.alt }}" class="my-custom-class" />
This syntax exposes the underlying image Rendition (tmp_photo) to the developer. A “Rendition” contains the information specific to the way you’ve requested to format the image using the resize-rule, i.e. dimensions and source URL.
If your site defines a custom image model using AbstractImage, any additional fields you add to an image (e.g. a copyright holder) are not included in the rendition.
Therefore, if you’d added the field author to your AbstractImage in the above example, you’d access it using {{ page.photo.author }} rather than {{ tmp_photo.author }}.
(Due to the links in the database between renditions and their parent image, you could access it as {{ tmp_photo.image.author }}, but that has reduced readability.)
Note
The image property used for the src attribute is actually image.url, not image.src.
The attrs shortcut
You can also use the attrs property as a shorthand to output the attributes src, width, height and alt in one go:
<img {{ tmp_photo.attrs }} class="my-custom-class" />
Images embedded in rich text
The information above relates to images defined via image-specific fields in your model. However, images can also be embedded arbitrarily in Rich Text fields by the page editor (see Rich Text (HTML)).
Images embedded in Rich Text fields can’t be controlled by the template developer as easily. There are no image objects to work with, so the {% image %} template tag can’t be used. Instead, editors can choose from one of a number of image “Formats” at the point of inserting images into their text.
Wagtail comes with three pre-defined image formats, but more can be defined in Python by the developer. These formats are:
Full width- Creates an image rendition using
width-800, giving thetag the CSS class
full-width. Left-aligned- Creates an image rendition using
width-500, giving thetag the CSS class
left. Right-aligned- Creates an image rendition using
width-500, giving thetag the CSS class
right.
Note
The CSS classes added to images do not come with any accompanying stylesheets, or inline styles. e.g. the left class will do nothing, by default. The developer is expected to add these classes to their front end CSS files, to define exactly what they want left, right or full-width to mean.
For more information about image formats, including creating your own, see Image Formats in the Rich Text Editor
Output image format
Wagtail may automatically change the format of some images when they are resized:
- PNG and JPEG images don’t change format
- GIF images without animation are converted to PNGs
- BMP images are converted to PNGs
It is also possible to override the output format on a per-tag basis by using the format filter after the resize rule.
For example, to make the tag always convert the image to a JPEG, use format-jpeg:
{% image page.photo width-400 format-jpeg %}
You may also use format-png or format-gif.
JPEG image quality
Wagtail’s JPEG image quality setting defaults to 85 (which is quite high). This can be changed either globally or on a per-tag basis.
Changing globally
Use the WAGTAILIMAGES_JPEG_QUALITY setting to change the global default JPEG quality:
# settings.py

# Make low-quality but small images
WAGTAILIMAGES_JPEG_QUALITY = 40
Note that this won’t affect any previously generated images so you may want to delete all renditions so they can regenerate with the new setting. This can be done from the Django shell:
# Replace this with your custom rendition model if you use one
>>> from wagtail.wagtailimages.models import Rendition
>>> Rendition.objects.all().delete()
Changing per-tag
It’s also possible to have different JPEG qualities on individual tags by using the jpegquality filter. This will always override the default setting:
{% image page.photo width-400 jpegquality-40 %}
Note that this will have no effect on PNG or GIF files. If you want all images to be low quality, you can use this filter with format-jpeg (which forces all images to output in JPEG format):
{% image page.photo width-400 format-jpeg jpegquality-40 %}
Generating image renditions in Python
All of the image transformations mentioned above can also be used directly in Python code. See Generating renditions in Python.
Search
Wagtail provides a comprehensive and extensible search interface. In addition, it provides ways to promote search results through “Editor’s Picks”. Wagtail also collects simple statistics on queries made through the search interface.
Indexing
To make a model searchable, you’ll need to add it into the search index. All pages, images and documents are indexed for you, so you can start searching them right away.
If you have created some extra fields in a subclass of Page or Image, you may want to add these new fields to the search index too so that a user’s search query will match on their content. See Indexing extra fields for info on how to do this.
If you have a custom model that you would like to make searchable, see Indexing custom models.
Updating the index
If the search index is kept separate from the database (when using Elasticsearch for example), you need to keep them both in sync. There are two ways to do this: using the search signal handlers, or calling the update_index command periodically. For best speed and reliability, it’s best to use both if possible.
Changed in version 0.8: Signal handlers are now automatically registered
wagtailsearch provides some signal handlers which bind to the save/delete signals of all indexed models. This would automatically add and delete them from all backends you have registered in WAGTAILSEARCH_BACKENDS. These signal handlers are automatically registered when the wagtail.wagtailsearch app is loaded.
update_index command¶Wagtail also provides a command for rebuilding the index from scratch.
./manage.py update_index
It is recommended to run this command once a week and at the following times:
- whenever any pages have been created through a script (after an import, for example)
- whenever any changes have been made to models or search configuration
The search may not return any results while this command is running, so avoid running it at peak times.
Indexing extra fields
Warning
Indexing extra fields is only supported with ElasticSearch as your backend. If you’re using the database backend, any other fields you define via search_fields will be ignored.
Fields must be explicitly added to the search_fields property of your Page-derived model, in order for you to be able to search/filter on them. This is done by overriding search_fields to append a list of extra SearchField/FilterField objects to it.
This creates an EventPage model with two fields: description and date. description is indexed as a SearchField and date is indexed as a FilterField
from wagtail.wagtailsearch import index
from django.utils import timezone

class EventPage(Page):
    description = models.TextField()
    date = models.DateField()

    search_fields = Page.search_fields + [ # Inherit search_fields from Page
        index.SearchField('description'),
        index.FilterField('date'),
    ]


# Get future events which contain the string "Christmas" in the title or description
>>> EventPage.objects.filter(date__gt=timezone.now()).search("Christmas")
index.SearchField¶These are used for performing full-text searches on your models, usually for text fields.
- partial_match (
boolean) - Setting this to true allows results to be matched on parts of words. For example, this is set on the title field by default, so a page titledHello World!will be found if the user only typesHelinto the search box.- boost (
int/float) - This allows you to set fields as being more important than others. Setting this to a high number on a field will cause pages with matches in that field to be ranked higher. By default, this is set to 2 on the Page title field and 1 on all other fields.- es_extra (
dict) - This field is to allow the developer to set or override any setting on the field in the ElasticSearch mapping. Use this if you want to make use of any ElasticSearch features that are not yet supported in Wagtail.
index.FilterField¶These are added to the search index but are not used for full-text searches. Instead, they allow you to run filters on your search results.
Note
This is not supported in the Database Backend (default)
Search/filter fields do not need to be Django model fields. They can also be any method or attribute on your model class.
One use for this is indexing the get_*_display methods Django creates automatically for fields with choices.
from wagtail.wagtailsearch import index

class EventPage(Page):
    IS_PRIVATE_CHOICES = (
        (False, "Public"),
        (True, "Private"),
    )

    is_private = models.BooleanField(choices=IS_PRIVATE_CHOICES)

    search_fields = Page.search_fields + [
        # Index the human-readable string for searching.
        index.SearchField('get_is_private_display'),

        # Index the boolean value for filtering.
        index.FilterField('is_private'),
    ]
Callables also provide a way to index fields from related models. In the example from Inline Panels and Model Clusters, to index each BookPage by the titles of its related_links:
class BookPage(Page):
    # ...
    def get_related_link_titles(self):
        # Get list of titles and concatenate them
        return '\n'.join(self.related_links.all().values_list('name', flat=True))

    search_fields = Page.search_fields + [
        # ...
        index.SearchField('get_related_link_titles'),
    ]
Indexing custom models
Any Django model can be indexed and searched.
To do this, inherit from index.Indexed and add some search_fields to the model.
from wagtail.wagtailsearch import index

class Book(index.Indexed, models.Model):
    title = models.CharField(max_length=255)
    genre = models.CharField(max_length=255, choices=GENRE_CHOICES)
    author = models.ForeignKey(Author)
    published_date = models.DateTimeField()

    search_fields = [
        index.SearchField('title', partial_match=True, boost=10),
        index.SearchField('get_genre_display'),

        index.FilterField('genre'),
        index.FilterField('author'),
        index.FilterField('published_date'),
    ]

# As this model doesn't have a search method in its QuerySet, we have to call search directly on the backend
>>> from wagtail.wagtailsearch.backends import get_search_backend
>>> s = get_search_backend()

# Run a search for a book by Roald Dahl
>>> roald_dahl = Author.objects.get(name="Roald Dahl")
>>> s.search("chocolate factory", Book.objects.filter(author=roald_dahl))
[<Book: Charlie and the chocolate factory>]
Searching
Searching QuerySets
Wagtail search is built on Django’s QuerySet API. You should be able to search any Django QuerySet provided the model and the fields being filtered on have been added to the search index.
Wagtail provides a shortcut for searching pages: the .search() QuerySet method. You can call this on any PageQuerySet. For example:
# Search future EventPages
>>> from wagtail.wagtailcore.models import EventPage
>>> EventPage.objects.filter(date__gt=timezone.now()).search("Hello world!")
All other methods of PageQuerySet can be used with search(). For example:
# Search all live EventPages that are under the events index
>>> EventPage.objects.live().descendant_of(events_index).search("Event")
[<EventPage: Event 1>, <EventPage: Event 2>]
Note
The search() method will convert your QuerySet into an instance of one of Wagtail’s SearchResults classes (depending on backend). This means that you must perform filtering before calling search().
Wagtail’s document and image models provide a search method on their QuerySets, just as pages do:
>>> from wagtail.wagtailimages.models import Image

>>> Image.objects.filter(uploaded_by_user=user).search("Hello")
[<Image: Hello>, <Image: Hello world!>]
Custom models can be searched by using the search method on the search backend directly:
>>> from myapp.models import Book
>>> from wagtail.wagtailsearch.backends import get_search_backend

# Search books
>>> s = get_search_backend()
>>> s.search("Great", Book)
[<Book: Great Expectations>, <Book: The Great Gatsby>]
You can also pass a QuerySet into the search method which allows you to add filters to your search results:
>>> from myapp.models import Book
>>> from wagtail.wagtailsearch.backends import get_search_backend

# Search books
>>> s = get_search_backend()
>>> s.search("Great", Book.objects.filter(published_date__year__lt=1900))
[<Book: Great Expectations>]
By default, Wagtail will search all fields that have been indexed using index.SearchField.
This can be limited to a certian set of fields by using the fields keyword argument:
# Search just the title field
>>> EventPage.objects.search("Event", fields=["title"])
[<EventPage: Event 1>, <EventPage: Event 2>]
The search operator specifies how search should behave when the user has typed in multiple search terms. There are two possible values:
- “or” - The results must match at least one term (default for Elasticsearch)
- “and” - The results must match all terms (default for database search)
Both operators have benefits and drawbacks. The “or” operator will return many more results but will likely contain a lot of results that aren’t relevent. The “and” operator only returns results that contain all search terms, but require the user to be more precise with their query.
We recommend using the “or” operator when ordering by relevance and the “and” operator when ordering by anything else (note: the database backend doesn’t currently support ordering by relevance).
Here’s an example of using the operator keyword argument:
# The database contains a "Thing" model with the following items:
# - Hello world
# - Hello
# - World


# Search with the "or" operator
>>> s = get_search_backend()
>>> s.search("Hello world", Things, operator="or")

# All records returned as they all contain either "hello" or "world"
[<Thing: Hello World>, <Thing: Hello>, <Thing: World>]


# Search with the "and" operator
>>> s = get_search_backend()
>>> s.search("Hello world", Things, operator="and")

# Only "hello world" returned as that's the only item that contains both terms
[<Thing: Hello world>]
For page, image and document models, the operator keyword argument is also supported on the QuerySet’s search method:
>>> Page.objects.search("Hello world", operator="or")

# All pages containing either "hello" or "world" are returned
[<Page: Hello World>, <Page: Hello>, <Page: World>]
By default, search results are ordered by relevance, if the backend supports it. To preserve the QuerySet’s existing ordering, the order_by_relevance keyword argument needs to be set to False on the search() method.
For example:
# Get a list of events ordered by date
>>> EventPage.objects.order_by('date').search("Event", order_by_relevance=False)

# Events ordered by date
[<EventPage: Easter>, <EventPage: Halloween>, <EventPage: Christmas>]
For each matched result, Elasticsearch calculates a “score”, which is a number that represents how relevant the result is based on the user’s query. The results are usually ordered based on the score.
There are some cases where having access to the score is useful (such as programmatically combining two queries for different models). You can add the score to each result by calling the .annotate_score(field) method on the SearchQuerySet.
For example:
>>> events = EventPage.objects.search("Event").annotate_score("_score")
>>> for event in events:
...    print(event.title, event._score)
...
("Easter", 2.5),
("Haloween", 1.7),
("Christmas", 1.5),
Note that the score itself is arbitrary and it is only useful for comparison of results for the same query.
An example page search view
Here’s an example Django view that could be used to add a “search” page to your site:
# views.py

from django.shortcuts import render

from wagtail.wagtailcore.models import Page
from wagtail.wagtailsearch.models import Query


def search(request):
    # Search
    search_query = request.GET.get('query', None)
    if search_query:
        search_results = Page.objects.live().search(search_query)

        # Log the query so Wagtail can suggest promoted results
        Query.get(search_query).add_hit()
    else:
        search_results = Page.objects.none()

    # Render template
    return render(request, 'search_results.html', {
        'search_query': search_query,
        'search_results': search_results,
    })
And here’s a template to go with it:
{% extends "base.html" %}
{% load wagtailcore_tags %}

{% block title %}Search{% endblock %}

{% block content %}
    <form action="{% url 'search' %}" method="get">
        <input type="text" name="query" value="{{ search_query }}">
        <input type="submit" value="Search">
    </form>

    {% if search_results %}
        <ul>
            {% for result in search_results %}
                <li>
                    <h4><a href="{% pageurl result %}">{{ result }}</a></h4>
                    {% if result.search_description %}
                        {{ result.search_description|safe }}
                    {% endif %}
                </li>
            {% endfor %}
        </ul>
    {% elif search_query %}
        No results found
    {% else %}
        Please type something into the search box
    {% endif %}
{% endblock %}
Promoted search results
“Promoted search results” allow editors to explicitly link relevant content to search terms, so results pages can contain curated content in addition to results from the search engine.
This functionality is provided by the wagtailsearchpromotions contrib module.
Backends
Wagtailsearch has support for multiple backends, giving you the choice between using the database for search or an external service such as Elasticsearch. The database backend is enabled by default.
You can configure which backend to use with the WAGTAILSEARCH_BACKENDS setting:
WAGTAILSEARCH_BACKENDS = {
    'default': {
        'BACKEND': 'wagtail.wagtailsearch.backends.db',
    }
}
AUTO_UPDATE
By default, Wagtail will automatically keep all indexes up to date. This could impact performance when editing content, especially if your index is hosted on an external service.
The AUTO_UPDATE setting allows you to disable this on a per-index basis:
WAGTAILSEARCH_BACKENDS = {
    'default': {
        'BACKEND': ...,
        'AUTO_UPDATE': False,
    }
}
If you have disabled auto update, you must run the update_index command on a regular basis to keep the index in sync with the database.
ATOMIC_REBUILD
Warning
This option is not compatible with Elasticsearch 5.4.x due to a bug in the handling of aliases in this release. Please use a 5.3.x or 5.5.x release instead.
By default (when using the Elasticsearch backend), when the update_index command is run, Wagtail deletes the index and rebuilds it from scratch. This causes the search engine to not return results until the rebuild is complete and is also risky as you can’t rollback if an error occurs.
Setting the ATOMIC_REBUILD setting to True makes Wagtail rebuild into a separate index while keep the old index active until the new one is fully built. When the rebuild is finished, the indexes are swapped atomically and the old index is deleted.
BACKEND
Here’s a list of backends that Wagtail supports out of the box.
wagtail.wagtailsearch.backends.db
The database backend is very basic and is intended only to be used in development and on small sites. It cannot order results by relevance, severely hampering its usefulness when searching a large collection of pages.
It also doesn’t support:
- Searching on fields in subclasses of
Page(unless the class is being searched directly)- Indexing callables and other attributes
- Converting accented characters to ASCII
If any of these features are important to you, we recommend using Elasticsearch instead.
wagtail.contrib.postgres_search.backend
If you use PostgreSQL for your database and your site has less than a million pages, you probably want to use this backend.
See PostgreSQL search engine for more detail.
Changed in version 1.7: Support for Elasticsearch 2.x was added
Changed in version 1.8: Support for Elasticsearch 5.x was added
Elasticsearch versions 1, 2 and 5 are supported. Use the appropriate backend for your version:
wagtail.wagtailsearch.backends.elasticsearch (Elasticsearch 1.x)
wagtail.wagtailsearch.backends.elasticsearch2 (Elasticsearch 2.x)
wagtail.wagtailsearch.backends.elasticsearch5 (Elasticsearch 5.x)
Prerequisites are the Elasticsearch service itself and, via pip, the elasticsearch-py package. The major version of the package must match the installed version of Elasticsearch:
$ pip install "elasticsearch>=1.0.0,<2.0.0" # for Elasticsearch 1.x
$ pip install "elasticsearch>=2.0.0,<3.0.0" # for Elasticsearch 2.x
pip install "elasticsearch>=5.0.0,<6.0.0" # for Elasticsearch 5.x
The backend is configured in settings:
WAGTAILSEARCH_BACKENDS = {
    'default': {
        'BACKEND': 'wagtail.wagtailsearch.backends.elasticsearch2',
        'URLS': ['http://localhost:9200'],
        'INDEX': 'wagtail',
        'TIMEOUT': 5,
        'OPTIONS': {},
        'INDEX_SETTINGS': {},
    }
}
Other than BACKEND, the keys are optional and default to the values shown. Any defined key in OPTIONS is passed directly to the Elasticsearch constructor as case-sensitive keyword argument (e.g. 'max_retries': 1).
INDEX_SETTINGS is a dictionary used to override the default settings to create the index. The default settings are defined inside the ElasticsearchSearchBackend class in the module wagtail/wagtail/wagtailsearch/backends/elasticsearch.py. Any new key is added, any existing key, if not a dictionary, is replaced with the new value. Here’s a sample on how to configure the number of shards and setting the italian LanguageAnalyzer as the default analyzer:
WAGTAILSEARCH_BACKENDS = {
    'default': {
        ...,
        'INDEX_SETTINGS': {
            'settings': {
                'index': {
                    'number_of_shards': 1,
                    'analysis': {
                        'analyzer': {
                            'default': {
                                'type': 'italian'
                            }
                        }
                    }
                }
            }
        }
    }
If you prefer not to run an Elasticsearch server in development or production, there are many hosted services available, including Bonsai, who offer a free account suitable for testing and development. To use Bonsai:
- Sign up for an account at Bonsai
- Use your Bonsai dashboard to create a Cluster.
- Configure
URLSin the Elasticsearch entry inWAGTAILSEARCH_BACKENDSusing the Cluster URL from your Bonsai dashboard - Run
./manage.py update_index
The Elasticsearch backend is compatible with Amazon Elasticsearch Service, but requires additional configuration to handle IAM based authentication. This can be done with the requests-aws4auth package along with the following configuration:
from elasticsearch import Elasticsearch, RequestsHttpConnection
from requests_aws4auth import AWS4Auth

WAGTAILSEARCH_BACKENDS = {
    'default': {
        'BACKEND': 'wagtail.wagtailsearch.backends.elasticsearch',
        'INDEX': 'wagtail',
        'TIMEOUT': 5,
        'HOSTS': [{
          'host': 'YOURCLUSTER.REGION.es.amazonaws.com',
          'port': 443,
          'use_ssl': True,
          'verify_certs': True,
          'http_auth': AWS4Auth('ACCESS_KEY', 'SECRET_KEY', 'REGION', 'es'),
        }],
        'connection_class': RequestsHttpConnection,
    }
}
Wagtail search backends implement the interface defined in wagtail/wagtail/wagtailsearch/backends/base.py. At a minimum, the backend’s search() method must return a collection of objects or model.objects.none(). For a fully-featured search backend, examine the Elasticsearch backend code in elasticsearch.py.
Indexing
To make objects searchable, they must first be added to the search index. This involves configuring the models and fields that you would like to index (which is done for you for Pages, Images and Documents), and then actually inserting them into the index.
See Updating the index for information on how to keep the objects in your search index in sync with the objects in your database.
If you have created some extra fields in a subclass of Page or Image, you may want to add these new fields to the search index, so a user’s search query can match the Page or Image’s extra content. See Indexing extra fields.
If you have a custom model which doesn’t derive from Page or Image that you would like to make searchable, see Indexing custom models.
Snippets
Snippets are pieces of content which do not necessitate a full webpage to render. They could be used for making secondary content, such as headers, footers, and sidebars, editable in the Wagtail admin. Snippets are Django models which do not inherit the Page class and are thus not organized into the Wagtail tree. However, they can still be made editable by assigning panels and identifying the model as a snippet with the register_snippet class decorator.
Snippets lack many of the features of pages, such as being orderable in the Wagtail admin or having a defined URL. Decide carefully if the content type you would want to build into a snippet might be more suited to a page.
Snippet Models
Here’s an example snippet from the Wagtail demo website:
from django.db import models
from django.utils.encoding import python_2_unicode_compatible

from wagtail.wagtailadmin.edit_handlers import FieldPanel
from wagtail.wagtailsnippets.models import register_snippet

...

@register_snippet
@python_2_unicode_compatible  # provide equivalent __unicode__ and __str__ methods on Python 2
class Advert(models.Model):
    url = models.URLField(null=True, blank=True)
    text = models.CharField(max_length=255)

    panels = [
        FieldPanel('url'),
        FieldPanel('text'),
    ]

    def __str__(self):
        return self.text
The Advert model uses the basic Django model class and defines two properties: text and URL. The editing interface is very close to that provided for Page-derived models, with fields assigned in the panels property. Snippets do not use multiple tabs of fields, nor do they provide the “save as draft” or “submit for moderation” features.
@register_snippet tells Wagtail to treat the model as a snippet. The panels list defines the fields to show on the snippet editing page. It’s also important to provide a string representation of the class through def __str__(self): so that the snippet objects make sense when listed in the Wagtail admin.
Including Snippets in Template Tags
The simplest way to make your snippets available to templates is with a template tag. This is mostly done with vanilla Django, so perhaps reviewing Django’s documentation for django custom template tags will be more helpful. We’ll go over the basics, though, and point out any considerations to make for Wagtail.
First, add a new python file to a templatetags folder within your app. The demo website, for instance uses the path wagtaildemo/demo/templatetags/demo_tags.py. We’ll need to load some Django modules and our app’s models, and ready the register decorator:
from django import template
from demo.models import *

register = template.Library()

...

# Advert snippets
@register.inclusion_tag('demo/tags/adverts.html', takes_context=True)
def adverts(context):
    return {
        'adverts': Advert.objects.all(),
        'request': context['request'],
    }
@register.inclusion_tag() takes two variables: a template and a boolean on whether that template should be passed a request context. It’s a good idea to include request contexts in your custom template tags, since some Wagtail-specific template tags like pageurl need the context to work properly. The template tag function could take arguments and filter the adverts to return a specific model, but for brevity we’ll just use Advert.objects.all().
Here’s what’s in the template used by this template tag:
{% for advert in adverts %}
    <p>
        <a href="{{ advert.url }}">
            {{ advert.text }}
        </a>
    </p>
{% endfor %}
Then, in your own page templates, you can include your snippet template tag with:
{% load wagtailcore_tags demo_tags %}

...

{% block content %}

    ...

    {% adverts %}

{% endblock %}
Binding Pages to Snippets
In the above example, the list of adverts is a fixed list, displayed independently of the page content. This might be what you want for a common panel in a sidebar, say – but in other scenarios you may wish to refer to a particular snippet from within a page’s content. This can be done by defining a foreign key to the snippet model within your page model, and adding a SnippetChooserPanel to the page’s content_panels list. For example, if you wanted to be able to specify an advert to appear on BookPage:
from wagtail.wagtailsnippets.edit_handlers import SnippetChooserPanel
# ...
class BookPage(Page):
    advert = models.ForeignKey(
        'demo.Advert',
        null=True,
        blank=True,
        on_delete=models.SET_NULL,
        related_name='+'
    )

    content_panels = Page.content_panels + [
        SnippetChooserPanel('advert'),
        # ...
    ]
The snippet could then be accessed within your template as page.advert.
To attach multiple adverts to a page, the SnippetChooserPanel can be placed on an inline child object of BookPage, rather than on BookPage itself. Here this child model is named BookPageAdvertPlacement (so called because there is one such object for each time that an advert is placed on a BookPage):
from django.db import models

from wagtail.wagtailcore.models import Page, Orderable
from wagtail.wagtailsnippets.edit_handlers import SnippetChooserPanel

from modelcluster.fields import ParentalKey

...

class BookPageAdvertPlacement(Orderable, models.Model):
    page = ParentalKey('demo.BookPage', related_name='advert_placements')
    advert = models.ForeignKey('demo.Advert', related_name='+')

    class Meta:
        verbose_name = "advert placement"
        verbose_name_plural = "advert placements"

    panels = [
        SnippetChooserPanel('advert'),
    ]

    def __str__(self):
        return self.page.title + " -> " + self.advert.text


class BookPage(Page):
    ...

    content_panels = Page.content_panels + [
        InlinePanel('advert_placements', label="Adverts"),
        # ...
    ]
These child objects are now accessible through the page’s advert_placements property, and from there we can access the linked Advert snippet as advert. In the template for BookPage, we could include the following:
{% for advert_placement in page.advert_placements.all %}
    <p>
        <a href="{{ advert_placement.advert.url }}">
            {{ advert_placement.advert.text }}
        </a>
    </p>
{% endfor %}
Making Snippets Searchable
If a snippet model inherits from wagtail.wagtailsearch.index.Indexed, as described in Indexing custom models, Wagtail will automatically add a search box to the chooser interface for that snippet type. For example, the Advert snippet could be made searchable as follows:
...

from wagtail.wagtailsearch import index

...

@register_snippet
class Advert(index.Indexed, models.Model):
    url = models.URLField(null=True, blank=True)
    text = models.CharField(max_length=255)

    panels = [
        FieldPanel('url'),
        FieldPanel('text'),
    ]

    search_fields = [
        index.SearchField('text', partial_match=True),
    ]
Tagging snippets
Adding tags to snippets is very similar to adding tags to pages. The only difference is that taggit.manager.TaggableManager should be used in the place of ClusterTaggableManager.
from modelcluster.fields import ParentalKey
from modelcluster.models import ClusterableModel
from taggit.models import TaggedItemBase
from taggit.managers import TaggableManager

class AdvertTag(TaggedItemBase):
    content_object = ParentalKey('demo.Advert', related_name='tagged_items')

@register_snippet
class Advert(ClusterableModel):
    ...
    tags = TaggableManager(through=AdvertTag, blank=True)

    panels = [
        ...
        FieldPanel('tags'),
    ]
The documentation on tagging pages has more information on how to use tags in views.
Freeform page content using StreamField
StreamField provides a content editing model suitable for pages that do not follow a fixed structure – such as blog posts or news stories – where the text may be interspersed with subheadings, images, pull quotes and video. It’s also suitable for more specialised content types, such as maps and charts (or, for a programming blog, code snippets). In this model, these different content types are represented as a sequence of ‘blocks’, which can be repeated and arranged in any order.
For further background on StreamField, and why you would use it instead of a rich text field for the article body, see the blog post Rich text fields and faster horses.
StreamField also offers a rich API to define your own block types, ranging from simple collections of sub-blocks (such as a ‘person’ block consisting of first name, surname and photograph) to completely custom components with their own editing interface. Within the database, the StreamField content is stored as JSON, ensuring that the full informational content of the field is preserved, rather than just an HTML representation of it.
Using StreamField
StreamField is a model field that can be defined within your page model like any other field:
from django.db import models

from wagtail.wagtailcore.models import Page
from wagtail.wagtailcore.fields import StreamField
from wagtail.wagtailcore import blocks
from wagtail.wagtailadmin.edit_handlers import FieldPanel, StreamFieldPanel
from wagtail.wagtailimages.blocks import ImageChooserBlock

class BlogPage(Page):
    author = models.CharField(max_length=255)
    date = models.DateField("Post date")
    body = StreamField([
        ('heading', blocks.CharBlock(classname="full title")),
        ('paragraph', blocks.RichTextBlock()),
        ('image', ImageChooserBlock()),
    ])

    content_panels = Page.content_panels + [
        FieldPanel('author'),
        FieldPanel('date'),
        StreamFieldPanel('body'),
    ]
Note: StreamField is not backwards compatible with other field types such as RichTextField. If you need to migrate an existing field to StreamField, refer to Migrating RichTextFields to StreamField.
The parameter to StreamField is a list of (name, block_type) tuples. ‘name’ is used to identify the block type within templates and the internal JSON representation (and should follow standard Python conventions for variable names: lower-case and underscores, no spaces) and ‘block_type’ should be a block definition object as described below. (Alternatively, StreamField can be passed a single StreamBlock instance - see Structural block types.)
This defines the set of available block types that can be used within this field. The author of the page is free to use these blocks as many times as desired, in any order.
Basic block types
All block types accept the following optional keyword arguments:
default- The default value that a new ‘empty’ block should receive.
label- The label to display in the editor interface when referring to this block - defaults to a prettified version of the block name (or, in a context where no name is assigned - such as within a
ListBlock- the empty string). icon- The name of the icon to display for this block type in the menu of available block types. For a list of icon names, see the Wagtail style guide, which can be enabled by adding
wagtail.contrib.wagtailstyleguideto your project’sINSTALLED_APPS. template- The path to a Django template that will be used to render this block on the front end. See Template rendering.
group- The group used to categorize this block, i.e. any blocks with the same group name will be shown together in the editor interface with the group name as a heading.
The basic block types provided by Wagtail are as follows:
CharBlock
wagtail.wagtailcore.blocks.CharBlock
A single-line text input. The following keyword arguments are accepted:
required(default: True)- If true, the field cannot be left blank.
max_length,min_length- Ensures that the string is at most or at least the given length.
help_text- Help text to display alongside the field.
TextBlock
wagtail.wagtailcore.blocks.TextBlock
A multi-line text input. As with CharBlock, the keyword arguments required, max_length, min_length and help_text are accepted.
EmailBlock
wagtail.wagtailcore.blocks.EmailBlock
A single-line email input that validates that the email is a valid Email Address. The keyword arguments required and help_text are accepted.
For an example of EmailBlock in use, see Example: PersonBlock
IntegerBlock
wagtail.wagtailcore.blocks.IntegerBlock
A single-line integer input that validates that the integer is a valid whole number. The keyword arguments required, max_value, min_value and help_text are accepted.
For an example of IntegerBlock in use, see Example: PersonBlock
FloatBlock
wagtail.wagtailcore.blocks.FloatBlock
A single-line Float input that validates that the value is a valid floating point number. The keyword arguments required, max_value and min_value are accepted.
DecimalBlock
wagtail.wagtailcore.blocks.DecimalBlock
A single-line decimal input that validates that the value is a valid decimal number. The keyword arguments required, max_value, min_value, max_digits and decimal_places are accepted.
For an example of DecimalBlock in use, see Example: PersonBlock
RegexBlock
wagtail.wagtailcore.blocks.RegexBlock
A single-line text input that validates a string against a regex expression. The regular expression used for validation must be supplied as the first argument, or as the keyword argument regex. To customise the message text used to indicate a validation error, pass a dictionary as the keyword argument error_messages containing either or both of the keys required (for the message shown on an empty value) or invalid (for the message shown on a non-matching value):
blocks.RegexBlock(regex=r'^[0-9]{3}$', error_messages={
    'invalid': "Not a valid library card number."
})
The keyword arguments regex, required, max_length, min_length and error_messages are accepted.
URLBlock
wagtail.wagtailcore.blocks.URLBlock
A single-line text input that validates that the string is a valid URL. The keyword arguments required, max_length, min_length and help_text are accepted.
BooleanBlock
wagtail.wagtailcore.blocks.BooleanBlock
A checkbox. The keyword arguments required and help_text are accepted. As with Django’s BooleanField, a value of required=True (the default) indicates that the checkbox must be ticked in order to proceed. For a checkbox that can be ticked or unticked, you must explicitly pass in required=False.
DateBlock
wagtail.wagtailcore.blocks.DateBlock
A date picker. The keyword arguments required, help_text and format are accepted.
format(default: None)- Date format. This must be one of the recognised formats listed in the DATE_INPUT_FORMATS setting. If not specifed Wagtail will use
WAGTAIL_DATE_FORMATsetting with fallback to ‘%Y-%m-%d’.
TimeBlock
wagtail.wagtailcore.blocks.TimeBlock
A time picker. The keyword arguments required and help_text are accepted.
DateTimeBlock
wagtail.wagtailcore.blocks.DateTimeBlock
A combined date / time picker. The keyword arguments required, help_text and format are accepted.
format(default: None)- Date format. This must be one of the recognised formats listed in the DATETIME_INPUT_FORMATS setting. If not specifed Wagtail will use
WAGTAIL_DATETIME_FORMATsetting with fallback to ‘%Y-%m-%d %H:%M’.
RichTextBlock
wagtail.wagtailcore.blocks.RichTextBlock
A WYSIWYG editor for creating formatted text including links, bold / italics etc.
RawHTMLBlock
wagtail.wagtailcore.blocks.RawHTMLBlock
A text area for entering raw HTML which will be rendered unescaped in the page output. The keyword arguments required, max_length, min_length and help_text are accepted.
Warning
When this block is in use, there is nothing to prevent editors from inserting malicious scripts into the page, including scripts that would allow the editor to acquire administrator privileges when another administrator views the page. Do not use this block unless your editors are fully trusted.
BlockQuoteBlock
wagtail.wagtailcore.blocks.BlockQuoteBlock
A text field, the contents of which will be wrapped in an HTML <blockquote> tag pair. The keyword arguments required, max_length, min_length and help_text are accepted.
ChoiceBlock
wagtail.wagtailcore.blocks.ChoiceBlock
A dropdown select box for choosing from a list of choices. The following keyword arguments are accepted:
choices- A list of choices, in any format accepted by Django’s
choicesparameter for model fields (https://docs.djangoproject.com/en/stable/ref/models/fields/#field-choices), or a callable returning such a list. required(default: True)- If true, the field cannot be left blank.
help_text- Help text to display alongside the field.
ChoiceBlock can also be subclassed to produce a reusable block with the same list of choices everywhere it is used. For example, a block definition such as:
blocks.ChoiceBlock(choices=[
    ('tea', 'Tea'),
    ('coffee', 'Coffee'),
], icon='cup')
could be rewritten as a subclass of ChoiceBlock:
class DrinksChoiceBlock(blocks.ChoiceBlock):
    choices = [
        ('tea', 'Tea'),
        ('coffee', 'Coffee'),
    ]

    class Meta:
        icon = 'cup'
StreamField definitions can then refer to DrinksChoiceBlock() in place of the full ChoiceBlock definition. Note that this only works when choices is a fixed list, not a callable.
PageChooserBlock
wagtail.wagtailcore.blocks.PageChooserBlock
A control for selecting a page object, using Wagtail’s page browser. The following keyword arguments are accepted:
required(default: True)- If true, the field cannot be left blank.
target_model(default: Page)- Restrict choices to one or more specific page types. Accepts a page model class, model name (as a string), or a list or tuple of these.
can_choose_root(default: False)- If true, the editor can choose the tree root as a page. Normally this would be undesirable, since the tree root is never a usable page, but in some specialised cases it may be appropriate. For example, a block providing a feed of related articles could use a PageChooserBlock to select which subsection of the site articles will be taken from, with the root corresponding to ‘everywhere’.
DocumentChooserBlock
wagtail.wagtaildocs.blocks.DocumentChooserBlock
A control to allow the editor to select an existing document object, or upload a new one. The keyword argument required is accepted.
ImageChooserBlock
wagtail.wagtailimages.blocks.ImageChooserBlock
A control to allow the editor to select an existing image, or upload a new one. The keyword argument required is accepted.
SnippetChooserBlock
wagtail.wagtailsnippets.blocks.SnippetChooserBlock
A control to allow the editor to select a snippet object. Requires one positional argument: the snippet class to choose from. The keyword argument required is accepted.
EmbedBlock
wagtail.wagtailembeds.blocks.EmbedBlock
A field for the editor to enter a URL to a media item (such as a YouTube video) to appear as embedded media on the page. The keyword arguments required, max_length, min_length and help_text are accepted.
StaticBlock
wagtail.wagtailcore.blocks.StaticBlock
A block which doesn’t have any fields, thus passes no particular values to its template during rendering. This can be useful if you need the editor to be able to insert some content which is always the same or doesn’t need to be configured within the page editor, such as an address, embed code from third-party services, or more complex pieces of code if the template uses template tags.
By default, some default text (which contains the label keyword argument if you pass it) will be displayed in the editor interface, so that the block doesn’t look empty. But you can also customise it entirely by passing a text string as the admin_text keyword argument instead:
blocks.StaticBlock(
    admin_text='Latest posts: no configuration needed.',
    # or admin_text=mark_safe('<b>Latest posts</b>: no configuration needed.'),
    template='latest_posts.html')
StaticBlock can also be subclassed to produce a reusable block with the same configuration everywhere it is used:
class LatestPostsStaticBlock(blocks.StaticBlock):
    class Meta:
        icon = 'user'
        label = 'Latest posts'
        admin_text = '{label}: configured elsewhere'.format(label=label)
        template = 'latest_posts.html'
Structural block types
In addition to the basic block types above, it is possible to define new block types made up of sub-blocks: for example, a ‘person’ block consisting of sub-blocks for first name, surname and image, or a ‘carousel’ block consisting of an unlimited number of image blocks. These structures can be nested to any depth, making it possible to have a structure containing a list, or a list of structures.
StructBlock
wagtail.wagtailcore.blocks.StructBlock
A block consisting of a fixed group of sub-blocks to be displayed together. Takes a list of (name, block_definition) tuples as its first argument:
('person', blocks.StructBlock([
    ('first_name', blocks.CharBlock(required=True)),
    ('surname', blocks.CharBlock(required=True)),
    ('photo', ImageChooserBlock()),
    ('biography', blocks.RichTextBlock()),
], icon='user'))
Alternatively, the list of sub-blocks can be provided in a subclass of StructBlock:
class PersonBlock(blocks.StructBlock):
    first_name = blocks.CharBlock(required=True)
    surname = blocks.CharBlock(required=True)
    photo = ImageChooserBlock()
    biography = blocks.RichTextBlock()

    class Meta:
        icon = 'user'
The Meta class supports the properties default, label, icon and template, which have the same meanings as when they are passed to the block’s constructor.
This defines PersonBlock() as a block type that can be re-used as many times as you like within your model definitions:
body = StreamField([
    ('heading', blocks.CharBlock(classname="full title")),
    ('paragraph', blocks.RichTextBlock()),
    ('image', ImageChooserBlock()),
    ('person', PersonBlock()),
])
Further options are available for customising the display of a StructBlock within the page editor - see Custom editing interfaces for StructBlock.
ListBlock
wagtail.wagtailcore.blocks.ListBlock
A block consisting of many sub-blocks, all of the same type. The editor can add an unlimited number of sub-blocks, and re-order and delete them. Takes the definition of the sub-block as its first argument:
('ingredients_list', blocks.ListBlock(blocks.CharBlock(label="Ingredient")))
Any block type is valid as the sub-block type, including structural types:
('ingredients_list', blocks.ListBlock(blocks.StructBlock([
    ('ingredient', blocks.CharBlock(required=True)),
    ('amount', blocks.CharBlock()),
])))
StreamBlock
wagtail.wagtailcore.blocks.StreamBlock
A block consisting of a sequence of sub-blocks of different types, which can be mixed and reordered at will. Used as the overall mechanism of the StreamField itself, but can also be nested or used within other structural block types. Takes a list of (name, block_definition) tuples as its first argument:
('carousel', blocks.StreamBlock(
    [
        ('image', ImageChooserBlock()),
        ('quotation', blocks.StructBlock([
            ('text', blocks.TextBlock()),
            ('author', blocks.CharBlock()),
        ])),
        ('video', EmbedBlock()),
    ],
    icon='cogs'
))
As with StructBlock, the list of sub-blocks can also be provided as a subclass of StreamBlock:
class CarouselBlock(blocks.StreamBlock):
    image = ImageChooserBlock()
    quotation = blocks.StructBlock([
        ('text', blocks.TextBlock()),
        ('author', blocks.CharBlock()),
    ])
    video = EmbedBlock()

    class Meta:
        icon='cogs'
Since StreamField accepts an instance of StreamBlock as a parameter, in place of a list of block types, this makes it possible to re-use a common set of block types without repeating definitions:
class HomePage(Page):
    carousel = StreamField(CarouselBlock())
Example: PersonBlock
This example demonstrates how the basic block types introduced above can be combined into a more complex block type based on StructBlock:
from wagtail.wagtailcore import blocks

class PersonBlock(blocks.StructBlock):
    name = blocks.CharBlock()
    height = blocks.DecimalBlock()
    age = blocks.IntegerBlock()
    email = blocks.EmailBlock()

    class Meta:
        template = 'blocks/person_block.html'
Template rendering
StreamField provides an HTML representation for the stream content as a whole, as well as for each individual block. To include this HTML into your page, use the {% include_block %} tag:
{% load wagtailcore_tags %}

 ...

{% include_block page.body %}
In the default rendering, each block of the stream is wrapped in a <div class="block-my_block_name"> element (where my_block_name is the block name given in the StreamField definition). If you wish to provide your own HTML markup, you can instead iterate over the field’s value, and invoke {% include_block %} on each block in turn:
{% load wagtailcore_tags %}

 ...

<article>
    {% for block in page.body %}
        <section>{% include_block block %}</section>
    {% endfor %}
</article>
For more control over the rendering of specific block types, each block object provides block_type and value properties:
{% load wagtailcore_tags %}

 ...

<article>
    {% for block in page.body %}
        {% if block.block_type == 'heading' %}
            <h1>{{ block.value }}</h1>
        {% else %}
            <section class="block-{{ block.block_type }}">
                {% include_block block %}
            </section>
        {% endif %}
    {% endfor %}
</article>
By default, each block is rendered using simple, minimal HTML markup, or no markup at all. For example, a CharBlock value is rendered as plain text, while a ListBlock outputs its child blocks in a <ul> wrapper. To override this with your own custom HTML rendering, you can pass a template argument to the block, giving the filename of a template file to be rendered. This is particularly useful for custom block types derived from StructBlock:
('person', blocks.StructBlock(
    [
        ('first_name', blocks.CharBlock(required=True)),
        ('surname', blocks.CharBlock(required=True)),
        ('photo', ImageChooserBlock()),
        ('biography', blocks.RichTextBlock()),
    ],
    template='myapp/blocks/person.html',
    icon='user'
))
Or, when defined as a subclass of StructBlock:
class PersonBlock(blocks.StructBlock):
    first_name = blocks.CharBlock(required=True)
    surname = blocks.CharBlock(required=True)
    photo = ImageChooserBlock()
    biography = blocks.RichTextBlock()

    class Meta:
        template = 'myapp/blocks/person.html'
        icon = 'user'
Within the template, the block value is accessible as the variable value:
{% load wagtailimages_tags %}

<div class="person">
    {% image value.photo width-400 %}
    <h2>{{ value.first_name }} {{ value.surname }}</h2>
    {{ value.biography }}
</div>
Since first_name, surname, photo and biography are defined as blocks in their own right, this could also be written as:
{% load wagtailcore_tags wagtailimages_tags %}

<div class="person">
    {% image value.photo width-400 %}
    <h2>{% include_block value.first_name %} {% include_block value.surname %}</h2>
    {% include_block value.biography %}
</div>
Writing {{ my_block }} is roughly equivalent to {% include_block my_block %}, but the short form is more restrictive, as it does not pass variables from the calling template such as request or page; for this reason, it is recommended that you only use it for simple values that do not render HTML of their own. For example, if our PersonBlock used the template:
{% load wagtailimages_tags %}

<div class="person">
    {% image value.photo width-400 %}
    <h2>{{ value.first_name }} {{ value.surname }}</h2>

    {% if request.user.is_authenticated %}
        <a href="#">Contact this person</a>
    {% endif %}

    {{ value.biography }}
</div>
then the request.user.is_authenticated test would not work correctly when rendering the block through a {{ ... }} tag:
{##}

{% for block in page.body %}
    {% if block.block_type == 'person' %}
        <div>
            {{ block }}
        </div>
    {% endif %}
{% endfor %}

{##}

{% for block in page.body %}
    {% if block.block_type == 'person' %}
        <div>
            {% include_block block %}
        </div>
    {% endif %}
{% endfor %}
Like Django’s {% include %} tag, {% include_block %} also allows passing additional variables to the included template, through the syntax {% include_block my_block with foo="bar" %}:
{##}

{% for block in page.body %}
    {% if block.block_type == 'person' %}
        {% include_block block with classname="important" %}
    {% endif %}
{% endfor %}

{##}

<div class="{{ classname }}">
    ...
</div>
The syntax {% include_block my_block with foo="bar" only %} is also supported, to specify that no variables from the parent template other than foo will be passed to the child template.
As well as passing variables from the parent template, block subclasses can pass additional template variables of their own by overriding the get_context method:
import datetime

class EventBlock(blocks.StructBlock):
    title = blocks.CharBlock(required=True)
    date = blocks.DateBlock(required=True)

    def get_context(self, value, parent_context=None):
        context = super(EventBlock, self).get_context(value, parent_context=parent_context)
        context['is_happening_today'] = (value['date'] == datetime.date.today())
        return context

    class Meta:
        template = 'myapp/blocks/event.html'
In this example, the variable is_happening_today will be made available within the block template. The parent_context keyword argument is available when the block is rendered through an {% include_block %} tag, and is a dict of variables passed from the calling template.
BoundBlocks and values
All block types, not just StructBlock, accept a template parameter to determine how they will be rendered on a page. However, for blocks that handle basic Python data types, such as CharBlock and IntegerBlock, there are some limitations on where the template will take effect, since those built-in types (str, int and so on) cannot be ‘taught’ about their template rendering. As an example of this, consider the following block definition:
class HeadingBlock(blocks.CharBlock):
    class Meta:
        template = 'blocks/heading.html'
where blocks/heading.html consists of:
<h1>{{ value }}</h1>
This gives us a block that behaves as an ordinary text field, but wraps its output in <h1> tags whenever it is rendered:
class BlogPage(Page):
    body = StreamField([
        # ...
        ('heading', HeadingBlock()),
        # ...
    ])
{% load wagtailcore_tags %}

{% for block in page.body %}
    {% if block.block_type == 'heading' %}
        {% include_block block %}  {##}
    {% endif %}
{% endfor %}
This kind of arrangement - a value that supposedly represents a plain text string, but has its own custom HTML representation when output on a template - would normally be a very messy thing to achieve in Python, but it works here because the items you get when iterating over a StreamField are not actually the ‘native’ values of the blocks. Instead, each item is returned as an instance of BoundBlock - an object that represents the pairing of a value and its block definition. By keeping track of the block definition, a BoundBlock always knows which template to render. To get to the underlying value - in this case, the text content of the heading - you would need to access block.value. Indeed, if you were to output {% include_block block.value %} on the page, you would find that it renders as plain text, without the <h1> tags.
(More precisely, the items returned when iterating over a StreamField are instances of a class StreamChild, which provides the block_type property as well as value.)
Experienced Django developers may find it helpful to compare this to the BoundField class in Django’s forms framework, which represents the pairing of a form field value with its corresponding form field definition, and therefore knows how to render the value as an HTML form field.
Most of the time, you won’t need to worry about these internal details; Wagtail will use the template rendering wherever you would expect it to. However, there are certain cases where the illusion isn’t quite complete - namely, when accessing children of a ListBlock or StructBlock. In these cases, there is no BoundBlock wrapper, and so the item cannot be relied upon to know its own template rendering. For example, consider the following setup, where our HeadingBlock is a child of a StructBlock:
class EventBlock(blocks.StructBlock):
    heading = HeadingBlock()
    description = blocks.TextBlock()
    # ...

    class Meta:
        template = 'blocks/event.html'
In blocks/event.html:
{% load wagtailcore_tags %}

<div class="event {% if value.heading == 'Party!' %}lots-of-balloons{% endif %}">
    {% include_block value.heading %}
    - {% include_block value.description %}
</div>
In this case, value.heading returns the plain string value rather than a BoundBlock; this is necessary because otherwise the comparison in {% if value.heading == 'Party!' %} would never succeed. This in turn means that {% include_block value.heading %} renders as the plain string, without the <h1> tags. To get the HTML rendering, you need to explicitly access the BoundBlock instance through value.bound_blocks.heading:
{% load wagtailcore_tags %}

<div class="event {% if value.heading == 'Party!' %}lots-of-balloons{% endif %}">
    {% include_block value.bound_blocks.heading %}
    - {% include_block value.description %}
</div>
In practice, it would probably be more natural and readable to make the <h1> tag explicit in the EventBlock’s template:
{% load wagtailcore_tags %}

<div class="event {% if value.heading == 'Party!' %}lots-of-balloons{% endif %}">
    <h1>{{ value.heading }}</h1>
    - {% include_block value.description %}
</div>
This limitation does not apply to StructBlock and StreamBlock values as children of a StructBlock, because Wagtail implements these as complex objects that know their own template rendering, even when not wrapped in a BoundBlock. For example, if a StructBlock is nested in another StructBlock, as in:
class EventBlock(blocks.StructBlock):
    heading = HeadingBlock()
    description = blocks.TextBlock()
    guest_speaker = blocks.StructBlock([
        ('first_name', blocks.CharBlock()),
        ('surname', blocks.CharBlock()),
        ('photo', ImageChooserBlock()),
    ], template='blocks/speaker.html')
then {% include_block value.guest_speaker %} within the EventBlock’s template will pick up the template rendering from blocks/speaker.html as intended.
In summary, interactions between BoundBlocks and plain values work according to the following rules:
- When iterating over the value of a StreamField or StreamBlock (as in
{% for block in page.body %}), you will get back a sequence of BoundBlocks. - If you have a BoundBlock instance, you can access the plain value as
block.value. - Accessing a child of a StructBlock (as in
value.heading) will return a plain value; to retrieve the BoundBlock instead, usevalue.bound_blocks.heading. - The value of a ListBlock is a plain Python list; iterating over it returns plain child values.
- StructBlock and StreamBlock values always know how to render their own templates, even if you only have the plain value rather than the BoundBlock.
Custom editing interfaces for StructBlock
To customise the styling of a StructBlock as it appears in the page editor, you can specify a form_classname attribute (either as a keyword argument to the StructBlock constructor, or in a subclass’s Meta) to override the default value of struct-block:
class PersonBlock(blocks.StructBlock):
    first_name = blocks.CharBlock(required=True)
    surname = blocks.CharBlock(required=True)
    photo = ImageChooserBlock()
    biography = blocks.RichTextBlock()

    class Meta:
        icon = 'user'
        form_classname = 'person-block struct-block'
You can then provide custom CSS for this block, targeted at the specified classname, by using the insert_editor_css hook.
For more extensive customisations that require changes to the HTML markup as well, you can override the form_template attribute in Meta to specify your own template path. The following variables are available on this template:
children- An
OrderedDictofBoundBlocks for all of the child blocks making up thisStructBlock; typically your template will callrender_formon each of these. help_text- The help text for this block, if specified.
classname- The class name passed as
form_classname(defaults tostruct-block). block_definition- The
StructBlockinstance that defines this block. prefix- The prefix used on form fields for this block instance, guaranteed to be unique across the form.
To add additional variables, you can override the block’s get_form_context method:
class PersonBlock(blocks.StructBlock):
    first_name = blocks.CharBlock(required=True)
    surname = blocks.CharBlock(required=True)
    photo = ImageChooserBlock()
    biography = blocks.RichTextBlock()

    def get_form_context(self, value, prefix='', errors=None):
        context = super(PersonBlock, self).get_form_context(value, prefix=prefix, errors=errors)
        context['suggested_first_names'] = ['John', 'Paul', 'George', 'Ringo']
        return context

    class Meta:
        icon = 'user'
        form_template = 'myapp/block_forms/person.html'
Custom block types
If you need to implement a custom UI, or handle a datatype that is not provided by Wagtail’s built-in block types (and cannot built up as a structure of existing fields), it is possible to define your own custom block types. For further guidance, refer to the source code of Wagtail’s built-in block classes.
For block types that simply wrap an existing Django form field, Wagtail provides an abstract class wagtail.wagtailcore.blocks.FieldBlock as a helper. Subclasses just need to set a field property that returns the form field object:
class IPAddressBlock(FieldBlock):
    def __init__(self, required=True, help_text=None, **kwargs):
        self.field = forms.GenericIPAddressField(required=required, help_text=help_text)
        super(IPAddressBlock, self).__init__(**kwargs)
Migrations
StreamField definitions within migrations
As with any model field in Django, any changes to a model definition that affect a StreamField will result in a migration file that contains a ‘frozen’ copy of that field definition. Since a StreamField definition is more complex than a typical model field, there is an increased likelihood of definitions from your project being imported into the migration – which would cause problems later on if those definitions are moved or deleted.
To mitigate this, StructBlock, StreamBlock and ChoiceBlock implement additional logic to ensure that any subclasses of these blocks are deconstructed to plain instances of StructBlock, StreamBlock and ChoiceBlock – in this way, the migrations avoid having any references to your custom class definitions. This is possible because these block types provide a standard pattern for inheritance, and know how to reconstruct the block definition for any subclass that follows that pattern.
If you subclass any other block class, such as FieldBlock, you will need to either keep that class definition in place for the lifetime of your project, or implement a custom deconstruct method that expresses your block entirely in terms of classes that are guaranteed to remain in place. Similarly, if you customise a StructBlock, StreamBlock or ChoiceBlock subclass to the point where it can no longer be expressed as an instance of the basic block type – for example, if you add extra arguments to the constructor – you will need to provide your own deconstruct method.
Migrating RichTextFields to StreamField
If you change an existing RichTextField to a StreamField, and create and run migrations as normal, the migration will complete with no errors, since both fields use a text column within the database. However, StreamField uses a JSON representation for its data, so the existing text needs to be converted with a data migration in order to become accessible again. For this to work, the StreamField needs to include a RichTextBlock as one of the available block types. The field can then be converted by creating a new migration (./manage.py makemigrations --empty myapp) and editing it as follows (in this example, the ‘body’ field of the demo.BlogPage model is being converted to a StreamField with a RichTextBlock named rich_text):
# -*- coding: utf-8 -*-
from __future__ import unicode_literals

from django.db import models, migrations
from wagtail.wagtailcore.rich_text import RichText


def convert_to_streamfield(apps, schema_editor):
    BlogPage = apps.get_model("demo", "BlogPage")
    for page in BlogPage.objects.all():
        if page.body.raw_text and not page.body:
            page.body = [('rich_text', RichText(page.body.raw_text))]
            page.save()


def convert_to_richtext(apps, schema_editor):
    BlogPage = apps.get_model("demo", "BlogPage")
    for page in BlogPage.objects.all():
        if page.body.raw_text is None:
            raw_text = ''.join([
                child.value.source for child in page.body
                if child.block_type == 'rich_text'
            ])
            page.body = raw_text
            page.save()


class Migration(migrations.Migration):

    dependencies = [
        # leave the dependency line from the generated migration intact!
        ('demo', '0001_initial'),
    ]

    operations = [
        migrations.RunPython(
            convert_to_streamfield,
            convert_to_richtext,
        ),
    ]
Note that the above migration will work on published Page objects only. If you also need to migrate draft pages and page revisions, then edit your new data migration as in the following example instead:
# -*- coding: utf-8 -*-
from __future__ import unicode_literals

import json

from django.core.serializers.json import DjangoJSONEncoder
from django.db import migrations, models

from wagtail.wagtailcore.rich_text import RichText


def page_to_streamfield(page):
    changed = False
    if page.body.raw_text and not page.body:
        page.body = [('rich_text', {'rich_text': RichText(page.body.raw_text)})]
        changed = True
    return page, changed


def pagerevision_to_streamfield(revision_data):
    changed = False
    body = revision_data.get('body')
    if body:
        try:
            json.loads(body)
        except ValueError:
            revision_data['body'] = json.dumps(
                [{
                    "value": {"rich_text": body},
                    "type": "rich_text"
                }],
                cls=DjangoJSONEncoder)
            changed = True
        else:
            # It's already valid JSON. Leave it.
            pass
    return revision_data, changed


def page_to_richtext(page):
    changed = False
    if page.body.raw_text is None:
        raw_text = ''.join([
            child.value['rich_text'].source for child in page.body
            if child.block_type == 'rich_text'
        ])
        page.body = raw_text
        changed = True
    return page, changed


def pagerevision_to_richtext(revision_data):
    changed = False
    body = revision_data.get('body', 'definitely non-JSON string')
    if body:
        try:
            body_data = json.loads(body)
        except ValueError:
            # It's not apparently a StreamField. Leave it.
            pass
        else:
            raw_text = ''.join([
                child['value']['rich_text'] for child in body_data
                if child['type'] == 'rich_text'
            ])
            revision_data['body'] = raw_text
            changed = True
    return revision_data, changed


def convert(apps, schema_editor, page_converter, pagerevision_converter):
    BlogPage = apps.get_model("demo", "BlogPage")
    for page in BlogPage.objects.all():

        page, changed = page_converter(page)
        if changed:
            page.save()

        for revision in page.revisions.all():
            revision_data = json.loads(revision.content_json)
            revision_data, changed = pagerevision_converter(revision_data)
            if changed:
                revision.content_json = json.dumps(revision_data, cls=DjangoJSONEncoder)
                revision.save()


def convert_to_streamfield(apps, schema_editor):
    return convert(apps, schema_editor, page_to_streamfield, pagerevision_to_streamfield)


def convert_to_richtext(apps, schema_editor):
    return convert(apps, schema_editor, page_to_richtext, pagerevision_to_richtext)


class Migration(migrations.Migration):

    dependencies = [
        # leave the dependency line from the generated migration intact!
        ('demo', '0001_initial'),
    ]

    operations = [
        migrations.RunPython(
            convert_to_streamfield,
            convert_to_richtext,
        ),
    ]
Permissions
Wagtail adapts and extends the Django permission system to cater for the needs of website content creation, such as moderation workflows, and multiple teams working on different areas of a site (or multiple sites within the same Wagtail installation). Permissions can be configured through the ‘Groups’ area of the Wagtail admin interface, under ‘Settings’.
Page permissions
Permissions can be attached at any point in the page tree, and propagate down the tree. For example, if a site had the page tree:
MegaCorp/
    About us
    Offices/
        UK
        France
        Germany
then a group with ‘edit’ permissions on the ‘Offices’ page would automatically receive the ability to edit the ‘UK’, ‘France’ and ‘Germany’ pages. Permissions can be set globally for the entire tree by assigning them on the ‘root’ page - since all pages must exist underneath the root node, and the root cannot be deleted, this permission will cover all pages that exist now and in future.
Whenever a user creates a page through the Wagtail admin, that user is designated as the owner of that page. Any user with ‘add’ permission has the ability to edit pages they own, as well as adding new ones. This is in recognition of the fact that creating pages is typically an iterative process involving creating a number of draft versions - giving a user the ability to create a draft but not letting them subsequently edit it would not be very useful. Ability to edit a page also implies the ability to delete it; unlike Django’s standard permission model, there is no distinct ‘delete’ permission.
The full set of available permission types is as follows:
- Add - grants the ability to create new subpages underneath this page (provided the page model permits this - see Parent page / subpage type rules), and to edit and delete pages owned by the current user. Published pages cannot be deleted unless the user also has ‘publish’ permission.
- Edit - grants the ability to edit and delete this page, and any pages underneath it, regardless of ownership. A user with only ‘edit’ permission may not create new pages, only existing ones. Published pages cannot be deleted unless the user also has ‘publish’ permission.
- Publish - grants the ability to publish and unpublish this page and/or its children. A user without publish permission cannot directly make changes that are visible to visitors of the website; instead, they must submit their changes for moderation (which will send a notification to users with publish permission). Publish permission is independent of edit permission; a user with only publish permission will not be able to make any edits of their own.
- Bulk delete - allows a user to delete pages that have descendants, in a single operation. Without this permission, a user has to delete the descendant pages individually before deleting the parent. This is a safeguard against accidental deletion. This permission must be used in conjunction with ‘add’ / ‘edit’ permission, as it does not provide any deletion rights of its own; it only provides a ‘shortcut’ for the permissions the user has already. For example, a user with just ‘add’ and ‘bulk delete’ permissions will only be able to bulk-delete if all the affected pages are owned by that user, and are unpublished.
- Lock - grants the ability to lock or unlock this page (and any pages underneath it) for editing, preventing users from making any further edits to it.
Drafts can be viewed only if the user has either Edit or Publish permission.
Image / document permissions
The permission rules for images and documents work on a similar basis to pages. Images and documents are considered to be ‘owned’ by the user who uploaded them; a user with ‘add’ permission also has the ability to edit items they own; and deletion is considered equivalent to editing rather than having a specific permission type.
Access to specific sets of images and documents can be controlled by setting up collections. By default all images and documents belong to the ‘root’ collection, but new collections can be created through the Settings -> Collections area of the admin interface. Permissions set on ‘root’ apply to all collections, so a user with ‘edit’ permission for images on root can edit all images; permissions set on other collections apply to that collection only.
Advanced topics
Images
Generating renditions in Python
Rendered versions of original images generated by the Wagtail {% image %} template tag are called “renditions”, and are stored as new image files in the site’s [media]/images directory on the first invocation.
Image renditions can also be generated dynamically from Python via the native get_rendition() method, for example:
newimage = myimage.get_rendition('fill-300x150|jpegquality-60')
If myimage had a filename of foo.jpg, a new rendition of the image file called foo.fill-300x150.jpegquality-60.jpg would be generated and saved into the site’s [media]/images directory. Argument options are identical to the {% image %} template tag’s filter spec, and should be separated with |.
The generated Rendition object will have properties specific to that version of the image, such as url, width and height, so something like this could be used in an API generator, for example:
url = myimage.get_rendition('fill-300x186|jpegquality-60').url
Properties belonging to the original image from which the generated Rendition was created, such as title, can be accessed through the Rendition’s image property:
>>> newimage.image.title
'Blue Sky'
>>> newimage.image.is_landscape()
True
See also: Using images in templates
Animated GIF support
Pillow, Wagtail’s default image library, doesn’t support animated GIFs.
To get animated GIF support, you will have to install Wand. Wand is a binding to ImageMagick so make sure that has been installed as well.
When installed, Wagtail will automatically use Wand for resizing GIF files but continue to resize other images with Pillow.
Custom image models
The Image model can be customised, allowing additional fields to be added to images.
To do this, you need to add two models to your project:
- The image model itself that inherits from
wagtail.wagtailimages.models.AbstractImage. This is where you would add your additional fields- The renditions model that inherits from
wagtail.wagtailimages.models.AbstractRendition. This is used to store renditions for the new model.
Here’s an example:
# models.py
from django.db import models

from wagtail.wagtailimages.models import Image, AbstractImage, AbstractRendition


class CustomImage(AbstractImage):
    # Add any extra fields to image here

    # eg. To add a caption field:
    # caption = models.CharField(max_length=255, blank=True)

    admin_form_fields = Image.admin_form_fields + (
        # Then add the field names here to make them appear in the form:
        # 'caption',
    )


class CustomRendition(AbstractRendition):
    image = models.ForeignKey(CustomImage, related_name='renditions')

    class Meta:
        unique_together = (
            ('image', 'filter_spec', 'focal_point_key'),
        )
Changed in version 1.10: In previous versions of Wagtail it was necessary to connect signal handlers to handle deletion of image files. As of Wagtail 1.10 this is now handled automatically.
Note
Fields defined on a custom image model must either be set as non-required (blank=True), or specify a default value - this is because uploading the image and entering custom data happen as two separate actions, and Wagtail needs to be able to create an image record immediately on upload.
Then set the WAGTAILIMAGES_IMAGE_MODEL setting to point to it:
WAGTAILIMAGES_IMAGE_MODEL = 'images.CustomImage'
Migrating from the builtin image model
When changing an existing site to use a custom image model, no images will be copied to the new model automatically. Copying old images to the new model would need to be done manually with a data migration.
Any templates that reference the builtin image model will still continue to work as before but would need to be updated in order to see any new images.
Referring to the image model
-
wagtail.wagtailimages.get_image_model()¶ Get the image model from the
WAGTAILIMAGES_IMAGE_MODELsetting. Useful for developers making Wagtail plugins that need the image model. Defaults to the standardImagemodel if no custom model is defined.
-
wagtail.wagtailimages.get_image_model_string()¶ Get the dotted
app.Modelname for the image model as a string. Useful for developers making Wagtail plugins that need to refer to the image model, such as in foreign keys, but the model itself is not required.
Feature Detection
Wagtail has the ability to automatically detect faces and features inside your images and crop the images to those features.
Feature detection uses OpenCV to detect faces/features in an image when the image is uploaded. The detected features stored internally as a focal point in the focal_point_{x, y, width, height} fields on the Image model. These fields are used by the fill image filter when an image is rendered in a template to crop the image.
Setup
Feature detection requires OpenCV which can be a bit tricky to install as it’s not currently pip-installable.
Debian and ubuntu provide an apt-get package called python-opencv:
$ sudo apt-get install python-opencv python-numpy
This will install PyOpenCV into your site packages. If you are using a virtual environment, you need to make sure site packages are enabled or Wagtail will not be able to import PyOpenCV.
If you are not using a virtual envionment, you can skip this step.
Enabling site packages is different depending on whether you are using pyvenv (Python 3.3+ only) or virtualenv to manage your virtual environment.
Go into your pyvenv directory and open the pyvenv.cfg file then set include-system-site-packages to true.
Go into your virtualenv directory and delete a file called lib/python-x.x/no-global-site-packages.txt.
You can test that OpenCV can be seen by Wagtail by opening up a python shell (with your virtual environment active) and typing:
import cv
If you don’t see an ImportError, it worked. (If you see the error libdc1394 error: Failed to initialize libdc1394, this is harmless and can be ignored.)
Once OpenCV is installed, you need to set the WAGTAILIMAGES_FEATURE_DETECTION_ENABLED setting to True:
# settings.py

WAGTAILIMAGES_FEATURE_DETECTION_ENABLED = True
Feature detection runs when new images are uploaded in to Wagtail. If you already have images in your Wagtail site and would like to run feature detection on them, you will have to run it manually.
You can manually run feature detection on all images by running the following code in the python shell:
from wagtail.wagtailimages.models import Image

for image in Image.objects.all():
    if not image.has_focal_point():
        image.set_focal_point(image.get_suggested_focal_point())
        image.save()
Dynamic image serve view
In most cases, developers wanting to generate image renditions in Python should use the get_rendition() method. See Generating renditions in Python.
If you need to be able to generate image versions for an external system such as a blog or mobile app, Wagtail provides a view for dynamically generating renditions of images by calling a unique URL.
The view takes an image id, filter spec and security signature in the URL. If these parameters are valid, it serves an image file matching that criteria.
Like the {% image %} tag, the rendition is generated on the first call and subsequent calls are served from a cache.
Setup
Add an entry for the view into your URLs configuration:
from wagtail.wagtailimages.views.serve import ServeView

urlpatterns = [
    ...

    url(r'^images/([^/]*)/(\d*)/([^/]*)/[^/]*$', ServeView.as_view(), name='wagtailimages_serve'),

    ...

    # Ensure that the wagtailimages_serve line appears above the default Wagtail page serving route
    url(r'', include(wagtail_urls)),
]
Usage
When the dynamic serve view is enabled, an image URL generator in the admin interface becomes available automatically. This can be accessed through the edit page of any image by clicking the “URL generator” button on the right hand side.
This interface allows editors to generate URLs to cropped versions of the image.
Dynamic image URLs can also be generated using Python code and served to a client over an API or used directly in the template.
One advantage of using dynamic image URLs in the template is that they do not block the initial response while rendering like the {% image %} tag does.
from django.core.urlresolvers import reverse
from wagtail.wagtailimages.views.serve import generate_signature

def generate_image_url(image, filter_spec):
    signature = generate_signature(image.id, filter_spec)
    url = reverse('wagtailimages_serve', args=(signature, image.id, filter_spec))

    # Append image's original filename to the URL (optional)
    url += image.file.name[len('original_images/'):]

    return url
And here’s an example of this being used in a view:
def display_image(request, image_id):
    image = get_object_or_404(Image, id=image_id)

    return render(request, 'display_image.html', {
        'image_url': generate_image_url(image, 'fill-100x100')
    })
Image operations can be chained by joining them with a | character:
return render(request, 'display_image.html', {
    'image_url': generate_image_url(image, 'fill-100x100|jpegquality-40')
})
Advanced configuration
By default, the view will serve the image file directly. This behaviour can be changed to a 301 redirect instead which may be useful if you host your images externally.
To enable this, pass action='redirect' into the ServeView.as_view() method in your urls configuration:
from wagtail.wagtailimages.views.serve import ServeView

urlpatterns = [
    ...

    url(r'^images/([^/]*)/(\d*)/([^/]*)/[^/]*$', ServeView.as_view(action='redirect'), name='wagtailimages_serve'),
]
django-sendfile offloads the job of transferring the image data to the web server instead of serving it directly from the Django application. This could greatly reduce server load in situations where your site has many images being downloaded but you’re unable to use a Caching proxy or a CDN.
You firstly need to install and configure django-sendfile and configure your web server to use it. If you haven’t done this already, please refer to the installation docs.
To serve images with django-sendfile, you can use the SendFileView class. This view can be used out of the box:
from wagtail.wagtailimages.views.serve import SendFileView

urlpatterns = [
    ...

    url(r'^images/([^/]*)/(\d*)/([^/]*)/[^/]*$', SendFileView.as_view(), name='wagtailimages_serve'),
]
You can customise it to override the backend defined in the SENDFILE_BACKEND setting:
from wagtail.wagtailimages.views.serve import SendFileView
from project.sendfile_backends import MyCustomBackend

class MySendFileView(SendFileView):
    backend = MyCustomBackend
You can also customise it to serve private files. For example, if the only need is to be authenticated (e.g. for Django >= 1.9):
from django.contrib.auth.mixins import LoginRequiredMixin
from wagtail.wagtailimages.views.serve import SendFileView

class PrivateSendFileView(LoginRequiredMixin, SendFileView):
    raise_exception = True
Configuring Django for Wagtail
To install Wagtail completely from scratch, create a new Django project and an app within that project. For instructions on these tasks, see Writing your first Django app. Your project directory will look like the following:
myproject/
    myproject/
        __init__.py
        settings.py
        urls.py
        wsgi.py
    myapp/
        __init__.py
        models.py
        tests.py
        admin.py
        views.py
    manage.py
From your app directory, you can safely remove admin.py and views.py, since Wagtail will provide this functionality for your models. Configuring Django to load Wagtail involves adding modules and variables to settings.py and URL configuration to urls.py. For a more complete view of what’s defined in these files, see Django Settings and Django URL Dispatcher.
What follows is a settings reference which skips many boilerplate Django settings. If you just want to get your Wagtail install up quickly without fussing with settings at the moment, see Ready to Use Example Configuration Files.
Middleware (settings.py)
MIDDLEWARE_CLASSES = [
  'django.contrib.sessions.middleware.SessionMiddleware',
  'django.middleware.common.CommonMiddleware',
  'django.middleware.csrf.CsrfViewMiddleware',
  'django.contrib.auth.middleware.AuthenticationMiddleware',
  'django.contrib.auth.middleware.SessionAuthenticationMiddleware',
  'django.contrib.messages.middleware.MessageMiddleware',
  'django.middleware.clickjacking.XFrameOptionsMiddleware',
  'django.middleware.security.SecurityMiddleware',

  'wagtail.wagtailcore.middleware.SiteMiddleware',

  'wagtail.wagtailredirects.middleware.RedirectMiddleware',
]
Wagtail requires several common Django middleware modules to work and cover basic security. Wagtail provides its own middleware to cover these tasks:
SiteMiddleware- Wagtail routes pre-defined hosts to pages within the Wagtail tree using this middleware.
RedirectMiddleware- Wagtail provides a simple interface for adding arbitrary redirects to your site and this module makes it happen.
Apps (settings.py)
INSTALLED_APPS = [

  'myapp',  # your own app

  'wagtail.wagtailforms',
  'wagtail.wagtailredirects',
  'wagtail.wagtailembeds',
  'wagtail.wagtailsites',
  'wagtail.wagtailusers',
  'wagtail.wagtailsnippets',
  'wagtail.wagtaildocs',
  'wagtail.wagtailimages',
  'wagtail.wagtailsearch',
  'wagtail.wagtailadmin',
  'wagtail.wagtailcore',

  'taggit',
  'modelcluster',

  'django.contrib.auth',
  'django.contrib.contenttypes',
  'django.contrib.sessions',
  'django.contrib.messages',
  'django.contrib.staticfiles',
]
Wagtail requires several Django app modules, third-party apps, and defines several apps of its own. Wagtail was built to be modular, so many Wagtail apps can be omitted to suit your needs. Your own app (here myapp) is where you define your models, templates, static assets, template tags, and other custom functionality for your site.
Wagtail Apps
wagtailcore- The core functionality of Wagtail, such as the
Pageclass, the Wagtail tree, and model fields. wagtailadmin- The administration interface for Wagtail, including page edit handlers.
wagtaildocs- The Wagtail document content type.
wagtailsnippets- Editing interface for non-Page models and objects. See Snippets.
wagtailusers- User editing interface.
wagtailimages- The Wagtail image content type.
wagtailembeds- Module governing oEmbed and Embedly content in Wagtail rich text fields. See Inserting videos into body content.
wagtailsearch- Search framework for Page content. See Search Page.
wagtailredirects- Admin interface for creating arbitrary redirects on your site.
wagtailforms- Models for creating forms on your pages and viewing submissions. See Form builder.
Third-Party Apps
taggit- Tagging framework for Django. This is used internally within Wagtail for image and document tagging and is available for your own models as well. See Tagging for a Wagtail model recipe or the Taggit Documentation.
modelcluster- Extension of Django ForeignKey relation functionality, which is used in Wagtail pages for on-the-fly related object creation. For more information, see Inline Panels and Model Clusters or the django-modelcluster github project page.
Settings Variables (settings.py)
Wagtail makes use of the following settings, in addition to Django’s core settings:
Site Name
WAGTAIL_SITE_NAME = 'Stark Industries Skunkworks'
This is the human-readable name of your Wagtail install which welcomes users upon login to the Wagtail admin.
Append Slash
# Don't add a trailing slash to Wagtail-served URLs
WAGTAIL_APPEND_SLASH = False
Similar to Django’s APPEND_SLASH, this setting controls how Wagtail will handle requests that don’t end in a trailing slash.
When WAGTAIL_APPEND_SLASH is True (default), requests to Wagtail pages which omit a trailing slash will be redirected by Django’s CommonMiddleware to a URL with a trailing slash.
When WAGTAIL_APPEND_SLASH is False, requests to Wagtail pages will be served both with and without trailing slashes. Page links generated by Wagtail, however, will not include trailing slashes.
Note
If you use the False setting, keep in mind that serving your pages both with and without slashes may affect search engines’ ability to index your site. See this Google Webmaster Blog post for more details.
Search
WAGTAILSEARCH_BACKENDS = {
    'default': {
        'BACKEND': 'wagtail.wagtailsearch.backends.elasticsearch2',
        'INDEX': 'myapp'
    }
}
Define a search backend. For a full explanation, see Backends.
WAGTAILSEARCH_RESULTS_TEMPLATE = 'myapp/search_results.html'
WAGTAILSEARCH_RESULTS_TEMPLATE_AJAX = 'myapp/includes/search_listing.html'
Override the templates used by the search front-end views.
WAGTAILSEARCH_HITS_MAX_AGE = 14
Set the number of days (default 7) that search query logs are kept for; these are used to identify popular search terms for promoted search results. Queries older than this will be removed by the search_garbage_collect command.
Embeds
Wagtail uses the oEmbed standard with a large but not comprehensive number of “providers” (Youtube, Vimeo, etc.). You can also use a different embed backend by providing an Embedly key or replacing the embed backend by writing your own embed finder function.
WAGTAILEMBEDS_EMBED_FINDER = 'myapp.embeds.my_embed_finder_function'
Use a custom embed finder function, which takes a URL and returns a dict with metadata and embeddable HTML. Refer to the wagtail.wagtailemebds.embeds module source for more information and examples.
# not a working key, get your own!
WAGTAILEMBEDS_EMBEDLY_KEY = '253e433d59dc4d2xa266e9e0de0cb830'
Providing an API key for the Embedly service will use that as a embed backend, with a more extensive list of providers, as well as analytics and other features. For more information, see Embedly.
To use Embedly, you must also install their Python module:
$ pip install embedly
Dashboard
New in version 1.10.
WAGTAILADMIN_RECENT_EDITS_LIMIT = 5
This setting lets you change the number of items shown at ‘Your most recent edits’ on the dashboard.
Images
WAGTAILIMAGES_IMAGE_MODEL = 'myapp.MyImage'
This setting lets you provide your own image model for use in Wagtail, which might extend the built-in AbstractImage class or replace it entirely.
Maximum Upload size for Images
WAGTAILIMAGES_MAX_UPLOAD_SIZE = 20 * 1024 * 1024 # i.e. 20MB
This setting lets you override the maximum upload size for images (in bytes). If omitted, Wagtail will fall back to using its 10MB default value.
Password Management
WAGTAIL_PASSWORD_MANAGEMENT_ENABLED = True
This specifies whether users are allowed to change their passwords (enabled by default).
WAGTAIL_PASSWORD_RESET_ENABLED = True
This specifies whether users are allowed to reset their passwords. Defaults to the same as WAGTAIL_PASSWORD_MANAGEMENT_ENABLED.
Email Notifications
WAGTAILADMIN_NOTIFICATION_FROM_EMAIL = 'wagtail@myhost.io'
Wagtail sends email notifications when content is submitted for moderation, and when the content is accepted or rejected. This setting lets you pick which email address these automatic notifications will come from. If omitted, Django will fall back to using the DEFAULT_FROM_EMAIL variable if set, and webmaster@localhost if not.
Email Notifications format
WAGTAILADMIN_NOTIFICATION_USE_HTML = True
Notification emails are sent in text/plain by default, change this to use HTML formatting.
Wagtail update notifications
WAGTAIL_ENABLE_UPDATE_CHECK = True
For admins only, Wagtail performs a check on the dashboard to see if newer releases are available. This also provides the Wagtail team with the hostname of your Wagtail site. If you’d rather not receive update notifications, or if you’d like your site to remain unknown, you can disable it with this setting.
Private pages / documents
PASSWORD_REQUIRED_TEMPLATE = 'myapp/password_required.html'
This is the path to the Django template which will be used to display the “password required” form when a user accesses a private page. For more details, see the Private pages documentation.
DOCUMENT_PASSWORD_REQUIRED_TEMPLATE = 'myapp/document_password_required.html'
New in version 1.11.
As above, but for password restrictions on documents. For more details, see the Private pages documentation.
Case-Insensitive Tags
TAGGIT_CASE_INSENSITIVE = True
Tags are case-sensitive by default (‘music’ and ‘Music’ are treated as distinct tags). In many cases the reverse behaviour is preferable.
Multi-word tags
New in version 1.10.
TAG_SPACES_ALLOWED = False
Tags can only consist of a single word, no spaces allowed. The default setting is True (spaces in tags are allowed).
Unicode Page Slugs
WAGTAIL_ALLOW_UNICODE_SLUGS = True
By default, page slugs can contain any alphanumeric characters, including non-Latin alphabets (except on Django 1.8, where only ASCII characters are supported). Set this to False to limit slugs to ASCII characters.
Auto update preview
New in version 1.10.
WAGTAIL_AUTO_UPDATE_PREVIEW = False
When enabled, data from an edited page is automatically sent to the server on each change, even without saving. That way, users don’t have to click on “Preview” to update the content of the preview page. However, the preview page tab is not refreshed automatically, users have to do it manually. This behaviour is disabled by default.
Custom User Edit Forms
See Custom user models.
WAGTAIL_USER_EDIT_FORM = 'users.forms.CustomUserEditForm'
Allows the default UserEditForm class to be overridden with a custom form when a custom user model is being used and extra fields are required in the user edit form.
WAGTAIL_USER_CREATION_FORM = 'users.forms.CustomUserCreationForm'
Allows the default UserCreationForm class to be overridden with a custom form when a custom user model is being used and extra fields are required in the user creation form.
WAGTAIL_USER_CUSTOM_FIELDS = ['country']
A list of the extra custom fields to be appended to the default list.
Usage for images, documents and snippets
WAGTAIL_USAGE_COUNT_ENABLED = True
When enabled Wagtail shows where a particular image, document or snippet is being used on your site (disabled by default). A link will appear on the edit page showing you which pages they have been used on.
Note
The usage count only applies to direct (database) references. Using documents, images and snippets within StreamFields or rich text fields will not be taken into account.
Date and DateTime inputs
WAGTAIL_DATE_FORMAT = '%d.%m.%Y.'
WAGTAIL_DATETIME_FORMAT = '%d.%m.%Y. %H:%M'
Specifies the date and datetime format to be used in input fields in the Wagtail admin. The format is specified in Python datetime module syntax, and must be one of the recognised formats listed in the DATE_INPUT_FORMATS or DATETIME_INPUT_FORMATS setting respectively (see DATE_INPUT_FORMATS).
Admin languages
New in version 1.10.
Users can choose between several languages for the admin interface in the account settings. The list of languages is by default all the available languages in Wagtail. To change it, set WAGTAILADMIN_PERMITTED_LANGUAGES:
WAGTAILADMIN_PERMITTED_LANGUAGES = [('en', 'English'),
                                    ('pt', 'Portuguese')]
Since the syntax is the same as Django LANGUAGES, you can do this so users can only choose between front office languages:
LANGUAGES = WAGTAILADMIN_PERMITTED_LANGUAGES = [('en', 'English'),
                                                ('pt', 'Portuguese')]
URL Patterns
from django.contrib import admin

from wagtail.wagtailcore import urls as wagtail_urls
from wagtail.wagtailadmin import urls as wagtailadmin_urls
from wagtail.wagtaildocs import urls as wagtaildocs_urls
from wagtail.wagtailsearch import urls as wagtailsearch_urls

urlpatterns = [
    url(r'^django-admin/', include(admin.site.urls)),

    url(r'^admin/', include(wagtailadmin_urls)),
    url(r'^search/', include(wagtailsearch_urls)),
    url(r'^documents/', include(wagtaildocs_urls)),

    # Optional URL for including your own vanilla Django urls/views
    url(r'', include('myapp.urls')),

    # For anything not caught by a more specific rule above, hand over to
    # Wagtail's serving mechanism
    url(r'', include(wagtail_urls)),
]
This block of code for your project’s urls.py does a few things:
- Load the vanilla Django admin interface to
/django-admin/ - Load the Wagtail admin and its various apps
- Dispatch any vanilla Django apps you’re using other than Wagtail which require their own URL configuration (this is optional, since Wagtail might be all you need)
- Lets Wagtail handle any further URL dispatching.
That’s not everything you might want to include in your project’s URL configuration, but it’s what’s necessary for Wagtail to flourish.
Ready to Use Example Configuration Files
These two files should reside in your project directory (myproject/myproject/).
settings.py
import os

PROJECT_DIR = os.path.dirname(os.path.dirname(os.path.abspath(__file__)))
BASE_DIR = os.path.dirname(PROJECT_DIR)

DEBUG = True

# Application definition

INSTALLED_APPS = [
    'myapp',

    'wagtail.wagtailforms',
    'wagtail.wagtailredirects',
    'wagtail.wagtailembeds',
    'wagtail.wagtailsites',
    'wagtail.wagtailusers',
    'wagtail.wagtailsnippets',
    'wagtail.wagtaildocs',
    'wagtail.wagtailimages',
    'wagtail.wagtailsearch',
    'wagtail.wagtailadmin',
    'wagtail.wagtailcore',

    'taggit',
    'modelcluster',

    'django.contrib.auth',
    'django.contrib.contenttypes',
    'django.contrib.sessions',
    'django.contrib.messages',
    'django.contrib.staticfiles',
]


MIDDLEWARE_CLASSES = [
    'django.contrib.sessions.middleware.SessionMiddleware',
    'django.middleware.common.CommonMiddleware',
    'django.middleware.csrf.CsrfViewMiddleware',
    'django.contrib.auth.middleware.AuthenticationMiddleware',
    'django.contrib.auth.middleware.SessionAuthenticationMiddleware',
    'django.contrib.messages.middleware.MessageMiddleware',
    'django.middleware.clickjacking.XFrameOptionsMiddleware',
    'django.middleware.security.SecurityMiddleware',

    'wagtail.wagtailcore.middleware.SiteMiddleware',
    'wagtail.wagtailredirects.middleware.RedirectMiddleware',
]

ROOT_URLCONF = 'myproject.urls'

TEMPLATES = [
    {
        'BACKEND': 'django.template.backends.django.DjangoTemplates',
        'DIRS': [
            os.path.join(PROJECT_DIR, 'templates'),
        ],
        'APP_DIRS': True,
        'OPTIONS': {
            'context_processors': [
                'django.template.context_processors.debug',
                'django.template.context_processors.request',
                'django.contrib.auth.context_processors.auth',
                'django.contrib.messages.context_processors.messages',
            ],
        },
    },
]

WSGI_APPLICATION = 'wagtaildemo.wsgi.application'

# Database

DATABASES = {
    'default': {
        'ENGINE': 'django.db.backends.postgresql_psycopg2',
        'NAME': 'myprojectdb',
        'USER': 'postgres',
        'PASSWORD': '',
        'HOST': '',  # Set to empty string for localhost.
        'PORT': '',  # Set to empty string for default.
        'CONN_MAX_AGE': 600,  # number of seconds database connections should persist for
    }
}

# Internationalization

LANGUAGE_CODE = 'en-us'
TIME_ZONE = 'UTC'
USE_I18N = True
USE_L10N = True
USE_TZ = True


# Static files (CSS, JavaScript, Images)

STATICFILES_FINDERS = [
    'django.contrib.staticfiles.finders.FileSystemFinder',
    'django.contrib.staticfiles.finders.AppDirectoriesFinder',
]

STATICFILES_DIRS = [
    os.path.join(PROJECT_DIR, 'static'),
]

STATIC_ROOT = os.path.join(BASE_DIR, 'static')
STATIC_URL = '/static/'

MEDIA_ROOT = os.path.join(BASE_DIR, 'media')
MEDIA_URL = '/media/'


ADMINS = [
    # ('Your Name', 'your_email@example.com'),
]
MANAGERS = ADMINS

# Default to dummy email backend. Configure dev/production/local backend
# as per https://docs.djangoproject.com/en/dev/topics/email/#email-backends
EMAIL_BACKEND = 'django.core.mail.backends.dummy.EmailBackend'

# Hosts/domain names that are valid for this site; required if DEBUG is False
ALLOWED_HOSTS = []

# Make this unique, and don't share it with anybody.
SECRET_KEY = 'change-me'

EMAIL_SUBJECT_PREFIX = '[Wagtail] '

INTERNAL_IPS = ('127.0.0.1', '10.0.2.2')

# A sample logging configuration. The only tangible logging
# performed by this configuration is to send an email to
# the site admins on every HTTP 500 error when DEBUG=False.
# See http://docs.djangoproject.com/en/dev/topics/logging for
# more details on how to customize your logging configuration.
LOGGING = {
    'version': 1,
    'disable_existing_loggers': False,
    'filters': {
        'require_debug_false': {
            '()': 'django.utils.log.RequireDebugFalse'
        }
    },
    'handlers': {
        'mail_admins': {
            'level': 'ERROR',
            'filters': ['require_debug_false'],
            'class': 'django.utils.log.AdminEmailHandler'
        }
    },
    'loggers': {
        'django.request': {
            'handlers': ['mail_admins'],
            'level': 'ERROR',
            'propagate': True,
        },
    }
}


# WAGTAIL SETTINGS

# This is the human-readable name of your Wagtail install
# which welcomes users upon login to the Wagtail admin.
WAGTAIL_SITE_NAME = 'My Project'

# Override the search results template for wagtailsearch
# WAGTAILSEARCH_RESULTS_TEMPLATE = 'myapp/search_results.html'
# WAGTAILSEARCH_RESULTS_TEMPLATE_AJAX = 'myapp/includes/search_listing.html'

# Replace the search backend
#WAGTAILSEARCH_BACKENDS = {
#  'default': {
#    'BACKEND': 'wagtail.wagtailsearch.backends.elasticsearch2',
#    'INDEX': 'myapp'
#  }
#}

# Wagtail email notifications from address
# WAGTAILADMIN_NOTIFICATION_FROM_EMAIL = 'wagtail@myhost.io'

# Wagtail email notification format
# WAGTAILADMIN_NOTIFICATION_USE_HTML = True

# If you want to use Embedly for embeds, supply a key
# (this key doesn't work, get your own!)
# WAGTAILEMBEDS_EMBEDLY_KEY = '253e433d59dc4d2xa266e9e0de0cb830'

# Reverse the default case-sensitive handling of tags
TAGGIT_CASE_INSENSITIVE = True
urls.py
from django.conf.urls import include, url
from django.conf.urls.static import static
from django.views.generic.base import RedirectView
from django.contrib import admin
from django.conf import settings
import os.path

from wagtail.wagtailcore import urls as wagtail_urls
from wagtail.wagtailadmin import urls as wagtailadmin_urls
from wagtail.wagtaildocs import urls as wagtaildocs_urls
from wagtail.wagtailsearch import urls as wagtailsearch_urls


urlpatterns = [
    url(r'^django-admin/', include(admin.site.urls)),

    url(r'^admin/', include(wagtailadmin_urls)),
    url(r'^search/', include(wagtailsearch_urls)),
    url(r'^documents/', include(wagtaildocs_urls)),

    # For anything not caught by a more specific rule above, hand over to
    # Wagtail's serving mechanism
    url(r'', include(wagtail_urls)),
]


if settings.DEBUG:
    from django.contrib.staticfiles.urls import staticfiles_urlpatterns

    urlpatterns += staticfiles_urlpatterns() # tell gunicorn where static files are in dev mode
    urlpatterns += static(settings.MEDIA_URL + 'images/', document_root=os.path.join(settings.MEDIA_ROOT, 'images'))
    urlpatterns += [
        url(r'^favicon\.ico$', RedirectView.as_view(url=settings.STATIC_URL + 'myapp/images/favicon.ico'))
    ]
Deploying Wagtail
On your server
Wagtail is straightforward to deploy on modern Linux-based distributions, but see the section on performance for the non-Python services we recommend.
Our current preferences are for Nginx, Gunicorn and supervisor on Debian, but Wagtail should run with any of the combinations detailed in Django’s deployment documentation.
On Openshift
OpenShift is Red Hat’s Platform-as-a-Service (PaaS) that allows developers to quickly develop, host, and scale applications in a cloud environment. With their Python, PostgreSQL and Elasticsearch cartridges there’s all you need to host a Wagtail site. To get quickly up and running you may use the wagtail-openshift-quickstart.
On other PAASs and IAASs
We know of Wagtail sites running on Heroku, Digital Ocean and elsewhere. If you have successfully installed Wagtail on your platform or infrastructure, please contribute your notes to this documentation!
Performance
Wagtail is designed for speed, both in the editor interface and on the front-end, but if you want even better performance or you need to handle very high volumes of traffic, here are some tips on eking out the most from your installation.
Editor interface
We have tried to minimise external dependencies for a working installation of Wagtail, in order to make it as simple as possible to get going. However, a number of default settings can be configured for better performance:
Cache
We recommend Redis as a fast, persistent cache. Install Redis through your package manager (on Debian or Ubuntu: sudo apt-get install redis-server), add django-redis to your requirements.txt, and enable it as a cache backend:
CACHES = {
    'default': {
        'BACKEND': 'django_redis.cache.RedisCache',
        'LOCATION': '127.0.0.1:6379',
        'OPTIONS': {
            'CLIENT_CLASS': 'django_redis.client.DefaultClient',
        }
    }
}
Search
Wagtail has strong support for Elasticsearch - both in the editor interface and for users of your site - but can fall back to a database search if Elasticsearch isn’t present. Elasticsearch is faster and more powerful than the Django ORM for text search, so we recommend installing it or using a hosted service like Searchly.
For details on configuring Wagtail for Elasticsearch, see Elasticsearch Backend.
Database
Wagtail is tested on SQLite, and should work on other Django-supported database backends, but we recommend PostgreSQL for production use.
Templates
The overhead from reading and compiling templates can add up. In some cases a significant performance improvement can be gained by using Django’s cached template loader:
TEMPLATES = [{
    'BACKEND': 'django.template.backends.django.DjangoTemplates',
    'DIRS': [os.path.join(BASE_DIR, 'templates')],
    'OPTIONS': {
        'loaders': [
            ('django.template.loaders.cached.Loader', [
                'django.template.loaders.filesystem.Loader',
                'django.template.loaders.app_directories.Loader',
            ]),
        ],
    },
}]
There is a caveat associated with this loader though. Changes to a template file will not be picked up once it is cached. This means that this loader should not be enabled during development.
Public users
Caching proxy
To support high volumes of traffic with excellent response times, we recommend a caching proxy. Both Varnish and Squid have been tested in production. Hosted proxies like Cloudflare should also work well.
Wagtail supports automatic cache invalidation for Varnish/Squid. See Frontend cache invalidator for more information.
Internationalisation
This document describes the internationalisation features of Wagtail and how to create multi-lingual sites.
Wagtail uses Django’s Internationalisation framework so most of the steps are the same as other Django projects.
Contents
Wagtail admin translations
The Wagtail admin backend has been translated into many different languages. You can find a list of currently available translations on Wagtail’s Transifex page. (Note: if you’re using an old version of Wagtail, this page may not accurately reflect what languages you have available).
If your language isn’t listed on that page, you can easily contribute new languages or correct mistakes. Sign up and submit changes to Transifex. Translation updates are typically merged into an official release within one month of being submitted.
Change Wagtail admin language on a per user basis
New in version 1.10.
Logged-in users can set their preferred language from /admin/account/. By default, Wagtail provides a list of languages that have a >= 90% translation coverage. It is possible to override this list via the WAGTAILADMIN_PERMITTED_LANGUAGES setting.
In case there is zero or one language permitted, the form will be hidden.
If there is no language selected by the user, the LANGUAGE_CODE wil be used.
Changing the primary language of your Wagtail installation
The default language of Wagtail is en-us (American English). You can change this by tweaking a couple of Django settings:
- Make sure USE_I18N is set to
True- Set LANGUAGE_CODE to your websites’ primary language
If there is a translation available for your language, the Wagtail admin backend should now be in the language you’ve chosen.
Creating sites with multiple languages
You can create sites with multiple language support by leveraging Django’s translation features.
This section of the documentation will show you how to use Django’s translation features with Wagtail and also describe a couple of methods for storing/retrieving translated content using Wagtail pages.
Enabling multiple language support
Firstly, make sure the USE_I18N Django setting is set to True.
To enable multi-language support, add django.middleware.locale.LocaleMiddleware to your MIDDLEWARE_CLASSES:
MIDDLEWARE_CLASSES = (
    ...

    'django.middleware.locale.LocaleMiddleware',
)
This middleware class looks at the user’s browser language and sets the language of the site accordingly.
Serving different languages from different URLs
Just enabling the multi-language support in Django sometimes may not be enough. By default, Django will serve different languages of the same page with the same URL. This has a couple of drawbacks:
- Users cannot change language without changing their browser settings
- It may not work well with various caching setups (as content varies based on browser settings)
Django’s i18n_patterns feature, when enabled, prefixes the URLs with the language code (eg /en/about-us). Users are forwarded to their preferred version, based on browser language, when they first visit the site.
This feature is enabled through the project’s root URL configuration. Just put the views you would like to have this enabled for in an i18n_patterns list and append that to the other URL patterns:
# mysite/urls.py

from django.conf.urls import include, url
from django.conf.urls.i18n import i18n_patterns
from django.conf import settings
from django.contrib import admin

from wagtail.wagtailadmin import urls as wagtailadmin_urls
from wagtail.wagtaildocs import urls as wagtaildocs_urls
from wagtail.wagtailcore import urls as wagtail_urls


urlpatterns = [
    url(r'^django-admin/', include(admin.site.urls)),

    url(r'^admin/', include(wagtailadmin_urls)),
    url(r'^documents/', include(wagtaildocs_urls)),
]


urlpatterns += i18n_patterns(
    # These URLs will have /<language_code>/ appended to the beginning

    url(r'^search/$', 'search.views.search', name='search'),

    url(r'', include(wagtail_urls)),
)
You can implement switching between languages by changing the part at the beginning of the URL. As each language has its own URL, it also works well with just about any caching setup.
Translating templates
Static text in templates needs to be marked up in a way that allows Django’s makemessages command to find and export the strings for translators and also allow them to switch to translated versions on the when the template is being served.
As Wagtail uses Django’s templates, inserting this markup and the workflow for exporting and translating the strings is the same as any other Django project.
See: https://docs.djangoproject.com/en/1.8/topics/i18n/translation/#internationalization-in-template-code
Translating content
The most common approach for translating content in Wagtail is to duplicate each translatable text field, providing a separate field for each language.
This section will describe how to implement this method manually but there is a third party module you can use, wagtail modeltranslation, which may be quicker if it meets your needs.
Duplicating the fields in your model
For each field you would like to be translatable, duplicate it for every language you support and suffix it with the language code:
class BlogPage(Page):

    title_fr = models.CharField(max_length=255)

    body_en = StreamField(...)
    body_fr = StreamField(...)

    # Language-independent fields don't need to be duplicated
    thumbnail_image = models.ForeignKey('wagtailimages.image', ...)
Note
We only define the French version of the title field as Wagtail already provides the English version for us.
Organising the fields in the admin interface
You can either put all the fields with their translations next to each other on the “content” tab or put the translations for other languages on different tabs.
See Customising the tabbed interface for information on how to add more tabs to the admin interface.
Accessing the fields from the template
In order for the translations to be shown on the site frontend, the correct field needs to be used in the template based on what language the client has selected.
Having to add language checks every time you display a field in a template, could make your templates very messy. Here’s a little trick that will allow you to implement this while keeping your templates and model code clean.
You can use a snippet like the following to add accessor fields on to your page model. These accessor fields will point at the field that contains the language the user has selected.
Copy this into your project and make sure it’s imported in any models.py files that contain a Page with translated fields. It will require some modification to support different languages.
from django.utils import translation

class TranslatedField(object):
    def __init__(self, en_field, fr_field):
        self.en_field = en_field
        self.fr_field = fr_field

    def __get__(self, instance, owner):
        if translation.get_language() == 'fr':
            return getattr(instance, self.fr_field)
        else:
            return getattr(instance, self.en_field)
Then, for each translated field, create an instance of TranslatedField with a nice name (as this is the name your templates will reference).
For example, here’s how we would apply this to the above BlogPage model:
class BlogPage(Page):
    ...

    translated_title = TranslatedField(
        'title',
        'title_fr',
    )
    body = TranslatedField(
        'body_en',
        'body_fr',
    )
Finally, in the template, reference the accessors instead of the underlying database fields:
{{ page.translated_title }}

{{ page.body }}
Other approaches
This tutorial will show you a method of creating multilingual sites in Wagtail by duplicating the page tree.
For example:
/
    en/
        about/
        contact/
    fr/
        about/
        contact/
The root page (/) should detect the browsers language and forward them to the correct language homepage (/en/, /fr/). This page should sit at the site root (where the homepage would normally be).
We must set Django’s LANGUAGES setting so we don’t redirect non English/French users to pages that don’t exist.
# settings.py
LANGUAGES = (
    ('en', _("English")),
    ('fr', _("French")),
)

# models.py
from django.utils import translation
from django.http import HttpResponseRedirect

from wagtail.wagtailcore.models import Page


class LanguageRedirectionPage(Page):

    def serve(self, request):
        # This will only return a language that is in the LANGUAGES Django setting
        language = translation.get_language_from_request(request)

        return HttpResponseRedirect(self.url + language + '/')
It may be useful to link different versions of the same page together to allow the user to easily switch between languages. But we don’t want to increase the burden on the editor too much so ideally, editors should only need to link one of the pages to the other versions and the links between the other versions should be created implicitly.
As this behaviour needs to be added to all page types that would be translated, its best to put this behaviour in a mixin.
Here’s an example of how this could be implemented (with English as the main language and French/Spanish as alternative languages):
from wagtail.wagtailcore.models import Page
from wagtail.wagtailadmin.edit_handlers import MultiFieldPanel, PageChooserPanel


class TranslatablePageMixin(models.Model):
    # One link for each alternative language
    # These should only be used on the main language page (english)
    french_link = models.ForeignKey(Page, null=True, on_delete=models.SET_NULL, blank=True, related_name='+')
    spanish_link = models.ForeignKey(Page, null=True, on_delete=models.SET_NULL, blank=True, related_name='+')

    panels = [
        PageChooserPanel('french_link'),
        PageChooserPanel('spanish_link'),
    ]

    def get_language(self):
        """
        This returns the language code for this page.
        """
        # Look through ancestors of this page for its language homepage
        # The language homepage is located at depth 3
        language_homepage = self.get_ancestors(inclusive=True).get(depth=3)

        # The slug of language homepages should always be set to the language code
        return language_homepage.slug


    # Method to find the main language version of this page
    # This works by reversing the above links

    def english_page(self):
        """
        This finds the english version of this page
        """
        language = self.get_language()

        if language == 'en':
            return self
        elif language == 'fr':
            return type(self).objects.filter(french_link=self).first().specific
        elif language == 'es':
            return type(self).objects.filter(spanish_link=self).first().specific


    # We need a method to find a version of this page for each alternative language.
    # These all work the same way. They firstly find the main version of the page
    # (english), then from there they can just follow the link to the correct page.

    def french_page(self):
        """
        This finds the french version of this page
        """
        english_page = self.english_page()

        if english_page and english_page.french_link:
            return english_page.french_link.specific

    def spanish_page(self):
        """
        This finds the spanish version of this page
        """
        english_page = self.english_page()

        if english_page and english_page.spanish_link:
            return english_page.spanish_link.specific

    class Meta:
        abstract = True


class AboutPage(Page, TranslatablePageMixin):
    ...
    content_panels = [
        ...
        MultiFieldPanel(TranslatablePageMixin.panels, 'Language links')
    ]


class ContactPage(Page, TranslatablePageMixin):
    ...
    content_panels = [
        ...
        MultiFieldPanel(TranslatablePageMixin.panels, 'Language links')
    ]
You can make use of these methods in your template by doing:
{% if page.english_page and page.get_language != 'en' %}
    <a href="{{ page.english_page.url }}">{% trans "View in English" %}</a>
{% endif %}

{% if page.french_page and page.get_language != 'fr' %}
    <a href="{{ page.french_page.url }}">{% trans "View in French" %}</a>
{% endif %}

{% if page.spanish_page and page.get_language != 'es' %}
    <a href="{{ page.spanish_page.url }}">{% trans "View in Spanish" %}</a>
{% endif %}
Private pages
Users with publish permission on a page can set it to be private by clicking the ‘Privacy’ control in the top right corner of the page explorer or editing interface. This sets a restriction on who is allowed to view the page and its sub-pages. Several different kinds of restriction are available:
- Accessible to logged-in users: The user must log in to view the page. All user accounts are granted access, regardless of permission level.
- Accessible with the following password: The user must enter the given password to view the page. This is appropriate for situations where you want to share a page with a trusted group of people, but giving them individual user accounts would be overkill. The same password is shared between all users, and this works independently of any user accounts that exist on the site.
- Accessible to users in specific groups: The user must be logged in, and a member of one or more of the specified groups, in order to view the page.
Similarly, documents can be made private by placing them in a collection with appropriate privacy settings (see Image / document permissions).
Private pages and documents work on Wagtail out of the box - the site implementer does not need to do anything to set them up. However, the default “log in” and “password required” forms are only bare-bones HTML pages, and site implementers may wish to replace them with a page customised to their site design.
Setting up a login page
The basic login page can be customised by setting WAGTAIL_FRONTEND_LOGIN_TEMPLATE to the path of a template you wish to use:
WAGTAIL_FRONTEND_LOGIN_TEMPLATE = 'myapp/login.html'
Wagtail uses Django’s standard django.contrib.auth.views.login view here, and so the context variables available on the template are as detailed in Django’s login view documentation.
If the stock Django login view is not suitable - for example, you wish to use an external authentication system, or you are integrating Wagtail into an existing Django site that already has a working login view - you can specify the URL of the login view via the WAGTAIL_FRONTEND_LOGIN_URL setting:
WAGTAIL_FRONTEND_LOGIN_URL = '/accounts/login/'
To integrate Wagtail into a Django site with an existing login mechanism, setting WAGTAIL_FRONTEND_LOGIN_URL = LOGIN_URL will usually be sufficient.
Setting up a global “password required” page
By setting PASSWORD_REQUIRED_TEMPLATE in your Django settings file, you can specify the path of a template which will be used for all “password required” forms on the site (except for page types that specifically override it - see below):
PASSWORD_REQUIRED_TEMPLATE = 'myapp/password_required.html'
This template will receive the same set of context variables that the blocked page would pass to its own template via get_context() - including page to refer to the page object itself - plus the following additional variables (which override any of the page’s own context variables of the same name):
- form - A Django form object for the password prompt; this will contain a field named
passwordas its only visible field. A number of hidden fields may also be present, so the page must loop overform.hidden_fieldsif not using one of Django’s rendering helpers such asform.as_p.- action_url - The URL that the password form should be submitted to, as a POST request.
A basic template suitable for use as PASSWORD_REQUIRED_TEMPLATE might look like this:
<!DOCTYPE HTML>
<html>
    <head>
        <title>Password required</title>
    </head>
    <body>
        <h1>Password required</h1>
        <p>You need a password to access this page.</p>
        <form action="{{ action_url }}" method="POST">
            {% csrf_token %}

            {{ form.non_field_errors }}

            <div>
                {{ form.password.errors }}
                {{ form.password.label_tag }}
                {{ form.password }}
            </div>

            {% for field in form.hidden_fields %}
                {{ field }}
            {% endfor %}
            <input type="submit" value="Continue" />
        </form>
    </body>
</html>
Password restrictions on documents use a separate template, specified through the setting DOCUMENT_PASSWORD_REQUIRED_TEMPLATE; this template also receives the context variables form and action_url as described above.
Setting a “password required” page for a specific page type
The attribute password_required_template can be defined on a page model to use a custom template for the “password required” view, for that page type only. For example, if a site had a page type for displaying embedded videos along with a description, it might choose to use a custom “password required” template that displays the video description as usual, but shows the password form in place of the video embed.
class VideoPage(Page):
    ...

    password_required_template = 'video/password_required.html'
Customising Wagtail
Customising the editing interface
Customising the tabbed interface
As standard, Wagtail organises panels for pages into three tabs: ‘Content’, ‘Promote’ and ‘Settings’. For snippets Wagtail puts all panels into one page. Depending on the requirements of your site, you may wish to customise this for specific page types or snippets - for example, adding an additional tab for sidebar content. This can be done by specifying an edit_handler attribute on the page or snippet model. For example:
from wagtail.wagtailadmin.edit_handlers import TabbedInterface, ObjectList

class BlogPage(Page):
    # field definitions omitted

    content_panels = [
        FieldPanel('title', classname="full title"),
        FieldPanel('date'),
        FieldPanel('body', classname="full"),
    ]
    sidebar_content_panels = [
        SnippetChooserPanel('advert'),
        InlinePanel('related_links', label="Related links"),
    ]

    edit_handler = TabbedInterface([
        ObjectList(content_panels, heading='Content'),
        ObjectList(sidebar_content_panels, heading='Sidebar content'),
        ObjectList(Page.promote_panels, heading='Promote'),
        ObjectList(Page.settings_panels, heading='Settings', classname="settings"),
    ])
Rich Text (HTML)
Wagtail provides a general-purpose WYSIWYG editor for creating rich text content (HTML) and embedding media such as images, video, and documents. To include this in your models, use the RichTextField function when defining a model field:
from wagtail.wagtailcore.fields import RichTextField
from wagtail.wagtailadmin.edit_handlers import FieldPanel


class BookPage(Page):
    book_text = RichTextField()

    content_panels = Page.content_panels + [
        FieldPanel('body', classname="full"),
    ]
RichTextField inherits from Django’s basic TextField field, so you can pass any field parameters into RichTextField as if using a normal Django field. This field does not need a special panel and can be defined with FieldPanel.
However, template output from RichTextField is special and need to be filtered to preserve embedded content. See Rich text (filter).
If you’re interested in extending the capabilities of the Wagtail WYSIWYG editor (hallo.js), See Extending the WYSIWYG Editor (hallo.js).
hallo.js)¶To inject JavaScript into the Wagtail page editor, see the insert_editor_js hook. Once you have the hook in place and your hallo.js plugin loads into the Wagtail page editor, use the following JavaScript to register the plugin with hallo.js.
registerHalloPlugin(name, opts);
hallo.js plugin names are prefixed with the "IKS." namespace, but the name you pass into registerHalloPlugin() should be without the prefix. opts is an object passed into the plugin.
For information on developing custom hallo.js plugins, see the project’s page: https://github.com/bergie/hallo
On loading, Wagtail will search for any app with the file image_formats.py and execute the contents. This provides a way to customise the formatting options shown to the editor when inserting images in the RichTextField editor.
As an example, add a “thumbnail” format:
# image_formats.py
from wagtail.wagtailimages.formats import Format, register_image_format

register_image_format(Format('thumbnail', 'Thumbnail', 'richtext-image thumbnail', 'max-120x120'))
To begin, import the Format class, register_image_format function, and optionally unregister_image_format function. To register a new Format, call the register_image_format with the Format object as the argument. The Format class takes the following constructor arguments:
name- The unique key used to identify the format. To unregister this format, call
unregister_image_formatwith this string as the only argument. label- The label used in the chooser form when inserting the image into the
RichTextField. classnamesThe string to assign to the
classattribute of the generated<img>tag.Note
Any class names you provide must have CSS rules matching them written separately, as part of the front end CSS code. Specifying a
classnamesvalue ofleftwill only ensure that class is output in the generated markup, it won’t cause the image to align itself left.filter_spec- The string specification to create the image rendition. For more, see the Using images in templates.
To unregister, call unregister_image_format with the string of the name of the Format as the only argument.
Customising generated forms
- class
wagtail.wagtailadmin.forms.WagtailAdminModelForm
- class
wagtail.wagtailadmin.forms.WagtailAdminPageForm
Wagtail automatically generates forms using the panels configured on the model. By default, this form subclasses WagtailAdminModelForm, or WagtailAdminPageForm for pages. A custom base form class can be configured by setting the base_form_class attribute on any model. Custom forms for snippets must subclass WagtailAdminModelForm, and custom forms for pages must subclass WagtailAdminPageForm.
This can be used to add non-model fields to the form, to automatically generate field content, or to add custom validation logic for your models:
from django import forms
from wagtail.wagtailadmin.edit_handlers import FieldPanel
from wagtail.wagtailadmin.forms import WagtailAdminPageForm
from wagtail.wagtailcore.models import Page


class EventPageForm(WagtailAdminPageForm):
    address = forms.CharField()

    def clean(self):
        cleaned_data = super(EventPageForm, self).clean()

        # Make sure that the event starts before it ends
        start_date = cleaned_data['start_date']
        end_date = cleaned_data['end_date']
        if start_date and end_date and start_date > end_date:
            self.add_error('end_date', 'The end date must be after the start date')

        return cleaned_data

    def save(self, commit=True):
        page = super(EventPageForm, self).save(commit=False)

        # Update the duration field from the submitted dates
        page.duration = (page.end_date - page.start_date).days

        # Fetch the location by geocoding the address
        page.location = geocoder.get_coordinates(self.cleaned_data['address'])

        if commit:
            page.save()
        return page


class EventPage(Page):
    start_date = models.DateField()
    end_date = models.DateField()
    duration = models.IntegerField()
    location = models.CharField()

    content_panels = [
        FieldPanel('start_date'),
        FieldPanel('end_date'),
        FieldPanel('address'),
    ]
    base_form_class = EventPageForm
Wagtail will generate a new subclass of this form for the model, adding any fields defined in panels or content_panels. Any fields already defined on the model will not be overridden by these automatically added fields, so the form field for a model field can be overridden by adding it to the custom form.
Customising admin templates
In your projects with Wagtail, you may wish to replace elements such as the Wagtail logo within the admin interface with your own branding. This can be done through Django’s template inheritance mechanism.
Note
Using {% extends %} in this way on a template you’re currently overriding is only supported in Django 1.9 and above. On Django 1.8, you will need to use django-overextends instead.
You need to create a templates/wagtailadmin/ folder within one of your apps - this may be an existing one, or a new one created for this purpose, for example, dashboard. This app must be registered in INSTALLED_APPS before wagtail.wagtailadmin:
INSTALLED_APPS = (
    # ...

    'dashboard',

    'wagtail.wagtailcore',
    'wagtail.wagtailadmin',

    # ...
)
Custom branding
The template blocks that are available to customise the branding in the admin interface are as follows:
branding_logo¶To replace the default logo, create a template file dashboard/templates/wagtailadmin/base.html that overrides the block branding_logo:
{% extends "wagtailadmin/base.html" %}
{% load staticfiles %}

{% block branding_logo %}
    <img src="{% static 'images/custom-logo.svg' %}" alt="Custom Project" width="80" />
{% endblock %}
branding_favicon¶To replace the favicon displayed when viewing admin pages, create a template file dashboard/templates/wagtailadmin/admin_base.html that overrides the block branding_favicon:
{% extends "wagtailadmin/admin_base.html" %}
{% load staticfiles %}

{% block branding_favicon %}
    <link rel="shortcut icon" href="{% static 'images/favicon.ico' %}" />
{% endblock %}
branding_login¶To replace the login message, create a template file dashboard/templates/wagtailadmin/login.html that overrides the block branding_login:
{% extends "wagtailadmin/login.html" %}

{% block branding_login %}Sign in to Frank's Site{% endblock %}
branding_welcome¶To replace the welcome message on the dashboard, create a template file dashboard/templates/wagtailadmin/home.html that overrides the block branding_welcome:
{% extends "wagtailadmin/home.html" %}

{% block branding_welcome %}Welcome to Frank's Site{% endblock %}
Specifying a site or page in the branding
The admin interface has a number of variables available to the renderer context that can be used to customize the branding in the admin page. These can be useful for customizing the dashboard on a multitenanted Wagtail installation:
root_page¶Returns the highest explorable page object for the currently logged in user. If the user has no explore rights, this will default to None.
root_site¶Returns the name on the site record for the above root page.
site_name¶Returns the value of root_site, unless it evaluates to None. In that case, it will return the value of settings.WAGTAIL_SITE_NAME.
To use these variables, create a template file dashboard/templates/wagtailadmin/home.html, just as if you were overriding one of the template blocks in the dashboard, and use them as you would any other Django template variable:
{% extends "wagtailadmin/home.html" %}

{% block branding_welcome %}Welcome to the Admin Homepage for {{ root_site }}{% endblock %}
Extending the login form
To add extra controls to the login form, create a template file dashboard/templates/wagtailadmin/login.html.
above_login and below_login¶To add content above or below the login form, override these blocks:
{% extends "wagtailadmin/login.html" %}

{% block above_login %} If you are not Frank you should not be here! {% endblock %}
fields¶To add extra fields to the login form, override the fields block. You will need to add {{ block.super }} somewhere in your block to include the username and password fields:
{% extends "wagtailadmin/login.html" %}

{% block fields %}
    {{ block.super }}
    <li class="full">
        <div class="field iconfield">
            Two factor auth token
            <div class="input icon-key">
                <input type="text" name="two-factor-auth">
            </div>
        </div>
    </li>
{% endblock %}
submit_buttons¶To add extra buttons to the login form, override the submit_buttons block. You will need to add {{ block.super }} somewhere in your block to include the sign in button:
{% extends "wagtailadmin/login.html" %}

{% block submit_buttons %}
    {{ block.super }}
    <a href="{% url 'signup' %}"><button type="button" class="button" tabindex="4">{% trans 'Sign up' %}</button></a>
{% endblock %}
login_form¶To completely customise the login form, override the login_form block. This block wraps the whole contents of the <form> element:
{% extends "wagtailadmin/login.html" %}

{% block login_form %}
    <p>Some extra form content</p>
    {{ block.super }}
{% endblock %}
Custom user models
Custom user forms example
This example shows how to add a text field and foreign key field to a custom user model and configure Wagtail user forms to allow the fields values to be updated.
Create a custom user model. In this case we extend the AbstractUser class and add two fields. The foreign key references another model (not shown).
class User(AbstractUser):
    country = models.CharField(verbose_name='country', max_length=255)
    status = models.ForeignKey(MembershipStatus, on_delete=models.SET_NULL, null=True, default=1)
Add the app containing your user model to INSTALLED_APPS and set AUTH_USER_MODEL to reference your model. In this example the app is called users and the model is User
AUTH_USER_MODEL = 'users.User'
Create your custom user create and edit forms in your app:
from django import forms
from django.utils.translation import ugettext_lazy as _

from wagtail.wagtailusers.forms import UserEditForm, UserCreationForm

from users.models import MembershipStatus


class CustomUserEditForm(UserEditForm):
    country = forms.CharField(required=True, label=_("Country"))
    status = forms.ModelChoiceField(queryset=MembershipStatus.objects, required=True, label=_("Status"))


class CustomUserCreationForm(UserCreationForm):
    country = forms.CharField(required=True, label=_("Country"))
    status = forms.ModelChoiceField(queryset=MembershipStatus.objects, required=True, label=_("Status"))
Extend the Wagtail user create and edit templates. These extended template should be placed in a template directory wagtailusers/users.
Template create.html:
{% extends "wagtailusers/users/create.html" %}

{% block extra_fields %}
    {% include "wagtailadmin/shared/field_as_li.html" with field=form.country %}
    {% include "wagtailadmin/shared/field_as_li.html" with field=form.status %}
{% endblock extra_fields %}
Note
Using {% extends %} in this way on a template you’re currently overriding is only supported in Django 1.9 and above. On Django 1.8, you will need to use django-overextends instead.
Template edit.html:
{% extends "wagtailusers/users/edit.html" %}

{% block extra_fields %}
    {% include "wagtailadmin/shared/field_as_li.html" with field=form.country %}
    {% include "wagtailadmin/shared/field_as_li.html" with field=form.status %}
{% endblock extra_fields %}
The extra_fields block allows fields to be inserted below the last name field in the default templates. Other block overriding options exist to allow appending fields to the end or beginning of the existing fields, or to allow all the fields to be redefined.
Add the wagtail settings to your project to reference the user form additions:
WAGTAIL_USER_EDIT_FORM = 'users.forms.CustomUserEditForm'
WAGTAIL_USER_CREATION_FORM = 'users.forms.CustomUserCreationForm'
WAGTAIL_USER_CUSTOM_FIELDS = ['country', 'status']
Third-party tutorials
Warning
The following list is a collection of tutorials and development notes from third-party developers. Some of the older links may not apply to the latest Wagtail versions.
- Wagtail-Multilingual: a simple project to demonstrate how multilingual is implemented (31 January 2017)
- Wagtail: 2 Steps for Adding Pages Outside of the CMS (15 February 2016)
- Adding a Twitter Widget for Wagtail’s new StreamField (2 April 2015)
- Working With Wagtail: Menus (22 January 2015)
- Upgrading Wagtail to use Django 1.7 locally using vagrant (10 December 2014)
- Wagtail redirect page. Can link to page, URL and document (24 September 2014)
- Outputing JSON for a model with properties and db fields in Wagtail/Django (24 September 2014)
- Bi-lingual website using Wagtail CMS (17 September 2014)
- Wagtail CMS – Lesser known features (12 September 2014)
- Wagtail notes: stateful on/off hallo.js plugins (9 August 2014)
- Add some blockquote buttons to Wagtail CMS’ WYSIWYG Editor (24 July 2014)
- Adding Bread Crumbs to the front end in Wagtail CMS (1 July 2014)
- Extending hallo.js using Wagtail hooks (9 July 2014)
- Wagtail notes: custom tabs per page type (10 May 2014)
- Wagtail notes: managing redirects as pages (10 May 2014)
- Wagtail notes: dynamic templates per page (10 May 2014)
- Wagtail notes: type-constrained PageChooserPanel (9 May 2014)
You can also find more resources from the community on Awesome Wagtail.
Tip
We are working on a collection of Wagtail tutorials and best practices. Please tweet @WagtailCMS or contact us directly to share your Wagtail HOWTOs, development notes or site launches.
Jinja2 template support
Wagtail supports Jinja2 templating for all front end features. More information on each of the template tags below can be found in the Writing templates documentation.
Configuring Django
Changed in version 1.3: Jinja2 tags were moved from “templatetags” into “jinja2tags” to separate them from Django template tags.
Django needs to be configured to support Jinja2 templates. As the Wagtail admin is written using regular Django templates, Django has to be configured to use both templating engines. Wagtail supports the Jinja2 backend that ships with Django 1.8 and above. Add the following configuration to the TEMPLATES setting for your app:
TEMPLATES = [
    # ...
    {
        'BACKEND': 'django.template.backends.jinja2.Jinja2',
        'APP_DIRS': True,
        'OPTIONS': {
            'extensions': [
                'wagtail.wagtailcore.jinja2tags.core',
                'wagtail.wagtailadmin.jinja2tags.userbar',
                'wagtail.wagtailimages.jinja2tags.images',
            ],
        },
    }
]
Jinja templates must be placed in a jinja2/ directory in your app. The template for an EventPage model in an events app should be created at events/jinja2/events/event_page.html.
By default, the Jinja environment does not have any Django functions or filters. The Django documentation has more information on configuring Jinja for Django.
self in templates
In Django templates, self can be used to refer to the current page, stream block, or field panel. In Jinja, self is reserved for internal use. When writing Jinja templates, use page to refer to pages, value for stream blocks, and field_panel for field panels.
Template tags, functions & filters
pageurl()
Generate a URL for a Page instance:
<a href="{{ pageurl(page.more_information) }}">More information</a>
See pageurl for more information
slugurl()
Generate a URL for a Page with a slug:
<a href="{{ slugurl("about") }}">About us</a>
See slugurl for more information
image()
Resize an image, and print an <img> tag:
{##}
{{ image(page.header_image, "fill-1024x200", class="header-image") }}

{##}
{% set background=image(page.background_image, "max-1024x1024") %}
<div class="wrapper" style="background-image: url({{ background.url }});">
See Using images in templates for more information
|richtext
Transform Wagtail’s internal HTML representation, expanding internal references to pages and images.
{{ page.body|richtext }}
See Rich text (filter) for more information
wagtailuserbar()
Output the Wagtail contextual flyout menu for editing pages from the front end
{{ wagtailuserbar() }}
See Wagtail User Bar for more information
{% include_block %}
Output the HTML representation for the stream content as a whole, as well as for each individual block.
Allows to pass template context (by default) to the StreamField template.
{% include_block page.body %}
{% include_block page.body with context %} {##}
{% include_block page.body without context %}
See StreamField template rendering for more information.
Note
The {% include_block %} tag is designed to closely follow the syntax and behaviour of Jinja’s {% include %}, so it does not implement the Django version’s feature of only passing specified variables into the context.
Testing your Wagtail site
Wagtail comes with some utilities that simplify writing tests for your site.
WagtailPageTests
- class
wagtail.tests.utils.WagtailPageTests¶ WagtailPageTestsextendsdjango.test.TestCase, adding a few newassertmethods. You should extend this class to make use of its methods:from wagtail.tests.utils import WagtailPageTests from myapp.models import MyPage class MyPageTests(WagtailPageTests): def test_can_create_a_page(self): ...
-
assertCanCreateAt(parent_model, child_model, msg=None)¶ Assert a particular child Page type can be created under a parent Page type.
parent_modelandchild_modelshould be the Page classes being tested.def test_can_create_under_home_page(self): # You can create a ContentPage under a HomePage self.assertCanCreateAt(HomePage, ContentPage)
-
assertCanNotCreateAt(parent_model, child_model, msg=None)¶ Assert a particular child Page type can not be created under a parent Page type.
parent_modelandchild_modelshould be the Page classes being tested.def test_cant_create_under_event_page(self): # You can not create a ContentPage under an EventPage self.assertCanNotCreateAt(EventPage, ContentPage)
-
assertCanCreate(parent, child_model, data, msg=None)¶ Assert that a child of the given Page type can be created under the parent, using the supplied POST data.
parentshould be a Page instance, andchild_modelshould be a Page subclass.datashould be a dict that will be POSTed at the Wagtail admin Page creation method.def test_can_create_content_page(self): # Get the HomePage root_page = HomePage.objects.get(pk=2) # Assert that a ContentPage can be made here, with this POST data self.assertCanCreate(root_page, ContentPage, { 'title': 'About us', 'body': 'Lorem ipsum dolor sit amet')
-
assertAllowedParentPageTypes(child_model, parent_models, msg=None)¶ Test that the only page types that
child_modelcan be created under areparent_models.The list of allowed parent models may differ from those set in
Page.parent_page_types, if the parent models have setPage.subpage_types.def test_content_page_parent_pages(self): # A ContentPage can only be created under a HomePage # or another ContentPage self.assertAllowedParentPageTypes( ContentPage, {HomePage, ContentPage}) # An EventPage can only be created under an EventIndex self.assertAllowedParentPageTypes( EventPage, {EventIndex})
-
assertAllowedSubpageTypes(parent_model, child_models, msg=None)¶ Test that the only page types that can be created under
parent_modelarechild_models.The list of allowed child models may differ from those set in
Page.subpage_types, if the child models have setPage.parent_page_types.def test_content_page_subpages(self): # A ContentPage can only have other ContentPage children self.assertAllowedSubpageTypes( ContentPage, {ContentPage}) # A HomePage can have ContentPage and EventIndex children self.assertAllowedParentPageTypes( HomePage, {ContentPage, EventIndex})
-
Wagtail API
The API module provides a public-facing, JSON-formatted API to allow retrieving content as raw field data. This is useful for cases like serving content to non-web clients (such as a mobile phone app) or pulling content out of Wagtail for use in another site.
There are currently two versions of the API available: v1 and v2. Both versions are “stable” so it is recommended to use v2. V1 is only provided for backwards compatibility and will be removed from Wagtail soon.
See RFC 8: Wagtail API for full details on our stabilisation policy.
Version 2 (recommended)
Wagtail API v2 Configuration Guide
This section of the docs will show you how to set up a public API for your Wagtail site.
Even though the API is built on Django REST Framework, you do not need to install this manually as it is already a dependency of Wagtail.
Firstly, you need to enable Wagtail’s API app so Django can see it. Add wagtail.api.v2 to INSTALLED_APPS in your Django project settings:
# settings.py

INSTALLED_APPS = [
    ...

    'wagtail.api.v2',

    ...
]
Optionally, you may also want to add rest_framework to INSTALLED_APPS. This would make the API browsable when viewed from a web browser but is not required for basic JSON-formatted output.
Next, it’s time to configure which content will be exposed on the API. Each content type (such as pages, images and documents) has its own endpoint. Endpoints are combined by a router, which provides the url configuration you can hook into the rest of your project.
Wagtail provides three endpoint classes you can use:
- Pages
wagtail.api.v2.endpoints.PagesAPIEndpoint- Images
wagtail.wagtailimages.api.v2.endpoints.ImagesAPIEndpoint- Documents
wagtail.wagtaildocs.api.v2.endpoints.DocumentsAPIEndpoint
You can subclass any of these endpoint classes to customise their functionality. Additionally, there is a base endpoint class you can use for adding different content types to the API: wagtail.api.v2.endpoints.BaseAPIEndpoint
For this example, we will create an API that includes all three builtin content types in their default configuration:
# api.py

from wagtail.api.v2.endpoints import PagesAPIEndpoint
from wagtail.api.v2.router import WagtailAPIRouter
from wagtail.wagtailimages.api.v2.endpoints import ImagesAPIEndpoint
from wagtail.wagtaildocs.api.v2.endpoints import DocumentsAPIEndpoint

# Create the router. "wagtailapi" is the URL namespace
api_router = WagtailAPIRouter('wagtailapi')

# Add the three endpoints using the "register_endpoint" method.
# The first parameter is the name of the endpoint (eg. pages, images). This
# is used in the URL of the endpoint
# The second parameter is the endpoint class that handles the requests
api_router.register_endpoint('pages', PagesAPIEndpoint)
api_router.register_endpoint('images', ImagesAPIEndpoint)
api_router.register_endpoint('documents', DocumentsAPIEndpoint)
Next, register the URLs so Django can route requests into the API:
# urls.py
from .api import api_router
urlpatterns = [
...
url(r'^api/v2/', api_router.urls),
...
# Ensure that the api_router line appears above the default Wagtail page serving route
url(r'', include(wagtail_urls)),
]
With this configuration, pages will be available at /api/v2/pages/, images at /api/v2/images/ and documents at /api/v2/documents/
It’s likely that you would need to export some custom fields over the API. This can be done by adding a list of fields to be exported into the api_fields attribute for each page model.
For example:
# blog/models.py
from wagtail.api import APIField
class BlogPageAuthor(Orderable):
page = models.ForeignKey('blog.BlogPage', related_name='authors')
name = models.CharField(max_length=255)
api_fields = [
APIField('name'),
]
class BlogPage(Page):
published_date = models.DateTimeField()
body = RichTextField()
feed_image = models.ForeignKey('wagtailimages.Image', ...)
private_field = models.CharField(max_length=255)
# Export fields over the API
api_fields = [
APIField('published_date'),
APIField('body'),
APIField('feed_image'),
APIField('authors'), # This will nest the relevant BlogPageAuthor objects in the API response
]
This will make published_date, body, feed_image and a list of authors with the name field available in the API. But to access these fields, you must select the blog.BlogPage type using the ?type parameter in the API itself.
Serialisers are used to convert the database representation of a model into JSON format. You can override the serialiser for any field using the serializer keyword argument:
from rest_framework.fields import DateField
class BlogPage(Page):
...
api_fields = [
# Change the format of the published_date field to "Thursday 06 April 2017"
APIField('published_date', serializer=DateField(format='%A $d %B %Y')),
...
]
Django REST framework’s serializers can all take a source argument allowing you to add API fields that have a different field name or no underlying field at all:
from rest_framework.fields import DateField
class BlogPage(Page):
...
api_fields = [
# Date in ISO8601 format (the default)
APIField('published_date'),
# A separate published_date_display field with a different format
APIField('published_date_display', serializer=DateField(format='%A $d %B %Y', source='published_date')),
...
]
This adds two fields to the API (other fields omitted for brevity):
{
"published_date": "2017-04-06",
"published_date_display": "Thursday 06 April 2017"
}
The ImageRenditionField serialiser allows you to add renditions of images into your API. It requires an image filter string specifying the resize operations to perform on the image. It can also take the source keyword argument described above.
For example:
from wagtail.wagtailimages.api.fields.ImageRenditionField
class BlogPage(Page):
...
api_fields = [
# Adds information about the source image (eg, title) into the API
APIField('feed_image'),
# Adds a URL to a rendered thumbnail of the image to the API
APIField('feed_image_thumbnail', serializer=ImageRenditionField('fill-100x100', source='feed_image')),
...
]
This would add the following to the JSON:
{
"feed_image": {
"id": 45529,
"meta": {
"type": "wagtailimages.Image",
"detail_url": "http://www.example.com/api/v2/images/12/",
"tags": []
},
"title": "A test image",
"width": 2000,
"height": 1125
},
"feed_image_thumbnail": {
"url": "http://www.example.com/media/images/a_test_image.fill-100x100.jpg",
"width": 100,
"height": 100
}
}
WAGTAILAPI_BASE_URL¶(required when using frontend cache invalidation)
This is used in two places, when generating absolute URLs to document files and invalidating the cache.
Generating URLs to documents will fall back the the current request’s hostname if this is not set. Cache invalidation cannot do this, however, so this setting must be set when using this module alongside the wagtailfrontendcache module.
WAGTAILAPI_SEARCH_ENABLED¶(default: True)
Setting this to false will disable full text search. This applies to all endpoints.
WAGTAILAPI_LIMIT_MAX¶(default: 20)
This allows you to change the maximum number of results a user can request at a time. This applies to all endpoints.
Wagtail API v2 Usage Guide
Note
This is the usage guide for version 2 of the API. For version 1, see Wagtail API Usage Guide
The Wagtail API module exposes a public, read only, JSON-formatted API which can be used by external clients (such as a mobile app) or the site’s frontend.
This document is intended for developers using the API exposed by Wagtail. For documentation on how to enable the API module in your Wagtail site, see Wagtail API v2 Configuration Guide
To fetch content over the API, perform a GET request against one of the following endpoints:
- Pages
/api/v2/pages/- Images
/api/v2/images/- Documents
/api/v2/documents/
Note
The available endpoints and their URLs may vary from site to site, depending on how the API has been configured.
Each response contains the list of items (items) and the total count (meta.total_count). The total count is irrespective of pagination.
GET /api/v2/endpoint_name/
HTTP 200 OK
Content-Type: application/json
{
"meta": {
"total_count": "total number of results"
},
"items": [
{
"id": 1,
"meta": {
"type": "app_name.ModelName",
"detail_url": "http://api.example.com/api/v2/endpoint_name/1/"
},
"field": "value"
},
{
"id": 2,
"meta": {
"type": "app_name.ModelName",
"detail_url": "http://api.example.com/api/v2/endpoint_name/2/"
},
"field": "different value"
}
]
}
Wagtail sites contain many page types, each with their own set of fields. The pages endpoint will only expose the common fields by default (such as title and slug).
To access custom page fields with the API, select the page type with the ?type parameter. This will filter the results to only include pages of that type but will also make all the exported custom fields for that type available in the API.
For example, to access the published_date, body and authors fields on the blog.BlogPage model in the configuration docs:
GET /api/v2/pages/?type=blog.BlogPage&fields=published_date,body,authors(name)
HTTP 200 OK
Content-Type: application/json
{
"meta": {
"total_count": 10
},
"items": [
{
"id": 1,
"meta": {
"type": "blog.BlogPage",
"detail_url": "http://api.example.com/api/v2/pages/1/",
"html_url": "http://www.example.com/blog/my-blog-post/",
"slug": "my-blog-post",
"first_published_at": "2016-08-30T16:52:00Z"
},
"title": "Test blog post",
"published_date": "2016-08-30",
"authors": [
{
"id": 1,
"meta": {
"type": "blog.BlogPageAuthor",
},
"name": "Karl Hobley"
}
]
},
...
]
}
Note
Only fields that have been explicitly exported by the developer may be used in the API. This is done by adding a api_fields attribute to the page model. You can read about configuration here.
This doesn’t apply to images/documents as there is only one model exposed in those endpoints. But for projects that have customised image/document models, the api_fields attribute can be used to export any custom fields into the API.
The number of items in the response can be changed by using the ?limit parameter (default: 20) and the number of items to skip can be changed by using the ?offset parameter.
For example:
GET /api/v2/pages/?offset=20&limit=20
HTTP 200 OK
Content-Type: application/json
{
"meta": {
"total_count": 50
},
"items": [
pages 20 - 40 will be listed here.
]
}
Note
There may be a maximum value for the ?limit parameter. This can be modified in your project settings by setting WAGTAILAPI_LIMIT_MAX to either a number (the new maximum value) or None (which disables maximum value check).
The results can be ordered by any field by setting the ?order parameter to the name of the field to order by.
GET /api/v2/pages/?order=title
HTTP 200 OK
Content-Type: application/json
{
"meta": {
"total_count": 50
},
"items": [
pages will be listed here in ascending title order (a-z)
]
}
The results will be ordered in ascending order by default. This can be changed to descending order by prefixing the field name with a - sign.
GET /api/v2/pages/?order=-title
HTTP 200 OK
Content-Type: application/json
{
"meta": {
"total_count": 50
},
"items": [
pages will be listed here in descending title order (z-a)
]
}
Note
Ordering is case-sensitive so lowercase letters are always ordered after uppercase letters when in ascending order.
Passing random into the ?order parameter will make results return in a random order. If there is no caching, each request will return results in a different order.
GET /api/v2/pages/?order=random
HTTP 200 OK
Content-Type: application/json
{
"meta": {
"total_count": 50
},
"items": [
pages will be listed here in random order
]
}
Note
It’s not possible to use ?offset while ordering randomly because consistent random ordering cannot be guarenteed over multiple requests (so requests for subsequent pages may return results that also appeared in previous pages).
Any field may be used in an exact match filter. Use the filter name as the parameter and the value to match against.
For example, to find a page with the slug “about”:
GET /api/v2/pages/?slug=about
HTTP 200 OK
Content-Type: application/json
{
"meta": {
"total_count": 1
},
"items": [
{
"id": 10,
"meta": {
"type": "standard.StandardPage",
"detail_url": "http://api.example.com/api/v2/pages/10/",
"html_url": "http://www.example.com/about/",
"slug": "about",
"first_published_at": "2016-08-30T16:52:00Z"
},
"title": "About"
},
]
}
Pages can additionally be filtered by their position of the tree. For this, there are two parameters you can use: ?child_of and ?descendant_of.
The ?child_of filter takes the id of a page and filters the list of results to contain only direct children of that page.
For example, this can be useful for constructing the main menu, by passing the id of the homepage to the filter:
GET /api/v2/pages/?child_of=2&show_in_menus=true
HTTP 200 OK
Content-Type: application/json
{
"meta": {
"total_count": 5
},
"items": [
{
"id": 3,
"meta": {
"type": "blog.BlogIndexPage",
"detail_url": "http://api.example.com/api/v2/pages/3/",
"html_url": "http://www.example.com/blog/",
"slug": "blog",
"first_published_at": "2016-09-21T13:54:00Z"
},
"title": "About"
},
{
"id": 10,
"meta": {
"type": "standard.StandardPage",
"detail_url": "http://api.example.com/api/v2/pages/10/",
"html_url": "http://www.example.com/about/",
"slug": "about",
"first_published_at": "2016-08-30T16:52:00Z"
},
"title": "About"
},
...
]
}
The ?descendant_of filter also takes the id of a page but includes all descendants (children of children) instead of just directly children.
Passing a query to the ?search parameter will perform a full-text search on the results.
The query is split into “terms” (by word boundary), then each term is normalised (lowercased and unaccented).
For example: ?search=James+Joyce
The search_operator specifies how multiple terms in the query should be handled. There are two possible values:
and- All terms in the search query (excluding stop words) must exist in each resultor- At least one term in the search query must exist in each result
The or operator is generally better than and as it allows the user to be inexact with their query and the ranking algorithm will make sure that irrelevant results are not returned at the top of the page.
The default search operator depends on whether the search engine being used by the site supports ranking. If it does (Elasticsearch), the operator will default to or. Otherwise (database), it will default to and.
For the same reason, it’s also recommended to use the and operator when using ?search in conjunction with ?order (as this disables ranking).
For example: ?search=James+Joyce&order=-first_published_at&search_operator=and
By default, only a subset of the available fields are returned in the response. The ?fields parameter can be used to both add additional fields to the response and remove default fields that you know you won’t need.
Additional fields can be added to the response by setting ?fields to a comma-separated list of field names you want to add.
For example, ?fields=body,feed_image will add the body and feed_image fields to the response.
This can also be used across relationships. For example, ?fields=body,feed_image(width,height) will nest the width and height of the image in the response.
Setting ?fields to an asterisk (*) will add all available fields to the response. This is useful for discovering what fields have been exported.
For example: ?fields=*
Fields you know that you do not need can be removed by prefixing the name with a - and adding it to ?fields.
For example, ?fields=-title,body will remove title and add body.
This can also be used with the asterisk. For example, ?fields=*,-body adds all fields except for body.
To specify exactly the fields you need, you can set the first item in fields to an underscore (_) which removes all default fields.
For example, ?fields=_,title will only return the title field.
You can retrieve a single object from the API by appending its id to the end of the URL. For example:
- Pages
/api/v2/pages/1/ - Images
/api/v2/images/1/ - Documents
/api/v2/documents/1/
All exported fields will be returned in the response by default. You can use the ?fields parameter to customise which fields are shown.
For example: /api/v2/pages/1/?fields=_,title,body will return just the title and body of the page with the id of 1.
These fields are returned by every endpoint.
id(number)The unique ID of the object
Note
Except for page types, every other content type has its own id space so you must combine this with the
typefield in order to get a unique identifier for an object.type(string)- The type of the object in
app_label.ModelNameformat detail_url(string)- The URL of the detail view for the object
title(string)meta.slug(string)- These values are taken from their corresponding fields on the page
meta.html_url(string)- If the site has an HTML frontend that’s generated by Wagtail, this field will be set to the URL of this page
meta.parent- Nests some information about the parent page (only available on detail views)
- The results list in listing responses has been renamed to
items(was previously eitherpages,imagesordocuments)
- The
fieldsparameter has been improved to allow removing fields, adding all fields and customising nested fields
html_url,slug,first_publised_at,expires_atandshow_in_menusfields have been added to the pages endpointdownload_urlfield has been added to the documents endpoint- Multiple page types can be specified in
typeparameter on pages endpointtrueandfalsemay now be used when filtering boolean fieldsordercan now be used in conjunction withsearchsearch_operatorparameter was added
Version 1
See Wagtail API v1
Reference
Pages
Wagtail requires a little careful setup to define the types of content that you want to present through your website. The basic unit of content in Wagtail is the Page, and all of your page-level content will inherit basic webpage-related properties from it. But for the most part, you will be defining content yourself, through the construction of Django models using Wagtail’s Page as a base.
Wagtail organizes content created from your models in a tree, which can have any structure and combination of model objects in it. Wagtail doesn’t prescribe ways to organize and interrelate your content, but here we’ve sketched out some strategies for organizing your models.
The presentation of your content, the actual webpages, includes the normal use of the Django template system. We’ll cover additional functionality that Wagtail provides at the template level later on.
Theory
Introduction to Trees
If you’re unfamiliar with trees as an abstract data type, you might want to review the concepts involved.
As a web developer, though, you probably already have a good understanding of trees as filesystem directories or paths. Wagtail pages can create the same structure, as each page in the tree has its own URL path, like so:
/
people/
nien-nunb/
laura-roslin/
events/
captain-picard-day/
winter-wrap-up/
The Wagtail admin interface uses the tree to organize content for editing, letting you navigate up and down levels in the tree through its Explorer menu. This method of organization is a good place to start in thinking about your own Wagtail models.
It might be handy to think of the Page-derived models you want to create as being one of two node types: parents and leaves. Wagtail isn’t prescriptive in this approach, but it’s a good place to start if you’re not experienced in structuring your own content types.
Parent nodes on the Wagtail tree probably want to organize and display a browse-able index of their descendants. A blog, for instance, needs a way to show a list of individual posts.
A Parent node could provide its own function returning its descendant objects.
class EventPageIndex(Page):
# ...
def events(self):
# Get list of live event pages that are descendants of this page
events = EventPage.objects.live().descendant_of(self)
# Filter events list to get ones that are either
# running now or start in the future
events = events.filter(date_from__gte=date.today())
# Order by date
events = events.order_by('date_from')
return events
This example makes sure to limit the returned objects to pieces of content which make sense, specifically ones which have been published through Wagtail’s admin interface (live()) and are children of this node (descendant_of(self)). By setting a subpage_types class property in your model, you can specify which models are allowed to be set as children, and by setting a parent_page_types class property, you can specify which models are allowed to be parents of this page model. Wagtail will allow any Page-derived model by default. Regardless, it’s smart for a parent model to provide an index filtered to make sense.
Leaves are the pieces of content itself, a page which is consumable, and might just consist of a bunch of properties. A blog page leaf might have some body text and an image. A person page leaf might have a photo, a name, and an address.
It might be helpful for a leaf to provide a way to back up along the tree to a parent, such as in the case of breadcrumbs navigation. The tree might also be deep enough that a leaf’s parent won’t be included in general site navigation.
The model for the leaf could provide a function that traverses the tree in the opposite direction and returns an appropriate ancestor:
class EventPage(Page):
# ...
def event_index(self):
# Find closest ancestor which is an event index
return self.get_ancestors().type(EventIndexPage).last()
If defined, subpage_types and parent_page_types will also limit the parent models allowed to contain a leaf. If not, Wagtail will allow any combination of parents and leafs to be associated in the Wagtail tree. Like with index pages, it’s a good idea to make sure that the index is actually of the expected model to contain the leaf.
Your Page-derived models might have other interrelationships which extend the basic Wagtail tree or depart from it entirely. You could provide functions to navigate between siblings, such as a “Next Post” link on a blog page (post->post->post). It might make sense for subtrees to interrelate, such as in a discussion forum (forum->post->replies) Skipping across the hierarchy might make sense, too, as all objects of a certain model class might interrelate regardless of their ancestors (events = EventPage.objects.all). It’s largely up to the models to define their interrelations, the possibilities are really endless.
Anatomy of a Wagtail Request
For going beyond the basics of model definition and interrelation, it might help to know how Wagtail handles requests and constructs responses. In short, it goes something like:
- Django gets a request and routes through Wagtail’s URL dispatcher definitions
- Wagtail checks the hostname of the request to determine which
Siterecord will handle this request.- Starting from the root page of that site, Wagtail traverses the page tree, calling the
route()method and letting each page model decide whether it will handle the request itself or pass it on to a child page.- The page responsible for handling the request returns a
RouteResultobject fromroute(), which identifies the page along with any additionalargs/kwargsto be passed toserve().- Wagtail calls
serve(), which constructs a context usingget_context()serve()finds a template to pass it to usingget_template()- A response object is returned by
serve()and Django responds to the requester.
You can apply custom behavior to this process by overriding Page class methods such as route() and serve() in your own models. For examples, see Recipes.
Recipes
Overriding the serve() Method
Wagtail defaults to serving Page-derived models by passing a reference to the page object to a Django HTML template matching the model’s name, but suppose you wanted to serve something other than HTML? You can override the serve() method provided by the Page class and handle the Django request and response more directly.
Consider this example from the Wagtail demo site’s models.py, which serves an EventPage object as an iCal file if the format variable is set in the request:
class EventPage(Page):
...
def serve(self, request):
if "format" in request.GET:
if request.GET['format'] == 'ical':
# Export to ical format
response = HttpResponse(
export_event(self, 'ical'),
content_type='text/calendar',
)
response['Content-Disposition'] = 'attachment; filename=' + self.slug + '.ics'
return response
else:
# Unrecognised format error
message = 'Could not export event\n\nUnrecognised format: ' + request.GET['format']
return HttpResponse(message, content_type='text/plain')
else:
# Display event page as usual
return super(EventPage, self).serve(request)
serve() takes a Django request object and returns a Django response object. Wagtail returns a TemplateResponse object with the template and context which it generates, which allows middleware to function as intended, so keep in mind that a simpler response object like a HttpResponse will not receive these benefits.
With this strategy, you could use Django or Python utilities to render your model in JSON or XML or any other format you’d like.
Adding Endpoints with Custom route() Methods
Note
A much simpler way of adding more endpoints to pages is provided by the wagtailroutablepage module.
Wagtail routes requests by iterating over the path components (separated with a forward slash /), finding matching objects based on their slug, and delegating further routing to that object’s model class. The Wagtail source is very instructive in figuring out what’s happening. This is the default route() method of the Page class:
class Page(...):
...
def route(self, request, path_components):
if path_components:
# request is for a child of this page
child_slug = path_components[0]
remaining_components = path_components[1:]
# find a matching child or 404
try:
subpage = self.get_children().get(slug=child_slug)
except Page.DoesNotExist:
raise Http404
# delegate further routing
return subpage.specific.route(request, remaining_components)
else:
# request is for this very page
if self.live:
# Return a RouteResult that will tell Wagtail to call
# this page's serve() method
return RouteResult(self)
else:
# the page matches the request, but isn't published, so 404
raise Http404
route() takes the current object (self), the request object, and a list of the remaining path_components from the request URL. It either continues delegating routing by calling route() again on one of its children in the Wagtail tree, or ends the routing process by returning a RouteResult object or raising a 404 error.
The RouteResult object (defined in wagtail.wagtailcore.url_routing) encapsulates all the information Wagtail needs to call a page’s serve() method and return a final response: this information consists of the page object, and any additional args/kwargs to be passed to serve().
By overriding the route() method, we could create custom endpoints for each object in the Wagtail tree. One use case might be using an alternate template when encountering the print/ endpoint in the path. Another might be a REST API which interacts with the current object. Just to see what’s involved, lets make a simple model which prints out all of its child path components.
First, models.py:
from django.shortcuts import render
from wagtail.wagtailcore.url_routing import RouteResult
from django.http.response import Http404
from wagtail.wagtailcore.models import Page
...
class Echoer(Page):
def route(self, request, path_components):
if path_components:
# tell Wagtail to call self.serve() with an additional 'path_components' kwarg
return RouteResult(self, kwargs={'path_components': path_components})
else:
if self.live:
# tell Wagtail to call self.serve() with no further args
return RouteResult(self)
else:
raise Http404
def serve(self, path_components=[]):
return render(request, self.template, {
'page': self,
'echo': ' '.join(path_components),
})
This model, Echoer, doesn’t define any properties, but does subclass Page so objects will be able to have a custom title and slug. The template just has to display our {{ echo }} property.
Now, once creating a new Echoer page in the Wagtail admin titled “Echo Base,” requests such as:
http://127.0.0.1:8000/echo-base/tauntaun/kennel/bed/and/breakfast/
Will return:
tauntaun kennel bed and breakfast
Be careful if you’re introducing new required arguments to the serve() method - Wagtail still needs to be able to display a default view of the page for previewing and moderation, and by default will attempt to do this by calling serve() with a request object and no further arguments. If your serve() method does not accept that as a method signature, you will need to override the page’s serve_preview() method to call serve() with suitable arguments:
def serve_preview(self, request, mode_name):
return self.serve(request, color='purple')
Tagging
Wagtail provides tagging capability through the combination of two django modules, taggit and modelcluster. taggit provides a model for tags which is extended by modelcluster, which in turn provides some magical database abstraction which makes drafts and revisions possible in Wagtail. It’s a tricky recipe, but the net effect is a many-to-many relationship between your model and a tag class reserved for your model.
Using an example from the Wagtail demo site, here’s what the tag model and the relationship field looks like in models.py:
from modelcluster.fields import ParentalKey
from modelcluster.contrib.taggit import ClusterTaggableManager
from taggit.models import TaggedItemBase
class BlogPageTag(TaggedItemBase):
content_object = ParentalKey('demo.BlogPage', related_name='tagged_items')
class BlogPage(Page):
...
tags = ClusterTaggableManager(through=BlogPageTag, blank=True)
promote_panels = Page.promote_panels + [
...
FieldPanel('tags'),
]
Wagtail’s admin provides a nice interface for inputting tags into your content, with typeahead tag completion and friendly tag icons.
Now that we have the many-to-many tag relationship in place, we can fit in a way to render both sides of the relation. Here’s more of the Wagtail demo site models.py, where the index model for BlogPage is extended with logic for filtering the index by tag:
class BlogIndexPage(Page):
...
def serve(self, request):
# Get blogs
blogs = BlogPage.objects.child_of(self).live()
# Filter by tag
tag = request.GET.get('tag')
if tag:
blogs = blogs.filter(tags__name=tag)
return render(request, self.template, {
'page': self,
'blogs': blogs,
})
Here, blogs.filter(tags__name=tag) invokes a reverse Django queryset filter on the BlogPageTag model to optionally limit the BlogPage objects sent to the template for rendering. Now, lets render both sides of the relation by showing the tags associated with an object and a way of showing all of the objects associated with each tag. This could be added to the blog_page.html template:
{% for tag in page.tags.all %}
<a href="{% pageurl page.blog_index %}?tag={{ tag }}">{{ tag }}</a>
{% endfor %}
Iterating through page.tags.all will display each tag associated with page, while the link(s) back to the index make use of the filter option added to the BlogIndexPage model. A Django query could also use the tagged_items related name field to get BlogPage objects associated with a tag.
This is just one possible way of creating a taxonomy for Wagtail objects. With all of the components for a taxonomy available through Wagtail, you should be able to fulfill even the most exotic taxonomic schemes.
Available panel types
FieldPanel
- class
wagtail.wagtailadmin.edit_handlers.FieldPanel(field_name, classname=None, widget=None)¶ This is the panel used for basic Django field types.
-
field_name¶ This is the name of the class property used in your model definition.
-
classname¶ This is a string of optional CSS classes given to the panel which are used in formatting and scripted interactivity. By default, panels are formatted as inset fields.
The CSS class
fullcan be used to format the panel so it covers the full width of the Wagtail page editor.The CSS class
titlecan be used to give the field a larger text size, suitable for representing page titles and section headings.
-
widget(optional)¶ This parameter allows you to specify a Django form widget to use instead of the default widget for this field type.
-
MultiFieldPanel
- class
wagtail.wagtailadmin.edit_handlers.MultiFieldPanel(children, heading="", classname=None)¶ This panel condenses several
FieldPanels or choosers, from alistortuple, under a singleheadingstring.-
children¶ A
listortupleof child panels
-
heading¶ A heading for the fields
-
Collapsing MultiFieldPanels to save space
By default, MultiFieldPanel s are expanded and not collapsible. Adding collapsible to classname will enable the collapse control. Adding both collapsible and collapsed to the classname parameter will load the editor page with the MultiFieldPanel collapsed under its heading.
content_panels = [
MultiFieldPanel(
[
ImageChooserPanel('cover'),
DocumentChooserPanel('book_file'),
PageChooserPanel('publisher'),
],
heading="Collection of Book Fields",
classname="collapsible collapsed"
),
]
InlinePanel
- class
wagtail.wagtailadmin.edit_handlers.InlinePanel(relation_name, panels=None, classname='', label='', help_text='', min_num=None, max_num=None)¶ This panel allows for the creation of a “cluster” of related objects over a join to a separate model, such as a list of related links or slides to an image carousel.
This is a poweful but complex feature which will take some space to cover, so we’ll skip over it for now. For a full explanation on the usage of
InlinePanel, see Inline Panels and Model Clusters.
FieldRowPanel
- class
wagtail.wagtailadmin.edit_handlers.FieldRowPanel(children, classname=None)¶ This panel creates a columnar layout in the editing interface, where each of the child Panels appears alongside each other rather than below.
Use of FieldRowPanel particularly helps reduce the “snow-blindness” effect of seeing so many fields on the page, for complex models. It also improves the perceived association between fields of a similar nature. For example if you created a model representing an “Event” which had a starting date and ending date, it may be intuitive to find the start and end date on the same “row”.
By default, the panel is divided into equal-width columns, but this can be overridden by adding
col*class names to each of the child Panels of the FieldRowPanel. The Wagtail editing interface is laid out using a grid system, in which the maximum width of the editor is 12 columns. Classescol1-col12can be applied to each child of a FieldRowPanel. The classcol3will ensure that field appears 3 columns wide or a quarter the width.col4would cause the field to be 4 columns wide, or a third the width.-
children¶ A
listortupleof child panels to display on the row
-
classname¶ A class to apply to the FieldRowPanel as a whole
-
PageChooserPanel
- class
wagtail.wagtailadmin.edit_handlers.PageChooserPanel(field_name, page_type=None, can_choose_root=False)¶ You can explicitly link
Page-derived models together using thePagemodel andPageChooserPanel.from wagtail.wagtailcore.models import Page from wagtail.wagtailadmin.edit_handlers import PageChooserPanel class BookPage(Page): related_page = models.ForeignKey( 'wagtailcore.Page', null=True, blank=True, on_delete=models.SET_NULL, related_name='+', ) content_panels = Page.content_panels + [ PageChooserPanel('related_page', 'demo.PublisherPage'), ]
PageChooserPaneltakes one required argument, the field name. Optionally, specifying a page type (in the form of an"appname.modelname"string) will filter the chooser to display only pages of that type. A list or tuple of page types can also be passed in, to allow choosing a page that matches any of those page types:PageChooserPanel('related_page', ['demo.PublisherPage', 'demo.AuthorPage'])
Passing
can_choose_root=Truewill allow the editor to choose the tree root as a page. Normally this would be undesirable, since the tree root is never a usable page, but in some specialised cases it may be appropriate; for example, a page with an automatic “related articles” feed could use a PageChooserPanel to select which subsection articles will be taken from, with the root corresponding to ‘everywhere’.
ImageChooserPanel
- class
wagtail.wagtailimages.edit_handlers.ImageChooserPanel(field_name)¶ Wagtail includes a unified image library, which you can access in your models through the
Imagemodel and theImageChooserPanelchooser. Here’s how:from wagtail.wagtailimages.models import Image from wagtail.wagtailimages.edit_handlers import ImageChooserPanel class BookPage(Page): cover = models.ForeignKey( 'wagtailimages.Image', null=True, blank=True, on_delete=models.SET_NULL, related_name='+' ) content_panels = Page.content_panels + [ ImageChooserPanel('cover'), ]
Django’s default behaviour is to “cascade” deletions through a ForeignKey relationship, which may not be what you want. This is why the
null,blank, andon_deleteparameters should be set to allow for an empty field. (See Django model field reference (on_delete) ).ImageChooserPaneltakes only one argument: the name of the field.Displaying
Imageobjects in a template requires the use of a template tag. See Using images in templates.
FormSubmissionsPanel
- class
wagtail.wagtailforms.edit_handlers.FormSubmissionsPanel¶ This panel adds a single, read-only section in the edit interface for pages implementing the
AbstractFormmodel. It includes the number of total submissions for the given form and also a link to the listing of submissions.from wagtail.wagtailforms.models import AbstractForm from wagtail.wagtailforms.edit_handlers import FormSubmissionsPanel class ContactFormPage(AbstractForm): content_panels = [ FormSubmissionsPanel(), ]
DocumentChooserPanel
- class
wagtail.wagtaildocs.edit_handlers.DocumentChooserPanel(field_name)¶ For files in other formats, Wagtail provides a generic file store through the
Documentmodel:from wagtail.wagtaildocs.models import Document from wagtail.wagtaildocs.edit_handlers import DocumentChooserPanel class BookPage(Page): book_file = models.ForeignKey( 'wagtaildocs.Document', null=True, blank=True, on_delete=models.SET_NULL, related_name='+' ) content_panels = Page.content_panels + [ DocumentChooserPanel('book_file'), ]
As with images, Wagtail documents should also have the appropriate extra parameters to prevent cascade deletions across a ForeignKey relationship.
DocumentChooserPaneltakes only one argument: the name of the field.
SnippetChooserPanel
Changed in version 1.1: Before Wagtail 1.1, it was necessary to pass the snippet model class as a second parameter to SnippetChooserPanel. This is now automatically picked up from the field.
- class
wagtail.wagtailsnippets.edit_handlers.SnippetChooserPanel(field_name, snippet_type=None)¶ Snippets are vanilla Django models you create yourself without a Wagtail-provided base class. A chooser,
SnippetChooserPanel, is provided which takes the field name as an argument.from wagtail.wagtailsnippets.edit_handlers import SnippetChooserPanel class BookPage(Page): advert = models.ForeignKey( 'demo.Advert', null=True, blank=True, on_delete=models.SET_NULL, related_name='+' ) content_panels = Page.content_panels + [ SnippetChooserPanel('advert'), ]
See Snippets for more information.
Django’s field types are automatically recognised and provided with an appropriate widget for input. Just define that field the normal Django way and pass the field name into FieldPanel when defining your panels. Wagtail will take care of the rest.
Here are some Wagtail-specific types that you might include as fields in your models.
By adding CSS classes to your panel definitions or adding extra parameters to your field definitions, you can control much of how your fields will display in the Wagtail page editing interface. Wagtail’s page editing interface takes much of its behaviour from Django’s admin, so you may find many options for customisation covered there. (See Django model field reference ).
Full-Width Input
Use classname="full" to make a field (input element) stretch the full width of the Wagtail page editor. This will not work if the field is encapsulated in a MultiFieldPanel, which places its child fields into a formset.
Titles
Use classname="title" to make Page’s built-in title field stand out with more vertical padding.
Required Fields
To make input or chooser selection mandatory for a field, add blank=False to its model definition. (See Django model field reference (blank) ).
Hiding Fields
Without a panel definition, a default form field (without label) will be used to represent your fields. If you intend to hide a field on the Wagtail page editor, define the field with editable=False (See Django model field reference (editable) ).
The django-modelcluster module allows for streamlined relation of extra models to a Wagtail page. For instance, you can create objects related through a ForeignKey relationship on the fly and save them to a draft revision of a Page object. Normally, your related objects “cluster” would need to be created beforehand (or asynchronously) before linking them to a Page.
Let’s look at the example of adding related links to a Page-derived model. We want to be able to add as many as we like, assign an order, and do all of this without leaving the page editing screen.
from wagtail.wagtailcore.models import Orderable, Page
from modelcluster.fields import ParentalKey
# The abstract model for related links, complete with panels
class RelatedLink(models.Model):
title = models.CharField(max_length=255)
link_external = models.URLField("External link", blank=True)
panels = [
FieldPanel('title'),
FieldPanel('link_external'),
]
class Meta:
abstract = True
# The real model which combines the abstract model, an
# Orderable helper class, and what amounts to a ForeignKey link
# to the model we want to add related links to (BookPage)
class BookPageRelatedLinks(Orderable, RelatedLink):
page = ParentalKey('demo.BookPage', related_name='related_links')
class BookPage(Page):
# ...
content_panels = Page.content_panels + [
InlinePanel('related_links', label="Related Links"),
]
The RelatedLink class is a vanilla Django abstract model. The BookPageRelatedLinks model extends it with capability for being ordered in the Wagtail interface via the Orderable class as well as adding a page property which links the model to the BookPage model we’re adding the related links objects to. Finally, in the panel definitions for BookPage, we’ll add an InlinePanel to provide an interface for it all. Let’s look again at the parameters that InlinePanel accepts:
InlinePanel( relation_name, panels=None, label='', help_text='', min_num=None, max_num=None )
The relation_name is the related_name label given to the cluster’s ParentalKey relation. You can add the panels manually or make them part of the cluster model. label and help_text provide a heading and caption, respectively, for the Wagtail editor. Finally, min_num and max_num allow you to set the minimum/maximum number of forms that the user must submit.
Changed in version 1.0: In previous versions, it was necessary to pass the base model as the first parameter to InlinePanel; this is no longer required.
For another example of using model clusters, see Tagging
For more on django-modelcluster, visit the django-modelcluster github project page.
Model Reference
This document contains reference information for the model classes inside the wagtailcore module.
Page
- class
wagtail.wagtailcore.models.Page¶ -
title¶ (text)
Human-readable title of the page.
-
slug¶ (text)
This is used for constructing the page’s URL.
For example:
http://domain.com/blog/[my-slug]/
-
content_type¶ (foreign key to
django.contrib.contenttypes.models.ContentType)A foreign key to the
ContentTypeobject that represents the specific model of this page.
-
live¶ (boolean)
A boolean that is set to
Trueif the page is published.Note: this field defaults to
Truemeaning that any pages that are created programmatically will be published by default.
-
has_unpublished_changes¶ (boolean)
A boolean that is set to
Truewhen the page is either in draft or published with draft changes.
-
owner¶ (foreign key to user model)
A foreign key to the user that created the page.
-
first_published_at¶ (date/time)
The date/time when the page was first published.
-
last_published_at¶ (date/time)
The date/time when the page was last published.
-
seo_title¶ (text)
Alternate SEO-crafted title, for use in the page’s
<title>HTML tag.
-
search_description¶ (text)
SEO-crafted description of the content, used for search indexing. This is also suitable for the page’s
<meta name="description">HTML tag.
(boolean)
Toggles whether the page should be included in site-wide menus.
Defaults to
Falseand can be overridden on the model withshow_in_menus_default = True.This is used by the
in_menu()QuerySet filter.
-
In addition to the model fields provided, Page has many properties and methods that you may wish to reference, use, or override in creating your own models.
- class
wagtail.wagtailcore.models.Page -
specific¶ Return this page in its most specific subclassed form.
-
specific_class¶ Return the class that this page would be if instantiated in its most specific form
-
url¶ Return the ‘most appropriate’ URL for referring to this page from the pages we serve, within the Wagtail backend and actual website templates; this is the local URL (starting with ‘/’) if we’re only running a single site (i.e. we know that whatever the current page is being served from, this link will be on the same domain), and the full URL (with domain) if not. Return None if the page is not routable.
Accepts an optional but recommended
requestkeyword argument that, if provided, will be used to cache site-level URL information (thereby avoiding repeated database / cache lookups) and, via therequest.siteattribute, determine whether a relative or full URL is most appropriate.
-
full_url¶ Return the full URL (including protocol / domain) to this page, or None if it is not routable
-
relative_url(current_site, request=None)¶ Return the ‘most appropriate’ URL for this page taking into account the site we’re currently on; a local URL if the site matches, or a fully qualified one otherwise. Return None if the page is not routable.
Accepts an optional but recommended
requestkeyword argument that, if provided, will be used to cache site-level URL information (thereby avoiding repeated database / cache lookups).
-
get_site()¶ Return the Site object that this page belongs to.
-
get_url_parts(request=None)¶ Determine the URL for this page and return it as a tuple of
(site_id, site_root_url, page_url_relative_to_site_root). Return None if the page is not routable.This is used internally by the
full_url,url,relative_urlandget_siteproperties and methods; pages with custom URL routing should override this method in order to have those operations return the custom URLs.Accepts an optional keyword argument
request, which may be used to avoid repeated database / cache lookups. Typically, a page model that overridesget_url_partsshould not need to deal withrequestdirectly, and should just pass it to the original method when callingsuper.
-
route(request, path_components)
-
serve(request, *args, **kwargs)
-
get_context(request, *args, **kwargs)
-
get_template(request, *args, **kwargs)
-
get_admin_display_title()¶ Return the title for this page as it should appear in the admin backend.
-
preview_modes¶ A list of (internal_name, display_name) tuples for the modes in which this page can be displayed for preview/moderation purposes. Ordinarily a page will only have one display mode, but subclasses of Page can override this - for example, a page containing a form might have a default view of the form, and a post-submission ‘thankyou’ page
-
serve_preview(request, mode_name)¶ Return an HTTP response for use in page previews. Normally this would be equivalent to self.serve(request), since we obviously want the preview to be indicative of how it looks on the live site. However, there are a couple of cases where this is not appropriate, and custom behaviour is required:
1) The page has custom routing logic that derives some additional required args/kwargs to be passed to serve(). The routing mechanism is bypassed when previewing, so there’s no way to know what args we should pass. In such a case, the page model needs to implement its own version of serve_preview.
2) The page has several different renderings that we would like to be able to see when previewing - for example, a form page might have one rendering that displays the form, and another rendering to display a landing page when the form is posted. This can be done by setting a custom preview_modes list on the page model - Wagtail will allow the user to specify one of those modes when previewing, and pass the chosen mode_name to serve_preview so that the page model can decide how to render it appropriately. (Page models that do not specify their own preview_modes list will always receive an empty string as mode_name.)
Any templates rendered during this process should use the ‘request’ object passed here - this ensures that request.user and other properties are set appropriately for the wagtail user bar to be displayed. This request will always be a GET.
-
get_parent(update=False)¶ Returns: the parent node of the current node object. Caches the result in the object itself to help in loops.
-
get_ancestors(inclusive=False)
-
get_descendants(inclusive=False)
-
get_siblings(inclusive=True)
-
search_fields¶ A list of fields to be indexed by the search engine. See Search docs Indexing extra fields
-
subpage_types¶ A whitelist of page models which can be created as children of this page type. For example, a
BlogIndexpage might allow aBlogPageas a child, but not aJobPage:class BlogIndex(Page): subpage_types = ['mysite.BlogPage', 'mysite.BlogArchivePage']
The creation of child pages can be blocked altogether for a given page by setting it’s subpage_types attribute to an empty array:
class BlogPage(Page): subpage_types = []
-
parent_page_types¶ A whitelist of page models which are allowed as parent page types. For example, a
BlogPagemay only allow itself to be created below theBlogIndexpage:class BlogPage(Page): parent_page_types = ['mysite.BlogIndexPage']
Pages can block themselves from being created at all by setting parent_page_types to an empty array (this is useful for creating unique pages that should only be created once):
class HiddenPage(Page): parent_page_types = []
- classmethod
can_exist_under(parent)¶ Checks if this page type can exist as a subpage under a parent page instance.
See also:
Page.can_create_at()andPage.can_move_to()
- classmethod
can_create_at(parent)¶ Checks if this page type can be created as a subpage under a parent page instance.
-
can_move_to(parent)¶ Checks if this page instance can be moved to be a subpage of a parent page instance.
-
password_required_template¶ Defines which template file should be used to render the login form for Protected pages using this model. This overrides the default, defined using
PASSWORD_REQUIRED_TEMPLATEin your settings. See Private pages
-
is_creatable¶ Controls if this page can be created through the Wagtail administration. Defaults to True, and is not inherited by subclasses. This is useful when using multi-table inheritance, to stop the base model from being created as an actual page.
-
base_form_class¶ The form class used as a base for editing Pages of this type in the Wagtail page editor. This attribute can be set on a model to customise the Page editor form. Forms must be a subclass of
WagtailAdminPageForm. See Customising generated forms for more information.
-
Site
The Site model is useful for multi-site installations as it allows an administrator to configure which part of the tree to use for each hostname that the server responds on.
This configuration is used by the SiteMiddleware middleware class which checks each request against this configuration and appends the Site object to the Django request object.
- class
wagtail.wagtailcore.models.Site¶ -
hostname¶ (text)
This is the hostname of the site, excluding the scheme, port and path.
For example:
www.mysite.comNote
If you’re looking for how to get the root url of a site, use the
root_urlattribute.
-
port¶ (number)
This is the port number that the site responds on.
-
site_name¶ (text - optional)
A human-readable name for the site. This is not used by Wagtail itself, but is suitable for use on the site front-end, such as in
<title>elements.For example:
Rod's World of Birds
-
root_page¶ (foreign key to
Page)This is a link to the root page of the site. This page will be what appears at the
/URL on the site and would usually be a homepage.
-
is_default_site¶ (boolean)
This is set to
Trueif the site is the default. Only one site can be the default.The default site is used as a fallback in situations where a site with the required hostname/port couldn’t be found.
-
- class
wagtail.wagtailcore.models.Site - static
find_for_request(request)¶ Find the site object responsible for responding to this HTTP request object. Try:
- unique hostname first
- then hostname and port
- if there is no matching hostname at all, or no matching hostname:port combination, fall back to the unique default site, or raise an exception
NB this means that high-numbered ports on an extant hostname may still be routed to a different hostname which is set as the default
-
root_url¶ This returns the URL of the site. It is calculated from the
hostnameand theportfields.The scheme part of the URL is calculated based on value of the
portfield:- 80 =
http:// - 443 =
https:// - Everything else will use the
http://scheme and the port will be appended to the end of the hostname (eg.http://mysite.com:8000/)
- 80 =
- static
get_site_root_paths()¶ Return a list of (root_path, root_url) tuples, most specific path first - used to translate url_paths into actual URLs with hostnames
- static
PageRevision
Every time a page is edited a new PageRevision is created and saved to the database. It can be used to find the full history of all changes that have been made to a page and it also provides a place for new changes to be kept before going live.
- Revisions can be created from any
Pageobject by calling itssave_revision()method- The content of the page is JSON-serialised and stored in the
content_jsonfield- You can retrieve a
PageRevisionas aPageobject by calling theas_page_object()method
- class
wagtail.wagtailcore.models.PageRevision¶ -
-
submitted_for_moderation¶ (boolean)
Trueif this revision is in moderation
-
created_at¶ (date/time)
This is the time the revision was created
-
user¶ (foreign key to user model)
This links to the user that created the revision
-
content_json¶ (text)
This field contains the JSON content for the page at the time the revision was created
-
- class
wagtail.wagtailcore.models.PageRevision -
objects¶ This manager is used to retrieve all of the
PageRevisionobjects in the databaseExample:
PageRevision.objects.all()
-
submitted_revisions¶ This manager is used to retrieve all of the
PageRevisionobjects that are awaiting moderator approvalExample:
PageRevision.submitted_revisions.all()
-
- class
wagtail.wagtailcore.models.PageRevision -
-
approve_moderation()¶ Calling this on a revision that’s in moderation will mark it as approved and publish it
-
reject_moderation()¶ Calling this on a revision that’s in moderation will mark it as rejected
-
is_latest_revision()¶ Returns
Trueif this revision is its page’s latest revision
-
publish()¶ Calling this will copy the content of this revision into the live page object. If the page is in draft, it will be published.
-
GroupPagePermission
PageViewRestriction
Page QuerySet reference
All models that inherit from Page are given some extra QuerySet methods accessible from their .objects attribute.
Examples
Selecting only live pages
live_pages = Page.objects.live()Selecting published EventPages that are descendants of events_index
events = EventPage.objects.live().descendant_of(events_index)Getting a list of menu items
# This gets a QuerySet of live children of the homepage with ``show_in_menus`` set menu_items = homepage.get_children().live().in_menu()
Reference
- class
wagtail.wagtailcore.query.PageQuerySet(model=None, query=None, using=None, hints=None)¶ -
live()¶ This filters the QuerySet to only contain published pages.
Example:
published_pages = Page.objects.live()
-
not_live()¶ This filters the QuerySet to only contain unpublished pages.
Example:
unpublished_pages = Page.objects.not_live()
This filters the QuerySet to only contain pages that are in the menus.
Example:
# Build a menu from live pages that are children of the homepage menu_items = homepage.get_children().live().in_menu()
Note
To put your page in menus, set the show_in_menus flag to true:
# Add 'my_page' to the menu my_page.show_in_menus = True
This filters the QuerySet to only contain pages that are not in the menus.
-
in_site(site)¶ This filters the QuerySet to only contain pages within the specified site.
Example:
# Get all the EventPages in the current site site_events = EventPage.objects.in_site(request.site)
-
page(other)¶ This filters the QuerySet so it only contains the specified page.
Example:
# Append an extra page to a QuerySet new_queryset = old_queryset | Page.objects.page(page_to_add)
-
not_page(other)¶ This filters the QuerySet so it doesn’t contain the specified page.
Example:
# Remove a page from a QuerySet new_queryset = old_queryset & Page.objects.not_page(page_to_remove)
-
descendant_of(other, inclusive=False)¶ This filters the QuerySet to only contain pages that descend from the specified page.
If inclusive is set to True, it will also contain the page itself (instead of just its descendants).
Example:
# Get EventPages that are under the special_events Page special_events = EventPage.objects.descendant_of(special_events_index) # Alternative way special_events = special_events_index.get_descendants()
-
not_descendant_of(other, inclusive=False)¶ This filters the QuerySet to not contain any pages that descend from the specified page.
If inclusive is set to True, it will also exclude the specified page.
Example:
# Get EventPages that are not under the archived_events Page non_archived_events = EventPage.objects.not_descendant_of(archived_events_index)
-
child_of(other)¶ This filters the QuerySet to only contain pages that are direct children of the specified page.
Example:
# Get a list of sections sections = Page.objects.child_of(homepage) # Alternative way sections = homepage.get_children()
-
not_child_of(other)¶ This filters the QuerySet to not contain any pages that are direct children of the specified page.
-
ancestor_of(other, inclusive=False)¶ This filters the QuerySet to only contain pages that are ancestors of the specified page.
If inclusive is set to True, it will also include the specified page.
Example:
# Get the current section current_section = Page.objects.ancestor_of(current_page).child_of(homepage).first() # Alternative way current_section = current_page.get_ancestors().child_of(homepage).first()
-
not_ancestor_of(other, inclusive=False)¶ This filters the QuerySet to not contain any pages that are ancestors of the specified page.
If inclusive is set to True, it will also exclude the specified page.
Example:
# Get the other sections other_sections = Page.objects.not_ancestor_of(current_page).child_of(homepage)
-
parent_of(other)¶ This filters the QuerySet to only contain the parent of the specified page.
-
not_parent_of(other)¶ This filters the QuerySet to exclude the parent of the specified page.
-
sibling_of(other, inclusive=True)¶ This filters the QuerySet to only contain pages that are siblings of the specified page.
By default, inclusive is set to True so it will include the specified page in the results.
If inclusive is set to False, the page will be excluded from the results.
Example:
# Get list of siblings siblings = Page.objects.sibling_of(current_page) # Alternative way siblings = current_page.get_siblings()
-
not_sibling_of(other, inclusive=True)¶ This filters the QuerySet to not contain any pages that are siblings of the specified page.
By default, inclusive is set to True so it will exclude the specified page from the results.
If inclusive is set to False, the page will be included in the results.
-
public()¶ This filters the QuerySet to only contain pages that are not in a private section
See: Private pages
Note
This doesn’t filter out unpublished pages. If you want to only have published public pages, use
.live().public()Example:
# Find all the pages that are viewable by the public all_pages = Page.objects.live().public()
-
not_public()¶ This filters the QuerySet to only contain pages that are in a private section
-
search(query_string, fields=None, operator=None, order_by_relevance=True, backend=u'default')¶ This runs a search query on all the items in the QuerySet
See: Searching QuerySets
Example:
# Search future events results = EventPage.objects.live().filter(date__gt=timezone.now()).search("Hello")
-
type(model)¶ This filters the QuerySet to only contain pages that are an instance of the specified model (including subclasses).
Example:
# Find all pages that are of type AbstractEmailForm, or a descendant of it form_pages = Page.objects.type(AbstractEmailForm)
-
not_type(model)¶ This filters the QuerySet to not contain any pages which are an instance of the specified model.
-
exact_type(model)¶ This filters the QuerySet to only contain pages that are an instance of the specified model (matching the model exactly, not subclasses).
Example:
# Find all pages that are of the exact type EventPage event_pages = Page.objects.exact_type(EventPage)
-
not_exact_type(model)¶ This filters the QuerySet to not contain any pages which are an instance of the specified model (matching the model exactly, not subclasses).
Example:
# Find all pages that are not of the exact type EventPage (but may be a subclass) non_event_pages = Page.objects.not_exact_type(EventPage)
-
unpublish()¶ This unpublishes all live pages in the QuerySet.
Example:
# Unpublish current_page and all of its children Page.objects.descendant_of(current_page, inclusive=True).unpublish()
-
specific()¶ This efficiently gets all the specific pages for the queryset, using the minimum number of queries.
Example:
# Get the specific instance of all children of the hompage, # in a minimum number of database queries. homepage.get_children().specific()
See also:
Page.specific
-
first_common_ancestor(include_self=False, strict=False)¶ Find the first ancestor that all pages in this queryset have in common. For example, consider a page heirarchy like:
- Home/ - Foo Event Index/ - Foo Event Page 1/ - Foo Event Page 2/ - Bar Event Index/ - Bar Event Page 1/ - Bar Event Page 2/
The common ancestors for some queries would be:
>>> Page.objects\ ... .type(EventPage)\ ... .first_common_ancestor() <Page: Home> >>> Page.objects\ ... .type(EventPage)\ ... .filter(title__contains='Foo')\ ... .first_common_ancestor() <Page: Foo Event Index>
This method tries to be efficient, but if you have millions of pages scattered across your page tree, it will be slow.
If include_self is True, the ancestor can be one of the pages in the queryset:
>>> Page.objects\ ... .filter(title__contains='Foo')\ ... .first_common_ancestor() <Page: Foo Event Index> >>> Page.objects\ ... .filter(title__exact='Bar Event Index')\ ... .first_common_ancestor() <Page: Bar Event Index>
A few invalid cases exist: when the queryset is empty, when the root Page is in the queryset and
include_selfis False, and when there are multiple page trees with no common root (a case Wagtail does not support). Ifstrictis False (the default), then the first root node is returned in these cases. Ifstrictis True, then aObjectDoesNotExistis raised.
-
Contrib modules
Wagtail ships with a variety of extra optional modules.
Site settings
You can define settings for your site that are editable by administrators in the Wagtail admin. These settings can be accessed in code, as well as in templates.
To use these settings, you must add wagtail.contrib.settings to your INSTALLED_APPS:
INSTALLED_APPS += [
'wagtail.contrib.settings',
]
Defining settings
Create a model that inherits from BaseSetting, and register it using the register_setting decorator:
from wagtail.contrib.settings.models import BaseSetting, register_setting
@register_setting
class SocialMediaSettings(BaseSetting):
facebook = models.URLField(
help_text='Your Facebook page URL')
instagram = models.CharField(
max_length=255, help_text='Your Instagram username, without the @')
trip_advisor = models.URLField(
help_text='Your Trip Advisor page URL')
youtube = models.URLField(
help_text='Your YouTube channel or user account URL')
A ‘Social media settings’ link will appear in the Wagtail admin ‘Settings’ menu.
Settings use edit handlers much like the rest of Wagtail. Add a panels setting to your model defining all the edit handlers required:
@register_setting
class ImportantPages(BaseSetting):
donate_page = models.ForeignKey(
'wagtailcore.Page', null=True, on_delete=models.SET_NULL)
sign_up_page = models.ForeignKey(
'wagtailcore.Page', null=True, on_delete=models.SET_NULL)
panels = [
PageChooserPanel('donate_page'),
PageChooserPanel('sign_up_page'),
]
You can also customize the editor handlers like you would do for Page model with a custom edit_handler attribute:
from wagtail.wagtailadmin.edit_handlers import TabbedInterface, ObjectList
@register_setting
class MySettings(BaseSetting):
# ...
first_tab_panels = [
FieldPanel('field_1'),
]
second_tab_panels = [
FieldPanel('field_2'),
]
edit_handler = TabbedInterface([
ObjectList(first_tab_panels, heading='First tab'),
ObjectList(second_tab_panels, heading='Second tab'),
])
You can change the label used in the menu by changing the verbose_name of your model.
You can add an icon to the menu by passing an ‘icon’ argument to the register_setting decorator:
@register_setting(icon='placeholder')
class SocialMediaSettings(BaseSetting):
class Meta:
verbose_name = 'social media accounts'
...
For a list of all available icons, please see the UI Styleguide.
Using the settings
Settings are designed to be used both in Python code, and in templates.
If access to a setting is required in the code, the for_site() method will retrieve the setting for the supplied site:
def view(request):
social_media_settings = SocialMediaSettings.for_site(request.site)
...
Add the settings context processor to your settings:
TEMPLATES = [
{
...
'OPTIONS': {
'context_processors': [
...
'wagtail.contrib.settings.context_processors.settings',
]
}
}
]
Then access the settings through {{ settings }}:
{{ settings.app_label.SocialMediaSettings.instagram }}
Note
Replace app_label with the label of the app containing your settings model.
If you are not in a RequestContext, then context processors will not have run, and the settings variable will not be availble. To get the settings, use the provided {% get_settings %} template tag. If a request is in the template context, but for some reason it is not a RequestContext, just use {% get_settings %}:
{% load wagtailsettings_tags %}
{% get_settings %}
{{ settings.app_label.SocialMediaSettings.instagram }}
If there is no request available in the template at all, you can use the settings for the default Wagtail site instead:
{% load wagtailsettings_tags %}
{% get_settings use_default_site=True %}
{{ settings.app_label.SocialMediaSettings.instagram }}
Note
You can not reliably get the correct settings instance for the current site from this template tag if the request object is not available. This is only relevant for multisite instances of Wagtail.
Add wagtail.contrib.settings.jinja2tags.settings extension to your Jinja2 settings:
TEMPLATES = [
# ...
{
'BACKEND': 'django.template.backends.jinja2.Jinja2',
'APP_DIRS': True,
'OPTIONS': {
'extensions': [
# ...
'wagtail.contrib.settings.jinja2tags.settings',
],
},
}
]
Then access the settings through the settings() template function:
{{ settings("app_label.SocialMediaSettings").twitter }}
Note
Replace app_label with the label of the app containing your settings model.
This will look for a request variable in the template context, and find the correct site to use from that. If for some reason you do not have a request available, you can instead use the settings defined for the default site:
{{ settings("app_label.SocialMediaSettings", use_default_site=True).instagram }}
You can store the settings instance in a variable to save some typing, if you have to use multiple values from one model:
{% with social_settings=settings("app_label.SocialMediaSettings") %}
Follow us on Twitter at @{{ social_settings.twitter }},
or Instagram at @{{ social_settings.Instagram }}.
{% endwith %}
Or, alternately, using the set tag:
{% set social_settings=settings("app_label.SocialMediaSettings") %}
Form builder
The wagtailforms module allows you to set up single-page forms, such as a ‘Contact us’ form, as pages of a Wagtail site. It provides a set of base models that site implementers can extend to create their own FormPage type with their own site-specific templates. Once a page type has been set up in this way, editors can build forms within the usual page editor, consisting of any number of fields. Form submissions are stored for later retrieval through a new ‘Forms’ section within the Wagtail admin interface; in addition, they can be optionally e-mailed to an address specified by the editor.
Note
wagtailforms is not a replacement for Django’s form support. It is designed as a way for page authors to build general-purpose data collection forms without having to write code. If you intend to build a form that assigns specific behaviour to individual fields (such as creating user accounts), or needs a custom HTML layout, you will almost certainly be better served by a standard Django form, where the fields are fixed in code rather than defined on-the-fly by a page author. See the wagtail-form-example project for an example of integrating a Django form into a Wagtail page.
Usage
Add wagtail.wagtailforms to your INSTALLED_APPS:
INSTALLED_APPS = [
...
'wagtail.wagtailforms',
]
Within the models.py of one of your apps, create a model that extends wagtailforms.models.AbstractEmailForm:
from modelcluster.fields import ParentalKey
from wagtail.wagtailadmin.edit_handlers import (
FieldPanel, FieldRowPanel,
InlinePanel, MultiFieldPanel
)
from wagtail.wagtailcore.fields import RichTextField
from wagtail.wagtailforms.models import AbstractEmailForm, AbstractFormField
class FormField(AbstractFormField):
page = ParentalKey('FormPage', related_name='form_fields')
class FormPage(AbstractEmailForm):
intro = RichTextField(blank=True)
thank_you_text = RichTextField(blank=True)
content_panels = AbstractEmailForm.content_panels + [
FieldPanel('intro', classname="full"),
InlinePanel('form_fields', label="Form fields"),
FieldPanel('thank_you_text', classname="full"),
MultiFieldPanel([
FieldRowPanel([
FieldPanel('from_address', classname="col6"),
FieldPanel('to_address', classname="col6"),
]),
FieldPanel('subject'),
], "Email"),
]
AbstractEmailForm defines the fields to_address, from_address and subject, and expects form_fields to be defined. Any additional fields are treated as ordinary page content - note that FormPage is responsible for serving both the form page itself and the landing page after submission, so the model definition should include all necessary content fields for both of those views.
If you do not want your form page type to offer form-to-email functionality, you can inherit from AbstractForm instead of AbstractEmailForm, and omit the to_address, from_address and subject fields from the content_panels definition.
You now need to create two templates named form_page.html and form_page_landing.html (where form_page is the underscore-formatted version of the class name). form_page.html differs from a standard Wagtail template in that it is passed a variable form, containing a Django Form object, in addition to the usual page variable. A very basic template for the form would thus be:
{% load wagtailcore_tags %}
<html>
<head>
<title>{{ page.title }}</title>
</head>
<body>
<h1>{{ page.title }}</h1>
{{ page.intro|richtext }}
<form action="{% pageurl page %}" method="POST">
{% csrf_token %}
{{ form.as_p }}
<input type="submit">
</form>
</body>
</html>
form_page_landing.html is a regular Wagtail template, displayed after the user makes a successful form submission. If you want to dynamically override the landing page template, you can do so with the get_landing_page_template method (in the same way that you would with get_template).
Displaying form submission information
FormSubmissionsPanel can be added to your page’s panel definitions to display the number of form submissions and the time of the most recent submission, along with a quick link to access the full submission data:
from wagtail.wagtailforms.edit_handlers import FormSubmissionsPanel
class FormPage(AbstractEmailForm):
# ...
content_panels = AbstractEmailForm.content_panels + [
FormSubmissionsPanel(),
FieldPanel('intro', classname="full"),
# ...
]
Index
For a basic usage example see Usage.
If you need to save additional data, you can use a custom form submission model. To do this, you need to:
- Define a model that extends
wagtail.wagtailforms.models.AbstractFormSubmission. - Override the
get_submission_classandprocess_form_submissionmethods in your page model.
Example:
import json
from django.conf import settings
from django.core.serializers.json import DjangoJSONEncoder
from django.db import models
from modelcluster.fields import ParentalKey
from wagtail.wagtailadmin.edit_handlers import (
FieldPanel, FieldRowPanel,
InlinePanel, MultiFieldPanel
)
from wagtail.wagtailcore.fields import RichTextField
from wagtail.wagtailforms.models import AbstractEmailForm, AbstractFormField, AbstractFormSubmission
class FormField(AbstractFormField):
page = ParentalKey('FormPage', related_name='form_fields')
class FormPage(AbstractEmailForm):
intro = RichTextField(blank=True)
thank_you_text = RichTextField(blank=True)
content_panels = AbstractEmailForm.content_panels + [
FieldPanel('intro', classname="full"),
InlinePanel('form_fields', label="Form fields"),
FieldPanel('thank_you_text', classname="full"),
MultiFieldPanel([
FieldRowPanel([
FieldPanel('from_address', classname="col6"),
FieldPanel('to_address', classname="col6"),
]),
FieldPanel('subject'),
], "Email"),
]
def get_submission_class(self):
return CustomFormSubmission
def process_form_submission(self, form):
self.get_submission_class().objects.create(
form_data=json.dumps(form.cleaned_data, cls=DjangoJSONEncoder),
page=self, user=form.user
)
class CustomFormSubmission(AbstractFormSubmission):
user = models.ForeignKey(settings.AUTH_USER_MODEL, on_delete=models.CASCADE)
If you want to add custom data to the CSV export, you will need to:
- Override the
get_data_fieldsmethod in page model. - Override
get_datain the submission model.
The following example shows how to add a username to the CSV export:
import json
from django.conf import settings
from django.core.serializers.json import DjangoJSONEncoder
from django.db import models
from modelcluster.fields import ParentalKey
from wagtail.wagtailadmin.edit_handlers import (
FieldPanel, FieldRowPanel,
InlinePanel, MultiFieldPanel
)
from wagtail.wagtailcore.fields import RichTextField
from wagtail.wagtailforms.models import AbstractEmailForm, AbstractFormField, AbstractFormSubmission
class FormField(AbstractFormField):
page = ParentalKey('FormPage', related_name='form_fields')
class FormPage(AbstractEmailForm):
intro = RichTextField(blank=True)
thank_you_text = RichTextField(blank=True)
content_panels = AbstractEmailForm.content_panels + [
FieldPanel('intro', classname="full"),
InlinePanel('form_fields', label="Form fields"),
FieldPanel('thank_you_text', classname="full"),
MultiFieldPanel([
FieldRowPanel([
FieldPanel('from_address', classname="col6"),
FieldPanel('to_address', classname="col6"),
]),
FieldPanel('subject'),
], "Email"),
]
def get_data_fields(self):
data_fields = [
('username', 'Username'),
]
data_fields += super(FormPage, self).get_data_fields()
return data_fields
def get_submission_class(self):
return CustomFormSubmission
def process_form_submission(self, form):
self.get_submission_class().objects.create(
form_data=json.dumps(form.cleaned_data, cls=DjangoJSONEncoder),
page=self, user=form.user
)
class CustomFormSubmission(AbstractFormSubmission):
user = models.ForeignKey(settings.AUTH_USER_MODEL, on_delete=models.CASCADE)
def get_data(self):
form_data = super(CustomFormSubmission, self).get_data()
form_data.update({
'username': self.user.username,
})
return form_data
Note that this code also changes the submissions list view.
If you want to prevent users from filling in a form more than once, you need to override the serve method in your page model.
Example:
import json
from django.conf import settings
from django.core.serializers.json import DjangoJSONEncoder
from django.db import models
from django.shortcuts import render
from modelcluster.fields import ParentalKey
from wagtail.wagtailadmin.edit_handlers import (
FieldPanel, FieldRowPanel,
InlinePanel, MultiFieldPanel
)
from wagtail.wagtailcore.fields import RichTextField
from wagtail.wagtailforms.models import AbstractEmailForm, AbstractFormField, AbstractFormSubmission
class FormField(AbstractFormField):
page = ParentalKey('FormPage', related_name='form_fields')
class FormPage(AbstractEmailForm):
intro = RichTextField(blank=True)
thank_you_text = RichTextField(blank=True)
content_panels = AbstractEmailForm.content_panels + [
FieldPanel('intro', classname="full"),
InlinePanel('form_fields', label="Form fields"),
FieldPanel('thank_you_text', classname="full"),
MultiFieldPanel([
FieldRowPanel([
FieldPanel('from_address', classname="col6"),
FieldPanel('to_address', classname="col6"),
]),
FieldPanel('subject'),
], "Email"),
]
def serve(self, request, *args, **kwargs):
if self.get_submission_class().objects.filter(page=self, user__pk=request.user.pk).exists():
return render(
request,
self.template,
self.get_context(request)
)
return super(FormPage, self).serve(request, *args, **kwargs)
def get_submission_class(self):
return CustomFormSubmission
def process_form_submission(self, form):
self.get_submission_class().objects.create(
form_data=json.dumps(form.cleaned_data, cls=DjangoJSONEncoder),
page=self, user=form.user
)
class CustomFormSubmission(AbstractFormSubmission):
user = models.ForeignKey(settings.AUTH_USER_MODEL, on_delete=models.CASCADE)
class Meta:
unique_together = ('page', 'user')
Your template should look like this:
{% load wagtailcore_tags %}
<html>
<head>
<title>{{ page.title }}</title>
</head>
<body>
<h1>{{ page.title }}</h1>
{% if user.is_authenticated and user.is_active or request.is_preview %}
{% if form %}
<div>{{ page.intro|richtext }}</div>
<form action="{% pageurl page %}" method="POST">
{% csrf_token %}
{{ form.as_p }}
<input type="submit">
</form>
{% else %}
<div>You can fill in the from only one time.</div>
{% endif %}
{% else %}
<div>To fill in the form, you must to log in.</div>
{% endif %}
</body>
</html>
The following example shows how to create a multi-step form.
from django.core.paginator import Paginator, PageNotAnInteger, EmptyPage
from django.shortcuts import render
from modelcluster.fields import ParentalKey
from wagtail.wagtailadmin.edit_handlers import (
FieldPanel, FieldRowPanel,
InlinePanel, MultiFieldPanel
)
from wagtail.wagtailcore.fields import RichTextField
from wagtail.wagtailforms.models import AbstractEmailForm, AbstractFormField
class FormField(AbstractFormField):
page = ParentalKey('FormPage', related_name='form_fields')
class FormPage(AbstractEmailForm):
intro = RichTextField(blank=True)
thank_you_text = RichTextField(blank=True)
content_panels = AbstractEmailForm.content_panels + [
FieldPanel('intro', classname="full"),
InlinePanel('form_fields', label="Form fields"),
FieldPanel('thank_you_text', classname="full"),
MultiFieldPanel([
FieldRowPanel([
FieldPanel('from_address', classname="col6"),
FieldPanel('to_address', classname="col6"),
]),
FieldPanel('subject'),
], "Email"),
]
def get_form_class_for_step(self, step):
return self.form_builder(step.object_list).get_form_class()
def serve(self, request, *args, **kwargs):
"""
Implements a simple multi-step form.
Stores each step into a session.
When the last step was submitted correctly, saves whole form into a DB.
"""
session_key_data = 'form_data-%s' % self.pk
is_last_step = False
step_number = request.GET.get('p', 1)
paginator = Paginator(self.get_form_fields(), per_page=1)
try:
step = paginator.page(step_number)
except PageNotAnInteger:
step = paginator.page(1)
except EmptyPage:
step = paginator.page(paginator.num_pages)
is_last_step = True
if request.method == 'POST':
# The first step will be submitted with step_number == 2,
# so we need to get a form from previous step
# Edge case - submission of the last step
prev_step = step if is_last_step else paginator.page(step.previous_page_number())
# Create a form only for submitted step
prev_form_class = self.get_form_class_for_step(prev_step)
prev_form = prev_form_class(request.POST, page=self, user=request.user)
if prev_form.is_valid():
# If data for step is valid, update the session
form_data = request.session.get(session_key_data, {})
form_data.update(prev_form.cleaned_data)
request.session[session_key_data] = form_data
if prev_step.has_next():
# Create a new form for a following step, if the following step is present
form_class = self.get_form_class_for_step(step)
form = form_class(page=self, user=request.user)
else:
# If there is no next step, create form for all fields
form = self.get_form(
request.session[session_key_data],
page=self, user=request.user
)
if form.is_valid():
# Perform validation again for whole form.
# After successful validation, save data into DB,
# and remove from the session.
self.process_form_submission(form)
del request.session[session_key_data]
# Render the landing page
return render(
request,
self.landing_page_template,
self.get_context(request)
)
else:
# If data for step is invalid
# we will need to display form again with errors,
# so restore previous state.
form = prev_form
step = prev_step
else:
# Create empty form for non-POST requests
form_class = self.get_form_class_for_step(step)
form = form_class(page=self, user=request.user)
context = self.get_context(request)
context['form'] = form
context['fields_step'] = step
return render(
request,
self.template,
context
)
Your template for this form page should look like this:
{% load wagtailcore_tags %}
<html>
<head>
<title>{{ page.title }}</title>
</head>
<body>
<h1>{{ page.title }}</h1>
<div>{{ page.intro|richtext }}</div>
<form action="{% pageurl page %}?p={{ fields_step.number|add:"1" }}" method="POST">
{% csrf_token %}
{{ form.as_p }}
<input type="submit">
</form>
</body>
</html>
Note that the example shown before allows the user to return to a previous step, or to open a second step without submitting the first step. Depending on your requirements, you may need to add extra checks.
If you are implementing polls or surveys, you may want to show results after submission. The following example demonstrates how to do this.
First, you need to collect results as shown below:
from modelcluster.fields import ParentalKey
from wagtail.wagtailadmin.edit_handlers import (
FieldPanel, FieldRowPanel,
InlinePanel, MultiFieldPanel
)
from wagtail.wagtailcore.fields import RichTextField
from wagtail.wagtailforms.models import AbstractEmailForm, AbstractFormField
class FormField(AbstractFormField):
page = ParentalKey('FormPage', related_name='form_fields')
class FormPage(AbstractEmailForm):
intro = RichTextField(blank=True)
thank_you_text = RichTextField(blank=True)
content_panels = AbstractEmailForm.content_panels + [
FieldPanel('intro', classname="full"),
InlinePanel('form_fields', label="Form fields"),
FieldPanel('thank_you_text', classname="full"),
MultiFieldPanel([
FieldRowPanel([
FieldPanel('from_address', classname="col6"),
FieldPanel('to_address', classname="col6"),
]),
FieldPanel('subject'),
], "Email"),
]
def get_context(self, request, *args, **kwargs):
context = super(FormPage, self).get_context(request, *args, **kwargs)
# If you need to show results only on landing page,
# you may need check request.method
results = dict()
# Get information about form fields
data_fields = [
(field.clean_name, field.label)
for field in self.get_form_fields()
]
# Get all submissions for current page
submissions = self.get_submission_class().objects.filter(page=self)
for submission in submissions:
data = submission.get_data()
# Count results for each question
for name, label in data_fields:
answer = data.get(name)
if answer is None:
# Something wrong with data.
# Probably you have changed questions
# and now we are receiving answers for old questions.
# Just skip them.
continue
if type(answer) is list:
# Answer is a list if the field type is 'Checkboxes'
answer = u', '.join(answer)
question_stats = results.get(label, {})
question_stats[answer] = question_stats.get(answer, 0) + 1
results[label] = question_stats
context.update({
'results': results,
})
return context
Next, you need to transform your template to display the results:
{% load wagtailcore_tags %}
<html>
<head>
<title>{{ page.title }}</title>
</head>
<body>
<h1>{{ page.title }}</h1>
<h2>Results</h2>
{% for question, answers in results.items %}
<h3>{{ question }}</h3>
{% for answer, count in answers.items %}
<div>{{ answer }}: {{ count }}</div>
{% endfor %}
{% endfor %}
<div>{{ page.intro|richtext }}</div>
<form action="{% pageurl page %}" method="POST">
{% csrf_token %}
{{ form.as_p }}
<input type="submit">
</form>
</body>
</html>
You can also show the results on the landing page.
Sitemap generator
This document describes how to create XML sitemaps for your Wagtail website using the wagtail.contrib.wagtailsitemaps module.
Note
As of Wagtail 1.10 the Django contrib sitemap app is used to generate sitemaps. However since Wagtail requires the Site instance to be available during the sitemap generation you will have to use the views from the wagtail.contrib.wagtailsitemaps.views module instead of the views provided by Django (django.contrib.sitemaps.views).
The usage of these views is otherwise identical, which means that customisation and caching of the sitemaps are done using the default Django patterns. See the Django documentation for in-depth information.
Basic configuration
You firstly need to add "django.contrib.sitemaps" to INSTALLED_APPS in your Django settings file:
INSTALLED_APPS = [ ... "django.contrib.sitemaps", ]
Then, in urls.py, you need to add a link to the wagtail.contrib.wagtailsitemaps.views.sitemap view which generates the sitemap:
from wagtail.contrib.wagtailsitemaps.views import sitemap
urlpatterns = [
...
url('^sitemap\.xml$', sitemap),
...
# Ensure that the 'sitemap' line appears above the default Wagtail page serving route
url(r'', include(wagtail_urls)),
]
You should now be able to browse to /sitemap.xml and see the sitemap working. By default, all published pages in your website will be added to the site map.
Setting the hostname
By default, the sitemap uses the hostname defined in the Wagtail Admin’s Sites area. If your default site is called localhost, then URLs in the sitemap will look like:
<url> <loc>http://localhost/about/</loc> <lastmod>2015-09-26</lastmod> </url>
For tools like Google Search Tools to properly index your site, you need to set a valid, crawlable hostname. If you change the site’s hostname from localhost to mysite.com, sitemap.xml will contain the correct URLs:
<url> <loc>http://mysite.com/about/</loc> <lastmod>2015-09-26</lastmod> </url>
Find out more about working with Sites.
Customising
The Page class defines a get_sitemap_urls method which you can override to customise sitemaps per Page instance. This method must return a list of dictionaries, one dictionary per URL entry in the sitemap. You can exclude pages from the sitemap by returning an empty list.
Each dictionary can contain the following:
- location (required) - This is the full URL path to add into the sitemap.
- lastmod - A python date or datetime set to when the page was last modified.
- changefreq
- priority
You can add more but you will need to override the sitemap.xml template in order for them to be displayed in the sitemap.
Serving multiple sitemaps
If you want to support the sitemap indexes from Django then you will need to use the index view from wagtail.contrib.sitemaps.views instead of the index view from django.contrib.sitemaps.views. Please see the Django documentation for further details.
Frontend cache invalidator
- Changed in version 0.7:
Multiple backend support added
Cloudflare support added
- Changed in version 1.7:
Amazon CloudFront support added
Many websites use a frontend cache such as Varnish, Squid, Cloudflare or CloudFront to gain extra performance. The downside of using a frontend cache though is that they don’t respond well to updating content and will often keep an old version of a page cached after it has been updated.
This document describes how to configure Wagtail to purge old versions of pages from a frontend cache whenever a page gets updated.
Setting it up
Firstly, add "wagtail.contrib.wagtailfrontendcache" to your INSTALLED_APPS:
INSTALLED_APPS = [ ... "wagtail.contrib.wagtailfrontendcache" ]
Changed in version 0.8: Signal handlers are now automatically registered
The wagtailfrontendcache module provides a set of signal handlers which will automatically purge the cache whenever a page is published or deleted. These signal handlers are automatically registered when the wagtail.contrib.wagtailfrontendcache app is loaded.
Add a new item into the WAGTAILFRONTENDCACHE setting and set the BACKEND parameter to wagtail.contrib.wagtailfrontendcache.backends.HTTPBackend. This backend requires an extra parameter LOCATION which points to where the cache is running (this must be a direct connection to the server and cannot go through another proxy).
# settings.py
WAGTAILFRONTENDCACHE = {
'varnish': {
'BACKEND': 'wagtail.contrib.wagtailfrontendcache.backends.HTTPBackend',
'LOCATION': 'http://localhost:8000',
},
}
Finally, make sure you have configured your frontend cache to accept PURGE requests:
Firstly, you need to register an account with Cloudflare if you haven’t already got one. You can do this here: Cloudflare Sign up
Add an item into the WAGTAILFRONTENDCACHE and set the BACKEND parameter to wagtail.contrib.wagtailfrontendcache.backends.CloudflareBackend. This backend requires three extra parameters, EMAIL (your Cloudflare account email), TOKEN (your API token from Cloudflare), and ZONEID (for zone id for your domain, see below).
To find the ZONEID for your domain, read the Cloudflare API Documentation
# settings.py
WAGTAILFRONTENDCACHE = {
'cloudflare': {
'BACKEND': 'wagtail.contrib.wagtailfrontendcache.backends.CloudflareBackend',
'EMAIL': 'your-cloudflare-email-address@example.com',
'TOKEN': 'your cloudflare api token',
'ZONEID': 'your cloudflare domain zone id',
},
}
Within Amazon Web Services you will need at least one CloudFront web distribution. If you don’t have one, you can get one here: CloudFront getting started
Add an item into the WAGTAILFRONTENDCACHE and set the BACKEND parameter to wagtail.contrib.wagtailfrontendcache.backends.CloudfrontBackend. This backend requires one extra parameter, DISTRIBUTION_ID (your CloudFront generated distribution id).
WAGTAILFRONTENDCACHE = {
'cloudfront': {
'BACKEND': 'wagtail.contrib.wagtailfrontendcache.backends.CloudfrontBackend',
'DISTRIBUTION_ID': 'your-distribution-id',
},
}
Configuration of credentials can done in multiple ways. You won’t need to store them in your Django settings file. You can read more about this here: Boto 3 Docs
In case you run multiple sites with Wagtail and each site has its CloudFront distribution, provide a mapping instead of a single distribution. Make sure the mapping matches with the hostnames provided in your site settings.
WAGTAILFRONTENDCACHE = {
'cloudfront': {
'BACKEND': 'wagtail.contrib.wagtailfrontendcache.backends.CloudfrontBackend',
'DISTRIBUTION_ID': {
'www.wagtail.io': 'your-distribution-id',
'www.madewithwagtail.org': 'your-distribution-id',
},
},
}
Note
In most cases, absolute URLs with www prefixed domain names should be used in your mapping. Only drop the www prefix if you’re absolutely sure you’re not using it (e.g. a subdomain).
Advanced usage
By default, Wagtail will only purge one URL per page. If your page has more than one URL to be purged, you will need to override the get_cached_paths method on your page type.
class BlogIndexPage(Page):
def get_blog_items(self):
# This returns a Django paginator of blog items in this section
return Paginator(self.get_children().live().type(BlogPage), 10)
def get_cached_paths(self):
# Yield the main URL
yield '/'
# Yield one URL per page in the paginator to make sure all pages are purged
for page_number in range(1, self.get_blog_items().num_pages + 1):
yield '/?page=' + str(page_number)
Another problem is pages that list other pages (such as a blog index) will not be purged when a blog entry gets added, changed or deleted. You may want to purge the blog index page so the updates are added into the listing quickly.
This can be solved by using the purge_page_from_cache utility function which can be found in the wagtail.contrib.wagtailfrontendcache.utils module.
Let’s take the the above BlogIndexPage as an example. We need to register a signal handler to run when one of the BlogPages get updated/deleted. This signal handler should call the purge_page_from_cache function on all BlogIndexPages that contain the BlogPage being updated/deleted.
# models.py
from django.dispatch import receiver
from django.db.models.signals import pre_delete
from wagtail.wagtailcore.signals import page_published
from wagtail.contrib.wagtailfrontendcache.utils import purge_page_from_cache
...
def blog_page_changed(blog_page):
# Find all the live BlogIndexPages that contain this blog_page
for blog_index in BlogIndexPage.objects.live():
if blog_page in blog_index.get_blog_items().object_list:
# Purge this blog index
purge_page_from_cache(blog_index)
@receiver(page_published, sender=BlogPage):
def blog_published_handler(instance):
blog_page_changed(instance)
@receiver(pre_delete, sender=BlogPage)
def blog_deleted_handler(instance):
blog_page_changed(instance)
wagtail.contrib.wagtailfrontendcache.utils provides another function called purge_url_from_cache. As the name suggests, this purges an individual URL from the cache.
For example, this could be useful for purging a single page of blogs:
from wagtail.contrib.wagtailfrontendcache.utils import purge_url_from_cache
# Purge the first page of the blog index
purge_url_from_cache(blog_index.url + '?page=1')
RoutablePageMixin
The RoutablePageMixin mixin provides a convenient way for a page to respond on multiple sub-URLs with different views. For example, a blog section on a site might provide several different types of index page at URLs like /blog/2013/06/, /blog/authors/bob/, /blog/tagged/python/, all served by the same page instance.
A Page using RoutablePageMixin exists within the page tree like any other page, but URL paths underneath it are checked against a list of patterns. If none of the patterns match, control is passed to subpages as usual (or failing that, a 404 error is thrown).
Installation
Add "wagtail.contrib.wagtailroutablepage" to your INSTALLED_APPS:
INSTALLED_APPS = [ ... "wagtail.contrib.wagtailroutablepage", ]
The basics
To use RoutablePageMixin, you need to make your class inherit from both wagtail.contrib.wagtailroutablepage.models.RoutablePageMixin and wagtail.wagtailcore.models.Page, then define some view methods and decorate them with wagtail.contrib.wagtailroutablepage.models.route.
Here’s an example of an EventPage with three views:
from wagtail.wagtailcore.models import Page
from wagtail.contrib.wagtailroutablepage.models import RoutablePageMixin, route
class EventPage(RoutablePageMixin, Page):
...
@route(r'^$')
def current_events(self, request):
"""
View function for the current events page
"""
...
@route(r'^past/$')
def past_events(self, request):
"""
View function for the past events page
"""
...
# Multiple routes!
@route(r'^year/(\d+)/$')
@route(r'^year/current/$')
def events_for_year(self, request, year=None):
"""
View function for the events for year page
"""
...
Reversing URLs
RoutablePageMixin adds a reverse_subpage() method to your page model which you can use for reversing URLs. For example:
# The URL name defaults to the view method name.
>>> event_page.reverse_subpage('events_for_year', args=(2015, ))
'year/2015/'
This method only returns the part of the URL within the page. To get the full URL, you must append it to the values of either the url or the full_url attribute on your page:
>>> event_page.url + event_page.reverse_subpage('events_for_year', args=(2015, ))
'/events/year/2015/'
>>> event_page.full_url + event_page.reverse_subpage('events_for_year', args=(2015, ))
'http://example.com/events/year/2015/'
The route name defaults to the name of the view. You can override this name with the name keyword argument on @route:
from wagtail.wagtailcore.models import Page
from wagtail.contrib.wagtailroutablepage.models import RoutablePageMixin, route
class EventPage(RoutablePageMixin, Page):
...
@route(r'^year/(\d+)/$', name='year')
def events_for_year(self, request, year):
"""
View function for the events for year page
"""
...
>>> event_page.reverse_subpage('year', args=(2015, ))
'/events/year/2015/'
The RoutablePageMixin class
- class
wagtail.contrib.wagtailroutablepage.models.RoutablePageMixin¶ This class can be mixed in to a Page model, allowing extra routes to be added to it.
- classmethod
get_subpage_urls()
-
resolve_subpage(path)¶ This method takes a URL path and finds the view to call.
Example:
view, args, kwargs = page.resolve_subpage('/past/') response = view(request, *args, **kwargs)
-
reverse_subpage(name, args=None, kwargs=None)¶ This method takes a route name/arguments and returns a URL path.
Example:
url = page.url + page.reverse_subpage('events_for_year', kwargs={'year': '2014'})
- classmethod
The routablepageurl template tag
routablepageurlis similar topageurl, but works withRoutablePages. It behaves like a hybrid between the built-inreverse, andpageurlfrom Wagtail.pageis the RoutablePage that URLs will be generated from.url_nameis a URL name defined inpage.subpage_urls.Positional arguments and keyword arguments should be passed as normal positional arguments and keyword arguments.
Example:
{% load wagtailroutablepage_tags %} {% routablepageurl page "feed" %} {% routablepageurl page "archive" 2014 08 14 %} {% routablepageurl page "food" foo="bar" baz="quux" %}
Wagtail API v1
Warning
This documentation covers the deprecated version 1 of the API, which is provided for backwards compatibility only. For the current version, see Wagtail API
The wagtailapi module can be used to create a read-only, JSON-based API for public Wagtail content.
There are three endpoints to the API:
- Pages:
/api/v1/pages/ - Images:
/api/v1/images/ - Documents:
/api/v1/documents/
See Wagtail API Installation and Wagtail API Configuration if you’re looking to add this module to your Wagtail site.
See Wagtail API Usage Guide for documentation on the API.
Index
To install, add wagtail.contrib.wagtailapi and rest_framework to INSTALLED_APPS in your Django settings and configure a URL for it in urls.py:
# settings.py
INSTALLED_APPS = [
...
'wagtail.contrib.wagtailapi',
'rest_framework',
]
# urls.py
from wagtail.contrib.wagtailapi import urls as wagtailapi_urls
urlpatterns = [
...
url(r'^api/', include(wagtailapi_urls)),
...
# Ensure that the wagtailapi_urls line appears above the default Wagtail page serving route
url(r'', include(wagtail_urls)),
]
WAGTAILAPI_BASE_URL (required when using frontend cache invalidation)
This is used in two places, when generating absolute URLs to document files and invalidating the cache.
Generating URLs to documents will fall back the the current request’s hostname if this is not set. Cache invalidation cannot do this, however, so this setting must be set when using this module alongside the wagtailfrontendcache module.
WAGTAILAPI_SEARCH_ENABLED (default: True)
Setting this to false will disable full text search. This applies to all endpoints.
WAGTAILAPI_LIMIT_MAX (default: 20)
This allows you to change the maximum number of results a user can request at a time. This applies to all endpoints.
By default, the pages endpoint only includes the id, title and type fields in both the listing and detail views.
You can add more fields to the pages endpoint by setting an attribute called api_fields to a list of field names:
class BlogPage(Page):
posted_by = models.CharField()
posted_at = models.DateTimeField()
content = RichTextField()
api_fields = ['posted_by', 'posted_at', 'content']
This list also supports child relations (which will be nested inside the returned JSON document):
class BlogPageRelatedLink(Orderable):
page = ParentalKey('BlogPage', related_name='related_links')
link = models.URLField()
api_fields = ['link']
class BlogPage(Page):
posted_by = models.CharField()
posted_at = models.DateTimeField()
content = RichTextField()
api_fields = ['posted_by', 'posted_at', 'content', 'related_links']
If you have a Varnish, Squid, Cloudflare or CloudFront instance in front of your API, the wagtailapi module can automatically invalidate cached responses for you whenever they are updated in the database.
To enable it, firstly configure the wagtail.contrib.wagtailfrontendcache module within your project (see [Wagtail frontend cache docs](http://docs.wagtail.io/en/latest/contrib_components/frontendcache.html) for more information).
Then make sure that the WAGTAILAPI_BASE_URL setting is set correctly (Example: WAGTAILAPI_BASE_URL = 'http://api.mysite.com').
Then finally, switch it on by setting WAGTAILAPI_USE_FRONTENDCACHE to True.
Performing a GET request against one of the endpoints will get you a listing of objects in that endpoint. The response will look something like this:
GET /api/v1/endpoint_name/
HTTP 200 OK
Content-Type: application/json
{
"meta": {
"total_count": "total number of results"
},
"endpoint_name": [
{
"id": 1,
"meta": {
"type": "app_name.ModelName",
"detail_url": "http://api.example.com/api/v1/endpoint_name/1/"
},
"field": "value"
},
{
"id": 2,
"meta": {
"type": "app_name.ModelName",
"detail_url": "http://api.example.com/api/v1/endpoint_name/2/"
},
"field": "different value"
}
]
}
This is the basic structure of all of the listing views. They all have a meta section with a total_count variable and a listing of things.
All of the endpoints also contain a “detail” view which returns information on an individual object. This view is always accessed by appending the id of the object to the URL.
pages endpoint¶This endpoint includes all live pages in your site that have not been put in a private section.
/api/v1/pages/)¶This is what a typical response from a GET request to this listing would look like:
GET /api/v1/pages/
HTTP 200 OK
Content-Type: application/json
{
"meta": {
"total_count": 2
},
"pages": [
{
"id": 2,
"meta": {
"type": "demo.HomePage",
"detail_url": "http://api.example.com/api/v1/pages/2/"
},
"title": "Homepage"
},
{
"id": 3,
"meta": {
"type": "demo.BlogIndexPage",
"detail_url": "http://api.example.com/api/v1/pages/3/"
},
"title": "Blog"
}
]
}
Each page object contains the id, a meta section and the fields with their values.
meta¶This section is used to hold “metadata” fields which aren’t fields in the database. Wagtail API adds two by default:
type- The app label/model name of the objectdetail_url- A URL linking to the detail view for this object
Most Wagtail sites are made up of multiple different types of page that each have their own specific fields. In order to view/filter/order on fields specific to one page type, you must select that page type using the type query parameter.
The type query parameter must be set to the Pages model name in the format: app_label.ModelName.
GET /api/v1/pages/?type=demo.BlogPage
HTTP 200 OK
Content-Type: application/json
{
"meta": {
"total_count": 3
},
"pages": [
{
"id": 4,
"meta": {
"type": "demo.BlogPage",
"detail_url": "http://api.example.com/api/v1/pages/4/"
},
"title": "My blog 1"
},
{
"id": 5,
"meta": {
"type": "demo.BlogPage",
"detail_url": "http://api.example.com/api/v1/pages/5/"
},
"title": "My blog 2"
},
{
"id": 6,
"meta": {
"type": "demo.BlogPage",
"detail_url": "http://api.example.com/api/v1/pages/6/"
},
"title": "My blog 3"
}
]
}
As you can see, we still only get the title field, even though we have selected a type. That’s because listing pages require you to explicitly tell it what extra fields you would like to see. You can do this with the fields query parameter.
Just set fields to a command-separated list of field names that you would like to use.
GET /api/v1/pages/?type=demo.BlogPage&fields=title,date_posted,feed_image
HTTP 200 OK
Content-Type: application/json
{
"meta": {
"total_count": 3
},
"pages": [
{
"id": 4,
"meta": {
"type": "demo.BlogPage",
"detail_url": "http://api.example.com/api/v1/pages/4/"
},
"title": "My blog 1",
"date_posted": "2015-01-23",
"feed_image": {
"id": 1,
"meta": {
"type": "wagtailimages.Image",
"detail_url": "http://api.example.com/api/v1/images/1/"
}
}
},
{
"id": 5,
"meta": {
"type": "demo.BlogPage",
"detail_url": "http://api.example.com/api/v1/pages/5/"
},
"title": "My blog 2",
"date_posted": "2015-01-24",
"feed_image": {
"id": 2,
"meta": {
"type": "wagtailimages.Image",
"detail_url": "http://api.example.com/api/v1/images/2/"
}
}
},
{
"id": 6,
"meta": {
"type": "demo.BlogPage",
"detail_url": "http://api.example.com/api/v1/pages/6/"
},
"title": "My blog 3",
"date_posted": "2015-01-25",
"feed_image": {
"id": 3,
"meta": {
"type": "wagtailimages.Image",
"detail_url": "http://api.example.com/api/v1/images/3/"
}
}
}
]
}
We now have enough information to make a basic blog listing with a feed image and date that the blog was posted.
Exact matches on field values can be done by using a query parameter with the same name as the field. Any pages with the field that exactly matches the value of this parameter will be returned.
GET /api/v1/pages/?type=demo.BlogPage&fields=title,date_posted&date_posted=2015-01-24
HTTP 200 OK
Content-Type: application/json
{
"meta": {
"total_count": 1
},
"pages": [
{
"id": 5,
"meta": {
"type": "demo.BlogPage",
"detail_url": "http://api.example.com/api/v1/pages/5/"
},
"title": "My blog 2",
"date_posted": "2015-01-24",
}
]
}
It is also possible to filter the listing to only include pages with a particular parent or ancestor. This is useful if you have multiple blogs on your site and only want to view the contents of one of them.
child_of
Filters the listing to only include direct children of the specified page.
For example, to get all the pages that are direct children of page 7.
GET /api/v1/pages/?child_of=7
HTTP 200 OK
Content-Type: application/json
{
"meta": {
"total_count": 1
},
"pages": [
{
"id": 4,
"meta": {
"type": "demo.BlogPage",
"detail_url": "http://api.example.com/api/v1/pages/4/"
},
"title": "Other blog 1"
}
]
}
descendant_of
Filters the listing to only include descendants of the specified page.
For example, to get all pages underneath the homepage:
GET /api/v1/pages/?descendant_of=2
HTTP 200 OK
Content-Type: application/json
{
"meta": {
"total_count": 1
},
"pages": [
{
"id": 3,
"meta": {
"type": "demo.BlogIndexPage",
"detail_url": "http://api.example.com/api/v1/pages/3/"
},
"title": "Blog"
},
{
"id": 4,
"meta": {
"type": "demo.BlogPage",
"detail_url": "http://api.example.com/api/v1/pages/4/"
},
"title": "My blog 1",
},
{
"id": 5,
"meta": {
"type": "demo.BlogPage",
"detail_url": "http://api.example.com/api/v1/pages/5/"
},
"title": "My blog 2",
},
{
"id": 6,
"meta": {
"type": "demo.BlogPage",
"detail_url": "http://api.example.com/api/v1/pages/6/"
},
"title": "My blog 3",
}
]
}
Like filtering, it is also possible to order on database fields. The endpoint accepts a query parameter called order which should be set to the field name to order by. Field names can be prefixed with a - to reverse the ordering. It is also possible to order randomly by setting this parameter to random.
GET /api/v1/pages/?type=demo.BlogPage&fields=title,date_posted,feed_image&order=-date_posted
HTTP 200 OK
Content-Type: application/json
{
"meta": {
"total_count": 3
},
"pages": [
{
"id": 6,
"meta": {
"type": "demo.BlogPage",
"detail_url": "http://api.example.com/api/v1/pages/6/"
},
"title": "My blog 3",
"date_posted": "2015-01-25",
"feed_image": {
"id": 3,
"meta": {
"type": "wagtailimages.Image",
"detail_url": "http://api.example.com/api/v1/images/3/"
}
}
},
{
"id": 5,
"meta": {
"type": "demo.BlogPage",
"detail_url": "http://api.example.com/api/v1/pages/5/"
},
"title": "My blog 2",
"date_posted": "2015-01-24",
"feed_image": {
"id": 2,
"meta": {
"type": "wagtailimages.Image",
"detail_url": "http://api.example.com/api/v1/images/2/"
}
}
},
{
"id": 4,
"meta": {
"type": "demo.BlogPage",
"detail_url": "http://api.example.com/api/v1/pages/4/"
},
"title": "My blog 1",
"date_posted": "2015-01-23",
"feed_image": {
"id": 1,
"meta": {
"type": "wagtailimages.Image",
"detail_url": "http://api.example.com/api/v1/images/1/"
}
}
}
]
}
Pagination is done using two query parameters called limit and offset. limit sets the number of results to return and offset is the index of the first result to return. The default and maximum value for limit is 20. The maximum value can be changed using the WAGTAILAPI_LIMIT_MAX setting.
GET /api/v1/pages/?limit=1&offset=1
HTTP 200 OK
Content-Type: application/json
{
"meta": {
"total_count": 2
},
"pages": [
{
"id": 3,
"meta": {
"type": "demo.BlogIndexPage",
"detail_url": "http://api.example.com/api/v1/pages/3/"
},
"title": "Blog"
}
]
}
Pagination will not change the total_count value in the meta.
To perform a full-text search, set the search parameter to the query string you would like to search on.
GET /api/v1/pages/?search=Blog
HTTP 200 OK
Content-Type: application/json
{
"meta": {
"total_count": 3
},
"pages": [
{
"id": 3,
"meta": {
"type": "demo.BlogIndexPage",
"detail_url": "http://api.example.com/api/v1/pages/3/"
},
"title": "Blog"
},
{
"id": 4,
"meta": {
"type": "demo.BlogPage",
"detail_url": "http://api.example.com/api/v1/pages/4/"
},
"title": "My blog 1",
},
{
"id": 5,
"meta": {
"type": "demo.BlogPage",
"detail_url": "http://api.example.com/api/v1/pages/5/"
},
"title": "My blog 2",
},
{
"id": 6,
"meta": {
"type": "demo.BlogPage",
"detail_url": "http://api.example.com/api/v1/pages/6/"
},
"title": "My blog 3",
}
]
}
The results are ordered by relevance. It is not possible to use the order parameter with a search query.
If your Wagtail site is using Elasticsearch, you do not need to select a type to access specific fields. This will search anything that’s defined in the models’ search_fields.
/api/v1/pages/{id}/)¶This view gives you access to all of the details for a particular page.
GET /api/v1/pages/6/
HTTP 200 OK
Content-Type: application/json
{
"id": 6,
"meta": {
"type": "demo.BlogPage",
"detail_url": "http://api.example.com/api/v1/pages/6/"
},
"parent": {
"id": 3,
"meta": {
"type": "demo.BlogIndexPage",
"detail_url": "http://api.example.com/api/v1/pages/3/"
}
},
"title": "My blog 3",
"date_posted": "2015-01-25",
"feed_image": {
"id": 3,
"meta": {
"type": "wagtailimages.Image",
"detail_url": "http://api.example.com/api/v1/images/3/"
}
},
"related_links": [
{
"title": "Other blog page",
"page": {
"id": 5,
"meta": {
"type": "demo.BlogPage",
"detail_url": "http://api.example.com/api/v1/pages/5/"
}
}
}
]
}
- The format is the same as that which is returned inside the listing view, with two additions:
- All of the available fields are added to the detail page by default
- A
parentfield has been included that contains information about the parent page
images endpoint¶This endpoint gives access to all uploaded images. This will use the custom image model if one was specified. Otherwise, it falls back to wagtailimages.Image.
/api/v1/images/)¶This is what a typical response from a GET request to this listing would look like:
GET /api/v1/images/
HTTP 200 OK
Content-Type: application/json
{
"meta": {
"total_count": 3
},
"images": [
{
"id": 4,
"meta": {
"type": "wagtailimages.Image",
"detail_url": "http://api.example.com/api/v1/images/4/"
},
"title": "Wagtail by Mark Harkin"
},
{
"id": 5,
"meta": {
"type": "wagtailimages.Image",
"detail_url": "http://api.example.com/api/v1/images/5/"
},
"title": "James Joyce"
},
{
"id": 6,
"meta": {
"type": "wagtailimages.Image",
"detail_url": "http://api.example.com/api/v1/images/6/"
},
"title": "David Mitchell"
}
]
}
Each image object contains the id and title of the image.
width, height and other fields¶Like the pages endpoint, the images endpoint supports the fields query parameter.
By default, this will allow you to add the width and height fields to your results. If your Wagtail site uses a custom image model, it is possible to have more.
GET /api/v1/images/?fields=title,width,height
HTTP 200 OK
Content-Type: application/json
{
"meta": {
"total_count": 3
},
"images": [
{
"id": 4,
"meta": {
"type": "wagtailimages.Image",
"detail_url": "http://api.example.com/api/v1/images/4/"
},
"title": "Wagtail by Mark Harkin",
"width": 640,
"height": 427
},
{
"id": 5,
"meta": {
"type": "wagtailimages.Image",
"detail_url": "http://api.example.com/api/v1/images/5/"
},
"title": "James Joyce",
"width": 500,
"height": 392
},
{
"id": 6,
"meta": {
"type": "wagtailimages.Image",
"detail_url": "http://api.example.com/api/v1/images/6/"
},
"title": "David Mitchell",
"width": 360,
"height": 282
}
]
}
Exact matches on field values can be done by using a query parameter with the same name as the field. Any images with the field that exactly matches the value of this parameter will be returned.
GET /api/v1/pages/?title=James Joyce
HTTP 200 OK
Content-Type: application/json
{
"meta": {
"total_count": 3
},
"images": [
{
"id": 5,
"meta": {
"type": "wagtailimages.Image",
"detail_url": "http://api.example.com/api/v1/images/5/"
},
"title": "James Joyce"
}
]
}
The images endpoint also accepts the order parameter which should be set to a field name to order by. Field names can be prefixed with a - to reverse the ordering. It is also possible to order randomly by setting this parameter to random.
GET /api/v1/images/?fields=title,width&order=width
HTTP 200 OK
Content-Type: application/json
{
"meta": {
"total_count": 3
},
"images": [
{
"id": 6,
"meta": {
"type": "wagtailimages.Image",
"detail_url": "http://api.example.com/api/v1/images/6/"
},
"title": "David Mitchell",
"width": 360
},
{
"id": 5,
"meta": {
"type": "wagtailimages.Image",
"detail_url": "http://api.example.com/api/v1/images/5/"
},
"title": "James Joyce",
"width": 500
},
{
"id": 4,
"meta": {
"type": "wagtailimages.Image",
"detail_url": "http://api.example.com/api/v1/images/4/"
},
"title": "Wagtail by Mark Harkin",
"width": 640
}
]
}
Pagination is done using two query parameters called limit and offset. limit sets the number of results to return and offset is the index of the first result to return. The default and maximum value for limit is 20. The maximum value can be changed using the WAGTAILAPI_LIMIT_MAX setting.
GET /api/v1/images/?limit=1&offset=1
HTTP 200 OK
Content-Type: application/json
{
"meta": {
"total_count": 3
},
"images": [
{
"id": 5,
"meta": {
"type": "wagtailimages.Image",
"detail_url": "http://api.example.com/api/v1/images/5/"
},
"title": "James Joyce",
"width": 500,
"height": 392
}
]
}
Pagination will not change the total_count value in the meta.
To perform a full-text search, set the search parameter to the query string you would like to search on.
GET /api/v1/images/?search=James
HTTP 200 OK
Content-Type: application/json
{
"meta": {
"total_count": 1
},
"pages": [
{
"id": 5,
"meta": {
"type": "wagtailimages.Image",
"detail_url": "http://api.example.com/api/v1/images/5/"
},
"title": "James Joyce",
"width": 500,
"height": 392
}
]
}
Like the pages endpoint, the results are ordered by relevance and it is not possible to use the order parameter with a search query.
/api/v1/images/{id}/)¶This view gives you access to all of the details for a particular image.
GET /api/v1/images/5/
HTTP 200 OK
Content-Type: application/json
{
"id": 5,
"meta": {
"type": "wagtailimages.Image",
"detail_url": "http://api.example.com/api/v1/images/5/"
},
"title": "James Joyce",
"width": 500,
"height": 392
}
documents endpoint¶This endpoint gives access to all uploaded documents.
/api/v1/documents/)¶The documents listing supports the same features as the images listing (documented above) but works with Documents instead.
/api/v1/documents/{id}/)¶This view gives you access to all of the details for a particular document.
GET /api/v1/documents/1/
HTTP 200 OK
Content-Type: application/json
{
"id": 1,
"meta": {
"type": "wagtaildocs.Document",
"detail_url": "http://api.example.com/api/v1/documents/1/",
"download_url": "http://api.example.com/documents/1/usage.md"
},
"title": "Wagtail API usage"
}
ModelAdmin
The modeladmin module allows you to create customisable listing pages for any model in your Wagtail project, and add navigation elements to the Wagtail admin area so that you can access them. Simply extend the ModelAdmin class, override a few attributes to suit your needs, register it with Wagtail using an easy one-line modeladmin_register method (you can copy and paste from the examples below), and you’re good to go.
You can use it with any Django model (it doesn’t need to extend Page or be registered as a Snippet), and it won’t interfere with any of the existing admin functionality that Wagtail provides.
Summary of features
- A customisable list view, allowing you to control what values are displayed for each row, available options for result filtering, default ordering, and more.
- Access your list views from the Wagtail admin menu easily with automatically generated menu items, with automatic ‘active item’ highlighting. Control the label text and icons used with easy-to-change attributes on your class.
- An additional
ModelAdminGroupclass, that allows you to group your related models, and list them together in their own submenu, for a more logical user experience. - Simple, robust add and edit views for your non-Page models that use the panel configurations defined on your model using Wagtail’s edit panels.
- For Page models, the system directs to Wagtail’s existing add and edit views, and returns you back to the correct list page, for a seamless experience.
- Full respect for permissions assigned to your Wagtail users and groups. Users will only be able to do what you want them to!
- All you need to easily hook your
ModelAdminclasses into Wagtail, taking care of URL registration, menu changes, and registering any missing model permissions, so that you can assign them to Groups. - Built to be customisable - While
modeladminprovides a solid experience out of the box, you can easily use your own templates, and theModelAdminclass has a large number of methods that you can override or extend, allowing you to customise the behaviour to a greater degree.
Want to know more about customising ModelAdmin?
modeladmin customisation primer¶The modeladmin app is designed to offer you as much flexibility as possible in how your model and its objects are represented in Wagtail’s CMS. This page aims to provide you with some background information to help you gain a better understanding of what the app can do, and to point you in the right direction, depending on the kind of customisations you’re looking to make.
ModelAdmin class isn’t the same as Django’s¶Wagtail’s ModelAdmin class is designed to be used in a similar way to Django’s class of the same name, and often uses the same attribute and method names to achieve similar things. However, there are a few key differences:
panels and edit_handlers¶In Wagtail, controlling which fields appear in add/edit forms for your Model, and defining how they are grouped and ordered, is achieved by adding a panels attribute, or edit_handler to your Model class. This remains the same whether your model is a Page type, a snippet, or just a standard Django Model. Because of this, Wagtail’s ModelAdmin class is mostly concerned with ‘listing’ configuration. For example, list_display, list_filter and search_fields attributes are present and support largely the same values as Django’s ModelAdmin class, while fields, fieldsets, exclude and other attributes you may be used to using to configure Django’s add/edit views, simply aren’t supported by Wagtail’s version.
While modeladmin‘s listing view and it’s supported customisation options work in exactly the same way for all types of Model, when it comes to the other management views, the treatment differs depending on whether your ModelAdmin class is representing a page type model (that extends wagtailcore.models.Page) or not.
Pages in Wagtail have some unique properties, and require additional views, interface elements and general treatment in order to be managed effectively. For example, they have a tree structure that must be preserved properly as pages are added, deleted and moved around. They also have a revisions system, their own permission considerations, and the facility to preview changes before saving changes. Because of this added complexity Wagtail provides its own specific views for managing any custom page types you might add to your project; whether you create a ModelAdmin class for them, or not.
In order to deliver a consistent experience for users, modeladmin simply redirects users to Wagtail’s existing page management views wherever possible. You should bare this in mind if you ever find yourself wanting to change what happens when pages of a certain type are added, deleted, published, or have some other action applied to them. Customising the CreateView or EditView for your a page type Model (even it just to add an additional stylesheet or javascript), simply won’t have any effect, as those views are not used.
If you do find yourself needing to customise the add, edit or other behaviour for a page type model, you should take a look at the following part of the documentation: Hooks.
ModelAdmin class is ‘modular’¶Unlike Django’s class of the same name, wagtailadmin’s ModelAmin acts primarily as a ‘controller’ class. While it does have a set of attributes and methods to enable you to configure how various components should treat your model, it has been deliberately designed to do as little work as possible by itself; it designates all of the real work to a set of separate, swappable components.
The theory is: If you want to do something differently, or add some functionality that modeladmin doesn’t already have, you can create new classes (or extend the ones provided by modeladmin) and easily configure your ModelAdmin class to use them instead of the defaults.
- Learn more about Overriding views
- Learn more about Overriding helper classes
You should familarise yourself with the attributes and methods supported by the ModelAdmin class, that allow you to change what is displayed in the IndexView. The following page should give you everything you need to get going: Customising IndexView - the listing view
The ModelAdmin class provides several attributes to enable you to easily add additional stylesheets and javascript to the admin interface for your model. Each atttribute simply needs to be a list of paths to the files you want to include. If the path is for a file in your project’s static directory, Wagtail will automatically prepended paths for each path with STATIC_URL, so you don’t need to repeat it each time in your list of paths.
If you’d like to add styles or scripts to the IndexView, you should set the following attributes:
index_view_extra_css- Where each item is the path name of a pre-compiled stylesheet that you’d like to include.index_view_extra_js- Where each item is the path name of a javascript file that you’d like to include.
If you’d like to do the same for CreateView and EditView, you should set the following attributes:
form_view_extra_css- Where each item is the path name of a pre-compiled stylesheet that you’d like to include.form_view_extra_js- Where each item is the path name of a javascript file that you’d like to include.
And if you’re using the InspectView for your model, and want to do the same for that view, your should set the following attributes:
inspect_view_extra_css- Where each item is the path name of a pre-compiled stylesheet that you’d like to include.inspect_view_extra_js- Where each item is the path name of a javascript file that you’d like to include.
For all modeladmin views, Wagtail looks for templates in the following folders within your project, before resorting to the defaults:
/modeladmin/app-name/model-name//modeladmin/app-name//modeladmin/
So, to override the template used by IndexView for example, you’d create a new index.html template and put it in one of those locations. For example, if you wanted to do this for an ArticlePage model in a news app, you’d add your custom template as modeladmin/news/article/index.html.
For reference, modeladmin looks for templates with the following names for each view:
'index.html'forIndexView'inspect.html'forInspectView'create.html'forCreateView'edit.html'forEditView'delete.html'forDeleteView'choose_parent.html'forChooseParentView
If for any reason you’d rather bypass this behaviour and explicitly specify a template for a specific view, you can set either of the following attributes on your ModelAdmin class:
index_template_nameto specify a template forIndexViewinspect_template_nameto specify a template forInspectViewcreate_template_nameto specify a template forCreateViewedit_template_nameto specify a template forEditViewdelete_template_nameto specify a template forDeleteViewchoose_parent_template_nameto specify a template forChooseParentView
For all of the views offered by ModelAdmin, the class provides an attribute that you can override, to tell it which class you’d like to use:
index_view_classinspect_view_classcreate_view_class(not used for ‘page type’ models)edit_view_class(not used for ‘page type’ models)delete_view_class(not used for ‘page type’ models)choose_parent_view_class(only used for ‘page type’ models)
For example, if you’d like to create your own view class and use it for the IndexView, you would do the following:
from wagtail.contrib.modeladmin.views import IndexView
from wagtail.contrib.modeladmin.options import ModelAdmin
from .models import MyModel
class MyCustomIndexView(IndexView):
# New functionality and exising method overrides added here
...
class MyModelAdmin(ModelAdmin):
model = MyModel
index_view_class = MyModelIndexView
Or, if you have no need for any of IndexView‘s exisiting functionality in your view, and would rather create your own view from scratch, modeladmin will support that, too. However, it’s highly recommended that you use modeladmin.views.WMABaseView as a base for your view. It’ll make integrating with your ModelAdmin class much easier, and provides a bunch of useful attributes and methods to get you started.
While ‘view classes’ are responsible for a lot of the work, there are also a number of other tasks that modeladmin must do regularly, that need to be handled in a consistent way, and in a number of different places. These tasks are designated to set of simple classes (in modeladmin, these are termed ‘helper’ classes) and can be found in wagtail.contrib.modeladmin.helpers.
If you ever intend to write and use your own custom views with modeladmin, you should familiarise yourself with these helpers, as they are made available to views via the modeladmin.views.WMABaseView view.
There are three types of ‘helper class’:
- URL helpers - That help with the consistent generation, naming and referencing of urls.
- Permission helpers - That help with ensuring only users with sufficient permissions can perform certain actions, or see options to perform those actions.
- Button helpers - That, with the help of the other two, helps with the generation of buttons for use in a number of places.
The ModelAdmin class allows you to define and use your own helper classes by setting values on the following attributes:
ModelAdmin.url_helper_class¶By default, the modeladmin.helpers.url.PageAdminURLHelper class is used when your model extends wagtailcore.models.Page, otherwise modeladmin.helpers.url.AdminURLHelper is used.
If you find that the above helper classes don’t cater for your needs, you can easily create your own helper class, by sub-classing AdminURLHelper or PageAdminURLHelper (if your model extend’s Wagtail’s Page model), and making any neccessary additions/overrides.
Once your class is defined, set the url_helper_class attribute on your ModelAdmin class to use your custom URLHelper, like so:
from wagtail.contrib.modeladmin.helpers import AdminURLHelper
from wagtail.contrib.modeladmin.options import ModelAdmin, modeladmin_register
from .models import MyModel
class MyURLHelper(AdminURLHelper):
...
class MyModelAdmin(ModelAdmin):
model = MyModel
url_helper_class = MyURLHelper
modeladmin_register(MyModelAdmin)
Or, if you have a more complicated use case, where simply setting that attribute isn’t possible (due to circular imports, for example) or doesn’t meet your needs, you can override the get_url_helper_class method, like so:
class MyModelAdmin(ModelAdmin):
model = MyModel
def get_url_helper_class(self):
if self.some_attribute is True:
return MyURLHelper
return AdminURLHelper
ModelAdmin.permission_helper_class¶By default, the modeladmin.helpers.permission.PagePermissionHelper class is used when your model extends wagtailcore.models.Page, otherwise modeladmin.helpers.permission.PermissionHelper is used.
If you find that the above helper classes don’t cater for your needs, you can easily create your own helper class, by sub-classing PermissionHelper or (if your model extend’s Wagtail’s Page model) PagePermissionHelper, and making any neccessary additions/overrides. Once defined, you set the permission_helper_class attribute on your ModelAdmin class to use your custom class instead of the default, like so:
from wagtail.contrib.modeladmin.helpers import PermissionHelper
from wagtail.contrib.modeladmin.options import ModelAdmin, modeladmin_register
from .models import MyModel
class MyPermissionHelper(PermissionHelper):
...
class MyModelAdmin(ModelAdmin):
model = MyModel
permission_helper_class = MyPermissionHelper
modeladmin_register(MyModelAdmin)
Or, if you have a more complicated use case, where simply setting an attribute isn’t possible or doesn’t meet your needs, you can override the get_permission_helper_class method, like so:
class MyModelAdmin(ModelAdmin):
model = MyModel
def get_get_permission_helper_class(self):
if self.some_attribute is True:
return MyPermissionHelper
return PermissionHelper
ModelAdmin.button_helper_class¶By default, the modeladmin.helpers.button.PageButtonHelper class is used when your model extends wagtailcore.models.Page, otherwise modeladmin.helpers.button.ButtonHelper is used.
If you wish to add or change buttons for your model’s IndexView, you’ll need to create your own button helper class, by sub-classing ButtonHelper or (if your model extend’s Wagtail’s Page model) PageButtonHelper, and make any neccessary additions/overrides. Once defined, you set the button_helper_class attribute on your ModelAdmin class to use your custom class instead of the default, like so:
from wagtail.contrib.modeladmin.helpers import ButtonHelper
from wagtail.contrib.modeladmin.options import ModelAdmin, modeladmin_register
from .models import MyModel
class MyButtonHelper(ButtonHelper):
...
class MyModelAdmin(ModelAdmin):
model = MyModel
button_helper_class = MyButtonHelper
modeladmin_register(MyModelAdmin)
Or, if you have a more complicated use case, where simply setting an attribute isn’t possible or doesn’t meet your needs, you can override the get_button_helper_class method, like so:
class MyModelAdmin(ModelAdmin):
model = MyModel
def get_button_helper_class(self):
if self.some_attribute is True:
return MyButtonHelper
return ButtonHelper
As long as you sub-class modeladmin.views.WMABaseView (or one of the more ‘specific’ view classes) to create your custom view, instances of each helper should be available on instances of your class as:
self.url_helperself.permission_helperself.button_helper
Unlike the other two, self.button_helper isn’t populated right away when the view is instantiated. In order to show the right buttons for the right users, ButtonHelper instances need to be ‘request aware’, so self.button_helper is only set once the view’s dispatch() method has run, which takes a HttpRequest object as an argument, from which the current user can be identified.
IndexView - the listing view¶For the sake of consistency, this section of the docs will refer to the listing view as IndexView, because that is the view class that does all the heavy lifting.
You can use the following attributes and methods on the ModelAdmin class to alter how your model data is treated and represented by the IndexView.
ModelAdmin.list_displayModelAdmin.list_filterModelAdmin.search_fieldsModelAdmin.orderingModelAdmin.list_per_pageModelAdmin.get_queryset()ModelAdmin.get_extra_attrs_for_row()ModelAdmin.get_extra_class_names_for_field_col()ModelAdmin.get_extra_attrs_for_field_col()wagtail.contrib.modeladmin.mixins.ThumbnailMixinModelAdmin.list_display_add_buttonsModelAdmin.index_view_extra_cssModelAdmin.index_view_extra_jsModelAdmin.index_template_nameModelAdmin.index_view_class
ModelAdmin.list_display¶Expected value: A list or tuple, where each item is the name of a field or single-argument callable on your model, or a similarly simple method defined on the ModelAdmin class itself.
Default value: ('__str__',)
Set list_display to control which fields are displayed in the IndexView for your model.
Example
` list_display = ('first_name', 'last_name') `
You have three possible values that can be used in list_display:
A field of the model. For example:
from wagtail.contrib.modeladmin.options import ModelAdmin from .models import Person class PersonAdmin(ModelAdmin): model = Person list_display = ('first_name', 'last_name')
The name of a custom method on your
ModelAdminclass, that accepts a single parameter for the model instance. For example:from wagtail.contrib.modeladmin.options import ModelAdmin from .models import Person class PersonAdmin(ModelAdmin): model = Person list_display = ('upper_case_name',) def upper_case_name(self, obj): return ("%s %s" % (obj.first_name, obj.last_name)).upper() upper_case_name.short_description = 'Name'
The name of a method on your
Modelclass that accepts onlyselfas an argument. For example:from django.db import models from wagtail.contrib.modeladmin.options import ModelAdmin class Person(models.Model): name = models.CharField(max_length=50) birthday = models.DateField() def decade_born_in(self): return self.birthday.strftime('%Y')[:3] + "0's" decade_born_in.short_description = 'Birth decade' class PersonAdmin(ModelAdmin): model = Person list_display = ('name', 'decade_born_in')
A few special cases to note about list_display:
If the field is a
ForeignKey, Django will display the output of__str__()(__unicode__()on Python 2) of the related object.If the string provided is a method of the model or
ModelAdminclass, Django will HTML-escape the output by default. To escape user input and allow your own unescaped tags, useformat_html(). For example:from django.db import models from django.utils.html import format_html from wagtail.contrib.modeladmin.options import ModelAdmin class Person(models.Model): first_name = models.CharField(max_length=50) last_name = models.CharField(max_length=50) color_code = models.CharField(max_length=6) def colored_name(self): return format_html( '<span style="color: #{};">{} {}</span>', self.color_code, self.first_name, self.last_name, ) class PersonAdmin(ModelAdmin): model = Person list_display = ('first_name', 'last_name', 'colored_name')
If the value of a field is
None, an empty string, or an iterable without elements, Wagtail will display a dash (-) for that column. You can override this by settingempty_value_displayon yourModelAdminclass. For example:from wagtail.contrib.modeladmin.options import ModelAdmin class PersonAdmin(ModelAdmin): empty_value_display = 'N/A' ...
Or, if you’d like to change the value used depending on the field, you can override
ModelAdmin‘sget_empty_value_display()method, like so:from django.db import models from wagtail.contrib.modeladmin.options import ModelAdmin class Person(models.Model): name = models.CharField(max_length=100) nickname = models.CharField(blank=True, max_length=100) likes_cat_gifs = models.NullBooleanField() class PersonAdmin(ModelAdmin): model = Person list_display = ('name', 'nickname', 'likes_cat_gifs') def get_empty_value_display(self, field_name=None): if field_name == 'nickname': return 'None given' if field_name == 'likes_cat_gifs': return 'Unanswered' return super(self, PersonAdmin).get_empty_value_display(field_name)
The
__str__()(__unicode__()on Python 2) method is just as valid inlist_displayas any other model method, so it’s perfectly OK to do this:list_display = ('__str__', 'some_other_field')
By default, the ability to sort results by an item in
list_displayis only offered when it’s a field that has an actual database value (because sorting is done at the database level). However, if the output of the method is representative of a database field, you can indicate this fact by setting theadmin_order_fieldattribute on that method, like so:from django.db import models from django.utils.html import format_html from wagtail.contrib.modeladmin.options import ModelAdmin class Person(models.Model): first_name = models.CharField(max_length=50) last_name = models.CharField(max_length=50) color_code = models.CharField(max_length=6) def colored_first_name(self): return format_html( '<span style="color: #{};">{}</span>', self.color_code, self.first_name, ) colored_first_name.admin_order_field = 'first_name' class PersonAdmin(ModelAdmin): model = Person list_display = ('first_name', 'colored_name')
The above will tell Wagtail to order by the
first_namefield when trying to sort bycolored_first_namein the index view.To indicate descending order with
admin_order_fieldyou can use a hyphen prefix on the field name. Using the above example, this would look like:colored_first_name.admin_order_field = '-first_name'
admin_order_fieldsupports query lookups to sort by values on related models, too. This example includes an “author first name” column in the list display and allows sorting it by first name:from django.db import models class Blog(models.Model): title = models.CharField(max_length=255) author = models.ForeignKey(Person, on_delete=models.CASCADE) def author_first_name(self, obj): return obj.author.first_name author_first_name.admin_order_field = 'author__first_name'
Elements of
list_displaycan also be properties. Please note however, that due to the way properties work in Python, settingshort_descriptionon a property is only possible when using theproperty()function and not with the@propertydecorator.For example:
from django.db import models from wagtail.contrib.modeladmin.options import ModelAdmin class Person(models.Model): first_name = models.CharField(max_length=50) last_name = models.CharField(max_length=50) def full_name_property(self): return self.first_name + ' ' + self.last_name full_name_property.short_description = "Full name of the person" full_name = property(full_name_property) class PersonAdmin(ModelAdmin): list_display = ('full_name',)
ModelAdmin.list_filter¶Expected value: A list or tuple, where each item is the name of model field of type BooleanField, CharField, DateField, DateTimeField, IntegerField or ForeignKey.
Set list_filter to activate filters in the right sidebar of the list page for your model. For example:
class PersonAdmin(ModelAdmin):
list_filter = ('is_staff', 'company')
ModelAdmin.search_fields¶Expected value: A list or tuple, where each item is the name of a model field of type CharField, TextField, RichTextField or StreamField.
Set search_fields to enable a search box at the top of the index page for your model. You should add names of any fields on the model that should be searched whenever somebody submits a search query using the search box.
Searching is all handled via Django’s queryset API, rather than using Wagtail’s search backend. This means it will work for all models, whatever search backend your project is using, and without any additional setup or configuration.
ModelAdmin.ordering¶Expected value: A list or tuple in the same format as a model’s [ordering](https://docs.djangoproject.com/en/1.9/ref/contrib/admin/#django.contrib.admin.ModelAdmin.list_display) parameter.
Set ordering to specify the default ordering of objects when listed by IndexView. If not provided, the model’s default ordering will be respected.
If you need to specify a dynamic order (for example, depending on user or language) you can override the get_ordering() method instead.
ModelAdmin.list_per_page¶Expected value: A positive integer
Set list_per_page to control how many items appear on each paginated page of the index view. By default, this is set to 100.
ModelAdmin.get_queryset()¶Must return: A QuerySet
The get_queryset method returns the ‘base’ queryset for your model, to which any filters and search queries are applied. By default, the all() method of your model’s default manager is used. But, if for any reason you only want a certain sub-set of objects to appear in the IndexView listing, overriding the get_queryset method on your ModelAdmin class can help you with that. The method takes an HttpRequest object as a parameter, so limiting objects by the current logged-in user is possible.
For example:
from django.db import models
from wagtail.contrib.modeladmin.options import ModelAdmin
class Person(models.Model):
first_name = models.CharField(max_length=50)
last_name = models.CharField(max_length=50)
managed_by = models.ForeignKey(`auth.User`, on_delete=models.CASCADE)
class PersonAdmin(ModelAdmin):
list_display = ('first_name', 'last_name')
def get_queryset(self, request):
qs = super(PersonAdmin, self).get_queryset(request)
# Only show people managed by the current user
return qs.filter(managed_by=request.user)
ModelAdmin.get_extra_attrs_for_row()¶Must return: A dictionary
The get_extra_attrs_for_row method allows you to add html attributes to the opening <tr> tag for each result, in addition to the data-object_pk and class attributes already added by the result_row_display tag.
If you want to add additional CSS classes, simply provide those class names as a string value using the class key, and the odd/even will be appended to your custom class names when rendering.
For example, if you wanted to add some additional class names based on field values, you could do something like:
from decimal import Decimal
from django.db import models
from wagtail.contrib.modeladmin.options import ModelAdmin
class BankAccount(models.Model):
name = models.CharField(max_length=50)
account_number = models.CharField(max_length=50)
balance = models.DecimalField(max_digits=5, num_places=2)
class BankAccountAdmin(ModelAdmin):
list_display = ('name', 'account_number', 'balance')
def get_extra_attrs_for_row(self, obj, context):
if obj.balance < Decimal('0.00'):
classname = 'balance-negative'
else:
classname = 'balance-positive'
return {
'class': classname,
}
ModelAdmin.get_extra_class_names_for_field_col()¶Must return: A list
The get_extra_class_names_for_field_col method allows you to add additional CSS class names to any of the columns defined by list_display for your model. The method takes two parameters:
obj: the object being represented by the current rowfield_name: the item fromlist_displaybeing represented by the current column
For example, if you’d like to apply some conditional formatting to a cell depending on the row’s value, you could do something like:
from decimal import Decimal
from django.db import models
from wagtail.contrib.modeladmin.options import ModelAdmin
class BankAccount(models.Model):
name = models.CharField(max_length=50)
account_number = models.CharField(max_length=50)
balance = models.DecimalField(max_digits=5, num_places=2)
class BankAccountAdmin(ModelAdmin):
list_display = ('name', 'account_number', 'balance')
def get_extra_class_names_for_field_col(self, obj, field_name):
field_name == 'balance':
if balance <= Decimal('-100.00'):
return ['brand-danger']
if balance <= Decimal('-0.00'):
return ['brand-warning']
if balance <= Decimal('-50.00'):
return ['brand-info']
else:
return ['brand-success']
return []
ModelAdmin.get_extra_attrs_for_field_col()¶Must return: A dictionary
The get_extra_attrs_for_field_col method allows you to add additional HTML attributes to any of the columns defined in list_display. Like the get_extra_class_names_for_field_col method above, this method takes two parameters:
obj: the object being represented by the current rowfield_name: the item fromlist_displaybeing represented by the current column
For example, you might like to add some tooltip text to a certain column, to help give the value more context:
from django.db import models
from wagtail.contrib.modeladmin.options import ModelAdmin
class Person(models.Model):
name = models.CharField(max_length=100)
likes_cat_gifs = models.NullBooleanField()
class PersonAdmin(ModelAdmin):
model = Person
list_display = ('name', 'likes_cat_gifs')
def get_extra_attrs_for_field_col(self, obj, field_name=None):
attrs = super(PersonAdmin, self).get_extra_attrs_for_field_col(obj, field_name)
if field_name == 'likes_cat_gifs' and obj.likes_cat_gifs is None:
attrs.update({
'title': (
'The person was shown several cat gifs, but failed to '
'indicate a preference.'
),
})
return attrs
Or you might like to add one or more data attributes to help implement some kind of interactivity using javascript:
from django.db import models
from wagtail.contrib.modeladmin.options import ModelAdmin
class Event(models.Model):
title = models.CharField(max_length=255)
start_date = models.DateField()
end_date = models.DateField()
start_time = models.TimeField()
end_time = models.TimeField()
class EventAdmin(ModelAdmin):
model = Event
list_display = ('title', 'start_date', 'end_date')
def get_extra_attrs_for_field_col(self, obj, field_name=None):
attrs = super(EventAdmin, self).get_extra_attrs_for_field_col(obj, field_name)
if field_name == 'start_date':
# Add the start time as data to the 'start_date' cell
attrs.update({ 'data-time': obj.start_time.strftime('%H:%M') })
elif field_name == 'end_date':
# Add the end time as data to the 'end_date' cell
attrs.update({ 'data-time': obj.end_time.strftime('%H:%M') })
return attrs
wagtail.contrib.modeladmin.mixins.ThumbnailMixin¶If you’re using wagtailimages.Image to define an image for each item in your model, ThumbnailMixin can help you add thumbnail versions of that image to each row in IndexView. To use it, simply extend ThumbnailMixin as well as ModelAdmin when defining your ModelAdmin class, and change a few attributes to change the thumbnail to your liking, like so:
from django.db import models
from wagtail.contrib.modeladmin.mixins import ThumbnailMixin
from wagtail.contrib.modeladmin.options import ModelAdmin
class Person(models.Model):
name = models.CharField(max_length=255)
avatar = models.ForeignKey('wagtailimages.Image', on_delete=models.SET_NULL, null=True)
likes_cat_gifs = models.NullBooleanField()
class PersonAdmin(ThumbnailMixin, ModelAdmin):
# Add 'admin_thumb' to list_display, where you want the thumbnail to appear
list_display = ('admin_thumb', 'name', 'likes_cat_gifs')
# Optionally tell IndexView to add buttons to a different column (if the
# first column contains the thumbnail, the buttons are likely better off
# displayed elsewhere)
list_display_add_buttons = 'name'
"""
Set 'thumb_image_field_name' to the name of the ForeignKey field that
links to 'wagtailimages.Image'
"""
thumb_image_field_name = 'avatar'
# Optionally override the filter spec used to create each thumb
thumb_image_filter_spec = 'fill-100x100' # this is the default
# Optionally override the 'width' attribute value added to each img tag
thumb_image_width = 50 # this is the default
# Optionally override the class name added to each img tag
thumb_classname = 'admin-thumb' # this is the default
# Optionally override the text that appears in the column header
thumb_col_header_text = 'image' # this is the default
# Optionally specify a fallback image to be used when the object doesn't
# have an image set, or the image has been deleted. It can an image from
# your static files folder, or an external URL.
thumb_default = 'http://lorempixel.com/100/100'
ModelAdmin.list_display_add_buttons¶Expected value: A string matching one of the items in list_display.
If for any reason you’d like to change which column the action buttons appear in for each row, you can specify a different column using list_display_add_buttons on your ModelAdmin class. The value must match one of the items your class’s list_display attribute. By default, buttons are added to the first column of each row.
See the ThumbnailMixin example above to see how list_display_add_buttons can be used.
ModelAdmin.index_view_extra_css¶Expected value: A list of path names of additional stylesheets to be added to the IndexView
See the following part of the docs to find out more: Adding additional stylesheets and/or javascript
ModelAdmin.index_view_extra_js¶Expected value: A list of path names of additional js files to be added to the IndexView
See the following part of the docs to find out more: Adding additional stylesheets and/or javascript
ModelAdmin.index_template_name¶Expected value: The path to a custom template to use for IndexView
See the following part of the docs to find out more: Overriding templates
ModelAdmin.index_view_class¶Expected value: A custom view class to replace modeladmin.views.IndexView
See the following part of the docs to find out more: Overriding views
CreateView, EditView and DeleteView¶NOTE: modeladmin only provides ‘create’, ‘edit’ and ‘delete’ functionality for non page type models (i.e. models that do not extend wagtailcore.models.Page). If your model is a ‘page type’ model, customising any of the following will not have any effect:
CreateView & EditView¶edit_handler can be used on any Django models.Model class, just like it can be used for Page models or other models registered as Snippets in Wagtail.
To change the way your MyPageModel is displayed in the CreateView and the EditView, simply define an edit_handler or panels attribute on your model class.
class MyPageModel(models.Model):
first_name = models.CharField(max_length=100)
last_name = models.CharField(max_length=100)
address = models.TextField()
panels = [
MultiFieldPanel([
FieldRowPanel([
FieldPanel('first_name', classname='fn'),
FieldPanel('last_name', classname='ln'),
]),
FieldPanel('address', classname='custom1',))
]
Or alternatively:
class MyPageModel(models.Model):
first_name = models.CharField(max_length=100)
last_name = models.CharField(max_length=100)
address = models.TextField()
custom_panels = [
MultiFieldPanel([
FieldRowPanel([
FieldPanel('first_name', classname='fn'),
FieldPanel('last_name', classname='ln'),
]),
FieldPanel('address', classname='custom1',))
]
edit_handler = ObjectList(custom_panels)
# or
edit_handler = TabbedInterface([ObjectList(custom_panels), ObjectList(...)])
ModelAdmin.form_view_extra_css¶Expected value: A list of path names of additional stylesheets to be added to CreateView and EditView
See the following part of the docs to find out more: Adding additional stylesheets and/or javascript
ModelAdmin.form_view_extra_js¶Expected value: A list of path names of additional js files to be added to CreateView and EditView
See the following part of the docs to find out more: Adding additional stylesheets and/or javascript
ModelAdmin.create_template_name¶Expected value: The path to a custom template to use for CreateView
See the following part of the docs to find out more: Overriding templates
ModelAdmin.create_view_class¶Expected value: A custom view class to replace modeladmin.views.CreateView
See the following part of the docs to find out more: Overriding views
ModelAdmin.edit_template_name¶Expected value: The path to a custom template to use for EditView
See the following part of the docs to find out more: Overriding templates
ModelAdmin.edit_view_class¶Expected value: A custom view class to replace modeladmin.views.EditView
See the following part of the docs to find out more: Overriding views
ModelAdmin.delete_template_name¶Expected value: The path to a custom template to use for DeleteView
See the following part of the docs to find out more: Overriding templates
ModelAdmin.delete_view_class¶Expected value: A custom view class to replace modeladmin.views.DeleteView
See the following part of the docs to find out more: Overriding views
ModelAdmin.form_fields_exclude¶Expected value: A list or tuple of fields names
When using CreateView or EditView to create or update model instances, this value will be passed to the edit form, so that any named fields will be excluded from the form. This is particularly useful when registering ModelAdmin classes for models from third-party apps, where defining panel configurations on the Model itself is more complicated.
InspectView¶The InspectView is disabled by default, as it’s not often useful for most models. However, if you need a view that enables users to view more detailed information about an instance without the option to edit it, you can easily enable the inspect view by setting inspect_view_enabled=True on your ModelAdmin class.
When enabled, an ‘Inspect’ button will automatically appear for each row in your index / listing view, linking to new page that shows values a list of field values for that particular object.
By default, all ‘concrete’ fields (where the field value is stored as a column in the database table for your model) will be shown. You can customise what values are displayed by adding the following attributes to your ModelAdmin class:
ModelAdmin.inspect_view_fields¶Expected value: A list or tuple, where each item is the name of a field or attribute on the instance that you’d like InpectView to render.
A sensible value will be rendered for most field types.
If you have wagtail.wagtailimages installed, and the value happens to be an instance of wagtailimages.models.Image (or a custom model that subclasses wagtailimages.models.AbstractImage), a thumbnail of that image will be rendered.
If you have wagtail.wagtaildocs installed, and the value happens to be an instance of wagtaildocs.models.Document (or a custom model that subclasses wagtaildocs.models.AbstractDocument), a link to that document will be rendered, along with the document title, file extension and size.
ModelAdmin.inspect_view_fields_exclude¶Expected value: A list or tuple, where each item is the name of a field that you’d like to exclude from InpectView
Note: If both inspect_view_fields and inspect_view_fields_exclude are set, inspect_view_fields_exclude will be ignored.
ModelAdmin.inspect_view_extra_css¶Expected value: A list of path names of additional stylesheets to be added to the InspectView
See the following part of the docs to find out more: Adding additional stylesheets and/or javascript
ModelAdmin.inspect_view_extra_js¶Expected value: A list of path names of additional js files to be added to the InspectView
See the following part of the docs to find out more: Adding additional stylesheets and/or javascript
ModelAdmin.inspect_template_name¶Expected value: The path to a custom template to use for InspectView
See the following part of the docs to find out more: Overriding templates
ModelAdmin.inspect_view_class¶Expected value: A custom view class to replace modeladmin.views.InspectView
See the following part of the docs to find out more: Overriding views
ChooseParentView¶When adding a new page via Wagtail’s explorer view, you essentially choose where you want to add a new page by navigating the relevant part of the page tree and choosing to ‘add a child page’ to your chosen parent page. Wagtail then asks you to select what type of page you’d like to add.
When adding a page from a ModelAdmin list page, we know what type of page needs to be added, but we might not automatically know where in the page tree it should be added. If there’s only one possible choice of parent for a new page (as defined by setting parent_page_types and subpage_types attributes on your models), then we skip a step and use that as the parent. Otherwise, the user must specify a parent page using modeladmin’s ChooseParentView.
It should be very rare that you need to customise this view, but in case you do, modeladmin offers the following attributes that you can override:
ModelAdmin.choose_parent_template_name¶Expected value: The path to a custom template to use for ChooseParentView
See the following part of the docs to find out more: Overriding templates
ModelAdmin.choose_parent_view_class¶Expected value: A custom view class to replace modeladmin.views.ChooseParentView
See the following part of the docs to find out more: Overriding views
Add wagtail.contrib.modeladmin to your INSTALLED_APPS:
INSTALLED_APPS = [
...
'wagtail.contrib.modeladmin',
]
You have a model in your app, and you want a listing page specifically for that model, with a menu item added to the menu in the Wagtail admin area so that you can get to it.
wagtail_hooks.py in your app directory would look something like this:
from wagtail.contrib.modeladmin.options import (
ModelAdmin, modeladmin_register)
from .models import MyPageModel
class MyPageModelAdmin(ModelAdmin):
model = MyPageModel
menu_label = 'Page Model' # ditch this to use verbose_name_plural from model
menu_icon = 'date' # change as required
menu_order = 200 # will put in 3rd place (000 being 1st, 100 2nd)
add_to_settings_menu = False # or True to add your model to the Settings sub-menu
exclude_from_explorer = False # or True to exclude pages of this type from Wagtail's explorer view
list_display = ('title', 'example_field2', 'example_field3', 'live')
list_filter = ('live', 'example_field2', 'example_field3')
search_fields = ('title',)
# Now you just need to register your customised ModelAdmin class with Wagtail
modeladmin_register(MyPageModelAdmin)
You have an app with several models that you want to show grouped together in Wagtail’s admin menu. Some of the models might extend Page, and others might be simpler models, perhaps registered as Snippets, perhaps not. No problem! ModelAdminGroup allows you to group them all together nicely.
wagtail_hooks.py in your app directory would look something like this:
from wagtail.contrib.modeladmin.options import (
ModelAdmin, ModelAdminGroup, modeladmin_register)
from .models import (
MyPageModel, MyOtherPageModel, MySnippetModel, SomeOtherModel)
class MyPageModelAdmin(ModelAdmin):
model = MyPageModel
menu_label = 'Page Model' # ditch this to use verbose_name_plural from model
menu_icon = 'doc-full-inverse' # change as required
list_display = ('title', 'example_field2', 'example_field3', 'live')
list_filter = ('live', 'example_field2', 'example_field3')
search_fields = ('title',)
class MyOtherPageModelAdmin(ModelAdmin):
model = MyOtherPageModel
menu_label = 'Other Page Model' # ditch this to use verbose_name_plural from model
menu_icon = 'doc-full-inverse' # change as required
list_display = ('title', 'example_field2', 'example_field3', 'live')
list_filter = ('live', 'example_field2', 'example_field3')
search_fields = ('title',)
class MySnippetModelAdmin(ModelAdmin):
model = MySnippetModel
menu_label = 'Snippet Model' # ditch this to use verbose_name_plural from model
menu_icon = 'snippet' # change as required
list_display = ('title', 'example_field2', 'example_field3')
list_filter = ('example_field2', 'example_field3')
search_fields = ('title',)
class SomeOtherModelAdmin(ModelAdmin):
model = SomeOtherModel
menu_label = 'Some other model' # ditch this to use verbose_name_plural from model
menu_icon = 'snippet' # change as required
list_display = ('title', 'example_field2', 'example_field3')
list_filter = ('example_field2', 'example_field3')
search_fields = ('title',)
class MyModelAdminGroup(ModelAdminGroup):
menu_label = 'My App'
menu_icon = 'folder-open-inverse' # change as required
menu_order = 200 # will put in 3rd place (000 being 1st, 100 2nd)
items = (MyPageModelAdmin, MyOtherPageModelAdmin, MySnippetModelAdmin, SomeOtherModelAdmin)
# When using a ModelAdminGroup class to group several ModelAdmin classes together,
# you only need to register the ModelAdminGroup class with Wagtail:
modeladmin_register(MyModelAdminGroup)
wagtail_hooks.py file¶If you have an app with more than one model that you wish to manage, or even multiple models you wish to group together with ModelAdminGroup classes, that’s possible. Just register each of your ModelAdmin classes using modeladmin_register, and they’ll work as expected.
class MyPageModelAdmin(ModelAdmin):
model = MyPageModel
...
class MyOtherPageModelAdmin(ModelAdmin):
model = MyOtherPageModel
...
class MyModelAdminGroup(ModelAdminGroup):
label = _("Group 1")
items = (ModelAdmin1, ModelAdmin2)
...
class MyOtherModelAdminGroup(ModelAdminGroup):
label = _("Group 2")
items = (ModelAdmin3, ModelAdmin4)
...
modeladmin_register(MyPageModelAdmin)
modeladmin_register(MyOtherPageModelAdmin)
modeladmin_register(MyModelAdminGroup)
modeladmin_register(MyOtherModelAdminGroup)
PostgreSQL search engine
New in version 1.10.
This contrib module provides a search engine backend for Wagtail using PostgreSQL full-text search capabilities.
Warning
Features:
- Supports all the search features available in Wagtail.
- Easy to install and adds no external dependency or service.
- Excellent performance for sites with up to 200 000 pages. Stays decent for sites up to a million pages.
- Faster to reindex than Elasticsearch if you use PostgreSQL 9.5 or more.
The only known downsides concern :
Downsides:
SearchField(partial_match=True)is not handled.- Due to a PostgreSQL limitation,
SearchField(boost=…)is only partially respected. It is changed so that there can only be 4 different boosts. If you define 4 or less different boosts, everything will be perfectly accurate. However, your search will be a little less accurate if you define more than 4 different boosts. That being said, it will work and be roughly the same. - When Specifying the fields to search, the index is not used, so it will be slow on huge sites.
- Still when Specifying the fields to search, you cannot search on a specific method.
Installation
Add 'wagtail.contrib.postgres_search', anywhere in your INSTALLED_APPS:
INSTALLED_APPS = [
...
'wagtail.contrib.postgres_search',
...
]
Then configure Wagtail to use it as a search backend. Give it the alias ‘default’ if you want it to be the default search backend:
WAGTAILSEARCH_BACKENDS = {
'default': {
'BACKEND': 'wagtail.contrib.postgres_search.backend',
},
}
After installing the module, run python manage.py migrate to create the necessary postgres_search_indexentry table.
You then need to index data inside this backend using the update_index command. You can reuse this command whenever you want. However, it should not be needed after a first usage since the search engine is automatically updated when data is modified. To disable this behaviour, see AUTO_UPDATE.
Configuration
Use the additional 'SEARCH_CONFIG' key to define which PostgreSQL search configuration should be used. For example:
WAGTAILSEARCH_BACKENDS = {
'default': {
'BACKEND': 'wagtail.contrib.postgres_search.backend',
'SEARCH_CONFIG': 'english',
}
}
As you can deduce, a PostgreSQL search configuration is mostly used to define rules for a language, English in this case. A search configuration consists in a compilation of algorithms (parsers & analysers) and language specifications (stop words, stems, dictionaries, synonyms, thesauruses, etc. ).
A few search configurations are already defined by default in PostgreSQL, you can list them using sudo -u postgres psql -c "\dF" in a Unix shell or by using this SQL query: SELECT cfgname FROM pg_catalog.pg_ts_config.
These already-defined search configurations are decent, but they’re basic compared to commercial search engines. If you want a nicer support of your language, you will have to create your own PostgreSQL search configuration. See the PostgreSQL documentation for an example, the list of parsers and a guide to use dictionaries.
Like the Elasticsearch backend, this backend supports ATOMIC_REBUILD:
WAGTAILSEARCH_BACKENDS = {
'default': {
'BACKEND': 'wagtail.contrib.postgres_search.backend',
'ATOMIC_REBUILD': True,
}
}
This is nearly useless with this backend. In Elasticsearch, all data is removed before rebuilding the index. But in this PostgreSQL backend, only objects no longer in the database are removed. Then the index is progressively updated, with no moment where the index is empty.
However, if you want to be extra sure that nothing wrong happens while updating the index, you can use atomic rebuild. The index will be rebuilt but nobody will have access to it until reindex is complete. If any error occurs during the operation, all changes to the index are reverted as if reindexing never happened.
Promoted search results
Changed in version 1.1: Before Wagtail 1.1, promoted search results were implemented in the wagtail.wagtailsearch core module and called “editors picks”.
The searchpromotions module provides the models and user interface for managing “Promoted search results” and displaying them in a search results page.
“Promoted search results” allow editors to explicitly link relevant content to search terms, so results pages can contain curated content in addition to results from the search engine.
Installation
The searchpromotions module is not enabled by default. To install it, add wagtail.contrib.wagtailsearchpromotions to INSTALLED_APPS in your project’s Django settings file.
INSTALLED_APPS = [
...
'wagtail.contrib.wagtailsearchpromotions',
]
This app contains migrations so make sure you run the migrate django-admin command after installing.
Usage
Once installed, a new menu item called “Promoted search results” should appear in the “Settings” menu. This is where you can assign pages to popular search terms.
To retrieve a list of promoted search results for a particular search query, you can use the {% get_search_promotions %} template tag from the wagtailsearchpromotions_tags templatetag library:
{% load wagtailcore_tags wagtailsearchpromotions_tags %}
...
{% get_search_promotions search_query as search_promotions %}
<ul>
{% for search_promotion in search_promotions %}
<li>
<a href="{% pageurl search_promotion.page %}">
<h2>{{ search_promotion.page.title }}</h2>
<p>{{ search_promotion.description }}</p>
</a>
</li>
{% endfor %}
</ul>
TableBlock
The TableBlock module provides an HTML table block type for StreamField. This module uses handsontable to provide users with the ability to create and edit HTML tables in Wagtail.

Installation
Add "wagtail.contrib.table_block" to your INSTALLED_APPS:
INSTALLED_APPS = [ ... "wagtail.contrib.table_block", ]
Basic Usage
After installation the TableBlock module can be used in a similar fashion to other StreamField blocks in the Wagtail core.
Just import the TableBlock from wagtail.contrib.table_block.blocks import TableBlock and add it to your StreamField declaration.
class DemoStreamBlock(StreamBlock): ... table = TableBlock()
Advanced Usage
When defining a TableBlock, Wagtail provides the ability to pass an optional table_options dictionary. The default TableBlock dictionary looks like this:
default_table_options = { 'minSpareRows': 0, 'startRows': 3, 'startCols': 3, 'colHeaders': False, 'rowHeaders': False, 'contextMenu': True, 'editor': 'text', 'stretchH': 'all', 'height': 108, 'language': language, 'renderer': 'text', 'autoColumnSize': False, }
Every key in the table_options dictionary maps to a handsontable option. These settings can be changed to alter the behaviour of tables in Wagtail. The following options are available:
- minSpareRows - The number of rows to append to the end of an empty grid. The default setting is 0.
- startRows - The default number of rows for a new table.
- startCols - The default number of columns for new tables.
- colHeaders - Can be set to
TrueorFalse. This setting designates if new tables should be created with column rows. Note: this only sets the behaviour for newly created tables. Page editors can override this by checking the the “Column header” checkbox in the table editor in the Wagtail admin. - rowHeaders - Operates the same as colHeaders to designate if new tables should be created with the first row as a header. Just like colHeaders this option can be overridden by the page editor in the Wagtail admin.
- contextMenu - Enables or disables the handsontable right-click menu. By default this is set to
True. - editor - Defines the editor used for table cells. The default setting is text.
- stretchH - Sets the default horizontal resizing of tables. Options include, ‘none’, ‘last’, and ‘all’. By default TableBlock uses ‘all’ for the even resizing of columns.
- height - The default height of the grid. By default TableBlock sets the height to
108for the optimal appearance of new tables in the editor. This is optimized for tables withstartRowsset to3. If you change the number of startRows in the configuration you might need to change theheightsetting to improve the default appearence in the editor. - language - The default language setting. By default TableBlock tries to get the language from
django.utils.translation.get_language. If needed, this setting can be overridden here. - renderer - The default setting handsontable uses to render the content of table cells.
- autoColumnSize - Enables or disables the autoColumnSize plugin. The TableBlock default setting is
False.
A complete list of handsontable options can be found on the handsontable website.
To change the default table options just pass a new table_options dictionary when a new TableBlock is declared.
new_table_options = { 'minSpareRows': 0, 'startRows': 6, 'startCols': 4, 'colHeaders': False, 'rowHeaders': False, 'contextMenu': True, 'editor': 'text', 'stretchH': 'all', 'height': 216, 'language': 'en', 'renderer': 'text', 'autoColumnSize': False, } class DemoStreamBlock(StreamBlock): ... table = TableBlock(table_options=new_table_options)
Site settings
Site-wide settings that are editable by administrators in the Wagtail admin.
Form builder
Allows forms to be created by admins and provides an interface for browsing form submissions.
Sitemap generator
Provides a view that generates a Google XML sitemap of your public Wagtail content.
Frontend cache invalidator
A module for automatically purging pages from a cache (Varnish, Squid, Cloudflare or Cloudfront) when their content is changed.
RoutablePageMixin
Provides a way of embedding Django URLconfs into pages.
Wagtail API v1
A module for adding a read only, JSON based web API to your Wagtail site
ModelAdmin
A module allowing for more customisable representation and management of custom models in Wagtail’s admin area.
Promoted search results
A module for managing “Promoted Search Results”
TableBlock
Provides a TableBlock for adding HTML tables to pages.
Management commands
publish_scheduled_pages
$ ./manage.py publish_scheduled_pages
This command publishes or unpublishes pages that have had these actions scheduled by an editor. It is recommended to run this command once an hour.
fixtree
$ ./manage.py fixtree
This command scans for errors in your database and attempts to fix any issues it finds.
move_pages
$ manage.py move_pages from to
This command moves a selection of pages from one section of the tree to another.
Options:
- from This is the id of the page to move pages from. All descendants of this page will be moved to the destination. After the operation is complete, this page will have no children.
- to This is the id of the page to move pages to.
update_index
$ ./manage.py update_index [--backend <backend name>]
This command rebuilds the search index from scratch. It is only required when using Elasticsearch.
It is recommended to run this command once a week and at the following times:
- whenever any pages have been created through a script (after an import, for example)
- whenever any changes have been made to models or search configuration
The search may not return any results while this command is running, so avoid running it at peak times.
Specifying which backend to update
By default, update_index will rebuild all the search indexes listed in WAGTAILSEARCH_BACKENDS.
If you have multiple backends and would only like to update one of them, you can use the --backend option.
For example, to update just the default backend:
$ python manage.py update_index --backend default
Indexing the schema only
You can prevent the update_index command from indexing any data by using the --schema-only option:
$ python manage.py update_index --schema-only
search_garbage_collect
$ ./manage.py search_garbage_collect
Wagtail keeps a log of search queries that are popular on your website. On high traffic websites, this log may get big and you may want to clean out old search queries. This command cleans out all search query logs that are more than one week old (or a number of days configurable through the WAGTAILSEARCH_HITS_MAX_AGE setting).
Hooks
On loading, Wagtail will search for any app with the file wagtail_hooks.py and execute the contents. This provides a way to register your own functions to execute at certain points in Wagtail’s execution, such as when a Page object is saved or when the main menu is constructed.
Registering functions with a Wagtail hook is done through the @hooks.register decorator:
from wagtail.wagtailcore import hooks
@hooks.register('name_of_hook')
def my_hook_function(arg1, arg2...)
# your code here
Alternatively, hooks.register can be called as an ordinary function, passing in the name of the hook and a handler function defined elsewhere:
hooks.register('name_of_hook', my_hook_function)
If you need your hooks to run in a particular order, you can pass the order parameter:
@hooks.register('name_of_hook', order=1) # This will run after every hook in the wagtail core
def my_hook_function(arg1, arg2...)
# your code here
@hooks.register('name_of_hook', order=-1) # This will run before every hook in the wagtail core
def my_other_hook_function(arg1, arg2...)
# your code here
@hooks.register('name_of_hook', order=2) # This will run after `my_hook_function`
def yet_another_hook_function(arg1, arg2...)
# your code here
The available hooks are listed below.
Admin modules
Hooks for building new areas of the admin interface (alongside pages, images, documents and so on).
construct_homepage_panels
Add or remove panels from the Wagtail admin homepage. The callable passed into this hook should take a
requestobject and a list ofpanels, objects which have arender()method returning a string. The objects also have anorderproperty, an integer used for ordering the panels. The default panels use integers between100and300.from django.utils.safestring import mark_safe from wagtail.wagtailcore import hooks class WelcomePanel(object): order = 50 def render(self): return mark_safe(""" <section class="panel summary nice-padding"> <h3>No, but seriously -- welcome to the admin homepage.</h3> </section> """) @hooks.register('construct_homepage_panels') def add_another_welcome_panel(request, panels): return panels.append( WelcomePanel() )
construct_homepage_summary_items
Add or remove items from the ‘site summary’ bar on the admin homepage (which shows the number of pages and other object that exist on the site). The callable passed into this hook should take arequestobject and a list ofSummaryItemobjects to be modified as required. These objects have arender()method, which returns an HTML string, and anorderproperty, which is an integer that specifies the order in which the items will appear.
describe_collection_contents
Called when Wagtail needs to find out what objects exist in a collection, if any. Currently this happens on the confirmation before deleting a collection, to ensure that non-empty collections cannot be deleted. The callable passed to this hook will receive acollectionobject, and should return eitherNone(to indicate no objects in this collection), or a dict containing the following keys:
count- A numeric count of items in this collection
count_text- A human-readable string describing the number of items in this collection, such as “3 documents”. (Sites with multi-language support should return a translatable string here, most likely using the
django.utils.translation.ungettextfunction.) url(optional)- A URL to an index page that lists the objects being described.
register_admin_urls
Register additional admin page URLs. The callable fed into this hook should return a list of Django URL patterns which define the structure of the pages and endpoints of your extension to the Wagtail admin. For more about vanilla Django URLconfs and views, see url dispatcher.
from django.http import HttpResponse from django.conf.urls import url from wagtail.wagtailcore import hooks def admin_view( request ): return HttpResponse( \ "I have approximate knowledge of many things!", \ content_type="text/plain") @hooks.register('register_admin_urls') def urlconf_time(): return [ url(r'^how_did_you_almost_know_my_name/$', admin_view, name='frank' ), ]
register_group_permission_panel
Add a new panel to the Groups form in the ‘settings’ area. The callable passed to this hook must return a ModelForm / ModelFormSet-like class, with a constructor that accepts a group object as itsinstancekeyword argument, and which implements the methodssave,is_valid, andas_admin_panel(which returns the HTML to be included on the group edit page).
register_admin_search_area
Add an item to the Wagtail admin search “Other Searches”. Behaviour of this hook is similar to
register_admin_menu_item. The callable passed to this hook must return an instance ofwagtail.wagtailadmin.search.SearchArea. New items can be constructed from theSearchAreaclass by passing the following parameters:
label: text displayed in the “Other Searches” option box. name: an internal name used to identify the search option; defaults to the slugified form of the label. url: the URL of the target search page. classnames: additional CSS classnames applied to the link, used to give it an icon. attrs: additional HTML attributes to apply to the link. order: an integer which determines the item’s position in the list of options. Setting the URL can be achieved using reverse() on the target search page. The GET parameter ‘q’ will be appended to the given URL.
A template tag,
search_otheris provided by thewagtailadmin_tagstemplate module. This tag takes a single, optional parameter,current, which allows you to specify thenameof the search option currently active. If the parameter is not given, the hook defaults to a reverse lookup of the page’s URL for comparison against theurlparameter.
SearchAreacan be subclassed to customise the HTML output, specify JavaScript files required by the option, or conditionally show or hide the item for specific requests (for example, to apply permission checks); see the source code (wagtail/wagtailadmin/search.py) for details.from django.core.urlresolvers import reverse from wagtail.wagtailcore import hooks from wagtail.wagtailadmin.search import SearchArea @hooks.register('register_admin_search_area') def register_frank_search_area(): return SearchArea('Frank', reverse('frank'), classnames='icon icon-folder-inverse', order=10000)
register_permissions
Return a queryset ofPermissionobjects to be shown in the Groups administration area.
filter_form_submissions_for_user
Allows access to form submissions to be customised on a per-user, per-form basis.
- This hook takes two parameters:
- The user attempting to access form submissions
- A
QuerySetof form pagesThe hook must return a
QuerySetcontaining a subset of these form pages which the user is allowed to access the submissions for.For example, to prevent non-superusers from accessing form submissions:
from wagtail.wagtailcore import hooks @hooks.register('filter_form_submissions_for_user') def construct_forms_for_user(user, queryset): if not user.is_superuser: queryset = queryset.none() return queryset
Editor interface
Hooks for customising the editing interface for pages and snippets.
construct_whitelister_element_rules
Customise the rules that define which HTML elements are allowed in rich text areas. By default only a limited set of HTML elements and attributes are whitelisted - all others are stripped out. The callables passed into this hook must return a dict, which maps element names to handler functions that will perform some kind of manipulation of the element. These handler functions receive the element as a BeautifulSoup Tag object.
The
wagtail.wagtailcore.whitelistmodule provides a few helper functions to assist in defining these handlers:allow_without_attributes, a handler which preserves the element but strips out all of its attributes, andattribute_rulewhich accepts a dict specifying how to handle each attribute, and returns a handler function. This dict will map attribute names to either True (indicating that the attribute should be kept), False (indicating that it should be dropped), or a callable (which takes the initial attribute value and returns either a final value for the attribute, or None to drop the attribute).For example, the following hook function will add the
<blockquote>element to the whitelist, and allow thetargetattribute on<a>elements:from wagtail.wagtailcore import hooks from wagtail.wagtailcore.whitelist import attribute_rule, check_url, allow_without_attributes @hooks.register('construct_whitelister_element_rules') def whitelister_element_rules(): return { 'blockquote': allow_without_attributes, 'a': attribute_rule({'href': check_url, 'target': True}), }
insert_editor_css
Add additional CSS files or snippets to the page editor.
from django.contrib.staticfiles.templatetags.staticfiles import static from django.utils.html import format_html from wagtail.wagtailcore import hooks @hooks.register('insert_editor_css') def editor_css(): return format_html( '<link rel="stylesheet" href="{}">', static('demo/css/vendor/font-awesome/css/font-awesome.min.css') )
insert_global_admin_css
Add additional CSS files or snippets to all admin pages.
from django.utils.html import format_html from django.contrib.staticfiles.templatetags.staticfiles import static from wagtail.wagtailcore import hooks @hooks.register('insert_global_admin_css') def global_admin_css(): return format_html('<link rel="stylesheet" href="{}">', static('my/wagtail/theme.css'))
insert_editor_js
Add additional JavaScript files or code snippets to the page editor.
from django.utils.html import format_html, format_html_join from django.conf import settings from wagtail.wagtailcore import hooks @hooks.register('insert_editor_js') def editor_js(): js_files = [ 'demo/js/hallo-plugins/hallo-demo-plugin.js', ] js_includes = format_html_join('\n', '<script src="{0}{1}"></script>', ((settings.STATIC_URL, filename) for filename in js_files) ) return js_includes + format_html( """ <script> registerHalloPlugin('demoeditor'); </script> """ )
insert_global_admin_js
Add additional JavaScript files or code snippets to all admin pages.
from django.utils.html import format_html from wagtail.wagtailcore import hooks @hooks.register('insert_global_admin_js') def global_admin_js(): return format_html( '<script src="https://cdnjs.cloudflare.com/ajax/libs/three.js/r74/three.js"></script>', )
Editor workflow
Hooks for customising the way users are directed through the process of creating page content.
after_create_page
Do something with a
Pageobject after it has been saved to the database (as a published page or a revision). The callable passed to this hook should take arequestobject and apageobject. The function does not have to return anything, but if an object with astatus_codeproperty is returned, Wagtail will use it as a response object. By default, Wagtail will instead redirect to the Explorer page for the new page’s parent.from django.http import HttpResponse from wagtail.wagtailcore import hooks @hooks.register('after_create_page') def do_after_page_create(request, page): return HttpResponse("Congrats on making content!", content_type="text/plain")
before_create_page
Called at the beginning of the “create page” view passing in the request, the parent page and page model class.
The function does not have to return anything, but if an object with a
status_codeproperty is returned, Wagtail will use it as a response object and skip the rest of the view.Unlike,
after_create_page, this is run both for bothGETandPOSTrequests.This can be used to completely override the editor on a per-view basis:
from wagtail.wagtailcore import hooks from .models import AwesomePage from .admin_views import edit_awesome_page @hooks.register('before_create_page') def before_create_page(request, parent_page, page_class): # Use a custom create view for the AwesomePage model if page_class == AwesomePage: return create_awesome_page(request, parent_page)
after_delete_page
Do something after aPageobject is deleted. Uses the same behavior asafter_create_page.
before_delete_page
Called at the beginning of the “delete page” view passing in the request and the page object.
Uses the same behavior as
before_create_page.
after_edit_page
Do something with aPageobject after it has been updated. Uses the same behavior asafter_create_page.
before_edit_page
Called at the beginning of the “edit page” view passing in the request and the page object.
Uses the same behavior as
before_create_page.
after_copy_page
Do something with aPageobject after it has been copied pasing in the request, page object and the new copied page. Uses the same behavior asafter_create_page.
before_copy_page
Called at the beginning of the “copy page” view passing in the request and the page object.
Uses the same behavior as
before_create_page.
construct_wagtail_userbar
Changed in version 1.0: The hook was renamed from
construct_wagtail_edit_birdAdd or remove items from the wagtail userbar. Add, edit, and moderation tools are provided by default. The callable passed into the hook must take the
requestobject and a list of menu objects,items. The menu item objects must have arendermethod which can take arequestobject and return the HTML string representing the menu item. See the userbar templates and menu item classes for more information.from wagtail.wagtailcore import hooks class UserbarPuppyLinkItem(object): def render(self, request): return '<li><a href="http://cuteoverload.com/tag/puppehs/" ' \ + 'target="_parent" class="action icon icon-wagtail">Puppies!</a></li>' @hooks.register('construct_wagtail_userbar') def add_puppy_link_item(request, items): return items.append( UserbarPuppyLinkItem() )
Choosers
construct_page_chooser_queryset
Called when rendering the page chooser view, to allow the page listing queryset to be customised. The callable passed into the hook will receive the current page queryset and the request object, and must return a Page queryset (either the original one, or a new one).
from wagtail.wagtailcore import hooks @hooks.register('construct_page_chooser_queryset') def show_my_pages_only(pages, request): # Only show own pages pages = pages.filter(owner=request.user) return pages
construct_document_chooser_queryset
Called when rendering the document chooser view, to allow the document listing queryset to be customised. The callable passed into the hook will receive the current document queryset and the request object, and must return a Document queryset (either the original one, or a new one).
from wagtail.wagtailcore import hooks @hooks.register('construct_document_chooser_queryset') def show_my_uploaded_documents_only(documents, request): # Only show uploaded documents documents = documents.filter(uploaded_by=request.user) return documents
construct_image_chooser_queryset
Called when rendering the image chooser view, to allow the image listing queryset to be customised. The callable passed into the hook will receive the current image queryset and the request object, and must return a Document queryset (either the original one, or a new one).
from wagtail.wagtailcore import hooks @hooks.register('construct_image_chooser_queryset') def show_my_uploaded_images_only(images, request): # Only show uploaded images images = images.filter(uploaded_by=request.user) return images
Page explorer
construct_explorer_page_queryset
Called when rendering the page explorer view, to allow the page listing queryset to be customised. The callable passed into the hook will receive the parent page object, the current page queryset, and the request object, and must return a Page queryset (either the original one, or a new one).
from wagtail.wagtailcore import hooks @hooks.register('construct_explorer_page_queryset') def show_my_profile_only(parent_page, pages, request): # If we're in the 'user-profiles' section, only show the user's own profile if parent_page.slug == 'user-profiles': pages = pages.filter(owner=request.user) return pages
register_page_listing_buttons
Add buttons to the actions list for a page in the page explorer. This is useful when adding custom actions to the listing, such as translations or a complex workflow.
This example will add a simple button to the listing:
from wagtail.wagtailadmin import widgets as wagtailadmin_widgets @hooks.register('register_page_listing_buttons') def page_listing_buttons(page, page_perms, is_parent=False): yield wagtailadmin_widgets.PageListingButton( 'A page listing button', '/goes/to/a/url/', priority=10 )The
priorityargument controls the order the buttons are displayed in. Buttons are ordered from low to high priority, so a button withpriority=10will be displayed before a button withpriority=20.
register_page_listing_more_buttons
Add buttons to the “More” dropdown menu for a page in the page explorer. This works similarly to the
register_page_listing_buttonshook but is useful for lesser-used custom actions that are better suited for the dropdown.This example will add a simple button to the dropdown menu:
from wagtail.wagtailadmin import widgets as wagtailadmin_widgets @hooks.register('register_page_listing_more_buttons') def page_listing_more_buttons(page, page_perms, is_parent=False): yield wagtailadmin_widgets.PageListingButton( 'A dropdown button', '/goes/to/a/url/', priority=10 )The
priorityargument controls the order the buttons are displayed in the dropdown. Buttons are ordered from low to high priority, so a button withpriority=10will be displayed before a button withpriority=20.
The admin widgets also provide
ButtonWithDropdownFromHook, which allows you to define a custom hook for generating a dropdown menu that gets attached to your button.Creating a button with a dropdown menu involves two steps. Firstly, you add your button to the
register_page_listing_buttonshook, just like the example above. Secondly, you register a new hook that yields the contents of the dropdown menu.This example shows how Wagtail’s default admin dropdown is implemented. You can also see how to register buttons conditionally, in this case by evaluating the
page_perms:@hooks.register('register_page_listing_buttons') def page_custom_listing_buttons(page, page_perms, is_parent=False): yield wagtailadmin_widgets.ButtonWithDropdownFromHook( 'More actions', hook_name='my_button_dropdown_hook', page=page, page_perms=page_perms, is_parent=is_parent, priority=50 ) @hooks.register('my_button_dropdown_hook') def page_custom_listing_more_buttons(page, page_perms, is_parent=False): if page_perms.can_move(): yield Button('Move', reverse('wagtailadmin_pages:move', args=[page.id]), priority=10) if page_perms.can_delete(): yield Button('Delete', reverse('wagtailadmin_pages:delete', args=[page.id]), priority=30) if page_perms.can_unpublish(): yield Button('Unpublish', reverse('wagtailadmin_pages:unpublish', args=[page.id]), priority=40)The template for the dropdown button can be customised by overriding
wagtailadmin/pages/listing/_button_with_dropdown.html. The JavaScript that runs the dropdowns makes use of custom data attributes, so you should leavedata-dropdownanddata-dropdown-togglein the markup if you customise it.
Page serving
before_serve_page
Called when Wagtail is about to serve a page. The callable passed into the hook will receive the page object, the request object, and the
argsandkwargsthat will be passed to the page’sserve()method. If the callable returns anHttpResponse, that response will be returned immediately to the user, and Wagtail will not proceed to callserve()on the page.from wagtail.wagtailcore import hooks @hooks.register('before_serve_page') def block_googlebot(page, request, serve_args, serve_kwargs): if request.META.get('HTTP_USER_AGENT') == 'GoogleBot': return HttpResponse("<h1>bad googlebot no cookie</h1>")
Document serving
before_serve_document
Called when Wagtail is about to serve a document. The callable passed into the hook will receive the document object and the request object. If the callable returns anHttpResponse, that response will be returned immediately to the user, instead of serving the document.
Signals
Wagtail’s PageRevision and Page implement Signals from django.dispatch. Signals are useful for creating side-effects from page publish/unpublish events.
Primarily, these are used by the Frontend Cache contrib module and the Wagtail API v1. You could also use signals to send publish notifications to a messaging service, or POST messages to another app that’s consuming the API, such as a static site generator.
page_published
This signal is emitted from a PageRevision when a revision is set to published.
| sender: | The page class |
|---|---|
| instance: | The specific Page instance. |
| revision: | The PageRevision that was published |
| kwargs: | Any other arguments passed to page_published.send(). |
To listen to a signal, implement page_published.connect(receiver, sender, **kwargs). Here’s a simple example showing how you might notify your team when something is published:
from wagtail.wagtailcore.signals import page_published
import urllib
import urllib2
# Let everyone know when a new page is published
def send_to_slack(sender, **kwargs):
instance = kwargs['instance']
url = 'https://hooks.slack.com/services/T00000000/B00000000/XXXXXXXXXXXXXXXXXXXXXXXX'
values = {
"text" : "%s was published by %s " % (instance.title, instance.owner.username),
"channel": "#publish-notifications",
"username": "the squid of content",
"icon_emoji": ":octopus:"
}
data = urllib.urlencode(values)
req = urllib2.Request(url, data)
response = urllib2.urlopen(req)
# Register a receiver
page_published.connect(send_to_slack)
Receiving specific model events
Sometimes you’re not interested in receiving signals for every model, or you want to handle signals for specific models in different ways. For instance, you may wish to do something when a new blog post is published:
from wagtail.wagtailcore.signals import page_published
from mysite.models import BlogPostPage
# Do something clever for each model type
def receiver(sender, **kwargs):
# Do something with blog posts
pass
# Register listeners for each page model class
page_published.connect(receiver, sender=BlogPostPage)
Wagtail provides access to a list of registered page types through the get_page_models() function in wagtail.wagtailcore.models.
Read the Django documentation for more information about specifying senders.
page_unpublished
This signal is emitted from a Page when the page is unpublished.
| sender: | The page class |
|---|---|
| instance: | The specific Page instance. |
| kwargs: | Any other arguments passed to page_unpublished.send() |
The project template
mysite/
home/
migrations/
__init__.py
0001_initial.py
0002_create_homepage.py
templates/
home/
home_page.html
__init__.py
models.py
search/
templates/
search/
search.html
__init__.py
views.py
mysite/
settings/
__init__.py
base.py
dev.py
production.py
static/
css/
mysite.css
js/
mysite.js
templates/
404.html
500.html
base.html
__init__.py
urls.py
wsgi.py
manage.py
requirements.txt
The “home” app
Location: /mysite/home/
This app is here to help get you started quicker by providing a HomePage model with migrations to create one when you first setup your app.
Default templates and static files
Location: /mysite/mysite/templates/ and /mysite/mysite/static/
The templates directory contains base.html, 404.html and 500.html. These files are very commonly needed on Wagtail sites to they have been added into the template.
The static directory contains an empty JavaScript and CSS file.
Django settings
Location: /mysite/mysite/settings/
The Django settings files are split up into base.py, dev.py, production.py and local.py.
base.py- This file is for global settings that will be used in both development and production. Aim to keep most of your configuration in this file.
dev.py- This file is for settings that will only be used by developers. For example:
DEBUG = True production.py- This file is for settings that will only run on a production server. For example:
DEBUG = False local.pyThis file is used for settings local to a particular machine. This file should never be tracked by a version control system.
Tip
On production servers, we recommend that you only store secrets in
local.py(such as API keys and passwords). This can save you headaches in the future if you are ever trying to debug why a server is behaving badly. If you are using multiple servers which need different settings then we recommend that you create a differentproduction.pyfile for each one.
Support
Stack Overflow
Stack Overflow is the best place to find answers to your questions about working with Wagtail - there is an active community of Wagtail users and developers responding to questions there. When posting questions, please read Stack Overflow’s advice on how to ask questions and remember to tag your question with “wagtail”.
Mailing list
For topics and discussions that do not fit Stack Overflow’s question-and-answer format, there is a Wagtail Support mailing list at groups.google.com/d/forum/wagtail.
Issues
If you think you’ve found a bug in Wagtail, or you’d like to suggest a new feature, please check the current list at github.com/wagtail/wagtail/issues. If your bug or suggestion isn’t there, raise a new issue, providing as much relevant context as possible.
Torchbox
Finally, if you have a query which isn’t relevant for either of the above forums, feel free to contact the Wagtail team at Torchbox directly, on hello@wagtail.io or @wagtailcms.
Using Wagtail: an Editor’s guide
This section of the documentation is written for the users of a Wagtail-powered site. That is, the content editors, moderators and administrators who will be running things on a day-to-day basis.
Introduction
Wagtail is a new open source content management system (CMS) developed by Torchbox. It is built on the Django framework and designed to be super easy to use for both developers and editors.
This documentation will explain how to:
- navigate the main user interface of Wagtail
- create pages of all different types
- modify, save, publish and unpublish pages
- how to set up users, and provide them with specific roles to create a publishing workflow
- upload, edit and include images and documents
- ... and more!
Getting started
The Wagtail demo site
The examples in this document are based on Torchbox.com. However, the instructions are general enough as to be applicable to any Wagtail site.
For the purposes of this documentation we will be using the URL, www.example.com, to represent the root (homepage) of your website.
Logging in
- The first port of call for an editor is the login page for the administrator interface.
- Access this by adding /admin onto the end of your root URL (e.g.
www.example.com/admin). - Enter your username and password and click Sign in.
Finding your way around
This section describes the different pages that you will see as you navigate around the CMS, and how you can find the content that you are looking for.
The Dashboard
The Dashboard provides information on:
- The number of pages, images, and documents currently held in the Wagtail CMS
- Any pages currently awaiting moderation (if you have these privileges)
- Your most recently edited pages
You can return to the Dashboard at any time by clicking the Wagtail logo in the top-left of the screen.
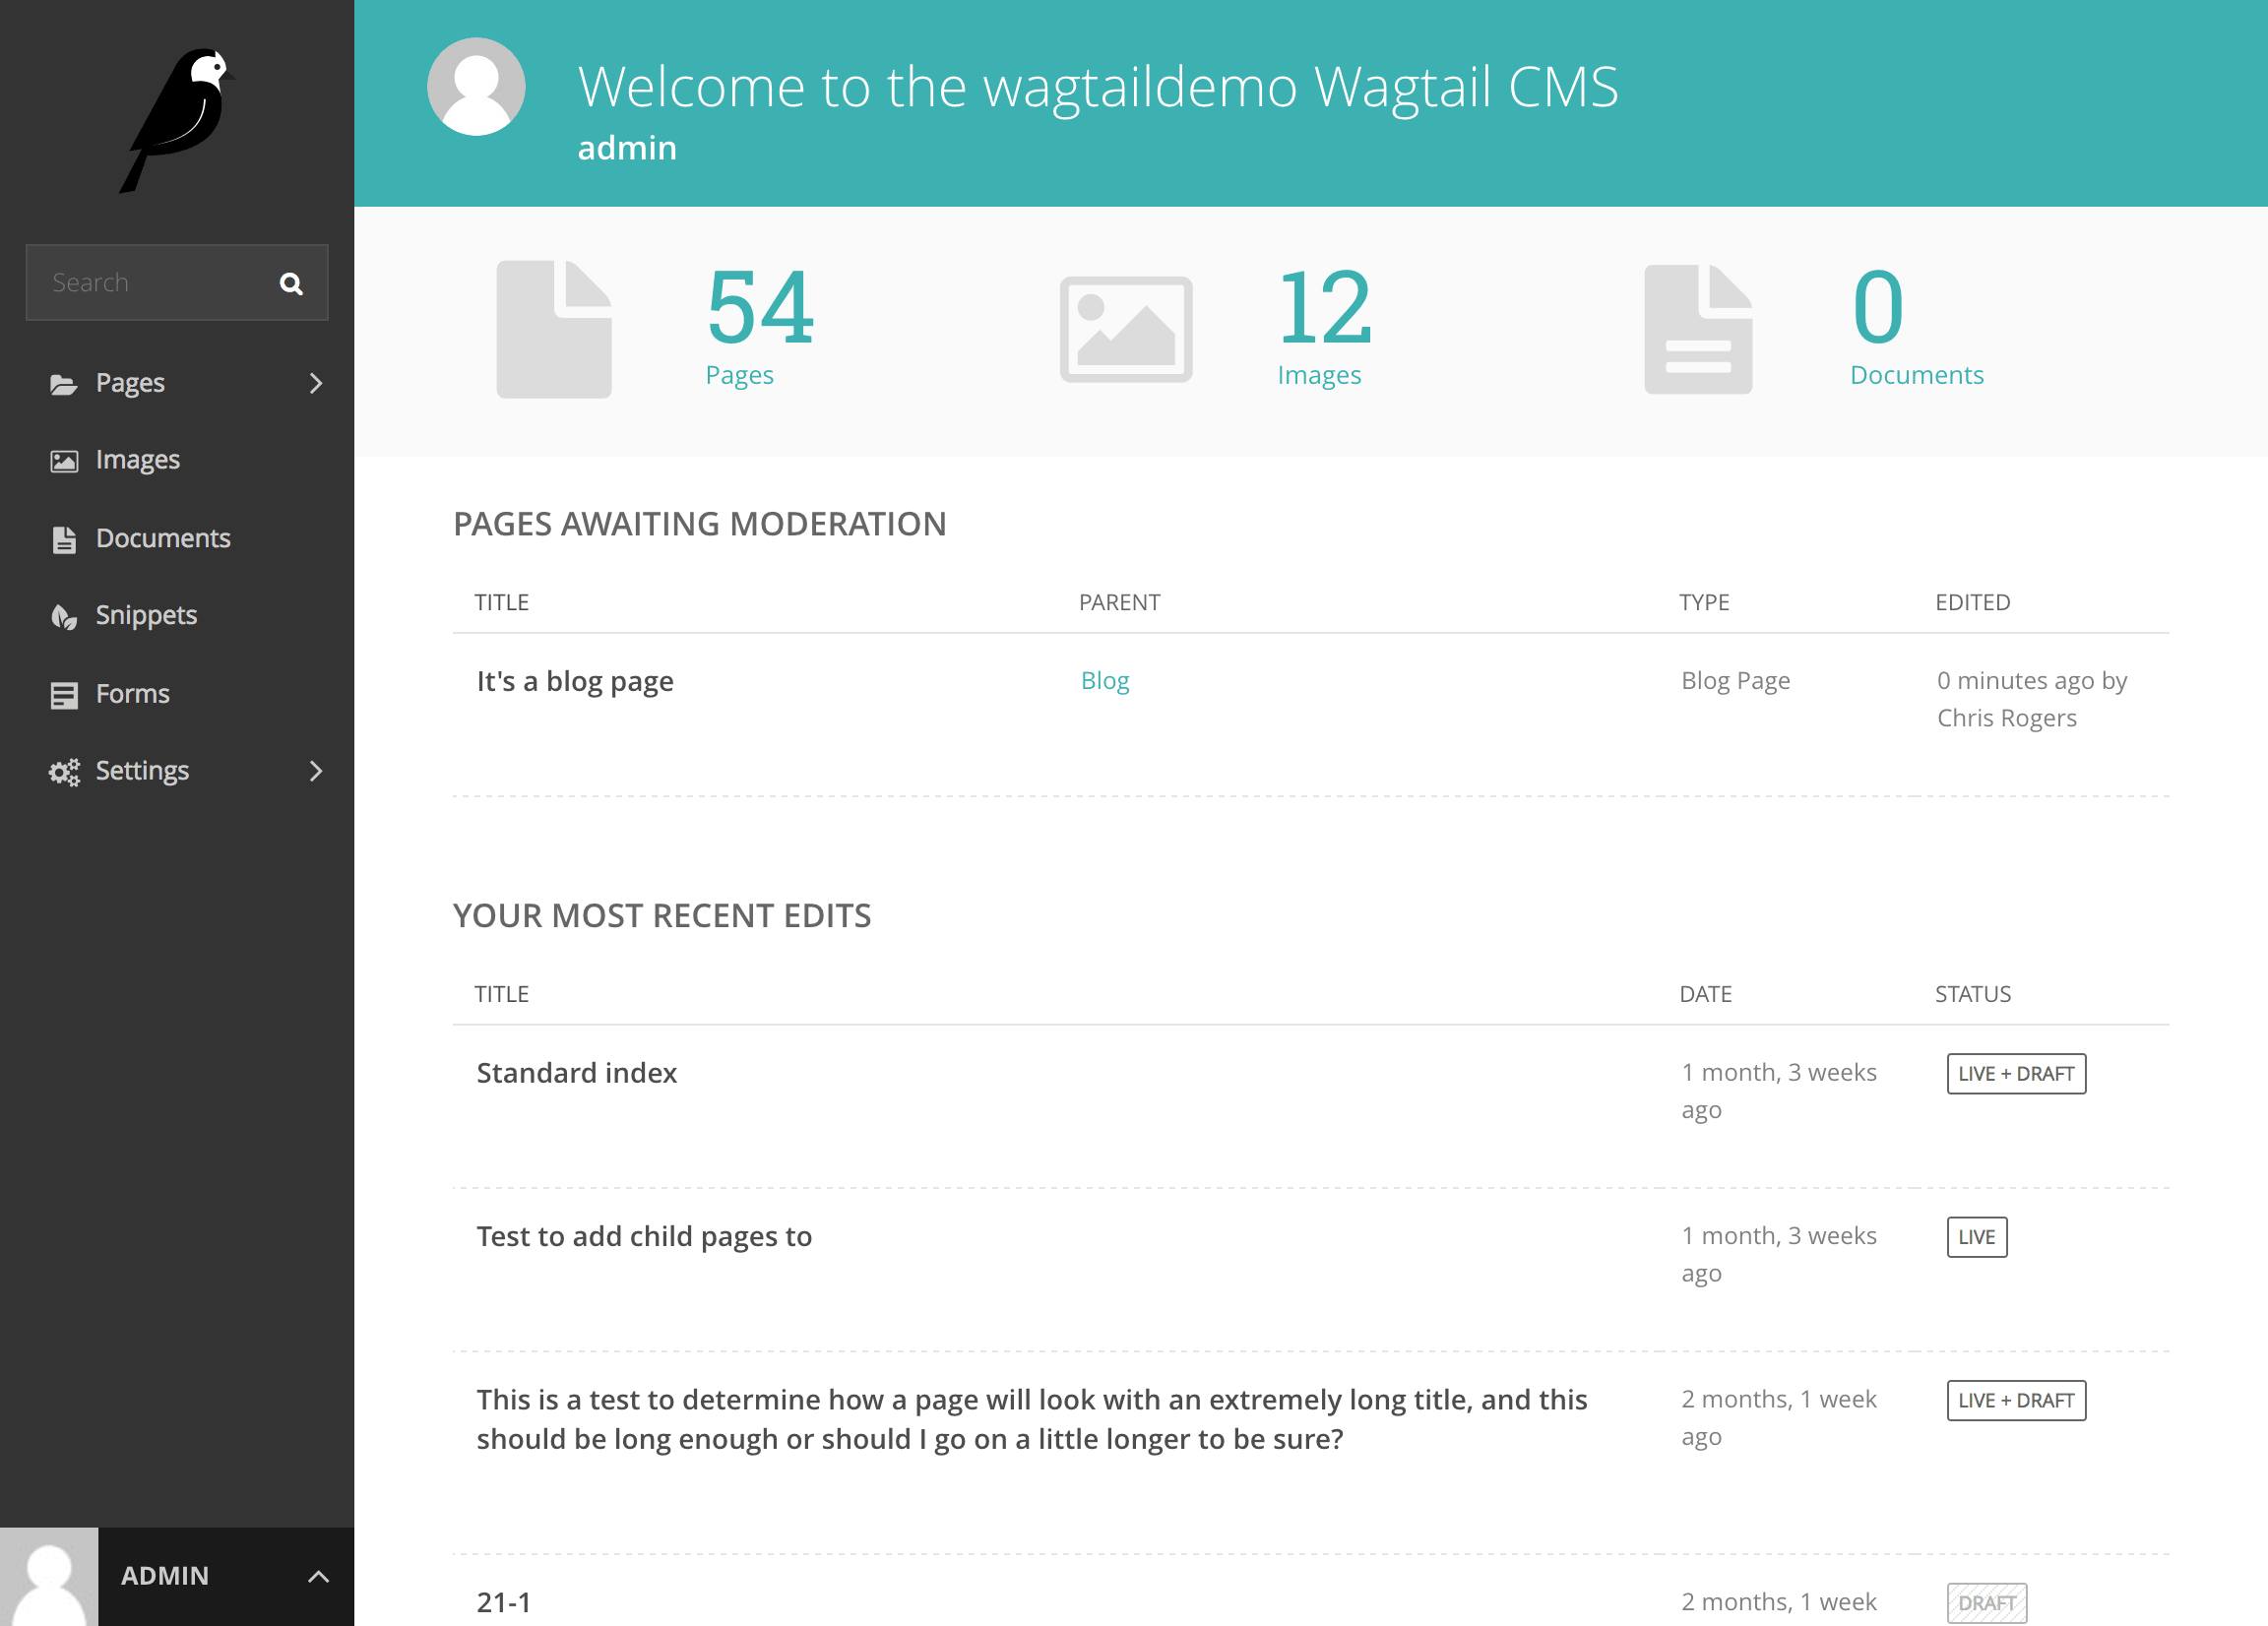
- Clicking the logo returns you to your Dashboard.
- The stats at the top of the page describe the total amount of content on the CMS (just for fun! ).
- The Pages awaiting moderation table will only be displayed if you have moderator or administrator privileges
- Clicking the name of a page will take you to the ‘Edit page’ interface for this page.
- Clicking approve or reject will either change the page status to live or return the page to draft status. An email will be sent to the creator of the page giving the result of moderation either way.
- The Parent column tells you what the parent page of the page awaiting moderation is called. Clicking the parent page name will take you to its Edit page.
- The Your most recent edits table displays the five pages that you most recently edited.
- The date column displays the date that you edited the page. Hover your mouse over the date for a more exact time/date.
- The status column displays the current status of the page. A page will have one of three statuses:
- Live: Published and accessible to website visitors
- Draft: Not live on the website.
- Live + Draft: A version of the page is live, but a newer version is in draft mode.
The Explorer menu
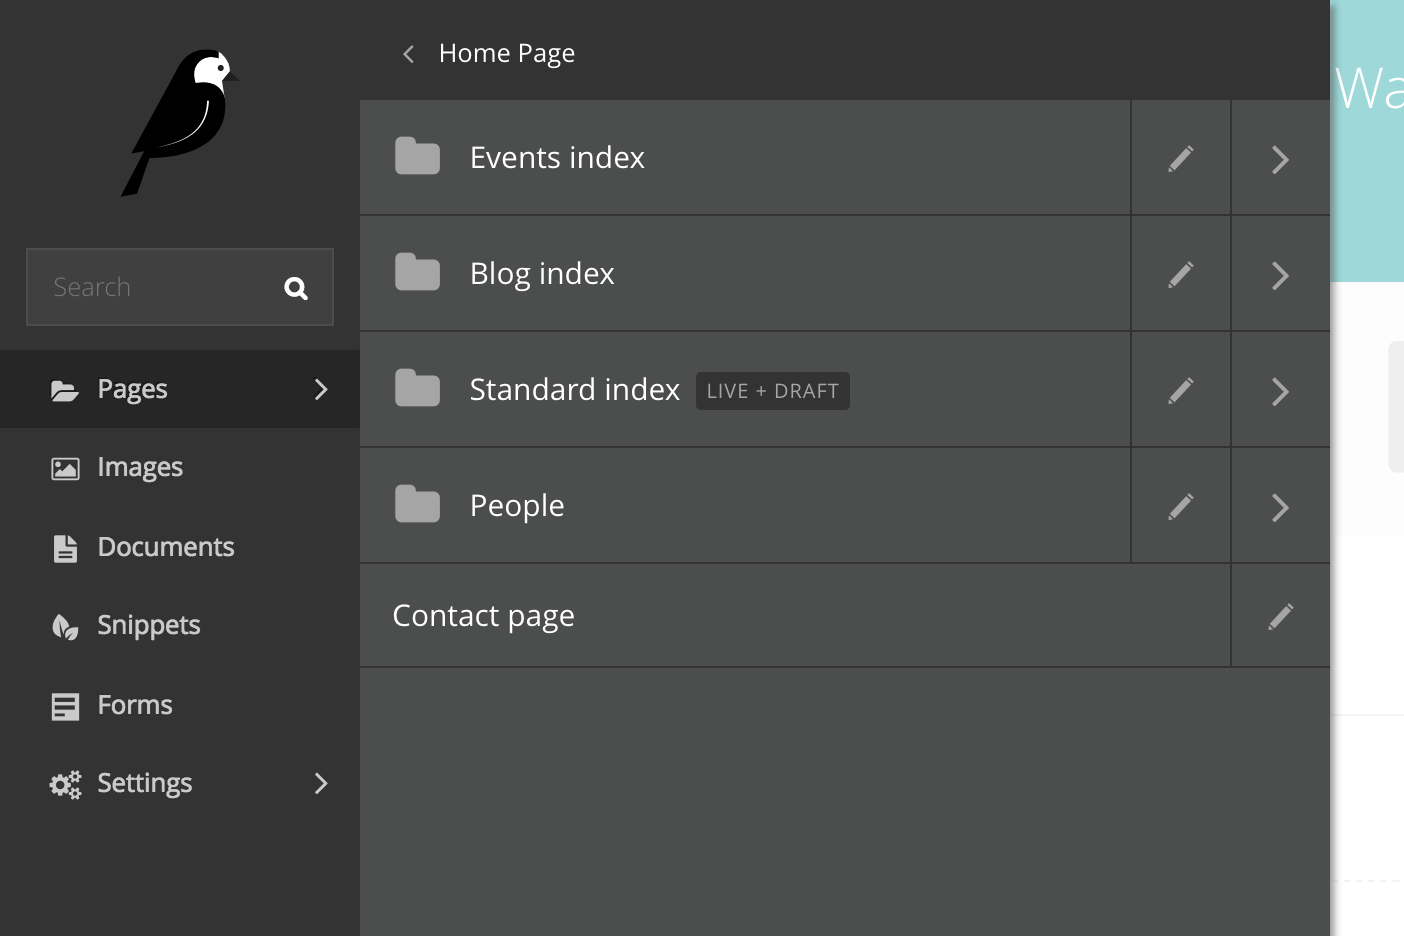
- Click the Pages button in the sidebar to open the explorer. This allows you to navigate through the sections of the site.
- Clicking the name of a page will take you to the Explorer page for that section.
- Clicking the edit icon for a page will take you to its edit screen.
- Clicking the arrow takes you to the sub-section.
- Clicking the section title takes you back to where you were.
Using search
- A very easy way to find the page that you want is to use the main search feature, accessible from the left-hand menu.
- Simply type in part or all of the name of the page you are looking for, and the results below will automatically update as you type.
- Clicking the page title in the results will take you to the Edit page for that result. You can differentiate between similar named pages using the Parent column, which tells you what the parent page of that page is.
The Explorer page
The Explorer page allows you to view the a page’s children and perform actions on them. From here you can publish/unpublish pages, move pages to other sections, drill down further into the content tree, or reorder pages under the parent for the purposes of display in menus.
- The name of the section you are looking at is displayed below the breadcrumb (the row of page names beginning with the home icon). Each section is also itself a page (in this case the homepage). Clicking the title of the section takes you to the Edit screen for the section page.
- As the heading suggests, below are the child pages of the section. Clicking the titles of each child page will take you to its Edit screen.
- Clicking the arrows will display a further level of child pages.

- As you drill down through the site the breadcrumb (the row of pages beginning with the home icon) will display the path you have taken. Clicking on the page titles in the breadcrumb will take you to the Explorer screen for that page.

- To add further child pages press the Add child page button below the parent page title. You can view the parent page on the live site by pressing the View live button. The Move button will take you to the Move page screen where you can reposition the page and all its child pages in the site structure.
- Similar buttons are available for each child page. These are made visible on hover.
Reordering pages
- Clicking the icon to the far left of the child pages table will enable the reordering handles. This allows you to reorder the way that content displays in the main menu of your website.
- Reorder by dragging the pages by the handles on the far left (the icon made up of 6 dots).
- Your new order will be automatically saved each time you drag and drop an item.
Creating new pages

Create new pages by clicking the Add child page button. This creates a child page of the section you are currently in. In this case a child page of the ‘School of Fine Art’ page.
Selecting a page type
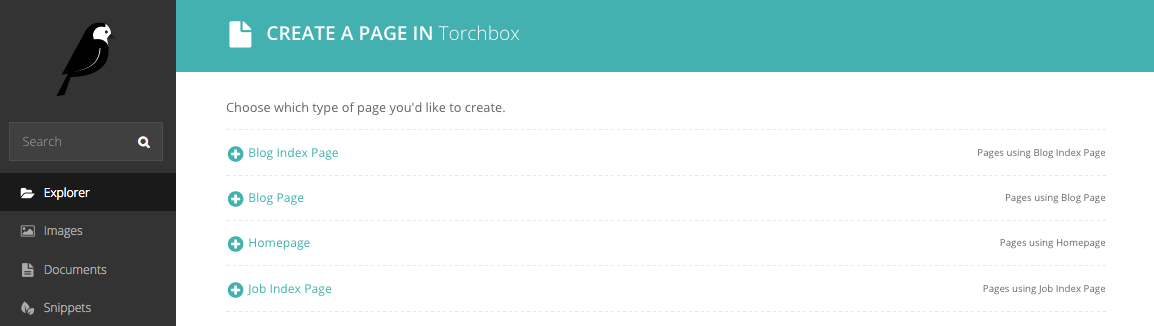
- On the left of the page chooser screen are listed all the types of pages that you can create. Clicking the page type name will take you to the Create new page screen for that page type (see below).
- Clicking the Pages using … Page links on the right will display all the pages that exist on the website of this type. This is to help you judge what type of page you will need to complete your task.
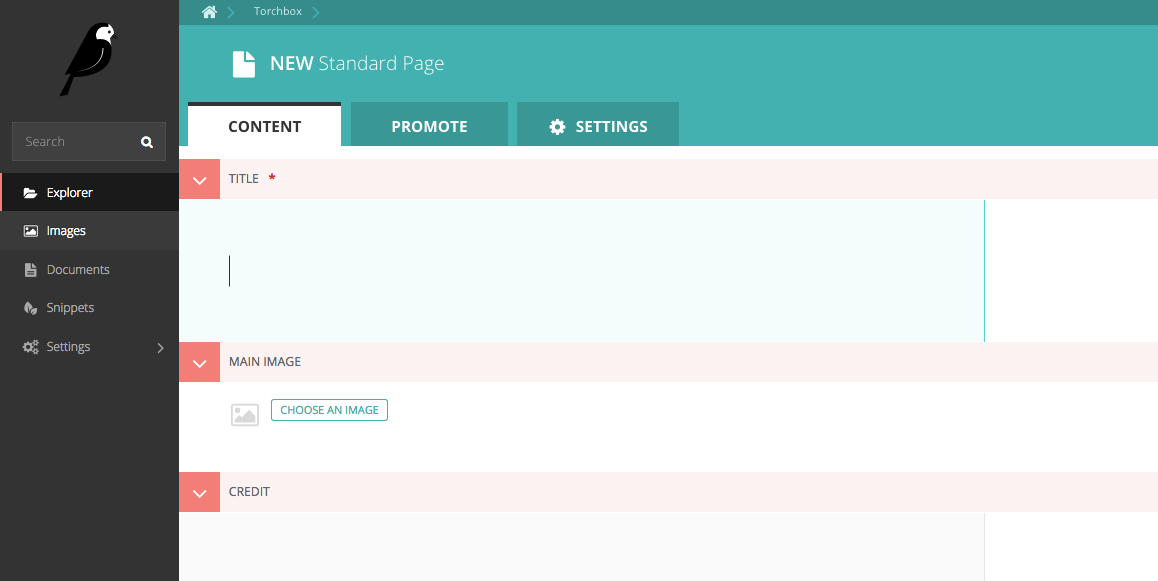
- Once you’ve selected a page type you will be presented with a blank New page screen.
- Click into the areas below each field’s heading to start entering content.
Creating page body content
Wagtail supports a number of basic fields for creating content, as well as our unique StreamField feature which allows you to construct complex layouts by combining these basic fields in any order.
StreamField
StreamField allows you to create complex layouts of content on a page by combining a number of different arrangements of content, ‘blocks’, in any order.
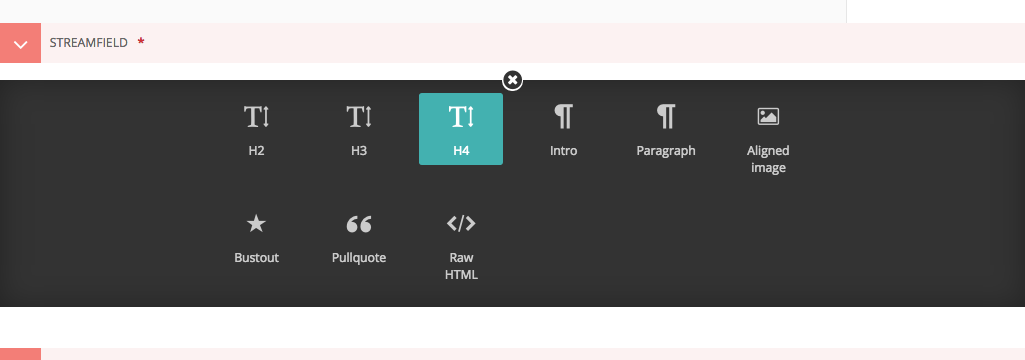
When you first edit a page, you will be presented with the empty StreamField area, with the option to choose one of several block types. The block types on your website may be different from the screenshot here, but the principles are the same.
Click the block type, and the options will disappear, revealing the entry field for that block.
Depending on the block you chose, the field will display differently, and there might even be more than one field! There are a few common field types though that we will talk about here.
- Basic text field
- Rich text field
- Image field
Basic text fields have no formatting options. How these display will be determined by the style of the page in which they are being inserted. Just click into the field and type!
Most of the time though, you need formatting options to create beautiful looking pages. So some fields, like the fields in the ‘Paragraph block’ shown in the screenshot, have many of the options you would expect from a word processor. These are referred to as rich text fields.
So, when you click into one of these fields, you will be presented with a set of tools which allow you to format and style your text. These tools also allow you to insert links, images, videos clips and links to documents.
Below is a summary of what the different buttons represent:
Bold / Italic: Either click then type for bold or italic, or highlight and select to convert existing text to bold or italic.

Paragraph / heading levels: Clicking into a paragraph and selecting one of these options will change the level of the text. H1 is not included as this is reserved for the page title.
Bulleted and numbered lists

Horizontal rule: Creates a horizontal line at the position of the cursor. If inserted inside a paragraph it will split the paragraph into two separate paragraphs.
Undo / redo: As expected will undo or redo the latest actions. Never use the your browser’s back button when attempting to undo changes as this could lead to errors. Either use this undo button, or the usual keyboard shortcut, CTRL+Z.
Insert image / video: Allows you to insert an image or video into the rich text field. See Inserting images and videos section for more details. See Inserting images <inserting_images.html> and Inserting videos <inserting_videos.html> sections.
Insert link / document: Allows you to insert a link or a document into the rich text field. See Inserting links and Inserting documents for more details. See Inserting links section <inserting_links.html>.
- To add new blocks, click the ‘+’ icons above or below the existing blocks.
- You’ll then be presented once again with the different blocks from which you may choose.
- You can cancel the addition of a new block by clicking the cross at the top of the block selection interface.
- Click the arrows on the right-hand side of each block to move blocks up and down in the StreamField order of content.
- The blocks will be displayed in the front-end in the order that they are placed in this interface.
- Click the rubbish bin on the far right to delete a field
Warning
Once a StreamField field is deleted it cannot be retrieved if the page has not been saved. Save your pages regularly so that if you accidentally delete a field you can reload the page to undo your latest edit.
Inserting images and videos in a page
There will obviously be many instances in which you will want to add images to a page. There are two main ways to add images to pages, either via a specific image chooser field, or via the rich text field image button. Which of these you use will be dependent on the individual setup of your site.
Inserting images using the image chooser field
Often a specific image field will be used for a main image on a page, or for an image to be used when sharing the page on social media. For the standard page on Torchbox.com, the former is used.
- You insert an image by clicking the Choose an image button.
Choosing an image to insert
You have two options when selecting an image to insert:
- Selecting an image from the existing image library, or…
- Uploading a new image to the CMS
When you click the Choose an image button you will be presented with a pop-up with two tabs at the top. The first, Search, allows you to search and select from the library. The second, Upload, allows you to upload a new image.
Choosing an image from the image library
The image below demonstrates finding and inserting an image that is already present in the CMS image library.
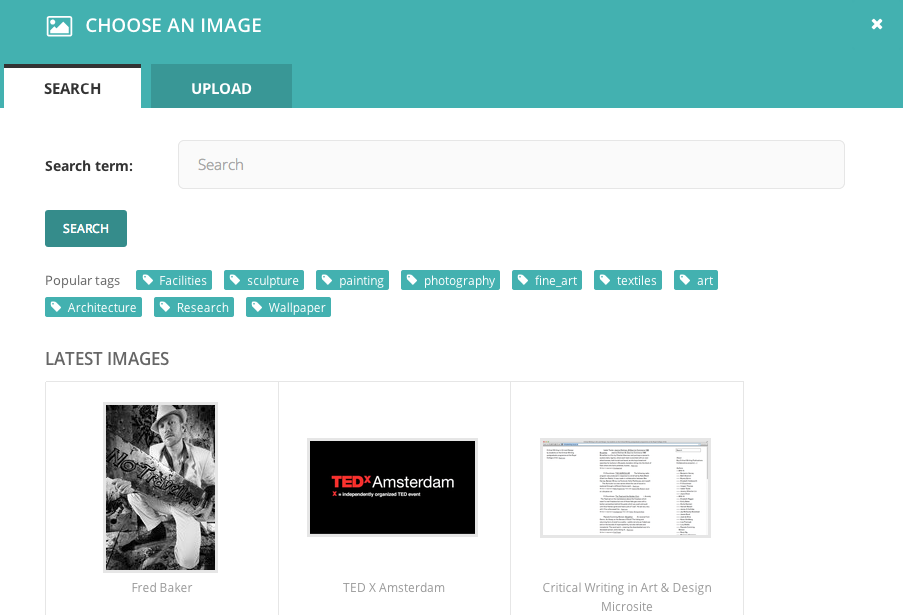
- Typing into the search box will automatically display the results below.
- Clicking one of the Popular tags will filter the search results by that tag.
- Clicking an image will take you to the Choose a format window (see image below).
Uploading a new image to the CMS
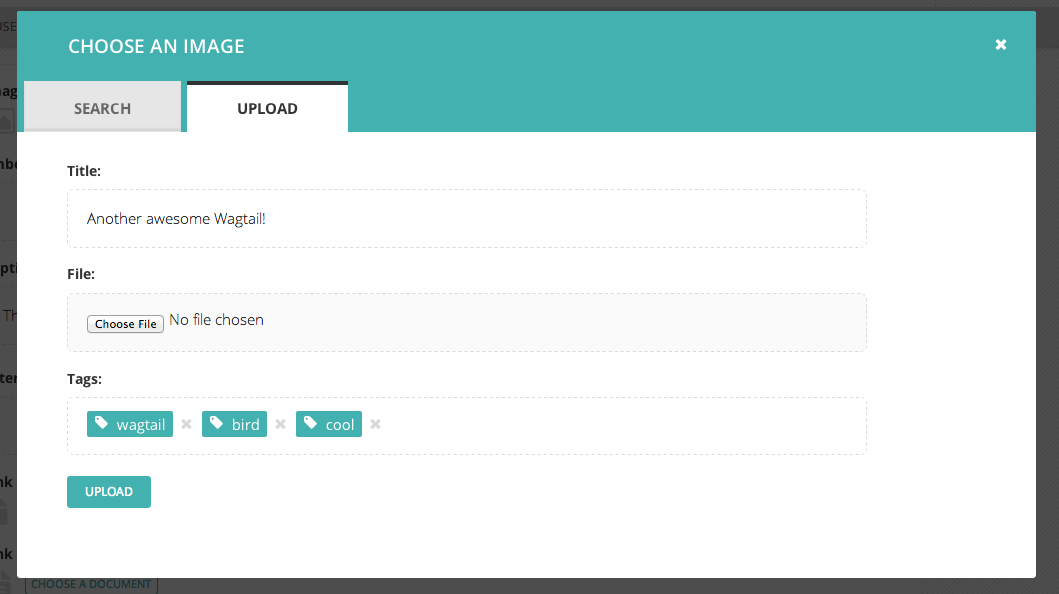
- You must include an image title for your uploaded image
- Click the Choose file button to choose an image from your computer.
- Tags allows you to associate tags with the image you are uploading. This allows them to be more easily found when searching. Each tag should be separated by a space. Good practice for creating multiple word tags is to use an underscore between each word (e.g. western_yellow_wagtail).
- Click Upload to insert the uploaded image into the carousel. The image will also be added to the main CMS image library for reuse in other content.
Inserting images using the rich text field

Images can also be inserted into the body text of a page via the rich text editor. When working in a rich text field, click the image illustrated above. You will then be presented with the same options as for inserting images into the main carousel.
In addition, Wagtail allows you to choose an alignment for you image.
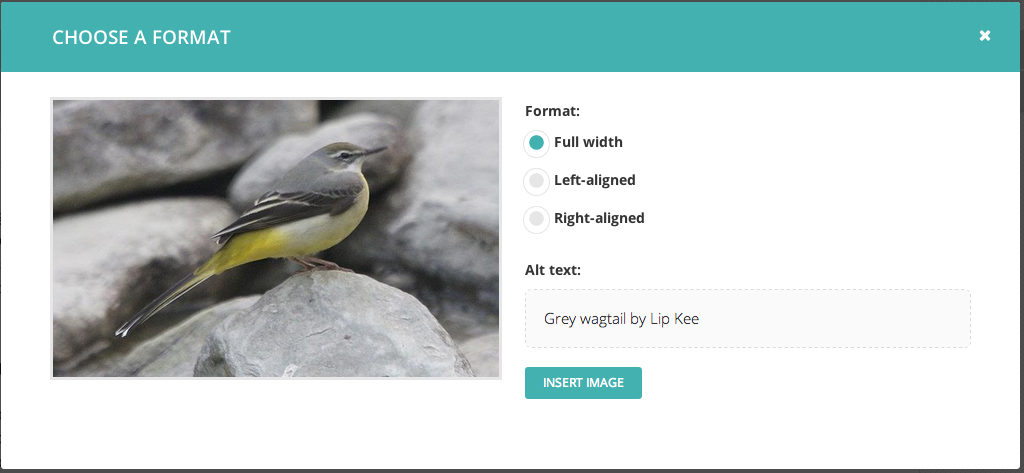
- You can select how the image is displayed by selecting one of the format options.
- You must provide specific alt text for your image.
The alignments available are described below:
- Full width: Image will be inserted using the full width of the text area.
- Half-width left/right aligned: Inserts the image at half the width of the text area. If inserted in a block of text the text will wrap around the image. If two half-width images are inserted together they will display next to each other.
Note
The display of images aligned in this way is dependent on your implementation of Wagtail, so you may get slightly different results.
Inserting links in a page
Similar to images, there are a variety of points at which you will want to add links. The most common place to insert a link will be in the body text of a page. You can insert a link into the body text by clicking the Insert link button in the rich text toolbar.
Whichever way you insert a link, you will be presented with the form displayed below.
- Search for an existing page to link to using the search bar at the top of the pop-up.
- Below the search bar you can select the type of link you want to insert. The following types are available:
- Internal link: A link to an existing page within your website.
- External link: A link to a page on another website.
- Email link: A link that will open the user’s default email client with the email address prepopulated.
- You can also navigate through the website to find an internal link via the explorer.
Inserting videos into body content
As well as inserting videos into a carousel, Wagtail’s rich text fields allow you to add videos into the body of a page by clicking the Add video button in the toolbar.
- Copy and paste the web address for the video (either YouTube or Vimeo) into the URL field and click Insert.
- A placeholder with the name of the video and a screenshot will be inserted into the text area. Clicking the X in the top corner will remove the video.
Inserting links to documents into body text
It is possible to insert links to documents held in the CMS into the body text of a web page by clicking the button above in the rich text field.
The process for doing this is the same as when inserting an image. You are given the choice of either choosing a document from the CMS, or uploading a new document.

Adding multiple items
A common feature of Wagtail is the ability to add more than one of a particular type of field or item. For example, you can add as many carousel items or related links as you wish.

- Whenever you see the white cross in the green circle illustrated here it means you can add multiple objects or items to a page. Clicking the icon will display the fields required for that piece of content. The image below demonstrates this with a Related link item.
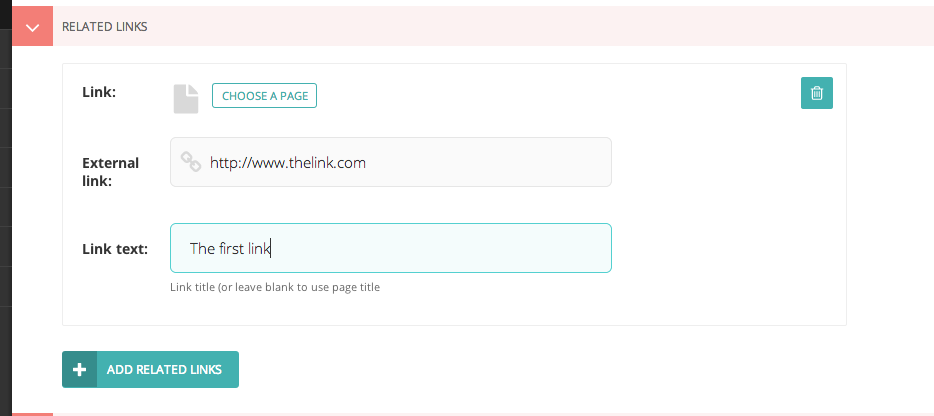
- You can delete an individual item by pressing the trash can in the top-right.
- You can add more items by clicking the link with the white cross again.

- You can reorder your multiple items using the up and down arrows. Doing this will affect the order in which they are display on the live page.
Required fields
- Fields marked with an asterisk are required. You will not be able to save a draft or submit the page for moderation without these fields being completed.
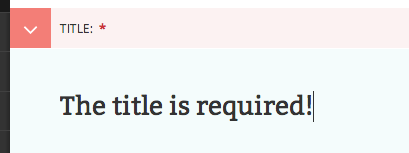
- If you try to save/submit the page with some required fields not filled out, you will see the error displayed here.
- The number of validation errors for each of the Promote and Content tabs will appear in a red circle, and the text, ‘This field is required’, will appear below each field that must be completed.
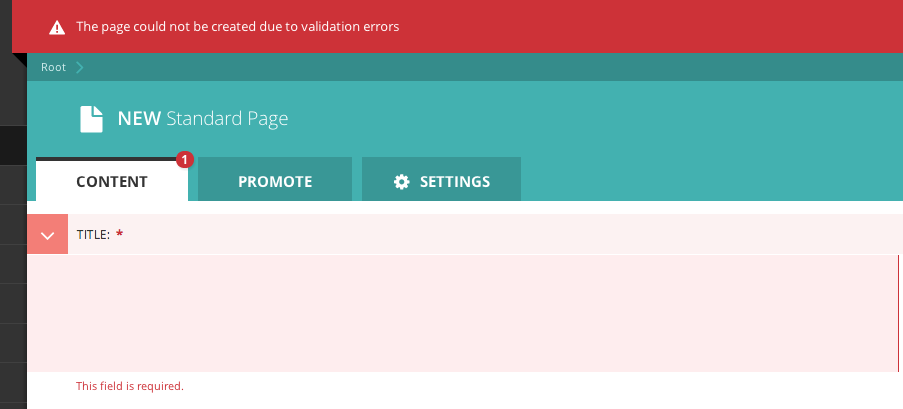
The Promote tab
A common feature of the Edit pages for all page types is the two tabs at the top of the screen. The first, Content, is where you build the content of the page itself.
The second, Promote, is where you can set all the ‘metadata’ (data about data!) for the page. Below is a description of all default fields in the promote tab and what they do.
- Slug: The last part of the web address for the page. E.g. the slug for a blog page called ‘The best things on the web’ would be the-best-things-on-the-web (
www.example.com/blog/the-best-things-on-the-web). This is automatically generated from the main page title set in the Content tab. This can be overridden by adding a new slug into the field. Slugs should be entirely lowercase, with words separated by hyphens (-). - Page title: An optional, search-engine friendly page title. This is the title that appears in the tab of your browser window. It is also the title that would appear in a search engine if the page was returned as part of a set of search results.
- Show in menus: Ticking this box will ensure that the page is included in automatically generated menus on your site. Note: Pages will only display in menus if all of its parent pages also have Show in menus ticked.
- Search description: This field allows you to add text that will be displayed if the page appears in search results. This is especially useful to distinguish between similarly named pages.

Note
You may see more fields than this in your promote tab. These are just the default fields, but you are free to add other fields to this section as necessary.
Previewing and submitting pages for moderation
The Save/Preview/Submit for moderation menu is always present at the bottom of the page edit/creation screen. The menu allows you to perform the following actions, dependent on whether you are an editor, moderator or administrator:
- Save draft: Saves your current changes but doesn’t submit the page for moderation and so won’t be published. (all roles)
- Submit for moderation: Saves your current changes and submits the page for moderation. A moderator will be notified and they will then either publish or reject the page. (all roles)
- Preview: Opens a new window displaying the page as it would look if published, but does not save your changes or submit the page for moderation. (all roles)
- Publish/Unpublish: Clicking either the Publish or Unpublish buttons will take you to a confirmation screen asking you to confirm that you wish to publish or unpublish this page. If a page is published it will be accessible from its specific URL and will also be displayed in site search results. (moderators and administrators only)
- Delete: Clicking this button will take you to a confirmation screen asking you to confirm that you wish to delete the current page. Be sure that this is actually what you want to do, as deleted pages are not recoverable. In many situations simply unpublishing the page will be enough. (moderators and administrators only)
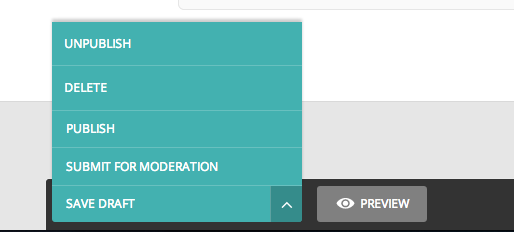
Editing existing pages
Here is how you can access the edit screen of an existing page:
- Clicking the title of the page in an Explorer page or in search results.
- Clicking the Edit link below the title in either of the situations above.
- Clicking the Edit icon for a page in the explorer menu.
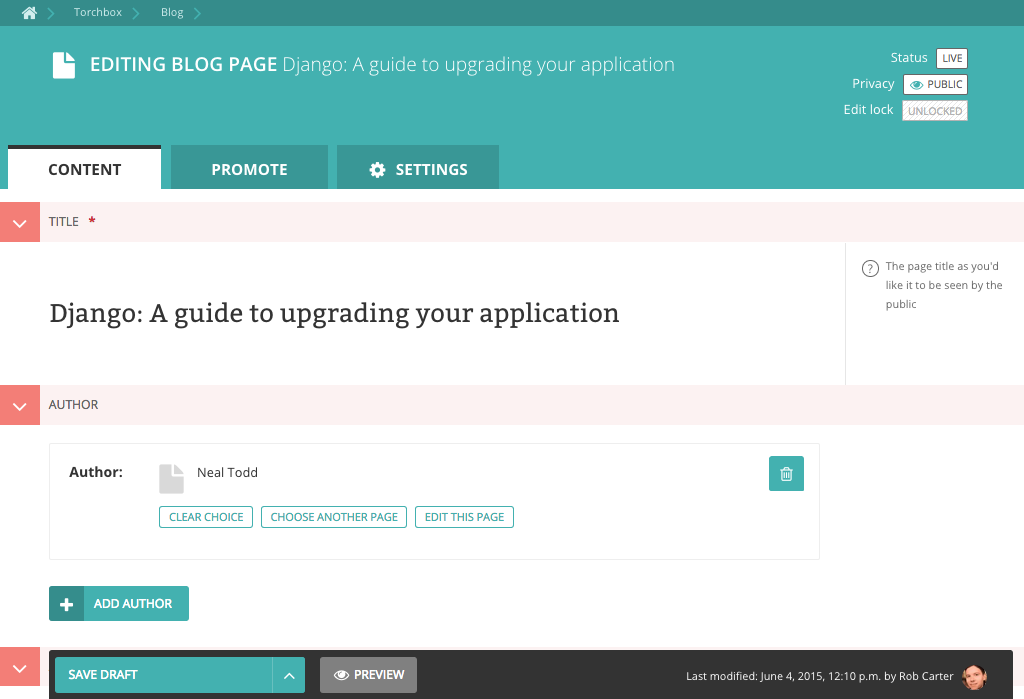
- When editing an existing page the title of the page being edited is displayed at the top of the page.
- The current status of the page is displayed in the top-right.
- You can change the title of the page by clicking into the title field.
- When you are typing into a field, help text is often displayed on the right-hand side of the screen.
Managing documents and images
Wagtail allows you to manage all of your documents and images through their own dedicated interfaces. See below for information on each of these elements.
Documents
Documents such as PDFs can be managed from the Documents interface, available in the left-hand menu. This interface allows you to add documents to and remove documents from the CMS.
- Add documents by clicking the Add document button in the top-right.
- Search for documents in the CMS by entering your search term in the search bar. The results will be automatically updated as you type.
- You can also filter the results by Popular tags. Click on a tag to update the search results listing.
- Edit the details of a document by clicking the document title.
- When editing a document you can replace the file associated with that document record. This means you can update documents without having to update the pages on which they are placed. Changing the file will change it on all pages that use the document.
- Add or remove tags using the Tags field.
- Save or delete documents using the buttons at the bottom of the interface.
Warning
Deleted documents cannot be recovered.
Images
If you want to edit, add or remove images from the CMS outside of the individual pages you can do so from the Images interface. This is accessed from the left-hand menu.

- Clicking an image will allow you to edit the data associated with it. This includes the Alt text, the photographers credit, the medium of the subject matter and much more.
Warning
Changing the alt text here will alter it for all occurrences of the image in carousels, but not in inline images, where the alt text can be set separately.
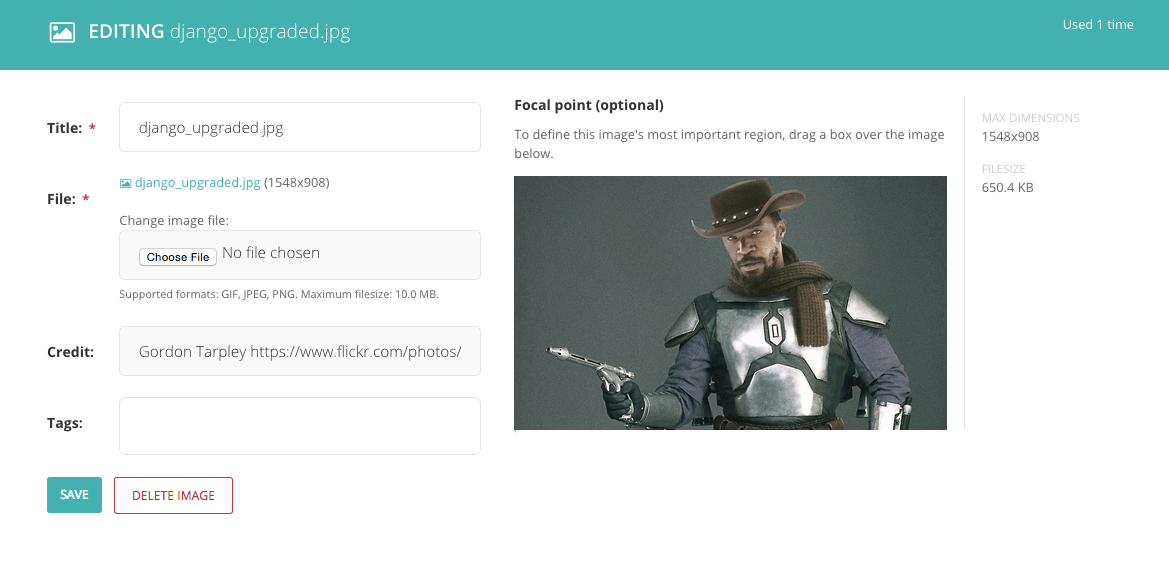
Changing the image
- When editing an image you can replace the file associated with that image record. This means you can update images without having to update the pages on which they are placed.
Warning
Changing the file will change it on all pages that use the image.
Focal area
- This interface allows you to select a focal area which can effect how your image displays to visitors on the front-end.
- If your images are cropped in some way to make them fit to a specific shape, then the focal area will define the centre point from which the image is cropped.
- To set the focal area, drag a marquee around the most important element of the image.
- To remove the focal area, hit the button below the image.
- If the feature is set up in your website, then on the front-end you will see the crop of this image focusing on your selection.
Snippets
Snippets allow you to create elements on a website once and reuse them in multiple places. Then, if you want to change something on the snippet, you only need to change it once, and it will change across all the occurances of the snippet.
How snippets are used can vary widely between websites. Here are a few examples of things Torchbox have used snippets for on our clients’ websites:
- For staff contact details, so that they can be added to many pages but managed in one place
- For Adverts, either to be applied sitewide or on individual pages
- To manage links in a global area of the site, for example in the footer
- For Calls to Action, such as Newsletter signup blocks, that may be consistent across many different pages
The Snippets menu
- You can access the Snippets menu by clicking on the ‘Snippets’ link in the left-hand menu bar.
- To add or edit a snippet, click on the snippet type you are interested in (often help text will be included to help you in selecting the right type)
- Click on an individual snippet to edit, or click ‘Add ...’ in the top right to add a new snippet
Warning
Editing a snippet will change it on all of the pages on which it has been used. In the top-right of the Snippet edit screen you will see a label saying how many times the snippet has been used. Clicking this label will display a listing of all of these pages.
Adding snippets whilst editing a page
If you are editing a page, and you find yourself in need of a new snippet, do not fear! You can create a new one without leaving the page you are editing:
- Whilst editing the page, open the snippets interface in a new tab, either by Ctrl+click (cmd+click on Mac) or by right clicking it and selecting ‘Open in new tab’ from the resulting menu.
- Add the snippet in this new tab as you normally would.
- Return to your existing tab and reopen the Snippet chooser window.
- You should now see your new snippet, even though you didn’t leave the edit page.
Note
Even though this is possible, it is worth saving your page as a draft as often as possible, to avoid your changes being lost by navigating away from the edit page accidentally.
Managing Redirects
About redirects
When dealing with publishing and unpublishing pages you will eventually need to make redirects. A redirect ensures that when a page is no longer available (404), the visitor and search engines are sent to a new page. Therefore the visitor won’t end up in a breaking journey which would result in a page not found.
Wagtail considers two types of configurable redirects depending on whether Permanent is checked or not:
- Permanent redirect (checked by default)
- Temporary redirect
For both redirects the visitor won’t experience a difference when visiting a page, but the search engine will react to these two type of redirects differently.
- In the case of a temporary redirect a search engine will keep track of your old page and will index the redirected page as well.
- With a permanent redirect, the search engine will mark the old page as obsolete and considers the new page as a replacement.
Note
As a best practice Wagtail will check redirects as permanent by default, in order to prevent the undermining of your search engine ranking.
Configuring redirects
To configure redirects head over to ‘Redirects’, which can be found in the Settings menu, accessible via the left-hand menu bar.
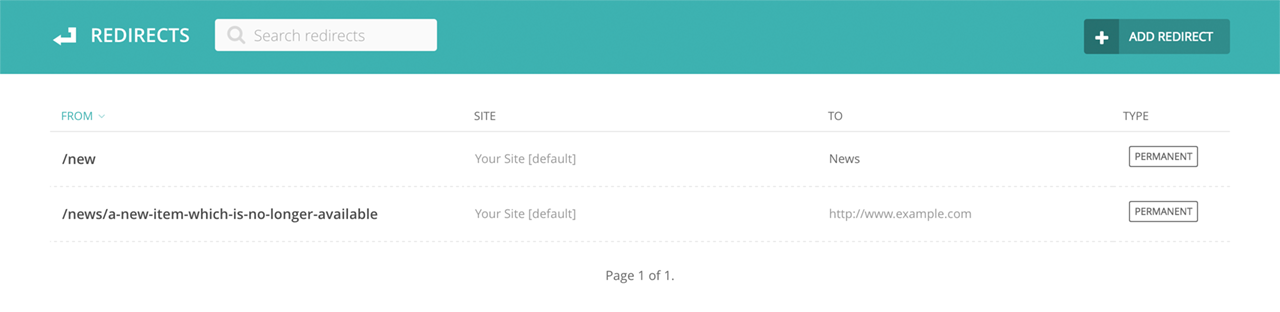
- Add a redirect by clicking the Add redirect button in the top-right.
- Search for redirects already configured by entering your search term in the search bar. The results will be automatically updated as you type.
- Edit the details of a redirect by clicking the URL path in the listing.
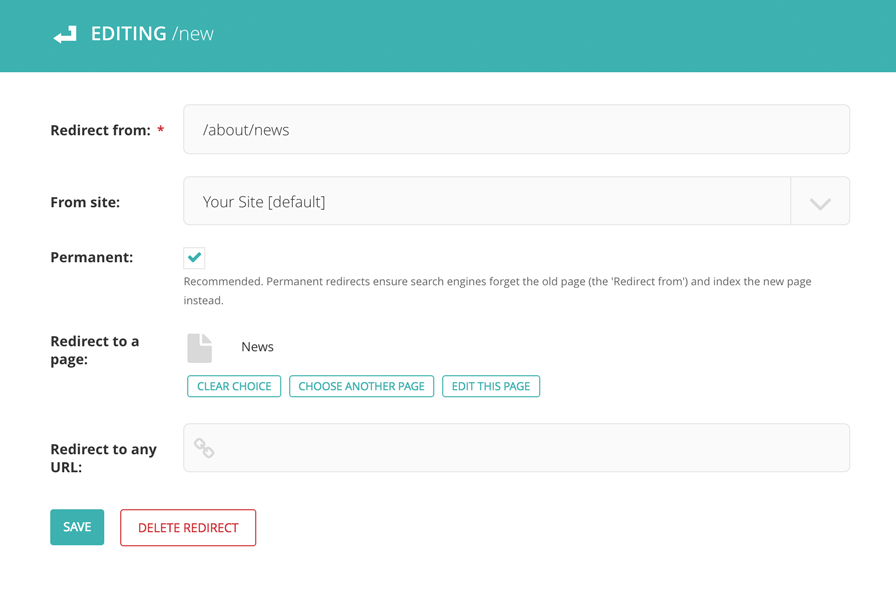
- Set Redirect from to the URL pattern which is no longer available on your site.
- Set the From site if applicable (for eg: a multisite environment).
- Check whether the redirect is Permanent or temporary (unchecked).
As a last step you can either redirect to a new page within Wagtail or you can redirect the page to a different domain outside of Wagtail.
- Select your page from the explorer for Redirect to a page.
- Set a full-domain and path for Redirect to any URL.
Note
Keep in mind a redirect will only be initiated if the page is not found. It will not be applied to existing pages (200) which will resolve on your site.
Administrator tasks
This section of the guide documents how to perform common tasks as an administrator of a Wagtail site.
Managing users and roles
As an administrator, a common task will be adding, modifying or removing user profiles.
This is done via the ‘Users’ interface, which can be found in the Settings menu, accessible via the left-hand menu bar.
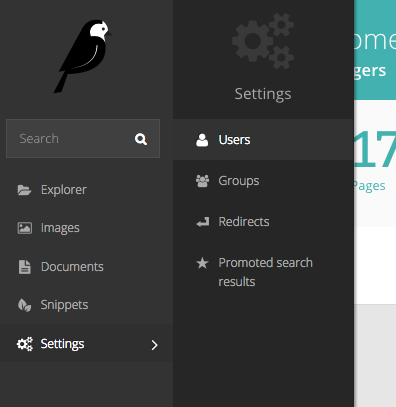
In this interface you can see all of your users, their usernames, their ‘level’ of access (otherwise known as their ‘role’), and their status, either active or inactive.
You can sort this listing either via Name or Username.

Clicking on a user’s name will open their profile details. From here you can then edit that users details.
Note
It is possible to change user’s passwords in this interface, but it is worth encouraging your users to use the ‘Forgotten password’ link on the login screen instead. This should save you some time!
Click the ‘Roles’ tab to edit the level of access your users have. By default there are three roles:
| Role | Create/view drafts | Publish content | Access Settings |
|---|---|---|---|
| Editor | Yes | No | No |
| Moderator | Yes | Yes | No |
| Administrator | Yes | Yes | Yes |
Promoted search results
Note
Promoted search results are an optional Wagtail feature. For details of how to enable them on a Wagtail installation, see wagtailsearchpromotions
Wagtail allows you to promote certain search results dependant on the keyword or phrase entered by the user when searching. This can be particularly useful when users commonly refer to parts of your organisation via an acronym that isn’t in official use, or if you want to direct users to a page that when they enter a certain term related to the page but not included in the text of the page itself.
As a concrete example, one of our clients wanted to direct people who searched for ‘finances’ to their ‘Annual budget review’ page. The word ‘finances’ is not mentioned in either the title or the body of the target page. So they created a promoted search result for the word ‘finances’ that pushed the budget page to the very top of the results.
Note
The promoted result will only work if the user types exactly the phrase that you have set it up for. If you have variations of phrase that you want to take into account, then you must create additional promoted results.
To set up the promoted search results, click on the ‘Promoted search results’ menu item in the ‘Settings’ menu.
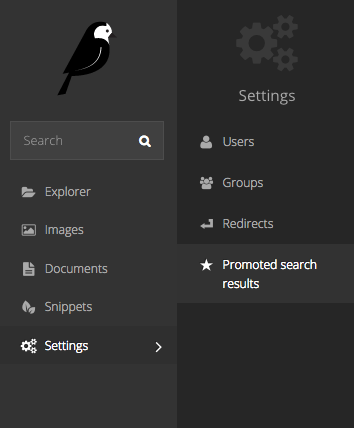
Add a new promoted result from the button in the top right of the resulting screen, or edit an existing promoted result by clicking on it.
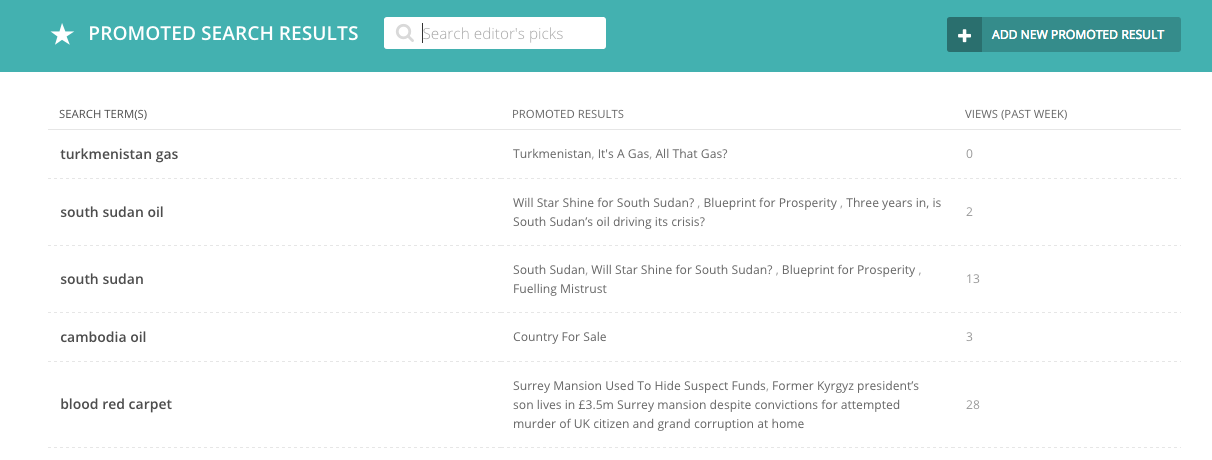
When adding a new promoted result, Wagtail provides you with a ‘Choose from popular search terms’ option. This will show you the most popular terms entered by users into your internal search. You can match this against your existing promoted results to ensure that users are able to find what they are looking for.
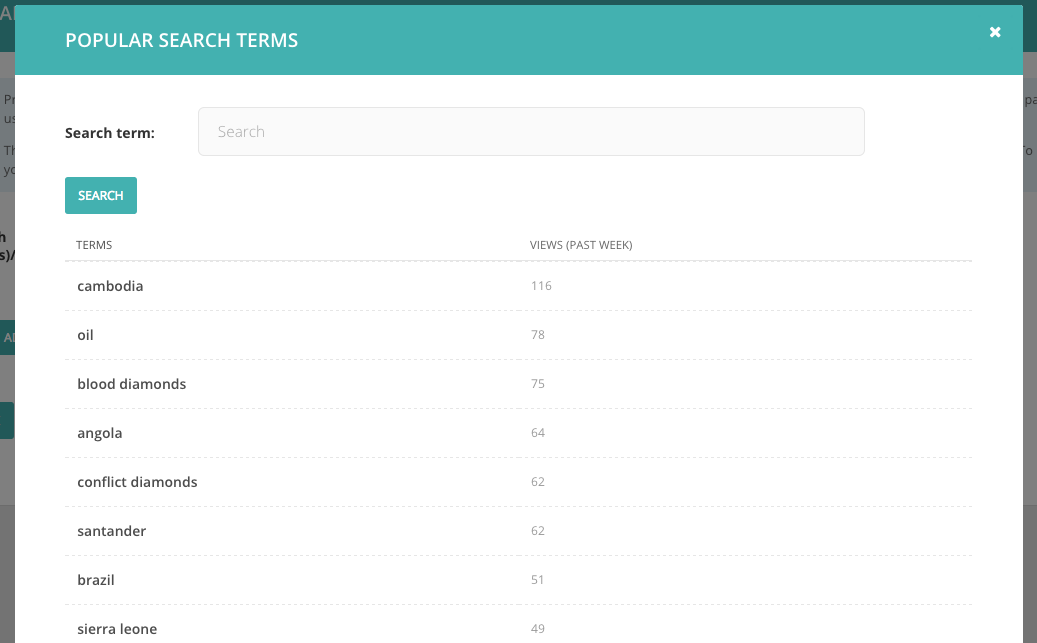
You then add a the result itself by clicking ‘Add recommended page’. You can add multiple results, but be careful about adding too many, as you may end up hiding all of your organic results with promoted results, which may not be helpful for users who aren’t really sure what they are looking for.
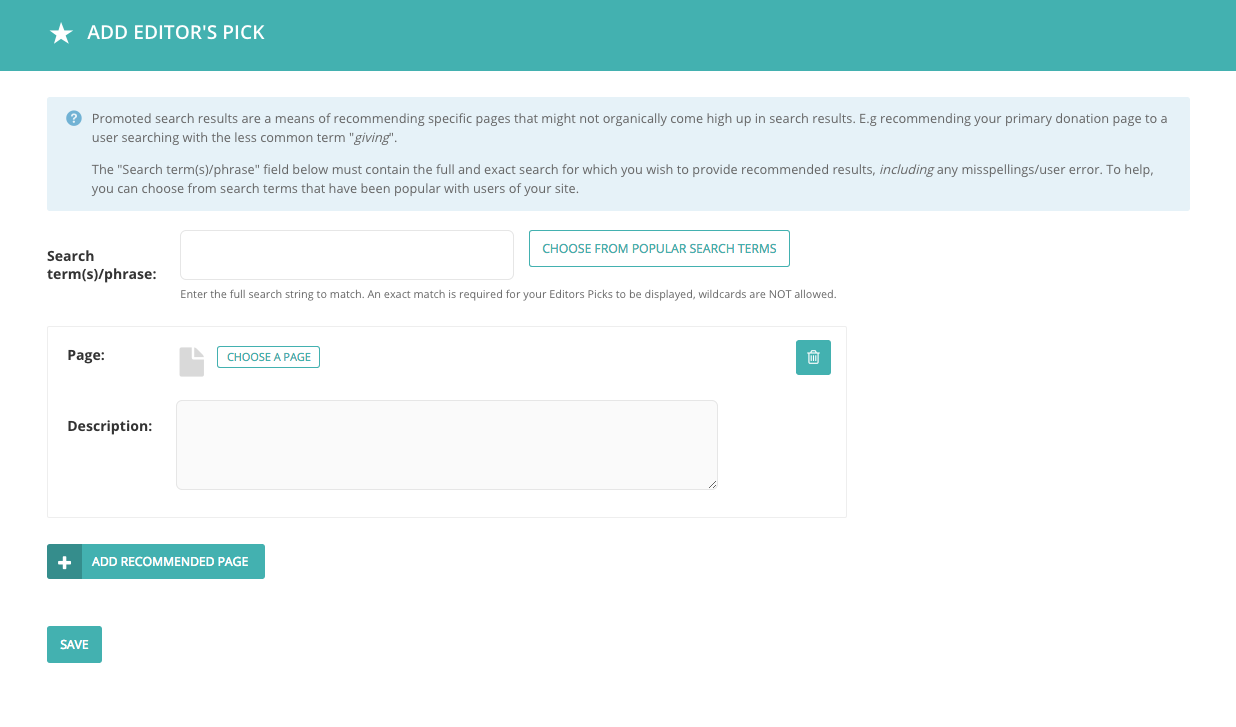
Browser issues
Some issues with Wagtail may come from the browser. Try clearing the browser cache and cookies, or you can also try using Wagtail with another browser to see if the problem persists.
JavaScript is required to use Wagtail – make sure it is enabled in your browser.
Supported browsers
For the best experience and security, we recommend that you keep your browser up to date. Go to Browse Happy for more information.
Contributing to Wagtail
Issues
The easiest way to contribute to Wagtail is to tell us how to improve it! First, check to see if your bug or feature request has already been submitted at github.com/wagtail/wagtail/issues. If it has, and you have some supporting information which may help us deal with it, comment on the existing issue. If not, please create a new one, providing as much relevant context as possible. For example, if you’re experiencing problems with installation, detail your environment and the steps you’ve already taken. If something isn’t displaying correctly, tell us what browser you’re using, and include a screenshot if possible.
Issue tracking
We welcome bug reports, feature requests and pull requests through Wagtail’s Github issue tracker.
Issues
An issue must always correspond to a specific action with a well-defined completion state: fixing a bug, adding a new feature, updating documentation, cleaning up code. Open-ended issues where the end result is not immediately clear (“come up with a way of doing translations”) are fine, as long as there’s a clear way to progress the issue and identify when it has been completed (not e.g. “make rich text fields suck less”).
Do not use issues for support queries or other questions (“How do I do X?” - although “Implement a way of doing X” or “Document how to do X” could well be valid issues). These should be asked on Stack Overflow, or for discussions that do not fit Stack Overflow’s question-and-answer format, the Wagtail Support Google group.
As soon as a ticket is opened - ideally within one day - a member of the core team will give it an initial classification, by either closing it as invalid or assigning it to a milestone. Don’t be discouraged if you feel that your ticket has been given a lower priority than it deserves - this decision isn’t permanent. We will consider all feedback, and reassign or reopen tickets where appropriate.
(From the other side, this means that the core team member doing the classification should feel free to make bold unilateral decisions - there’s no need to seek consensus first. If they make the wrong judgment call, that can always be reversed later.)
The possible milestones that it might be assigned to are as follows:
- invalid (closed): this issue doesn’t identify a specific action to be taken, or the action is not one that we want to take. For example - a bug report for something that’s working as designed, or a feature request for something that’s actively harmful.
- some-day: the issue is accepted as valid (i.e. it’s a bug report for a legitimate bug, or a useful feature request) but not deemed a priority to work on (in the opinion of the core team). For example - a bug that’s only cosmetic, or a feature that would be kind of neat but not really essential. There are no resources allocated to it - feel free to take it on!
- real-soon-now: the issue is considered important by the core team (roughly speaking: it’s a bug or missing feature that’s causing headaches for people) but isn’t necessarily going to be completed on any set timescale. There are no resources allocated to it - feel free to take it on!
- A specific version number (eg. 1.6): the issue is important enough that it needs to be fixed in this version. There are resources allocated and/or plans to work on the issue in the given version.
On some occasions it may take longer for the core team to classify an issue into a milestone. For example:
- It may require a non-trivial amount of work to confirm the presence of a bug. In this case, feedback and further details from other contributors, whether or not they can replicate the bug, would be particularly welcomed.
- It may require further discussion to decide whether the proposal is a good idea or not - if so, it will be tagged “design decision needed”.
We will endeavour to make sure that issues don’t remain in this state for prolonged periods. Issues and PRs tagged “design decision needed” will be revisited regularly and discussed with at least two core contributors - we aim to review each ticket at least once per release cycle (= 6 weeks) as part of weekly core team meetings.
Pull requests
As with issues, the core team will classify pull requests as soon as they are opened, usually within one day. Unless the change is invalid or particularly contentious (in which case it will be closed or marked as “design decision needed”), it will generally be classified under the next applicable version - the next minor release for new features, or the next patch release for bugfixes - and marked as ‘Needs review’.
- All contributors, core and non-core, are invited to offer feedback on the pull request.
- Core team members are invited to assign themselves to the pull request for review.
Subsequently (ideally within a week or two, but possibly longer for larger submissions) a core team member will merge it if it is ready to be merged, or tag it as requiring further work (‘needs work’ / ‘needs tests’ / ‘needs docs’). In the latter case, they may also reassign it to a later milestone (‘real-soon-now’ or ‘some-day’). Pull requests that require further work are handled and prioritised in the same way as issues - anyone is welcome to pick one up from the backlog, whether or not they were the original committer.
Rebasing / squashing of pull requests is welcome, but not essential. When doing so, do not squash commits that need reviewing into previous ones and make sure to preserve the sequence of changes. To fix mistakes in earlier commits, use git commit --fixup so that the final merge can be done with git rebase -i --autosquash.
Core team members working on Wagtail are expected to go through the same process with their own fork of the project.
Release schedule
We aim to release a new version every 2 months. To keep to this schedule, we will tend to ‘bump’ issues and PRs to a future release where necessary, rather than let them delay the present one. For this reason, an issue being tagged under a particular release milestone should not be taken as any kind of guarantee that the feature will actually be shipped in that release.
Pull requests
If you’re a Python or Django developer, fork it and read the developing docs to get stuck in! We welcome all contributions, whether they solve problems which are specific to you or they address existing issues. If you’re stuck for ideas, pick something from the issue list, or email us directly on hello@wagtail.io if you’d like us to suggest something!
Development
Setting up a local copy of the Wagtail git repository is slightly more involved than running a release package of Wagtail, as it requires Node.js and NPM for building Javascript and CSS assets. (This is not required when running a release version, as the compiled assets are included in the release package.)
If you’re happy to develop on a virtual machine, the vagrant-wagtail-develop setup script is the fastest way to get up and running. This will provide you with a running instance of the Wagtail demo site, with the Wagtail and wagtaildemo codebases available as shared folders for editing on your host machine.
(Build scripts for other platforms would be very much welcomed - if you create one, please let us know via the Wagtail Developers group!)
If you’d prefer to set up all the components manually, read on. These instructions assume that you’re familiar with using pip and virtualenv to manage Python packages.
Setting up the Wagtail codebase
Install Node.js, version 4.x, 5.x or 6.x. Instructions for installing Node.js can be found on the Node.js download page. You can also use Node version manager (nvm) since Wagtail supplies a .nvmrc file in the root of the project with the minimum required Node version - see nvm’s installation instructions.
You will also need to install the libjpeg and zlib libraries, if you haven’t done so already - see Pillow’s platform-specific installation instructions.
Clone a copy of the Wagtail codebase:
$ git clone https://github.com/wagtail/wagtail.git
$ cd wagtail
With your preferred virtualenv activated, install the Wagtail package in development mode with the included testing and documentation dependencies:
$ pip install -e '.[testing,docs]' -U
Install Node through nvm (optional):
$ nvm install
Install the tool chain for building static assets:
$ npm install
Compile the assets:
$ npm run build
Any Wagtail sites you start up in this virtualenv will now run against this development instance of Wagtail. We recommend using the Wagtail demo site as a basis for developing Wagtail.
Testing
From the root of the Wagtail codebase, run the following command to run all the tests:
$ python runtests.py
Running only some of the tests
At the time of writing, Wagtail has well over 2500 tests, which takes a while to run. You can run tests for only one part of Wagtail by passing in the path as an argument to runtests.py:
$ python runtests.py wagtail.wagtailcore
You can also run tests for individual TestCases by passing in the path as an argument to runtests.py
$ python runtests.py wagtail.wagtailcore.tests.test_blocks.TestIntegerBlock
Testing against PostgreSQL
By default, Wagtail tests against SQLite. You can switch to using PostgreSQL by using the --postgres argument:
$ python runtests.py --postgres
If you need to use a different user, password or host. Use the PGUSER, PGPASSWORD and PGHOST environment variables.
Testing against a different database
If you need to test against a different database, set the DATABASE_ENGINE environment variable to the name of the Django database backend to test against:
$ DATABASE_ENGINE=django.db.backends.mysql python runtests.py
This will create a new database called test_wagtail in MySQL and run the tests against it.
Testing Elasticsearch
You can test Wagtail against Elasticsearch by passing the --elasticsearch argument to runtests.py:
$ python runtests.py --elasticsearch
Wagtail will attempt to connect to a local instance of Elasticsearch (http://localhost:9200) and use the index test_wagtail.
If your Elasticsearch instance is located somewhere else, you can set the ELASTICSEARCH_URL environment variable to point to its location:
$ ELASTICSEARCH_URL=http://my-elasticsearch-instance:9200 python runtests.py --elasticsearch
Browser and device support
Wagtail is meant to be used on a wide variety of devices and browsers. Supported browser / device versions include:
| Browser | Device/OS | Version(s) |
|---|---|---|
| Mobile Safari | iOS Phone | Last 2 |
| Mobile Safari | iOS Tablet | Last 2 |
| Chrome | Android | Last 2 |
| IE | Desktop | 11 |
| Chrome | Desktop | Last 2 |
| MS Edge | Desktop | Last 2 |
| Firefox | Desktop | Latest |
| Firefox ESR | Desktop | Latest |
| Safari | macOS | Last 2 |
We aim for Wagtail to work in those environments. Our development standards ensure that the site is usable on other browsers and will work on future browsers. To test on IE, install virtual machines made available by Microsoft.
Unsupported browsers / devices include:
| Browser | Device/OS | Version(s) |
|---|---|---|
| Stock browser | Android | All |
| IE | Desktop | 10 and below |
| Safari | Windows | All |
Compiling static assets
All static assets such as JavaScript, CSS, images, and fonts for the Wagtail admin are compiled from their respective sources by gulp. The compiled assets are not committed to the repository, and are compiled before packaging each new release. Compiled assets should not be submitted as part of a pull request.
To compile the assets, run:
$ npm run build
This must be done after every change to the source files. To watch the source files for changes and then automatically recompile the assets, run:
$ npm start
Compiling the documentation
The Wagtail documentation is built by Sphinx. To install Sphinx and compile the documentation, run:
$ cd /path/to/wagtail
$ # Install the documentation dependencies
$ pip install -e .[docs]
$ # Compile the docs
$ cd docs/
$ make html
The compiled documentation will now be in docs/_build/html. Open this directory in a web browser to see it. Python comes with a module that makes it very easy to preview static files in a web browser. To start this simple server, run the following commands:
$ cd docs/_build/html/
$ # Python 2
$ python2 -mSimpleHTTPServer 8080
$ # Python 3
$ python3 -mhttp.server 8080
Now you can open <http://localhost:8080/> in your web browser to see the compiled documentation.
Sphinx caches the built documentation to speed up subsequent compilations. Unfortunately, this cache also hides any warnings thrown by unmodified documentation source files. To clear the built HTML and start fresh, so you can see all warnings thrown when building the documentation, run:
$ cd docs/
$ make clean
$ make html
Wagtail also provides a way for documentation to be compiled automatically on each change. To do this, you can run the following command to see the changes automatically at localhost:4000:
$ cd docs/
$ make livehtml
Committing code
This section is for the committers of Wagtail, or for anyone interested in the process of getting code committed to Wagtail.
Code should only be committed after it has been reviewed by at least one other reviewer or committer, unless the change is a small documentation change or fixing a typo. If additional code changes are made after the review, it is OK to commit them without further review if they are uncontroversial and small enough that there is minimal chance of introducing new bugs.
Most code contributions will be in the form of pull requests from Github. Pull requests should not be merged from Github, apart from small documentation fixes, which can be merged with the ‘Squash and merge’ option. Instead, the code should be checked out by a committer locally, the changes examined and rebased, the CHANGELOG.txt and release notes updated, and finally the code should be pushed to the master branch. This process is covered in more detail below.
Check out the code locally
If the code has been submitted as a pull request, you should fetch the changes and check them out in your Wagtail repository. A simple way to do this is by adding the following git alias to your ~/.gitconfig (assuming upstream is wagtail/wagtail):
[alias]
pr = !sh -c \"git fetch upstream pull/${1}/head:pr/${1} && git checkout pr/${1}\"
Now you can check out pull request number xxxx by running git pr xxxx.
Rebase on to master
Now that you have the code, you should rebase the commits on to the master branch. Rebasing is preferred over merging, as merge commits make the commit history harder to read for small changes.
You can fix up any small mistakes in the commits, such as typos and formatting, as part of the rebase. git rebase --interactive is an excellent tool for this job.
Ideally, use this as an opportunity to squash the changes to a few commits, so each commit is making a single meaningful change (and not breaking anything). If this is not possible because of the nature of the changes, it’s acceptable to either squash into a commit or leave all commits unsquashed, depending on which will be more readable in the commit history.
$ # Get the latest commits from Wagtail
$ git fetch upstream
$ git checkout master
$ git merge --ff-only upstream/master
$ # Rebase this pull request on to master
$ git checkout pr/xxxx
$ git rebase master
$ # Update master to this commit
$ git checkout master
$ git merge --ff-only pr/xxxx
Update CHANGELOG.txt and release notes
Every significant change to Wagtail should get an entry in the CHANGELOG.txt, and the release notes for the current version.
The CHANGELOG.txt contains a short summary of each new feature, refactoring, or bug fix in each release. Each summary should be a single line. Bug fixes should be grouped together at the end of the list for each release, and be prefixed with “Fix:”. The name of the contributor should be added at the end of the summary, in brackets, if they are not a core committer. For example:
* Fix: Tags added on the multiple image uploader are now saved correctly (Alex Smith)
The release notes for each version contain a more detailed description of each change. Backwards compatibility notes should also be included. Large new features or changes should get their own section, while smaller changes and bug fixes should be grouped together in their own section. See previous release notes for examples. The release notes for each version are found in docs/releases/x.x.x.rst.
If the contributor is a new person, and this is their first contribution to Wagtail, they should be added to the CONTRIBUTORS.rst list. Contributors are added in chronological order, with new contributors added to the bottom of the list. Use their preferred name. You can usually find the name of a contributor on their Github profile. If in doubt, or if their name is not on their profile, ask them how they want to be named.
If the changes to be merged are small enough to be a single commit, amend this single commit with the additions to the CHANGELOG.txt, release notes, and contributors:
$ git add CHANGELOG.txt docs/releases/x.x.x.rst CONTRIBUTORS.rst
$ git commit --amend --no-edit
If the changes do not fit in a single commit, make a new commit with the updates to the CHANGELOG.txt, release notes, and contributors. The commit message should say Release notes for #xxxx:
$ git add CHANGELOG.txt docs/releases/x.x.x.rst CONTRIBUTORS.rst
$ git commit -m 'Release notes for #xxxx'
Push to master
The changes are ready to be pushed to master now.
$ # Check that everything looks OK
$ git log upstream/master..master --oneline
$ git push --dry-run upstream master
$ # Push the commits!
$ git push upstream master
$ git branch -d pr/xxxx
When you have made a mistake
It’s ok! Everyone makes mistakes. If you realise that recent merged changes have a negative impact, create a new pull request with a revert of the changes and merge it without waiting for a review. The PR will serve as additional documentation for the changes, and will run through the CI tests.
Translations
Wagtail has internationalisation support so if you are fluent in a non-English language you can contribute by localising the interface.
Translation work should be submitted through Transifex.
Other contributions
We welcome contributions to all aspects of Wagtail. If you would like to improve the design of the user interface, or extend the documentation, please submit a pull request as above. If you’re not familiar with Github or pull requests, contact us directly and we’ll work something out.
More information
UI Styleguide
Developers working on the Wagtail UI or creating new UI components may wish to test their work against our Styleguide, which is provided as the contrib module “wagtailstyleguide”.
To install the styleguide module on your site, add it to the list of INSTALLED_APPS in your settings:
INSTALLED_APPS = (
...
'wagtail.contrib.wagtailstyleguide',
...
)
This will add a ‘Styleguide’ item to the Settings menu in the admin.
At present the styleguide is static: new UI components must be added to it manually, and there are no hooks into it for other modules to use. We hope to support hooks in the future.
The styleguide doesn’t currently provide examples of all the core interface components; notably the Page, Document, Image and Snippet chooser interfaces are not currently represented.
Python coding guidelines
PEP8
We ask that all Python contributions adhere to the PEP8 style guide, apart from the restriction on line length (E501) and some minor docstring-related issues. The list of PEP8 violations to ignore is in the tox.ini file, under the [flake8] header. You might want to configure the flake8 linter in your editor/IDE to use the configuration in this file.
In addition, import lines should be sorted according to isort 4.2.5 rules. If you have installed Wagtail’s testing dependencies (pip install -e .[testing]), you can check your code by running make lint.
Python 2 and 3 compatibility
All contributions should support Python 2 and 3 and we recommend using the six compatibility library (use the version bundled with Django, django.utils.six).
Django compatibility
Wagtail is written to be compatible with multiple versions of Django. Sometimes, this requires running one piece of code for recent version of Django, and another piece of code for older versions of Django. In these cases, always check which version of Django is being used by inspecting django.VERSION:
import django
if django.VERSION >= (1, 9):
# Use new attribute
related_field = field.rel
else:
# Use old, deprecated attribute
related_field = field.related
Always compare against the version using greater-or-equals (>=), so that code for newer versions of Django is first.
Do not use a try ... except when seeing if an object has an attribute or method introduced in a newer versions of Django, as it does not clearly express why the try ... except is used. An explicit check against the Django version makes the intention of the code very clear.
# Do not do this
try:
related_field = field.rel
except AttributeError:
related_field = field.related
If the code needs to use something that changed in a version of Django many times, consider making a function that encapsulates the check:
import django
def related_field(field):
if django.VERSION >= (1, 9):
return field.rel
else:
return field.related
If a new function has been introduced by Django that you think would be very useful for Wagtail, but is not available in older versions of Django that Wagtail supports, that function can be copied over in to Wagtail. If the user is running a new version of Django that has the function, the function should be imported from Django. Otherwise, the version bundled with Wagtail should be used. A link to the Django source code where this function was taken from should be included:
import django
if django.VERSION >= (1, 9):
from django.core.validators import validate_unicode_slug
else:
# Taken from https://github.com/django/django/blob/1.9/django/core/validators.py#L230
def validate_unicode_slug(value):
# Code left as an exercise to the reader
pass
Tests
Wagtail has a suite of tests, which we are committed to improving and expanding. See Testing.
We run continuous integration at travis-ci.org/wagtail/wagtail to ensure that no commits or pull requests introduce test failures. If your contributions add functionality to Wagtail, please include the additional tests to cover it; if your contributions alter existing functionality, please update the relevant tests accordingly.
CSS coding guidelines
Our CSS is written in Sass, using the SCSS syntax.
Compiling
The SCSS source files are compiled to CSS using the gulp build system. This requires node.js to run. To install the libraries required for compiling the SCSS, run the following from the Wagtail repository root:
$ npm install
To compile the assets, run:
$ npm run build
Alternatively, the SCSS files can be monitored, automatically recompiling when any changes are observed, by running:
$ npm start
Linting SCSS
Wagtail uses the “scss-lint” Ruby Gem for linting.
Install it thus:
$ gem install scss-lint
Then run the linter from the wagtail project root:
$ scss-lint
The linter is configured to check your code for adherance to the guidelines below, plus a little more.
- Use soft-tabs with a four space indent. Spaces are the only way to guarantee code renders the same in any person’s environment.
- Put spaces after
:in property declarations. - Put spaces before
{in rule declarations. - Put line breaks between rulesets.
- When grouping selectors, put each selector on its own line.
- Place closing braces of declaration blocks on a new line.
- Each declaration should appear on its own line for more accurate error reporting.
- Add a newline at the end of your
.scssfiles. - Strip trailing whitespace from your rules.
- Add a space after the comma, in comma-delimited property values e.g
rgba()
- Use hex color codes
#000unless usingrgba()in raw CSS (SCSS’rgba()function is overloaded to accept hex colors as a param, e.g.,rgba(#000, .5)). - Use
//for comment blocks (instead of/* */). - Use single quotes for string values
background: url('my/image.png')orcontent: 'moose' - Avoid specifying units for zero values, e.g.,
margin: 0;instead ofmargin: 0px;. - Strive to limit use of shorthand declarations to instances where you must explicitly set all the available values.
Leave off underscores and file extensions in includes:
// Bad
@import 'components/_widget.scss'
// Better
@import 'components/widget'
Use rems for font-size, because they offer absolute control over text. Additionally, unit-less line-height is preferred because it does not inherit a percentage value of its parent element, but instead is based on a multiplier of the font-size.
Always use classes instead of IDs in CSS code. IDs are overly specific and lead to duplication of CSS.
When styling a component, start with an element + class namespace, prefer direct descendant selectors by default, and use as little specificity as possible. Here is a good example:
<ul class="category-list">
<li class="item">Category 1</li>
<li class="item">Category 2</li>
<li class="item">Category 3</li>
</ul>
.category-list { // element + class namespace
// Direct descendant selector > for list items
> li {
list-style-type: disc;
}
// Minimal specificity for all links
a {
color: #f00;
}
}
Never reference js- prefixed class names from CSS files. js- are used exclusively from JS files.
Use the SMACSS is- prefix for state rules that are shared between CSS and JS.
As a rule of thumb, avoid unnecessary nesting in SCSS. At most, aim for three levels. If you cannot help it, step back and rethink your overall strategy (either the specificity needed, or the layout of the nesting).
Here are some good examples that apply the above guidelines:
// Example of good basic formatting practices
.styleguide-format {
color: #000;
background-color: rgba(0, 0, 0, .5);
border: 1px solid #0f0;
}
// Example of individual selectors getting their own lines (for error reporting)
.multiple,
.classes,
.get-new-lines {
display: block;
}
// Avoid unnecessary shorthand declarations
.not-so-good {
margin: 0 0 20px;
}
.good {
margin-bottom: 20px;
}
JavaScript coding guidelines
Write JavaScript according to the Airbnb Styleguide, with some exceptions:
- Use soft-tabs with a four space indent. Spaces are the only way to guarantee code renders the same in any person’s environment.
- We accept
snake_casein object properties, such asajaxResponse.page_title, however camelCase or UPPER_CASE should be used everywhere else.
Linting and formatting code
Wagtail provides some tooling configuration to help check your code meets the styleguide. You’ll need node.js and npm on your development machine. Ensure project dependencies are installed by running npm install
$ npm run lint:js
This will lint all the JS in the wagtail project, excluding vendor files and compiled libraries.
Some of the modals are generated via server-side scripts. These include template tags that upset the linter, so modal workflow JavaScript is excluded from the linter.
$ npm run format:js
This will perform safe edits to conform your JS code to the styleguide. It won’t touch the line-length, or convert quotemarks from double to single.
Run the linter after you’ve formatted the code to see what manual fixes you need to make to the codebase.
Under the hood, the tasks use the JavaScript Code Style library.
To edit the settings for ignored files, or to change the linting rules, edit the .jscsrc file in the wagtail project root.
A complete list of the possible linting rules can be found here: JSCS Rules
Wagtail’s release process
Official releases
Release numbering works as follows:
- Versions are numbered in the form
A.BorA.B.C. A.Bis the feature release version number. Each version will be mostly backwards compatible with the previous release. Exceptions to this rule will be listed in the release notes.Cis the patch release version number, which is incremented for bugfix and security releases. These releases will be 100% backwards-compatible with the previous patch release. The only exception is when a security or data loss issue can’t be fixed without breaking backwards-compatibility. If this happens, the release notes will provide detailed upgrade instructions.- Before a new feature release, we’ll make at least one release candidate release. These are of the form
A.BrcN, which means theNthrelease candidate of versionA.B.
In git, each Wagtail release will have a tag indicating its version number. Additionally, each release series has its own branch, called stable/A.B.x, and bugfix/security releases will be issued from those branches.
- Feature release
- Feature releases (A.B, A.B+1, etc.) will happen roughly every two months – see release process for details. These releases will contain new features, improvements to existing features, and such.
- Patch release
Patch releases (A.B.C, A.B.C+1, etc.) will be issued as needed, to fix bugs and/or security issues.
These releases will be 100% compatible with the associated feature release, unless this is impossible for security reasons or to prevent data loss. So the answer to “should I upgrade to the latest patch release?” will always be “yes.”
- Long-term support release
- Certain feature releases will be designated as long-term support (LTS) releases. These releases will get security and data loss fixes applied for a guaranteed period of time, typically six months.
Release cadence
Wagtail uses a loose form of semantic versioning. SemVer makes it easier to see at a glance how compatible releases are with each other. It also helps to anticipate when compatibility shims will be removed. It’s not a pure form of SemVer as each feature release will continue to have a few documented backwards incompatibilities where a deprecation path isn’t possible or not worth the cost.
Deprecation policy
A feature release may deprecate certain features from previous releases. If a feature is deprecated in feature release A.B, it will continue to work in the following version but raise warnings. Features deprecated in release A.B will be removed in the A.B+2 release to ensure deprecations are done over at least 2 feature releases.
So, for example, if we decided to start the deprecation of a function in Wagtail 1.4:
- Wagtail 1.4 will contain a backwards-compatible replica of the function which will raise a
RemovedInWagtail16Warning. - Wagtail 1.5 will still contain the backwards-compatible replica.
- Wagtail 1.6 will remove the feature outright.
The warnings are silent by default. You can turn on display of these warnings with the python -Wd option.
Supported versions
At any moment in time, Wagtail’s developer team will support a set of releases to varying levels.
The current development master will get new features and bug fixes requiring non-trivial refactoring.
Patches applied to the master branch must also be applied to the last feature release branch, to be released in the next patch release of that feature series, when they fix critical problems:
- Security issues.
- Data loss bugs.
- Crashing bugs.
- Major functionality bugs in newly-introduced features.
- Regressions from older versions of Wagtail.
The rule of thumb is that fixes will be backported to the last feature release for bugs that would have prevented a release in the first place (release blockers).
Security fixes and data loss bugs will be applied to the current master, the last feature release branch, and any other supported long-term support release branches.
Documentation fixes generally will be more freely backported to the last release branch. That’s because it’s highly advantageous to have the docs for the last release be up-to-date and correct, and the risk of introducing regressions is much less of a concern.
As a concrete example, consider a moment in time halfway between the release of Wagtail 1.6 and 1.7. At this point in time:
- Features will be added to
master, to be released as Wagtail 1.7. - Critical bug fixes will be applied to the
stable/1.6.xbranch, and released as 1.6.1, 1.6.2, etc. - Security fixes and bug fixes for data loss issues will be applied to
masterand to thestable/1.6.xandstable/1.4.x(LTS) branches. They will trigger the release of1.6.1,1.4.8, etc. - Documentation fixes will be applied to master, and, if easily backported, to the latest stable branch,
1.6.x.
Supported versions of Django
Each release of Wagtail declares which versions of Django it supports.
Typically, a new Wagtail feature release supports the last long-term support version and all following versions of Django.
For example, consider a moment in time before release of Wagtail 1.5 and after the following releases:
- Django 1.8 (LTS)
- Django 1.9
- Wagtail 1.4 (LTS) - Released before Django 1.10 and supports Django 1.8 and 1.9
- Django 1.10
Wagtail 1.5 will support Django 1.8 (LTS), 1.9, 1.10. Wagtail 1.4 will still support only Django 1.8 (LTS) and 1.9.
Release process
Wagtail uses a time-based release schedule, with feature releases every two months or so.
After each feature release, the release manager will announce a timeline for the next feature release.
Each release cycle consists of three parts:
The first phase of the release process will include figuring out what major features to include in the next version. This should include a good deal of preliminary work on those features – working code trumps grand design.
The second part of the release schedule is the “heads-down” working period. Using the roadmap produced at the end of phase one, we’ll all work very hard to get everything on it done.
At the end of phase two, any unfinished features will be postponed until the next release.
At this point, the stable/A.B.x branch will be forked from master.
The last part of a release cycle is spent fixing bugs – no new features will be accepted during this time.
Once all known blocking bugs have been addressed, a release candidate will be made available for testing. The final release will usually follow two weeks later, although this period may be extended if the further release blockers are found.
During this phase, committers will be more and more conservative with backports, to avoid introducing regressions. After the release candidate, only release blockers and documentation fixes should be backported.
Developers should avoid adding any new translatable strings after the release candidate - this ensures that translators have the full period between the release candidate and the final release to bring translations up to date. Translations will be re-imported immediately before the final release.
In parallel to this phase, master can receive new features, to be released in the A.B+1 cycle.
After a feature release (e.g. A.B), the previous release will go into bugfix mode.
The branch for the previous feature release (e.g. stable/A.B-1.x) will include bugfixes. Critical bugs fixed on master must also be fixed on the bugfix branch; this means that commits need to cleanly separate bug fixes from feature additions. The developer who commits a fix to master will be responsible for also applying the fix to the current bugfix branch.
Release notes
Wagtail 1.11 release notes
What’s new
Privacy settings on documents
Privacy settings can now be configured on collections, to restrict access to documents either by shared password or by user account. See: Private pages.
This feature was developed by Ulrich Wagner and Matt Westcott. Thank you to Wharton Research Data Services of The Wharton School for sponsoring this feature.
Other features
- Optimised page URL generation by caching site paths in the request scope (Tobias McNulty, Matt Westcott)
- The current live version of a page is now tracked on the revision listing view (Matheus Bratfisch)
- Each block created in a
StreamFieldis now assigned a globally unique identifier (Matt Westcott)- Mixcloud oEmbed pattern has been updated (Alice Rose)
- Added
last_published_atfield to the Page model (Matt Westcott)- Added
show_in_menus_defaultflag on page models, to allow “show in menus” to be checked by default (LB (Ben Johnston))- “Copy page” form now validates against copying to a destination where the user does not have permission (Henk-Jan van Hasselaar)
- Allows reverse relations in
RelatedFieldsfor elasticsearch & PostgreSQL search backends (Lucas Moeskops, Bertrand Bordage)- Added oEmbed support for Facebook (Mikalai Radchuk)
- Added oEmbed support for Tumblr (Mikalai Radchuk)
Bug fixes
- Unauthenticated AJAX requests to admin views now return 403 rather than redirecting to the login page (Karl Hobley)
TableBlockoptionsafterChange,afterCreateCol,afterCreateRow,afterRemoveCol,afterRemoveRowandcontextMenucan now be overridden (Loic Teixeira)- The lastmod field returned by wagtailsitemaps now shows the last published date rather than the date of the last draft edit (Matt Westcott)
- Document chooser upload form no longer renders container elements for hidden fields (Jeffrey Chau)
- Prevented exception when visiting a preview URL without initiating the preview (Paul Kamp)
Upgrade considerations
Caching of site-level URL information throughout the request cycle
The get_url_parts and relative_url methods on Page now accept an optional request keyword argument. Additionally, two new methods have been added, get_url (analogous to the url property) and get_full_url (analogous to the full_url) property. Whenever possible, these methods should be used instead of the property versions, and the request passed to each method. For example:
page_url = my_page.url
would become:
page_url = my_page.get_url(request=request)
This enables caching of underlying site-level URL information throughout the request cycle, thereby significantly reducing the number of cache or SQL queries your site will generate for a given page load. A common use case for these methods is any custom template tag your project may include for generating navigation menus. For more information, please refer to Page URLs.
Furthermore, if you have overridden get_url_parts or relative_url on any of your page models, you will need to update the method signature to support this keyword argument; most likely, this will involve changing the line:
def get_url_parts(self):
to:
def get_url_parts(self, *args, **kwargs):
and passing those through at the point where you are calling get_url_parts on super (if applicable).
See also: wagtail.wagtailcore.models.Page.get_url_parts(), wagtail.wagtailcore.models.Page.get_url(), wagtail.wagtailcore.models.Page.get_full_url(), and wagtail.wagtailcore.models.Page.relative_url()
“Password required” template for documents
This release adds the ability to password-protect documents as well as pages. The template used for the “password required” form is distinct from the one used for pages; if you have previously overridden the default template through the PASSWORD_REQUIRED_TEMPLATE setting, you may wish to provide a corresponding template for documents through the setting DOCUMENT_PASSWORD_REQUIRED_TEMPLATE. See: Private pages
Elasticsearch 5.4 is incompatible with ATOMIC_REBUILD
While not specific to Wagtail 1.11, users of Elasticsearch should be aware that the ATOMIC_REBUILD option is not compatible with Elasticsearch 5.4.x due to a bug in the handling of aliases. If you wish to use this feature, please use Elasticsearch 5.3.x or 5.5.x (when available).
Wagtail 1.10.1 release notes
What’s changed
Bug fixes
- Fix admin page preview that was broken 24 hours after previewing a page (Martin Hill)
- Removed territory-specific translations for Spanish, Polish, Swedish, Russian and Chinese (Taiwan) that block more complete translations from being used (Matt Westcott)
Wagtail 1.10 release notes
What’s new
PostgreSQL search engine
A new search engine has been added to Wagtail which uses PostgreSQL’s built-in full-text search functionality. This means that if you use PostgreSQL to manage your database, you can now get a good quality search engine without needing to install Elasticsearch.
To get started, see PostgreSQL search engine.
This feature was developed at the Arnhem sprint by Bertrand Bordage, Jaap Roes, Arne de Laat and Ramon de Jezus.
Django 1.11 and Python 3.6 support
Wagtail is now compatible with Django 1.11 and Python 3.6. Compatibility fixes were contributed by Tim Graham, Matt Westcott, Mikalai Radchuk and Bertrand Bordage.
User language preference
Users can now set their preferred language for the Wagtail admin interface under Account Settings → Language Preferences. The list of available languages can be configured via the WAGTAILADMIN_PERMITTED_LANGUAGES setting. This feature was developed by Daniel Chimeno.
New admin preview
Previewing pages in Wagtail admin interface was rewritten to make it more robust. In previous versions, preview was broken in several scenarios so users often ended up on a blank page with an infinite spinner.
An additional setting was created: WAGTAIL_AUTO_UPDATE_PREVIEW. It allows users to see changes done in the editor by refreshing the preview tab without having to click again on the preview button.
This was developed by Bertrand Bordage.
Other features
- Use minified versions of jQuery and jQuery UI in the admin. Total savings without compression 371 KB (Tom Dyson)
- Hooks can now specify the order in which they are run (Gagaro)
- Added a
submit_buttonsblock to login template (Gagaro)- Added
construct_image_chooser_queryset,construct_document_chooser_querysetandconstruct_page_chooser_querysethooks (Gagaro)- The homepage created in the project template is now titled “Home” rather than “Homepage” (Karl Hobley)
- Signal receivers for custom
ImageandRenditionmodels are connected automatically (Mike Dingjan)PageChooserBlockcan now accept a list/tuple of page models astarget_model(Mikalai Radchuk)- Styling tweaks for the ModelAdmin’s
IndexViewto be more inline with the Wagtail styleguide (Andy Babic)- Added
.nvmrcto the project root for Node versioning support (Janneke Janssen)- Added
form_fields_excludeproperty to ModelAdmin views (Matheus Bratfisch)- User creation / edit form now enforces password validators set in
AUTH_PASSWORD_VALIDATORS(Bertrand Bordage)- Added support for displaying
non_field_errorswhen validation fails in the page editor (Matt Westcott)- Added
WAGTAILADMIN_RECENT_EDITS_LIMITsetting to to define the number of your most recent edits on the dashboard (Maarten Kling)- Added link to the full Elasticsearch setup documentation from the Performance page (Matt Westcott)
- Tag input fields now accept spaces in tags by default, and can be overridden with the
TAG_SPACES_ALLOWEDsetting (Kees Hink, Alex Gleason)- Page chooser widgets now display the required page type where relevant (Christine Ho)
- Site root pages are now indicated with a globe icon in the explorer listing (Nick Smith, Huub Bouma)
- Draft page view is now restricted to users with edit / publish permission over the page (Kees Hink)
- Added the option to delete a previously saved focal point on a image (Maarten Kling)
- Page explorer menu item, search and summary panel are now hidden for users with no page permissions (Tim Heap)
- Added support for custom date and datetime formats in input fields (Bojan Mihelac)
- Added support for custom Django REST framework serialiser fields in
Page.api_fieldsusing a newAPIFieldclass (Karl Hobley)- Added
classnameargument toStreamFieldPanel(Christine Ho)- Added
groupkeyword argument to StreamField blocks for grouping related blocks together in the block menu (Andreas Nüßlein)- Update the sitemap generator to use the Django sitemap module (Michael van Tellingen, Mike Dingjan)
Bug fixes
- Marked ‘Date from’ / ‘Date to’ strings in wagtailforms for translation (Vorlif)
- “File” field label on image edit form is now translated (Stein Strindhaug)
- Unreliable preview is now reliable by always opening in a new window (Kjartan Sverrisson)
- Fixed placement of
{{ block.super }}insnippets/type_index.html(LB (Ben Johnston))- Optimised database queries on group edit page (Ashia Zawaduk)
- Choosing a popular search term for promoted search results now works correctly after pagination (Janneke Janssen)
- IDs used in tabbed interfaces are now namespaced to avoid collisions with other page elements (Janneke Janssen)
- Page title not displaying page name when moving a page (Trent Holliday)
- The ModelAdmin module can now work without the wagtailimages and wagtaildocs apps installed (Andy Babic)
- Cloudflare error handling now handles non-string error responses correctly (hdnpl)
- Search indexing now uses a defined query ordering to prevent objects from being skipped (Christian Peters)
- Ensure that number localisation is not applied to object IDs within admin templates (Tom Hendrikx)
- Paginating with a search present was always returning the 1st page in Internet Explorer 10 & 11 (Ralph Jacobs)
- RoutablePageMixin and wagtailforms previews now set the
request.is_previewflag (Wietze Helmantel)- The save and preview buttons in the page editor are now mobile-friendly (Maarten Kling)
- Page links within rich text now respect custom URLs defined on specific page models (Gary Krige, Huub Bouma)
- Default avatar no longer visible when using a transparent gravatar image (Thijs Kramer)
- Scrolling within the datetime picker is now usable again for touchpads (Ralph Jacobs)
- List-based fields within form builder form submissions are now displayed as comma-separated strings rather than as Python lists (Christine Ho, Matt Westcott)
- The page type usage listing now have a translatable page title (Ramon de Jezus)
- Styles for submission filtering form now have a consistent height. (Thijs Kramer)
- Slicing a search result set no longer loses the annotation added by
annotate_score(Karl Hobley)- String-based primary keys are now escaped correctly in ModelAdmin URLs (Andreas Nüßlein)
- Empty search in the API now works (Morgan Aubert)
RichTextBlocktoolbar now correctly positioned withinStructBlock(Janneke Janssen)- Fixed display of ManyToMany fields and False values on the ModelAdmin inspect view (Andy Babic)
- Prevent pages from being recursively copied into themselves (Matheus Bratfisch)
- Specifying the full file name in documents URL is mandatory (Morgan Aubert)
- Reordering inline forms now works correctly when moving past a deleted form (Janneke Janssen)
- Removed erroneous |safe filter from search results template in project template (Karl Hobley)
Upgrade considerations
Django 1.9 and Python 3.3 support dropped
Support for Django 1.9 and Python 3.3 has been dropped in this release; please upgrade from these before upgrading Wagtail. Note that the Django 1.8 release series is still supported, as a Long Term Support release.
Dropped support for generating static sites using django-medusa
Django-medusa is no longer maintained, and is incompatible with Django 1.8 and above. An alternative module based on the django-bakery package is available as a third-party contribution: https://github.com/moorinteractive/wagtail-bakery.
Signals on custom Image and Rendition models connected automatically
Projects using custom image models no longer need to set up signal receivers to handle deletion of image files and image feature detection, as these are now handled automatically by Wagtail. The following lines of code should be removed:
# Delete the source image file when an image is deleted
@receiver(post_delete, sender=CustomImage)
def image_delete(sender, instance, **kwargs):
instance.file.delete(False)
# Delete the rendition image file when a rendition is deleted
@receiver(post_delete, sender=CustomRendition)
def rendition_delete(sender, instance, **kwargs):
instance.file.delete(False)
# Perform image feature detection (if enabled)
@receiver(pre_save, sender=CustomImage)
def image_feature_detection(sender, instance, **kwargs):
if not instance.has_focal_point():
instance.set_focal_point(instance.get_suggested_focal_point())
Adding / editing users through Wagtail admin no longer sets is_staff flag
Previously, the is_staff flag (which grants access to the Django admin interface) was automatically set for superusers, and reset for other users, when creating and updating users through the Wagtail admin. This behaviour has now been removed, since Wagtail is designed to work independently of the Django admin. If you need to reinstate the old behaviour, you can set up a pre_save signal handler on the User model to set the flag appropriately.
Specifying the full file name in documents URL is mandatory
In previous releases, it was possible to download a document using the primary key and a fraction of its file name, or even without file name. You could get the same document at the addresses /documents/1/your-file-name.pdf, /documents/1/you & /documents/1/.
This feature was supposed to allow shorter URLs but was not used in Wagtail. For security reasons, we removed it, so only the full URL works: /documents/1/your-file-name.pdf
If any of your applications relied on the previous behaviour, you will have to rewrite it to take this into account.
Wagtail 1.9.1 release notes
What’s changed
Bug fixes
- Removed erroneous
|safefilter from search results template in project template (Karl Hobley)- Prevent pages from being recursively copied into themselves (Matheus Bratfisch)
Wagtail 1.9 release notes
What’s new
Revision comparisons

Wagtail now provides the ability to view differences between revisions of a page, from the revisions listing page and when reviewing a page in moderation. This feature was developed by Karl Hobley, Janneke Janssen and Matt Westcott. Thank you to Blackstone Chambers for sponsoring this feature.
Many-to-many relations on page models
Wagtail now supports a new field type ParentalManyToManyField that can be used to set up many-to-many relations on pages. For details, see the Categories section of the tutorial. This feature was developed by Thejaswi Puthraya and Matt Westcott.
Bulk-deletion of form submissions
Form builder form submissions can now be deleted in bulk from the form submissions index page. This feature was sponsored by St John’s College, Oxford and developed by Karl Hobley.
Accessing parent context from StreamField block get_context methods
The get_context method on StreamField blocks now receives a parent_context keyword argument, consisting of the dict of variables passed in from the calling template. For example, this makes it possible to perform pagination logic within get_context, retrieving the current page number from parent_context['request'].GET. See get_context on StreamField blocks. This feature was developed by Mikael Svensson and Peter Baumgartner.
Welcome message customisation for multi-tenanted installations
The welcome message on the admin dashboard has been updated to be more suitable for multi-tenanted installations. Users whose page permissions lie within a single site will now see that site name in the welcome message, rather than the installation-wide WAGTAIL_SITE_NAME. As before, this message can be customised, and additional template variables have been provided for this purpose - see Custom branding. This feature was developed by Jeffrey Chau.
Other features
- Changed text of “Draft” and “Live” buttons to “View draft” and “View live” (Dan Braghis)
- Added
get_api_representationmethod to streamfield blocks allowing the JSON representation in the API to be customised (Marco Fucci)- Added before_copy_page and after_copy_page hooks (Matheus Bratfisch)
- View live / draft links in the admin now consistently open in a new window (Marco Fucci)
ChoiceBlocknow omits the blank option if the block is required and has a default value (Andreas Nüßlein)- The
add_subpageview now maintains anextURL parameter to specify where to redirect to after completing page creation (Robert Rollins)- The
wagtailformsmodule now allows to define custom form submission model, add custom data to CSV export and some other customisations. See Form builder customisation (Mikalai Radchuk)- The Webpack configuration is now in a subfolder to declutter the project root, and uses environment-specific configurations for smaller bundles in production and easier debugging in development (Janneke Janssen, Thibaud Colas)
- Added page titles to title text on action buttons in the explorer, for improved accessibility (Matt Westcott)
Bug fixes
- Help text for StreamField is now visible and does not cover block controls (Stein Strindhaug)
- “X minutes ago” timestamps are now marked for translation (Janneke Janssen, Matt Westcott)
- Avoid indexing unsaved field content on save(update_fields=[...]) operations (Matt Westcott)
- Corrected ordering of arguments passed to ModelAdmin
get_extra_class_names_for_field_col/get_extra_attrs_for_field_colmethods (Andy Babic)pageurl/slugurltags now function when request.site is not available (Tobias McNulty, Matt Westcott)
Upgrade considerations
django-modelcluster and django-taggit dependencies updated
Wagtail now requires version 3.0 or later of django-modelcluster and version 0.20 or later of django-taggit; earlier versions are unsupported. In normal circumstances these packages will be upgraded automatically when upgrading Wagtail; however, if your Wagtail project has a requirements file that explicitly specifies an older version, this will need to be updated.
get_context methods on StreamField blocks need updating
Previously, get_context methods on StreamField blocks returned a dict of variables which would be merged into the calling template’s context before rendering the block template. get_context methods now receive a parent_context dict, and are responsible for returning the final context dictionary with any new variables merged into it. The old calling convention is now deprecated, and will be phased out in Wagtail 1.11.
In most cases, the method will be calling get_context on the superclass, and can be updated by passing the new parent_context keyword argument to it:
class MyBlock(Block):
def get_context(self, value):
context = super(MyBlock, self).get_context(value)
...
return context
becomes:
class MyBlock(Block):
def get_context(self, value, parent_context=None):
context = super(MyBlock, self).get_context(value, parent_context=parent_context)
...
return context
Note that get_context methods on page models are unaffected by this change.
Wagtail 1.8.2 release notes
What’s changed
Bug fixes
- Removed erroneous
|safefilter from search results template in project template (Karl Hobley)- Avoid indexing unsaved field content on
save(update_fields=[...])operations (Matt Westcott)- Prevent pages from being recursively copied into themselves (Matheus Bratfisch)
Wagtail 1.8.1 release notes
What’s changed
Bug fixes
- Reduced
Rendition.focal_point_keyfield length to prevent migration failure when upgrading to Wagtail 1.8 on MySQL withutf8character encoding (Andy Chosak, Matt Westcott)
Wagtail 1.8 release notes
What’s new
New page privacy options
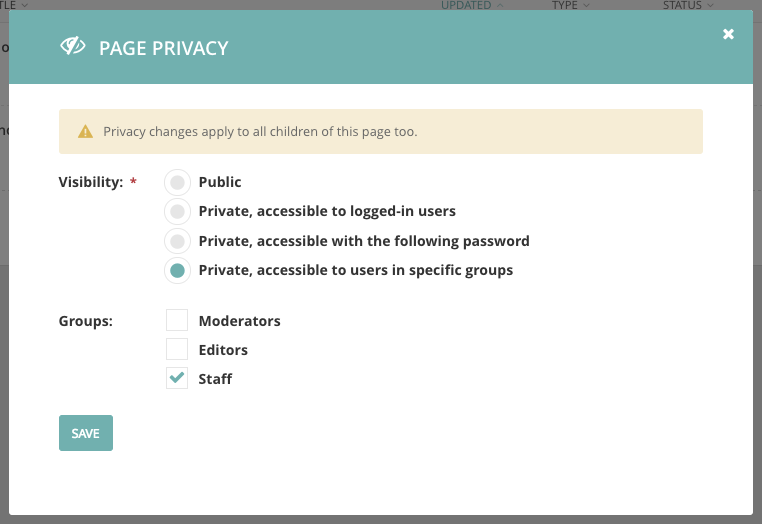
Access to pages can now be restricted based on user accounts and group membership, rather than just through a shared password. This makes it possible to set up intranet-style sites via the admin, with no additional coding. This feature was developed by Shawn Makinson, Tom Miller, Luca Perico and Matt Westcott.
See: Private pages
Restrictions on bulk-deletion of pages
Previously, any user with edit permission over a page and its descendants was able to delete them all as a single action, which led to the risk of accidental deletions. To guard against this, the permission rules have been revised so that a user with basic permissions can only delete pages that have no children; in order to delete a whole subtree, they must individually delete each child page first. A new “bulk delete” permission type has been added which allows a user to delete pages with children, as before; superusers receive this permission implicitly, and so there is no change of behaviour for them.
See: Permissions
This feature was developed by Matt Westcott.
Elasticsearch 5 support
Wagtail now supports Elasticsearch 5. See Elasticsearch Backend for configuration details. This feature was developed by Karl Hobley.
Permission-limited admin breadcrumb
Breadcrumb links within the admin are now limited to the portion of the page tree that covers all pages the user has permission over. As with the changes to the explorer sidebar menu in Wagtail 1.6, this is a step towards supporting full multi-tenancy (where multiple sites on the same Wagtail installation can be fully isolated from each other through permission configuration). This feature was developed by Jeffrey Chau, Robert Rollins and Matt Westcott.
Updated tutorial
The “Your first Wagtail site” tutorial has been extensively updated to cover concepts such as dynamic page listings, template context variables, and tagging. This update was contributed by Scot Hacker, with additions from Matt Westcott.
Other features
- Added support of a custom
edit_handlerfor site settings. See docs for the site settings module. (Axel Haustant)- Added
get_landing_page_templategetter method toAbstractForm(Gagaro)- Added
Page.get_admin_display_titlemethod to override how the title is displayed in the admin (Henk-Jan van Hasselaar)- Added support for specifying custom HTML attributes for table rows on ModelAdmin index pages. See ModelAdmin.get_extra_attrs_for_row() (Andy Babic)
- Added
first_common_ancestormethod toPageQuerySet(Tim Heap)- Page chooser now opens at the deepest ancestor page that covers all the pages of the required page type (Tim Heap)
PageChooserBlocknow accepts atarget_modeloption to specify the required page type (Tim Heap)- Modeladmin forms now respect
fields/excludeoptions passed on custom model forms (Thejaswi Puthraya)- Added new StreamField block type
StaticBlockfor blocks that occupy a position in a stream but otherwise have no configuration; see StaticBlock (Benoît Vogel)- Added new StreamField block type
BlockQuoteBlock(Scot Hacker)- Updated Cloudflare cache module to use the v4 API (Albert O’Connor)
- Added
exclude_from_explorerattribute to theModelAdminclass to allow hiding instances of a page type from Wagtail’s explorer views (Andy Babic)- Added
above_login,below_login,fieldsandlogin_formcustomisation blocks to the login page template - see Customising admin templates (Tim Heap)ChoiceBlocknow accepts a callable as the choices list (Mikalai Radchuk)- Redundant action buttons are now omitted from the root page in the explorer (Nick Smith)
- Locked pages are now disabled from editing at the browser level (Edd Baldry)
- Added
wagtail.wagtailcore.query.PageQuerySet.in_site()method for filtering page querysets to pages within the specified site (Chris Rogers)- Added the ability to override the default index settings for Elasticsearch. See Elasticsearch Backend (PyMan Claudio Marinozzi)
- Extra options for the Elasticsearch constructor should be now defined with the new key
OPTIONSof theWAGTAILSEARCH_BACKENDSsetting (PyMan Claudio Marinozzi)
Bug fixes
AbstractFormnow respects customget_templatemethods on the page model (Gagaro)- Use specific page model for the parent page in the explore index (Gagaro)
- Remove responsive styles in embed when there is no ratio available (Gagaro)
- Parent page link in page search modal no longer disappears on hover (Dan Braghis)
- ModelAdmin views now consistently call
get_context_data(Andy Babic)- Header for search results on the redirects index page now shows the correct count when the listing is paginated (Nick Smith)
set_url_pathsmanagement command is now compatible with Django 1.10 (Benjamin Bach)- Form builder email notifications now output multiple values correctly (Sævar Öfjörð Magnússon)
- Closing ‘more’ dropdown on explorer no longer jumps to the top of the page (Ducky)
- Users with only publish permission are no longer given implicit permission to delete pages (Matt Westcott)
search_garbage_collectmanagement command now works when wagtailsearchpromotions is not installed (Morgan Aubert)wagtail.contrib.settingscontext processor no longer fails whenrequest.siteis unavailable (Diederik van der Boor)TableBlockcontent is now indexed for search (Morgan Aubert)Page.copy()is now marked asalters_data, to prevent template code from triggering it (Diederik van der Boor)
Upgrade considerations
unique_together constraint on custom image rendition models needs updating
If your project is using a custom image model (see Custom image models), you will need to update the unique_together option on the corresponding Rendition model when upgrading to Wagtail 1.8. Change the line:
unique_together = (
('image', 'filter', 'focal_point_key'),
)
to:
unique_together = (
('image', 'filter_spec', 'focal_point_key'),
)
You will then be able to run manage.py makemigrations and manage.py migrate as normal.
Additionally, third-party code that accesses the Filter and Rendition models directly should note the following and make updates where applicable:
Filterwill no longer be a Django model as of Wagtail 1.9, and as such, ORM operations on it (such assave()andFilter.objects) are deprecated. It should be instantiated and used as an in-memory object instead - for example,flt, created = Filter.objects.get_or_create(spec='fill-100x100')should becomeflt = Filter(spec='fill-100x100').- The
filterfield of Rendition models is no longer in use; lookups should instead be performed on thefilter_specfield, which contains a filter spec string such as'fill-100x100'.
wagtail.wagtailimages.models.get_image_model has moved
The get_image_model function should now be imported from wagtail.wagtailimages rather than wagtail.wagtailimages.models. See Referring to the image model.
Non-administrators now need ‘bulk delete’ permission to delete pages with children
As a precaution against accidental data loss, this release introduces a new “bulk delete” permission on pages, which can be set through the Settings -> Groups area. Non-administrator users must have this permission in order to delete pages that have children; a user without this permission would have to delete each child individually before deleting the parent. By default, no groups are assigned this new permission. If you wish to restore the previous behaviour, and don’t want to configure permissions manually through the admin interface, you can do so with a data migration. Create an empty migration using ./manage.py makemigrations myapp --empty --name assign_bulk_delete_permission (replacing myapp with the name of one of your project’s apps) and edit the migration file to contain the following:
from __future__ import unicode_literals
from django.db import migrations
def add_bulk_delete_permission(apps, schema_editor):
"""Find all groups with add/edit page permissions, and assign them bulk_delete permission"""
GroupPagePermission = apps.get_model('wagtailcore', 'GroupPagePermission')
for group_id, page_id in GroupPagePermission.objects.filter(
permission_type__in=['add', 'edit']
).values_list('group', 'page').distinct():
GroupPagePermission.objects.create(
group_id=group_id, page_id=page_id, permission_type='bulk_delete'
)
def remove_bulk_delete_permission(apps, schema_editor):
GroupPagePermission = apps.get_model('wagtailcore', 'GroupPagePermission')
GroupPagePermission.objects.filter(permission_type='bulk_delete').delete()
class Migration(migrations.Migration):
dependencies = [
# keep the original dependencies line
]
operations = [
migrations.RunPython(add_bulk_delete_permission, remove_bulk_delete_permission),
]
Cloudflare cache module now requires a ZONEID setting
The wagtail.contrib.wagtailfrontendcache.backends.CloudflareBackend module has been updated to use Cloudflare’s v4 API, replacing the previous v1 implementation (which is unsupported as of November 9th, 2016). The new API requires users to supply a zone identifier, which should be passed as the ZONEID field of the WAGTAILFRONTENDCACHE setting:
WAGTAILFRONTENDCACHE = {
'cloudflare': {
'BACKEND': 'wagtail.contrib.wagtailfrontendcache.backends.CloudflareBackend',
'EMAIL': 'your-cloudflare-email-address@example.com',
'TOKEN': 'your cloudflare api token',
'ZONEID': 'your cloudflare domain zone id',
},
}
For details of how to obtain the zone identifier, see the Cloudflare API documentation.
Extra options for the Elasticsearch constructor should be now defined with the new key OPTIONS of the WAGTAILSEARCH_BACKENDS setting
For the Elasticsearch backend, all extra keys defined in WAGTAILSEARCH_BACKENDS are passed directly to the Elasticsearch constructor. All these keys now should be moved inside the new OPTIONS dictionary. The old behaviour is still supported, but deprecated.
For example, the following configuration changes the connection class that the Elasticsearch connector uses:
from elasticsearch import RequestsHttpConnection
WAGTAILSEARCH_BACKENDS = {
'default': {
'BACKEND': 'wagtail.wagtailsearch.backends.elasticsearch',
'connection_class': RequestsHttpConnection,
}
}
As connection_class needs to be passed through to the Elasticsearch connector, it should be moved to the new OPTIONS dictionary:
from elasticsearch import RequestsHttpConnection
WAGTAILSEARCH_BACKENDS = {
'default': {
'BACKEND': 'wagtail.wagtailsearch.backends.elasticsearch',
'OPTIONS': {
'connection_class': RequestsHttpConnection,
}
}
}
Wagtail 1.7 release notes
What’s new
Elasticsearch 2 support
Wagtail now supports Elasticsearch 2. Note that you need to change backend in WAGTAILSEARCH_BACKENDS, if you wish to switch to Elasticsearch 2. This feature was developed by Karl Hobley.
New image tag options for file type and JPEG compression level
The {% image %} tag now supports extra parameters for specifying the image file type and JPEG compression level on a per-tag basis. See Output image format and JPEG image quality. This feature was developed by Karl Hobley.
AWS CloudFront support added to cache invalidation module
Wagtail’s cache invalidation module can now invalidate pages cached in AWS CloudFront when they are updated or unpublished. This feature was developed by Rob Moorman.
See: Amazon CloudFront
Unpublishing subpages
Unpublishing a page now gives the option to unpublish its subpages at the same time. This feature was developed by Jordi Joan.
Minor features
- The
|embedfilter has been converted into a templatetag{% embed %}(Janneke Janssen)- The
wagtailformsmodule now provides aFormSubmissionPanelfor displaying details of form submissions; see Displaying form submission information for documentation. (João Luiz Lorencetti)- The Wagtail version number can now be obtained as a tuple using
from wagtail import VERSION(Tim Heap)send_maillogic has been moved fromAbstractEmailForm.process_form_submissionintoAbstractEmailForm.send_mail. Now it’s easier to override this logic (Tim Leguijt)- Added
before_create_page,before_edit_page,before_delete_pagehooks (Karl Hobley)- Updated font sizes and colours to improve legibility of admin menu and buttons (Stein Strindhaug)
- Added pagination to “choose destination” view when moving pages (Nick Smith, Žan Anderle)
- Added ability to annotate search results with score - see Annotating results with score (Karl Hobley)
- Added ability to limit access to form submissions - see filter_form_submissions_for_user (Mikalai Radchuk)
- Added the ability to configure the number of days search logs are kept for, through the WAGTAILSEARCH_HITS_MAX_AGE setting (Stephen Rice)
SnippetChooserBlocknow supports passing the model name as a string (Nick Smith)- Redesigned account settings / logout area in the sidebar for better clarity (Janneke Janssen)
- Pillow’s image optimisation is now applied when saving JPEG images (Karl Hobley)
Bug fixes
- Migrations for wagtailcore and project template are now reversible (Benjamin Bach)
- Migrations no longer depend on wagtailcore and taggit’s
__latest__migration, logically preventing those apps from receiving new migrations (Matt Westcott)- The default image format label text (‘Full width’, ‘Left-aligned’, ‘Right-aligned’) is now localised (Mikalai Radchuk)
- Text on the front-end ‘password required’ form is now marked for translation (Janneke Janssen)
- Text on the page view restriction form is now marked for translation (Luiz Boaretto)
- Fixed toggle behaviour of userbar on mobile (Robert Rollins)
- Image rendition / document file deletion now happens on a post_delete signal, so that files are not lost if the deletion does not proceed (Janneke Janssen)
- “Your recent edits” list on dashboard no longer leaves out pages that another user has subsequently edited (Michael Cordover, Kees Hink, João Luiz Lorencetti)
InlinePanelnow accepts aclassnameparameter as per the documentation (emg36, Matt Westcott)- Disabled use of escape key to revert content of rich text fields, which could cause accidental data loss (Matt Westcott)
- Setting
USE_THOUSAND_SEPARATOR = Trueno longer breaks the rendering of numbers in JS code for InlinePanel (Mattias Loverot, Matt Westcott)- Images / documents pagination now preserves GET parameters (Bojan Mihelac)
- Wagtail’s UserProfile model now sets a related_name of
wagtail_userprofileto avoid naming collisions with other user profile models (Matt Westcott)- Non-text content is now preserved when adding or editing a link within rich text (Matt Westcott)
- Fixed preview when
SECURE_SSL_REDIRECT = True(Aymeric Augustin)- Prevent hang when truncating an image filename without an extension (Ricky Robinett)
Upgrade considerations
Project template’s initial migration should not depend on wagtailcore.__latest__
On projects created under previous releases of Wagtail, the home/migrations/0001_initial.py migration created by the wagtail start command contains the following dependency line:
dependencies = [
('wagtailcore', '__latest__'),
]
This may produce InconsistentMigrationHistory errors under Django 1.10 when upgrading Wagtail, since Django interprets this to mean that no new migrations can legally be added to wagtailcore after this migration is applied. This line should be changed to:
dependencies = [
('wagtailcore', '0029_unicode_slugfield_dj19'),
]
Custom image models require a data migration for the new filter_spec field
The data model for image renditions will be changed in Wagtail 1.8 to eliminate Filter as a model. Wagtail sites using a custom image model (see Custom image models) need to have a schema and data migration in place prior to upgrading to Wagtail 1.8. To create these migrations:
Run
manage.py makemigrationsto create the schema migrationRun
manage.py makemigrations --empty myapp(replacingmyappwith the name of the app containing the custom image model) to create an empty migrationEdit the created migration to contain:
from wagtail.wagtailimages.utils import get_fill_filter_spec_migrationsand, for the
operationslist:forward, reverse = get_fill_filter_spec_migrations('myapp', 'CustomRendition') operations = [ migrations.RunPython(forward, reverse), ]replacing
myappandCustomRenditionwith the app and model name for the custom rendition model.
embed template filter is now a template tag
The embed template filter, used to translate the URL of a media resource (such as a YouTube video) into a corresponding embeddable HTML fragment, has now been converted to a template tag. Any template code such as:
{% load wagtailembeds_tags %}
...
{{ my_media_url|embed }}
should now be rewritten as:
{% load wagtailembeds_tags %}
...
{% embed my_media_url %}
Wagtail 1.6.3 release notes
What’s changed
Bug fixes
- Restore compatibility with django-debug-toolbar 1.5 (Matt Westcott)
- Edits to StreamFields are no longer ignored in page edits on Django >=1.10.1 when a default value exists (Matt Westcott)
Wagtail 1.6.2 release notes
What’s changed
Bug fixes
- Initial values of checkboxes on group permission edit form now are visible on Django 1.10 (Matt Westcott)
Wagtail 1.6.1 release notes
What’s new
Minor features
- Added
WAGTAIL_ALLOW_UNICODE_SLUGSsetting to make Unicode support optional in page slugs (Matt Westcott)
Bug fixes
- Wagtail’s middleware classes are now compatible with Django 1.10’s new-style middleware (Karl Hobley)
- The
can_create_at()method is now checked in the create page view (Mikalai Radchuk) - Fixed regression on Django 1.10.1 causing Page subclasses to fail to use PageManager (Matt Westcott)
- ChoiceBlocks with lazy translations as option labels no longer break Elasticsearch indexing (Matt Westcott)
- The page editor no longer fails to load JavaScript files with
ManifestStaticFilesStorage(Matt Westcott) - Django 1.10 enables client-side validation for all forms by default, but it fails to handle all the nuances of how forms are used in Wagtail. The client-side validation has been disabled for the Wagtail UI (Matt Westcott)
Upgrade considerations
Multi-level inheritance and custom managers
The inheritance rules for Custom Page managers have been updated to match Django’s standard behaviour. In the vast majority of scenarios there will be no change. However, in the specific case where a page model with a custom objects manager is subclassed further, the subclass will be assigned a plain Manager instead of a PageManager, and will now need to explicitly override this with a PageManager to function correctly:
class EventPage(Page):
objects = EventManager()
class SpecialEventPage(EventPage):
# Previously SpecialEventPage.objects would be set to a PageManager automatically;
# this now needs to be set explicitly
objects = PageManager()
Wagtail 1.6 release notes
What’s new
Django 1.10 support
Wagtail is now compatible with Django 1.10. Thanks to Mikalai Radchuk and Paul J Stevens for developing this, and to Tim Graham for reviewing and additional Django core assistance.
{% include_block %} tag for improved StreamField template inclusion
In previous releases, the standard way of rendering the HTML content of a StreamField was through a simple variable template tag, such as {{ page.body }}. This had the drawback that any templates used in the StreamField rendering would not inherit variables from the parent template’s context, such as page and request. To address this, a new template tag {% include_block page.body %} has been introduced as the new recommended way of outputting Streamfield content - this replicates the behaviour of Django’s {% include %} tag, passing on the full template context by default. For full documentation, see Template rendering. This feature was developed by Matt Westcott, and additionally ported to Jinja2 (see: Jinja2 template support) by Mikalai Radchuk.
Unicode page slugs
Page URL slugs can now contain Unicode characters, when using Django 1.9 or above. This feature was developed by Behzad Nategh.
Minor features
- Image upload form in image chooser now performs client side validation so that the selected file is not lost in the submission (Jack Paine)
- oEmbed URL for audioBoom was updated (Janneke Janssen)
- Remember tree location in page chooser when switching between Internal / External / Email link (Matt Westcott)
FieldRowPanelnow creates equal-width columns automatically ifcol*classnames are not specified (Chris Rogers)- Form builder now validates against multiple fields with the same name (Richard McMillan)
- The ‘choices’ field on the form builder no longer has a maximum length (Johannes Spielmann)
- Multiple ChooserBlocks inside a StreamField are now prefetched in bulk, for improved performance (Michael van Tellingen, Roel Bruggink, Matt Westcott)
- Added new EmailBlock and IntegerBlock (Oktay Altay)
- Added a new FloatBlock, DecimalBlock and a RegexBlock (Oktay Altay, Andy Babic)
- Wagtail version number is now shown on the settings menu (Chris Rogers)
- Added a system check to validate that fields listed in
search_fieldsare defined on the model (Josh Schneier)- Added formal APIs for customising the display of StructBlock forms within the page editor - see Custom editing interfaces for StructBlock (Matt Westcott)
wagtailforms.models.AbstractEmailFormnow supports multiple email recipients (Serafeim Papastefanos)- Added ability to delete users through Settings -> Users (Vincent Audebert; thanks also to Ludolf Takens and Tobias Schmidt for alternative implementations)
- Page previews now pass additional HTTP headers, to simulate the page being viewed by the logged-in user and avoid clashes with middleware (Robert Rollins)
- Added back buttons to page delete and unpublish confirmation screens (Matt Westcott)
- Recognise Flickr embed URLs using HTTPS (Danielle Madeley)
- Success message when publishing a page now correctly respects custom URLs defined on the specific page class (Chris Darko)
- Required blocks inside StreamField are now indicated with asterisks (Stephen Rice)
Bug fixes
- Email templates and document uploader now support custom
STATICFILES_STORAGE(Jonny Scholes)- Removed alignment options (deprecated in HTML and not rendered by Wagtail) from
TableBlockcontext menu (Moritz Pfeiffer)- Fixed incorrect CSS path on ModelAdmin’s “choose a parent page” view
- Prevent empty redirect by overnormalisation
- “Remove link” button in rich text editor didn’t trigger “edit” event, leading to the change to sometimes not be persisted (Matt Westcott)
RichTextvalues can now be correctly evaluated as booleans (Mike Dingjan, Bertrand Bordage)- wagtailforms no longer assumes an .html extension when determining the landing page template filename (kakulukia)
- Fixed styling glitch on bi-colour icon + text buttons in Chrome (Janneke Janssen)
- StreamField can now be used in an InlinePanel (Gagaro)
- StreamField block renderings using templates no longer undergo double escaping when using Jinja2 (Aymeric Augustin)
- RichText objects no longer undergo double escaping when using Jinja2 (Aymeric Augustin, Matt Westcott)
- Saving a page by pressing enter key no longer triggers a “Changes may not be saved message” (Sean Muck, Matt Westcott)
- RoutablePageMixin no longer breaks in the presence of instance-only attributes such as those generated by FileFields (Fábio Macêdo Mendes)
- The
--schema-onlyflag on update_index no longer expects an argument (Karl Hobley)- Added file handling to support custom user add/edit forms with images/files (Eraldo Energy)
- Placeholder text in modeladmin search now uses the correct template variable (Adriaan Tijsseling)
- Fixed bad SQL syntax for updating URL paths on Microsoft SQL Server (Jesse Legg)
- Added workaround for Django 1.10 bug https://code.djangoproject.com/ticket/27037 causing forms with file upload fields to fail validation (Matt Westcott)
Upgrade considerations
Form builder FormField models require a migration
There are some changes in the wagtailforms.models.AbstractFormField model:
- The
choicesfield has been changed from aCharFieldto aTextField, to allow it to be of unlimited length;- The help text for the
to_addressfield has been changed: it now gives more information on how to specify multiple addresses.
These changes require migration. If you are using the wagtailforms module in your project, you will need to run python manage.py makemigrations and python manage.py migrate after upgrading, in order to apply changes to your form page models.
TagSearchable needs removing from custom image / document model migrations
The mixin class wagtail.wagtailadmin.taggable.TagSearchable, used internally by image and document models, has been deprecated. If you are using custom image or document models in your project, the migration(s) which created them will contain frozen references to wagtail.wagtailadmin.taggable.TagSearchable, which must now be removed. The line:
import wagtail.wagtailadmin.taggable
should be replaced by:
import wagtail.wagtailsearch.index
and the line:
bases=(models.Model, wagtail.wagtailadmin.taggable.TagSearchable),
should be updated to:
bases=(models.Model, wagtail.wagtailsearch.index.Indexed),
render and render_basic methods on StreamField blocks now accept a context keyword argument
The render and render_basic methods on wagtail.wagtailcore.blocks.Block have been updated to accept an optional context keyword argument, a template context to use when rendering the block. If you have defined any custom StreamField blocks that override either of these methods, the method signature now needs to be updated to include this keyword argument:
class MyBlock(Block):
def render(self, value):
...
def render_basic(self, value):
...
should now become:
class MyBlock(Block):
def render(self, value, context=None):
...
def render_basic(self, value, context=None):
...
Wagtail 1.5.3 release notes
What’s changed
Bug fixes
- Pin html5lib to version 0.999999 to prevent breakage caused by internal API changes (Liam Brenner)
Wagtail 1.5.2 release notes
What’s new
Bug fixes
- Fixed regression in 1.5.1 on editing external links (Stephen Rice)
Wagtail 1.5.1 release notes
What’s new
Bug fixes
- When editing a document link in rich text, the document ID is no longer erroneously interpreted as a page ID (Stephen Rice)
- Removing embedded media from rich text by mouse click action now gets correctly registered as a change to the field (Loic Teixeira)
- Rich text editor is no longer broken in InlinePanels (Matt Westcott, Gagaro)
- Rich text editor is no longer broken in settings (Matt Westcott)
- Link tooltip now shows correct urls for newly inserted document links (Matt Westcott)
- Now page chooser (in a rich text editor) opens up at the link’s parent page, rather than at the page itself (Matt Westcott)
- Reverted fix for explorer menu scrolling with page content, as it blocked access to menus that exceed screen height
- Image listing in the image chooser no longer becomes unpaginated after an invalid upload form submission (Stephen Rice)
- Confirmation message on the ModelAdmin delete view no longer errors if the model’s string representation depends on the primary key (Yannick Chabbert)
- Applied correct translation tags for ‘permanent’ / ‘temporary’ labels on redirects (Matt Westcott)
Wagtail 1.5 release notes
What’s new
Reorganised page explorer actions
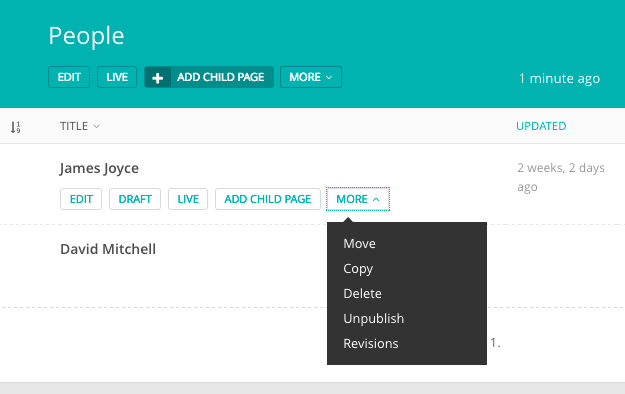
The action buttons on the page explorer have been reorganised to reduce clutter, and lesser-used actions have been moved to a “More” dropdown. A new hook register_page_listing_buttons has been added for adding custom action buttons to the page explorer.
ModelAdmin
Wagtail now includes an app wagtail.contrib.modeladmin (previously available separately as the wagtailmodeladmin package) which allows you to configure arbitrary Django models to be listed, added and edited through the Wagtail admin.
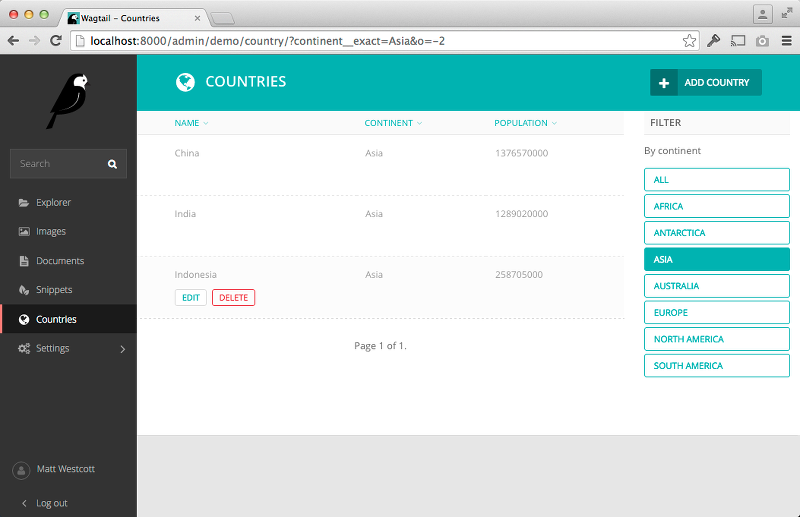
See ModelAdmin for full documentation. This feature was developed by Andy Babic.
TableBlock
TableBlock, a new StreamField block type for editing table-based content, is now available through the wagtail.contrib.table_block module.
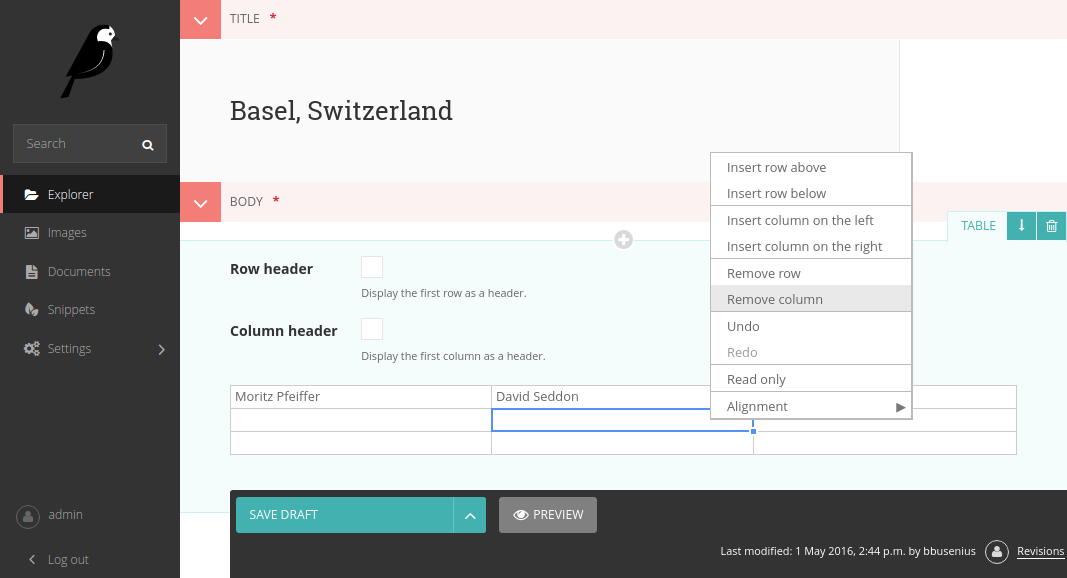
See TableBlock for documentation. This feature was developed by Moritz Pfeiffer, David Seddon and Brad Busenius.
Improved link handling in rich text
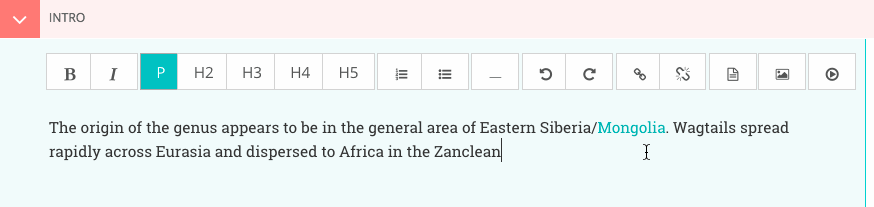
The user experience around inserting, editing and removing links inside rich text areas has been greatly improved: link destinations are shown as tooltips, and existing links can be edited as well as unlinked. This feature was developed by Loic Teixeira.
Improvements to the “Image serve view”
This view, which is used for requesting image thumbnails from an external app, has had some improvements made to it in this release.
- A “redirect” action has been added which will redirect the user to where the resized image is hosted rather than serving it from the app. This may be beneficial for performance if the images are hosted externally (eg, S3)
- It now takes an optional extra path component which can be used for appending a filename to the end of the URL
- The key is now configurable on the view so you don’t have to use your project’s
SECRET_KEY- It’s been refactored into a class based view and you can now create multiple serve views with different image models and/or keys
- It now supports serving image files using django-sendfile (Thanks to Yannick Chabbert for implementing this)
Minor features
- Password reset email now reminds the user of their username (Matt Westcott)
- Added jinja2 support for the
settingstemplate tag (Tim Heap)- Added ‘revisions’ action to pages list (Roel Bruggink)
- Added a hook insert_global_admin_js for inserting custom JavaScript throughout the admin backend (Tom Dyson)
- Recognise instagram embed URLs with
wwwprefix (Matt Westcott)- The type of the
search_fieldsattribute onPagemodels (and other searchable models) has changed from a tuple to a list (see upgrade consideration below) (Tim Heap)- Use PasswordChangeForm when user changes their password, requiring the user to enter their current password (Matthijs Melissen)
- Highlight current day in date picker (Jonas Lergell)
- Eliminated the deprecated
register.assignment_tagon Django 1.9 (Josh Schneier)- Increased size of Save button on site settings (Liam Brenner)
- Optimised Site.find_for_request to only perform one database query (Matthew Downey)
- Notification messages on creating / editing sites now include the site name if specified (Chris Rogers)
- Added
--schema-onlyoption toupdate_indexmanagement command- Added meaningful default icons to
StreamFieldblocks (Benjamin Bach)- Added title text to action buttons in the page explorer (Liam Brenner)
- Changed project template to explicitly import development settings via
settings.dev(Tomas Olander)- Improved L10N and I18N for revisions list (Roel Bruggink)
- The multiple image uploader now displays details of server errors (Nigel Fletton)
- Added
WAGTAIL_APPEND_SLASHsetting to determine whether page URLs end in a trailing slash - see Append Slash (Andrew Tork Baker)- Added auto resizing text field, richtext field, and snippet chooser to styleguide (Liam Brenner)
- Support field widget media inside
StreamBlockblocks (Karl Hobley)- Spinner was added to Save button on site settings (Liam Brenner)
- Added success message after logout from Admin (Liam Brenner)
- Added
get_upload_tomethod toAbstractRenditionwhich, when overridden, allows control over where image renditions are stored (Rob Moggach and Matt Westcott)- Added a mechanism to customise the add / edit user forms for custom user models - see Custom user models (Nigel Fletton)
- Added internal provision for swapping in alternative rich text editors (Karl Hobley)
Bug fixes
- The currently selected day is now highlighted only in the correct month in date pickers (Jonas Lergell)
- Fixed crash when an image without a source file was resized with the “dynamic serve view”
- Registered settings admin menu items now show active correctly (Matthew Downey)
- Direct usage of
Documentmodel replaced withget_document_modelfunction inwagtail.contrib.wagtailmedusaand inwagtail.contrib.wagtailapi- Failures on sending moderation notification emails now produce a warning, rather than crashing the admin page outright (Matt Fozard)
- All admin forms that could potentially include file upload fields now specify
multipart/form-datawhere appropriate (Tim Heap)- REM units in Wagtailuserbar caused incorrect spacing (Vincent Audebert)
- Explorer menu no longer scrolls with page content (Vincent Audebert)
decorate_urlpatternsnow usesfunctools.update_wrapperto keep view names and docstrings (Mario César)- StreamField block controls are no longer hidden by the StreamField menu when prepending a new block (Vincent Audebert)
- Removed invalid use of
__alias that prevented strings getting picked up for translation (Juha Yrjölä)- Routable pages without a main view no longer raise a
TypeError(Bojan Mihelac)- Fixed UnicodeEncodeError in wagtailforms when downloading a CSV for a form containing non-ASCII field labels on Python 2 (Mikalai Radchuk)
- Server errors during search indexing on creating / updating / deleting a model are now logged, rather than causing the overall operation to fail (Karl Hobley)
- Objects are now correctly removed from search indexes on deletion (Karl Hobley)
Upgrade considerations
Buttons in admin now require class="button"
The Wagtail admin CSS has been refactored for maintainability, and buttons now require an explicit button class. (Previously, the styles were applied on all inputs of type "submit", "reset" or "button".) If you have created any apps that extend the Wagtail admin with new views / templates, you will need to add this class to all buttons.
The search_fields attribute on models should now be set to a list
On searchable models (eg, Page or custom Image models) the search_fields attribute should now be a list instead of a tuple.
For example, the following Page model:
class MyPage(Page):
...
search_fields = Page.search_fields + (
indexed.SearchField('body'),
)
Should be changed to:
class MyPage(Page):
...
search_fields = Page.search_fields + [
indexed.SearchField('body'),
]
To ease the burden on third-party modules, adding tuples to Page.search_fields will still work. But this backwards-compatibility fix will be removed in Wagtail 1.7.
Elasticsearch backend now defaults to verifying SSL certs
Previously, if you used the Elasticsearch backend, configured with the URLS property like:
WAGTAILSEARCH_BACKENDS = {
'default': {
'BACKEND': 'wagtail.wagtailsearch.backends.elasticsearch',
'URLS': ['https://example.com/'],
}
}
Elasticsearch would not be configured to verify SSL certificates for HTTPS URLs. This has been changed so that SSL certificates are verified for HTTPS connections by default.
If you need the old behaviour back, where SSL certificates are not verified for your HTTPS connection, you can configure the Elasticsearch backend with the HOSTS option, like so:
WAGTAILSEARCH_BACKENDS = {
'default': {
'BACKEND': 'wagtail.wagtailsearch.backends.elasticsearch',
'HOSTS': [{
'host': 'example.com'
'use_ssl': True,
'verify_certs': False,
}],
}
}
See the Elasticsearch-py documentation for more configuration options.
Project template now imports settings.dev explicitly
In previous releases, the project template’s settings/__init__.py file was set up to import the development settings (settings/dev.py), so that these would be picked up as the default (i.e. whenever a settings module was not specified explicitly). However, in some setups this meant that the development settings were being inadvertently imported in production mode.
For this reason, the import in settings/__init__.py has now been removed, and commands must now specify myproject.settings.dev or myproject.settings.production as appropriate; the supporting scripts (such as manage.py) have been updated accordingly. As this is a change to the project template, existing projects are not affected; however, if you have any common scripts or configuration files that rely on importing myproject.settings as the settings module, these will need to be updated in order to work on projects created under Wagtail 1.5.
Wagtail 1.4.6 release notes
What’s changed
Bug fixes
- Pin html5lib to version 0.999999 to prevent breakage caused by internal API changes (Liam Brenner)
Wagtail 1.4.5 release notes
What’s changed
Bug fixes
- Paste / drag operations done entirely with the mouse are now correctly picked up as edits within the rich text editor (Matt Fozard)
- Logic for cancelling the “unsaved changes” check on form submission has been fixed to work cross-browser (Stephen Rice)
- The “unsaved changes” confirmation was erroneously shown on IE / Firefox when previewing a page with validation errors (Matt Westcott)
- The up / down / delete controls on the “Promoted search results” form no longer trigger a form submission (Matt Westcott)
- Opening preview window no longer performs user-agent sniffing, and now works correctly on IE11 (Matt Westcott)
- Tree paths are now correctly assigned when previewing a newly-created page underneath a parent with deleted children (Matt Westcott)
- Added BASE_URL setting back to project template
- Clearing the search box in the page chooser now returns the user to the browse view (Matt Westcott)
- The above fix also fixed an issue where Internet Explorer got stuck in the search view upon opening the page chooser (Matt Westcott)
Wagtail 1.4.4 release notes
What’s changed
Translations
- New translation for Slovenian (Mitja Pagon)
Bug fixes
- The
wagtailuserbartemplate tag now gracefully handles situations where therequestobject is not in the template context (Matt Westcott)- Meta classes on StreamField blocks now handle multiple inheritance correctly (Tim Heap)
- Now user can upload images / documents only into permitted collection from choosers
- Keyboard shortcuts for save / preview on the page editor no longer incorrectly trigger the “unsaved changes” message (Jack Paine / Matt Westcott)
- Redirects no longer fail when both a site-specific and generic redirect exist for the same URL path (Nick Smith, João Luiz Lorencetti)
- Wagtail now checks that Group is registered with the Django admin before unregistering it (Jason Morrison)
- Previewing inaccessible pages no longer fails with
ALLOWED_HOSTS = ['*'](Robert Rollins)- The submit button ‘spinner’ no longer activates if the form has client-side validation errors (Jack Paine, Matt Westcott)
- Overriding
MESSAGE_TAGSin project settings no longer causes messages in the Wagtail admin to lose their styling (Tim Heap)- Border added around explorer menu to stop it blending in with StreamField block listing; also fixes invisible explorer menu in Firefox 46 (Alex Gleason)
Wagtail 1.4.3 release notes
What’s changed
Bug fixes
- Fixed regression introduced in 1.4.2 which caused Wagtail to query the database during a system check (Tim Heap)
Wagtail 1.4.2 release notes
What’s changed
Bug fixes
- Streamfields no longer break on validation error
- Number of validation errors in each tab in the editor is now correctly reported again
- Userbar now opens on devices with both touch and mouse (Josh Barr)
wagtail.wagtailadmin.wagtail_hooksno longer callsstaticduring app load, so you can useManifestStaticFilesStoragewithout calling thecollectstaticcommand- Fixed crash on page save when a custom
Pageedit handler has been specified using theedit_handlerattribute (Tim Heap)
Wagtail 1.4.1 release notes
What’s changed
Bug fixes
- Fixed erroneous rendering of up arrow icons (Rob Moorman)
Wagtail 1.4 release notes
What’s new
Page revision management
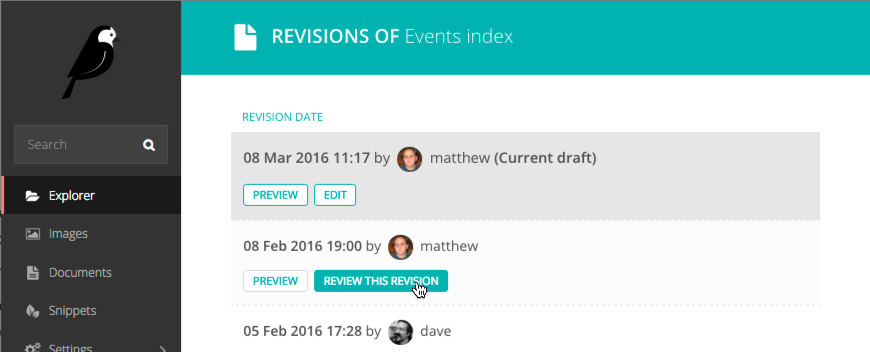
From the page editing interface, editors can now access a list of previous revisions of the page, and preview or roll back to any earlier revision.
Collections for image / document organisation
Images and documents can now be organised into collections, set up by administrators through the Settings -> Collections menu item. User permissions can be set either globally (on the ‘Root’ collection) or on individual collections, allowing different user groups to keep their media items separated. Thank you to the University of South Wales for sponsoring this feature.
Redesigned userbar
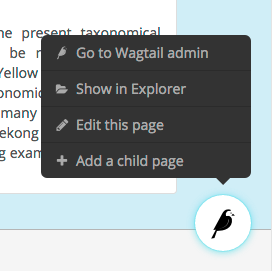
The Wagtail userbar (which gives editors quick access to the admin from the site frontend) has been redesigned, and no longer depends on an iframe. The new design allows more flexibility in label text, more configurable positioning to avoid overlapping with site navigation, and adds a new “Show in Explorer” option. This feature was developed by Thomas Winter and Gareth Price.
Protection against unsaved changes
The page editor interface now produces a warning if the user attempts to navigate away while there are unsaved changes.
Multiple document uploader
The “Add a document” interface now supports uploading multiple documents at once, in the same way as uploading images.
Custom document models
The Document model can now be overridden using the new WAGTAILDOCS_DOCUMENT_MODEL setting. This works in the same way that WAGTAILIMAGES_IMAGE_MODEL works for Image.
Removed django-compressor dependency
Wagtail no longer depends on the django-compressor library. While we highly recommend compressing and bundling the CSS and Javascript on your sites, using django-compressor places additional installation and configuration demands on the developer, so this has now been made optional.
Minor features
- The page search interface now searches all fields instead of just the title (Kait Crawford)
- Snippets now support a custom
edit_handlerproperty; this can be used to implement a tabbed interface, for example. See Customising the tabbed interface (Mikalai Radchuk)- Date/time pickers now respect the locale’s ‘first day of week’ setting (Peter Quade)
- Refactored the way forms are constructed for the page editor, to allow custom forms to be used
- Notification message on publish now indicates whether the page is being published now or scheduled for publication in future (Chris Rogers)
- Server errors when uploading images / documents through the chooser modal are now reported back to the user (Nigel Fletton)
- Added a hook insert_global_admin_css for inserting custom CSS throughout the admin backend (Tom Dyson)
- Added a hook construct_explorer_page_queryset for customising the set of pages displayed in the page explorer
- Page models now perform field validation, including testing slugs for uniqueness within a parent page, at the model level on saving
- Page slugs are now auto-generated at the model level on page creation if one has not been specified explicitly
- The
Pagemodel now has two new methodsget_site()andget_url_parts()to aid with customising the page URL generation logic- Upgraded jQuery to 2.2.1 (Charlie Choiniere)
- Multiple homepage summary items (
construct_homepage_summary_itemshook) now better vertically spaced (Nicolas Kuttler)- Email notifications can now be sent in HTML format. See Email Notifications format (Mike Dingjan)
StreamBlocknow has provision for throwing non-field-specific validation errors- Wagtail now works with Willow 0.3, which supports auto-correcting the orientation of images based on EXIF data
- New translations for Hungarian, Swedish (Sweden) and Turkish
Bug fixes
- Custom page managers no longer raise an error when used on an abstract model
- Wagtail’s migrations are now all reversible (Benjamin Bach)
- Deleting a page content type now preserves existing pages as basic Page instances, to prevent tree corruption
- The
Page.pathfield is now explicitly given the “C” collation on PostgreSQL to prevent tree ordering issues when using a database created with the Slovak locale- Wagtail’s compiled static assets are now put into the correct directory on Windows (Aarni Koskela)
ChooserBlocknow correctly handles models with primary keys other thanid(alexpilot11)- Fixed typo in Wistia oEmbed pattern (Josh Hurd)
- Added more accurate help text for the Administrator flag on user accounts (Matt Fozard)
- Tags added on the multiple image uploader are now saved correctly
- Documents created by a user are no longer deleted when the user is deleted
- Fixed a crash in
RedirectMiddlewarewhen a middleware class beforeSiteMiddlewarereturns a response (Josh Schneier)- Fixed error retrieving the moderator list on pages that are covered by multiple moderator permission records (Matt Fozard)
- Ordering pages in the explorer by reverse ‘last updated’ time now puts pages with no revisions at the top
- WagtailTestUtils now works correctly on custom user models without a
usernamefield (Adam Bolfik)- Logging in to the admin as a user with valid credentials but no admin access permission now displays an error message, rather than rejecting the user silently
- StreamBlock HTML rendering now handles non-ASCII characters correctly on Python 2 (Mikalai Radchuk)
- Fixed a bug preventing pages with a
OneToOneFieldfrom being copied (Liam Brenner)- SASS compilation errors during Wagtail development no longer cause exit of Gulp process, instead throws error to console and continues (Thomas Winter)
- Explorer page listing now uses specific page models, so that custom URL schemes defined on Page subclasses are respected
- Made settings menu clickable again in Firefox 46.0a2 (Juha Kujala)
- User management index view no longer assumes the presence of
username,first_name,last_nameand
Upgrade considerations
Removal of django-compressor
As Wagtail no longer installs django-compressor automatically as a dependency, you may need to make changes to your site’s configuration when upgrading. If your project is actively using django-compressor (that is, your site templates contain {% compress %} tags), you should ensure that your project’s requirements explicitly include django-compressor, rather than indirectly relying on Wagtail to install it. If you are not actively using django-compressor on your site, you should update your settings file to remove the line 'compressor' from INSTALLED_APPS, and remove 'compressor.finders.CompressorFinder' from STATICFILES_FINDERS.
Page models now enforce field validation
In previous releases, field validation on Page models was only applied at the form level, meaning that creating pages directly at the model level would bypass validation. For example, if NewsPage is a Page model with a required body field, then code such as:
news_page = NewsPage(title="Hello", slug='hello')
parent_page = NewsIndex.objects.get()
parent_page.add_child(instance=news_page)
would create a page that does not comply with the validation rules. This is no longer possible, as validation is now enforced at the model level on save() and save_revision(); as a result, code that creates pages programmatically (such as unit tests, and import scripts) may need to be updated to ensure that it creates valid pages.
Wagtail 1.3.1 release notes
What’s changed
Bug fixes
- Applied workaround for failing
wagtailimagesmigration on Django 1.8.8 / 1.9.1 with Postgres (see Django issue #26034)
Wagtail 1.3 release notes
What’s new
Django 1.9 support
Wagtail is now compatible with Django 1.9.
Indexing fields across relations in Elasticsearch
Fields on related objects can now be indexed in Elasticsearch using the new indexed.RelatedFields declaration type:
class Book(models.Model, index.Indexed):
...
search_fields = [
index.SearchField('title'),
index.FilterField('published_date'),
index.RelatedFields('author', [
index.SearchField('name'),
index.FilterField('date_of_birth'),
]),
]
# Search books where their author was born after 1950
# Both the book title and the authors name will be searched
>>> Book.objects.filter(author__date_of_birth__gt=date(1950, 1, 1)).search("Hello")
See: index.RelatedFields
Cross-linked admin search UI
The search interface in the Wagtail admin now includes a toolbar to quickly switch between different search types - pages, images, documents and users. A new register_admin_search_area hook is provided for adding new search types to this toolbar.
Minor features
- Added
WagtailPageTests, a helper module to simplify writing tests for Wagtail sites. See Testing your Wagtail site- Added system checks to check the
subpage_typesandparent_page_typesattributes of page models- Added
WAGTAIL_PASSWORD_RESET_ENABLEDsetting to allow password resets to be disabled independently of the password management interface (John Draper)- Submit for moderation notification emails now include the editor name (Denis Voskvitsov)
- Updated fonts for more comprehensive Unicode support
- Added
.altattribute to image renditions- The default
src,width,heightandaltattributes can now be overridden by attributes passed to the{% image %}tag- Added keyboard shortcuts for preview and save in the page editor
- Added
Pagemethodscan_exist_under,can_create_at,can_move_tofor customising page type business ruleswagtailadmin.utils.send_mailnow passes extra keyword arguments to Django’ssend_mailfunction (Matthew Downey)page_unpublishsignal is now fired for each page that was unpublished by a call toPageQuerySet.unpublish()- Add
get_upload_tomethod toAbstractImage, to allow overriding the default image upload path (Ben Emery)- Notification emails are now sent per user (Matthew Downey)
- Added the ability to override the default manager on Page models
- Added an optional human-friendly
site_namefield to sites (Timo Rieber)- Added a system check to warn developers who use a custom Wagtail build but forgot to build the admin css
- Added success message after updating image from the image upload view (Christian Peters)
- Added a
request.is_previewvariable for templates to distinguish between previewing and live (Denis Voskvitsov)- ‘Pages’ link on site stats dashboard now links to the site homepage when only one site exists, rather than the root level
- Added support for chaining multiple image operations on the
{% image %}tag (Christian Peters)- New translations for Arabic, Latvian and Slovak
Bug fixes
- Images and page revisions created by a user are no longer deleted when the user is deleted (Rich Atkinson)
- HTTP cache purge now works again on Python 2 (Mitchel Cabuloy)
- Locked pages can no longer be unpublished (Alex Bridge)
- Site records now implement
get_by_natural_key- Creating pages at the root level (and any other instances of the base
Pagemodel) now properly respects theparent_page_typessetting- Settings menu now opens correctly from the page editor and styleguide views
subpage_types/parent_page_typesbusiness rules are now enforced when moving pages- Multi-word tags on images and documents are now correctly preserved as a single tag (LKozlowski)
- Changed verbose names to start with lower case where necessary (Maris Serzans)
- Invalid images no longer crash the image listing (Maris Serzans)
MenuItemurlparameter can now take a lazy URL (Adon Metcalfe, rayrayndwiga)- Added missing translation tag to InlinePanel ‘Add’ button (jnns)
- Added missing translation tag to ‘Signing in...’ button text (Eugene MechanisM)
- Restored correct highlighting behaviour of rich text toolbar buttons
- Rendering a missing image through ImageChooserBlock no longer breaks the whole page (Christian Peters)
- Filtering by popular tag in the image chooser now works when using the database search backend
Upgrade considerations
Jinja2 template tag modules have changed location
Due to a change in the way template tags are imported in Django 1.9, it has been necessary to move the Jinja2 template tag modules from “templatetags” to a new location, “jinja2tags”. The correct configuration settings to enable Jinja2 templates are now as follows:
TEMPLATES = [
# ...
{
'BACKEND': 'django.template.backends.jinja2.Jinja2',
'APP_DIRS': True,
'OPTIONS': {
'extensions': [
'wagtail.wagtailcore.jinja2tags.core',
'wagtail.wagtailadmin.jinja2tags.userbar',
'wagtail.wagtailimages.jinja2tags.images',
],
},
}
]
ContentType-returning methods in wagtailcore are deprecated
The following internal functions and methods in wagtail.wagtailcore.models, which return a list of ContentType objects, have been deprecated. Any uses of these in your code should be replaced by the corresponding new function which returns a list of model classes instead:
get_page_types()- replaced byget_page_models()Page.clean_subpage_types()- replaced byPage.clean_subpage_models()Page.clean_parent_page_types()- replaced byPage.clean_parent_page_models()Page.allowed_parent_page_types()- replaced byPage.allowed_parent_page_models()Page.allowed_subpage_types()- replaced byPage.allowed_subpage_models()
In addition, note that these methods now return page types that are marked as is_creatable = False, including the base Page class. (Abstract models are not included, as before.)
Wagtail 1.2 release notes
What’s new
Site settings module
Wagtail now includes a contrib module (previously available as the wagtailsettings package) to allow administrators to edit site-specific settings.
See: Site settings
Jinja2 support
The core templatetags (pageurl, slugurl, image, richtext and wagtailuserbar) are now compatible with Jinja2 so it’s now possible to use Jinja2 as the template engine for your Wagtail site.
Note that the variable name self is reserved in Jinja2, and so Wagtail now provides alternative variable names where self was previously used: page to refer to page objects, and value to refer to StreamField blocks. All code examples in this documentation have now been updated to use the new variable names, for compatibility with Jinja2; however, users of the default Django template engine can continue to use self.
Site-specific redirects
You can now create redirects for a particular site using the admin interface.
Search API improvements
Wagtail’s image and document models now provide a search method on their QuerySets, making it easy to perform searches on filtered data sets. In addition, search methods now accept two new keyword arguments:
operator, to determine whether multiple search terms will be treated as ‘or’ (any term may match) or ‘and’ (all terms must match);order_by_relevance, set to True (the default) to order by relevance or False to preserve the QuerySet’s original ordering.
See: Searching
max_num and min_num parameters on inline panels
Inline panels now accept the optional parameters max_num and min_num, to specify the maximum / minimum number of child items that must exist in order for the page to be valid.
get_context on StreamField blocks
StreamField blocks now provide a get_context method that can be overridden to pass additional variables to the block’s template.
Browsable API
The Wagtail API now incorporates the browsable front-end provided by Django REST Framework. Note that this must be enabled by adding 'rest_framework' to your project’s INSTALLED_APPS setting.
Python 3.5 support
Wagtail now supports Python 3.5 when run in conjunction with Django 1.8.6 or later.
Minor features
- WagtailRedirectMiddleware can now ignore the query string if there is no redirect that exactly matches it
- Order of URL parameters now ignored by redirect middleware
- Added SQL Server compatibility to image migration
- Added classnames to Wagtail rich text editor buttons to aid custom styling
- Simplified body_class in default homepage template
- page_published signal now called with the revision object that was published
- Added a favicon to the admin interface, customisable by overriding the
branding_faviconblock (see Custom branding).- Added spinner animations to long-running form submissions
- The EMBEDLY_KEY setting has been renamed to WAGTAILEMBEDS_EMBEDLY_KEY
- StreamField blocks are now added automatically, without showing the block types menu, if only one block type exists (Alex Gleason)
- The
first_published_atandlatest_revision_created_atfields on page models are now available as filter fields on search queries- Wagtail admin now standardises on a single thumbnail image size, to reduce the overhead of creating multiple renditions
- Rich text fields now strip out HTML comments
- Page editor form now sets
enctype="multipart/form-data"as appropriate, allowing FileField to be used on page models (Petr Vacha)- Explorer navigation menu on a completely empty page tree now takes you to the root level, rather than doing nothing
- Added animation and fixed display issues when focusing a rich text field (Alex Gleason)
- Added a system check to warn if Pillow is compiled without JPEG / PNG support
- Page chooser now prevents users from selecting the root node where this would be invalid
- New translations for Dutch (Netherlands), Georgian, Swedish and Turkish (Turkey)
Bug fixes
- Page slugs are no longer auto-updated from the page title if the page is already published
- Deleting a page permission from the groups admin UI does not immediately submit the form
- Wagtail userbar is shown on pages that do not pass a
pagevariable to the template (e.g. because they override theservemethod)request.sitenow set correctly on page preview when the page is not in the default site- Project template no longer raises a deprecation warning (Maximilian Stauss)
PageManager.sibling_of(page)andPageManager.not_sibling_of(page)now default to inclusive (i.e.pageis considered a sibling of itself), for consistency with other sibling methods- The “view live” button displayed after publishing a page now correctly reflects any changes made to the page slug (Ryan Pineo)
- API endpoints now accept and ignore the
_query parameter used by jQuery for cache-busting- Page slugs are no longer cut off when Unicode characters are expanded into multiple characters (Sævar Öfjörð Magnússon)
- Searching a specific page model while filtering it by either ID or tree position no longer raises an error (Ashia Zawaduk)
- Scrolling an over-long explorer menu no longer causes white background to show through (Alex Gleason)
- Removed jitter when hovering over StreamField blocks (Alex Gleason)
- Non-ASCII email addresses no longer throw errors when generating Gravatar URLs (Denis Voskvitsov, Kyle Stratis)
- Dropdown for
ForeignKeys are now styled consistently (Ashia Zawaduk)- Date choosers now appear on top of StreamField menus (Sergey Nikitin)
- Fixed a migration error that was raised when block-updating from 0.8 to 1.1+
Page.copy()no longer breaks on models with aClusterTaggableManagerorManyToManyField- Validation errors when inserting an embed into a rich text area are now reported back to the editor
Upgrade considerations
PageManager.sibling_of(page) and PageManager.not_sibling_of(page) have changed behaviour
In previous versions of Wagtail, the sibling_of and not_sibling_of methods behaved inconsistently depending on whether they were called on a manager (e.g. Page.objects.sibling_of(some_page) or EventPage.objects.sibling_of(some_page)) or a QuerySet (e.g. Page.objects.all().sibling_of(some_page) or EventPage.objects.live().sibling_of(some_page)).
Previously, the manager methods behaved as exclusive by default; that is, they did not count the passed-in page object as a sibling of itself:
>>> event_1 = EventPage.objects.get(title='Event 1')
>>> EventPage.objects.sibling_of(event_1)
[<EventPage: Event 2>] # OLD behaviour: Event 1 is not considered a sibling of itself
This has now been changed to be inclusive by default; that is, the page is counted as a sibling of itself:
>>> event_1 = EventPage.objects.get(title='Event 1')
>>> EventPage.objects.sibling_of(event_1)
[<EventPage: Event 1>, <EventPage: Event 2>] # NEW behaviour: Event 1 is considered a sibling of itself
If the call to sibling_of or not_sibling_of is chained after another QuerySet method - such as all(), filter() or live() - behaviour is unchanged; this behaves as inclusive, as it did in previous versions:
>>> event_1 = EventPage.objects.get(title='Event 1')
>>> EventPage.objects.all().sibling_of(event_1)
[<EventPage: Event 1>, <EventPage: Event 2>] # OLD and NEW behaviour
If your project includes queries that rely on the old (exclusive) behaviour, this behaviour can be restored by adding the keyword argument inclusive=False:
>>> event_1 = EventPage.objects.get(title='Event 1')
>>> EventPage.objects.sibling_of(event_1, inclusive=False)
[<EventPage: Event 2>] # passing inclusive=False restores the OLD behaviour
Image.search and Document.search methods are deprecated
The Image.search and Document.search methods have been deprecated in favour of the new QuerySet-based search mechanism - see Searching Images, Documents and custom models. Code using the old search methods should be updated to search on QuerySets instead; for example:
Image.search("Hello", filters={'uploaded_by_user': user})
can be rewritten as:
Image.objects.filter(uploaded_by_user=user).search("Hello")
Wagtail API requires adding rest_framework to INSTALLED_APPS
If you have the Wagtail API (wagtail.contrib.wagtailapi) enabled, you must now add 'rest_framework' to your project’s INSTALLED_APPS setting. In the current version the API will continue to function without this app, but the browsable front-end will not be available; this ability will be dropped in a future release.
Page.get_latest_revision_as_page() now returns live page object when there are no draft changes
If you have any application code that makes direct updates to page data, at the model or database level, be aware that the way these edits are reflected in the page editor has changed.
Previously, the get_latest_revision_as_page method - used by the page editor to return the current page revision for editing - always retrieved data from the page’s revision history. Now, it will only do so if the page has unpublished changes (i.e. the page is in live + draft state) - pages which have received no draft edits since being published will return the page’s live data instead.
As a result, any changes made directly to a live page object will be immediately reflected in the editor without needing to update the latest revision record (but note, the old behaviour is still used for pages in live + draft state).
Wagtail 1.1 release notes
What’s new
specific() method on PageQuerySet
Usually, an operation that retrieves a queryset of pages (such as homepage.get_children()) will return them as basic Page instances, which only include the core page data such as title. The specific() method (e.g. homepage.get_children().specific()) now allows them to be retrieved as their most specific type, using the minimum number of queries.
“Promoted search results” has moved into its own module
Previously, this was implemented in wagtailsearch but now has been moved into a separate module: wagtail.contrib.wagtailsearchpromotions
Atomic rebuilding of Elasticsearch indexes
The Elasticsearch search backend now accepts an experimental ATOMIC_REBUILD flag which ensures that the existing search index continues to be available while the update_index task is running. See ATOMIC_REBUILD.
The wagtailapi module now uses Django REST Framework
The wagtailapi module is now built on Django REST Framework and it now also has a library of serialisers that you can use in your own REST Framework based APIs. No user-facing changes have been made.
We hope to support more REST framework features, such as a browsable API, in future releases.
Permissions fixes in the admin interface
A number of inconsistencies around permissions in the admin interface were fixed in this release:
- Removed all permissions for “User profile” (not used)
- Removed “delete” permission for Images and documents (not used)
- Users can now access images and documents when they only have the “change” permission (previously required “add” permission as well)
- Permissions for Users now taken from custom user model, if set (previously always used permissions on Djangos builtin User model)
- Groups and Users now respond consistently to their respective “add”, “change” and “delete” permissions
Searchable snippets
Snippets that inherit from wagtail.wagtailsearch.index.Indexed are now given a search box on the snippet chooser and listing pages. See Making Snippets Searchable.
Minor features
- Implemented deletion of form submissions
- Implemented pagination in the page chooser modal
- Changed INSTALLED_APPS in project template to list apps in precedence order
- The
{% image %}tag now supports filters on the image variable, e.g.{% image primary_img|default:secondary_img width-500 %}- Moved the style guide menu item into the Settings sub-menu
- Search backends can now be specified by module (e.g.
wagtail.wagtailsearch.backends.elasticsearch), rather than a specific class (wagtail.wagtailsearch.backends.elasticsearch.ElasticSearch)- Added
descendant_offilter to the API- Added optional directory argument to “wagtail start” command
- Non-superusers can now view/edit/delete sites if they have the correct permissions
- Image file size is now stored in the database, to avoid unnecessary filesystem lookups
- Page URL lookups hit the cache/database less often
- Updated URLs within the admin backend to use namespaces
- The
update_indextask now indexes objects in batches of 1000, to indicate progress and avoid excessive memory use- Added database indexes on PageRevision and Image to improve performance on large sites
- Search in page chooser now uses Wagtail’s search framework, to order results by relevance
PageChooserPanelnow supports passing a list (or tuple) of accepted page types- The snippet type parameter of
SnippetChooserPanelcan now be omitted, or passed as a model name string rather than a model class- Added aliases for the
selftemplate variable to accommodate Jinja as a templating engine:pagefor pages,field_panelfor field panels / edit handlers, andvaluefor blocks- Added signposting text to the explorer to steer editors away from creating pages at the root level unless they are setting up new sites
- “Clear choice” and “Edit this page” buttons are no longer shown on the page field of the group page permissions form
- Altered styling of stream controls to be more like all other buttons
- Added ability to mark page models as not available for creation using the flag
is_creatable; pages that are abstract Django models are automatically made non-creatable- New translations for Norwegian Bokmål and Icelandic
Bug fixes
- Text areas in the non-default tab of the page editor now resize to the correct height
- Tabs in “insert link” modal in the rich text editor no longer disappear (Tim Heap)
- H2 elements in rich text fields were accidentally given a click() binding when put insite a collapsible multi field panel
- The
wagtailimagesmodule is now compatible with remote storage backends that do not allow reopening closed files- Search no longer crashes when auto-indexing a model that doesn’t have an
idfield- The
wagtailfrontendcachemodule’s HTTP backend has been rewritten to reliably direct requests to the configured cache hostname- Resizing single pixel images with the “fill” filter no longer raises “ZeroDivisionError” or “tile cannot extend outside image”
- The queryset returned from
searchoperations when using the database search backend now correctly preserves additional properties of the original query, such asprefetch_related/select_related- Responses from the external image URL generator are correctly marked as streaming and will no longer fail when used with Django’s cache middleware
- Page copy now works with pages that use multiple inheritance
- Form builder pages now pick up template variables defined in the
get_contextmethod- When copying a page, IDs of child objects within page revision records were not remapped to the new objects; this would cause those objects to be lost from the original page when editing the new one
- Newly added redirects now take effect on all sites, rather than just the site that the Wagtail admin backend was accessed through
- Add user form no longer throws a hard error on validation failure
Upgrade considerations
“Promoted search results” no longer in wagtailsearch
This feature has moved into a contrib module so is no longer enabled by default.
To re-enable it, add wagtail.contrib.wagtailsearchpromotions to your INSTALLED_APPS:
INSTALLED_APPS = [
...
'wagtail.contrib.wagtailsearchpromotions',
...
If you have references to the wagtail.wagtailsearch.models.EditorsPick model in your project, you will need to update these to point to the wagtail.contrib.wagtailsearchpromotions.models.SearchPromotion model instead.
If you created your project using the wagtail start command with Wagtail 1.0, you will probably have references to this model in the search/views.py file.
is_abstract flag on page models has been replaced by is_creatable
Previous versions of Wagtail provided an undocumented is_abstract flag on page models - not to be confused with Django’s abstract Meta flag - to indicate that it should not be included in the list of available page types for creation. (Typically this would be used on model classes that were designed to be subclassed to create new page types, rather than used directly.) To avoid confusion with Django’s distinct concept of abstract models, this has now been replaced by a new flag, is_creatable.
If you have used is_abstract = True on any of your models, you should now change this to is_creatable = False.
It is not necessary to include this flag if the model is abstract in the Django sense (i.e. it has abstract = True in the model’s Meta class), since it would never be valid to create pages of that type.
Wagtail 1.0 release notes
What’s changed
StreamField - a field type for freeform content
StreamField provides an editing model for freeform content such as blog posts and news stories, allowing diverse content types such as text, images, headings, video and more specialised types such as maps and charts to be mixed in any order. See Freeform page content using StreamField.
Wagtail API - A RESTful API for your Wagtail site
When installed, the new Wagtail API module provides a RESTful web API to your Wagtail site. You can use this for accessing your raw field content for your sites pages, images and documents in JSON format. See Wagtail API v1
MySQL support
Wagtail now officially supports MySQL as a database backend.
Django 1.8 support
Wagtail now officially supports running under Django 1.8.
Vanilla project template
The built-in project template is more like the Django built-in one with several Wagtail-specific additions. It includes bare minimum settings and two apps (home and search).
Minor changes
- Dropped Django 1.6 support
- Dropped Python 2.6 and 3.2 support
- Dropped Elasticsearch 0.90.x support
- Removed dependency on
libsass- Users without usernames can now be created and edited in the admin interface
- Added new translations for Croatian and Finnish
- The Page model now records the date/time that a page was first published, as the field
first_published_at- Increased the maximum length of a page slug from 50 to 255 characters
- Added hooks
register_rich_text_embed_handlerandregister_rich_text_link_handlerfor customising link / embed handling within rich text fields- Page URL paths can now be longer than 255 characters
UI
- Improvements to the layout of the left-hand menu footer
- Menu items of custom apps are now highlighted when being used
- Added thousands separator for counters on dashboard
- Added contextual links to admin notification messages
- When copying pages, it is now possible to specify a place to copy to
- Added pagination to the snippets listing and chooser
- Page / document / image / snippet choosers now include a link to edit the chosen item
- Plain text fields in the page editor now use auto-expanding text areas
- Added “Add child page” button to admin userbar
- Added update notifications (See: Wagtail update notifications)
Page editor
- JavaScript includes in the admin backend have been moved to the HTML header, to accommodate form widgets that render inline scripts that depend on libraries such as jQuery
- The external link chooser in rich text areas now accepts URLs of the form ‘/some/local/path’, to allow linking to non-Wagtail-controlled URLs within the local site
- Bare text entered in rich text areas is now automatically wrapped in a paragraph element
Edit handlers API
FieldPanelnow accepts an optionalwidgetparameter to override the field’s default form widget- Page model fields without a
FieldPanelare no longer displayed in the form- No longer need to specify the base model on
InlinePaneldefinitions- Page classes can specify an edit_handler property to override the default Content / Promote / Settings tabbed interface. See Customising the tabbed interface.
Other admin changes
- SCSS files in wagtailadmin now use absolute imports, to permit overriding by user stylesheets
- Removed the dependency on
LOGIN_URLandLOGIN_REDIRECT_URLsettings- Password reset view names namespaced to wagtailadmin
- Removed the need to add permission check on admin views (now automated)
- Reversing
django.contrib.auth.admin.loginwill no longer lead to Wagtails login view (making it easier to have frontend login views)- Added cache-control headers to all admin views. This allows Varnish/Squid/CDN to run on vanilla settings in front of a Wagtail site
- Date / time pickers now consistently use times without seconds, to prevent JavasSript behaviour glitches when focusing / unfocusing fields
- Added hook
construct_homepage_summary_itemsfor customising the site summary panel on the admin homepage- Renamed the
construct_wagtail_edit_birdhook toconstruct_wagtail_userbar- ‘static’ template tags are now used throughout the admin templates, in place of
STATIC_URL
- Support for
django-sendfileadded- Documents now served with correct mime-type
- Support for
If-Modified-SinceHTTP header
- Search view accepts “page” GET parameter in line with pagination
- Added AUTO_UPDATE flag to search backend settings to enable/disable automatically updating the search index on model changes
- Added a new decorator-based syntax for RoutablePage, compatible with Django 1.8
Bug fixes
- The
document_servedsignal now correctly passes the Document class assenderand the document asinstance- Image edit page no longer throws
OSErrorwhen the original image is missing- Collapsible blocks stay open on any form error
- Document upload modal no longer switches tabs on form errors
with_metaclassis now imported from Django’s bundled copy of thesixlibrary, to avoid errors on Mac OS X from an outdated system copy of the library being imported
Upgrade considerations
Support for older Django/Python/Elasticsearch versions dropped
This release drops support for Django 1.6, Python 2.6/3.2 and Elasticsearch 0.90.x. Please make sure these are updated before upgrading.
If you are upgrading from Elasticsearch 0.90.x, you may also need to update the elasticsearch pip package to a version greater than 1.0 as well.
Wagtail version upgrade notifications are enabled by default
Starting from Wagtail 1.0, the admin dashboard will (for admin users only) perform a check to see if newer releases are available. This also provides the Wagtail team with the hostname of your Wagtail site. If you’d rather not receive update notifications, or if you’d like your site to remain unknown, you can disable it by adding this line to your settings file:
WAGTAIL_ENABLE_UPDATE_CHECK = False
InlinePanel definitions no longer need to specify the base model
In previous versions of Wagtail, inline child blocks on a page or snippet were defined using a declaration like:
InlinePanel(HomePage, 'carousel_items', label="Carousel items")
It is no longer necessary to pass the base model as a parameter, so this declaration should be changed to:
InlinePanel('carousel_items', label="Carousel items")
The old format is now deprecated; all existing InlinePanel declarations should be updated to the new format.
admin_form_fields attribute¶Django 1.8 now requires that all the fields in a ModelForm must be defined in its Meta.fields attribute.
As Wagtail uses Django’s ModelForm for creating image model forms, we’ve added a new attribute called admin_form_fields that should be set to a tuple of field names on the image model.
See Custom image models for an example.
You no longer need LOGIN_URL and LOGIN_REDIRECT_URL to point to Wagtail admin.
If you are upgrading from an older version of Wagtail, you probably want to remove these from your project settings.
Prevously, these two settings needed to be set to wagtailadmin_login and wagtailadmin_dashboard respectively or Wagtail would become very tricky to log in to. This is no longer the case and Wagtail should work fine without them.
RoutablePage now uses decorator syntax for defining views
In previous versions of Wagtail, page types that used the RoutablePageMixin had endpoints configured by setting their subpage_urls attribute to a list of urls with view names. This will not work on Django 1.8 as view names can no longer be passed into a url (see: https://docs.djangoproject.com/en/1.8/releases/1.8/#django-conf-urls-patterns).
Wagtail 1.0 introduces a new syntax where each view function is annotated with a @route decorator - see RoutablePageMixin.
The old subpage_urls convention will continue to work on Django versions prior to 1.8, but this is now deprecated; all existing RoutablePage definitions should be updated to the decorator-based convention.
Upgrading from the external wagtailapi module.
If you were previously using the external wagtailapi module (which has now become wagtail.contrib.wagtailapi). Please be aware of the following backwards-incompatible changes:
1. Representation of foreign keys has changed
Foreign keys were previously represented by just the value of their primary key. For example:
"feed_image": 1
This has now been changed to add some meta information:
"feed_image": {
"id": 1,
"meta": {
"type": "wagtailimages.Image",
"detail_url": "http://api.example.com/api/v1/images/1/"
}
}
2. On the page detail view, the “parent” field has been moved out of meta
Previously, there was a “parent” field in the “meta” section on the page detail view:
{
"id": 10,
"meta": {
"type": "demo.BlogPage",
"parent": 2
},
...
}
This has now been moved to the top level. Also, the above change to how foreign keys are represented applies to this field too:
{
"id": 10,
"meta": {
"type": "demo.BlogPage"
},
"parent": {
"id": 2,
"meta": {
"type": "demo.BlogIndexPage"
}
}
...
}
Celery no longer automatically used for sending notification emails
Previously, Wagtail would try to use Celery whenever the djcelery module was installed, even if Celery wasn’t actually set up. This could cause a very hard to track down problem where notification emails would not be sent so this functionality has now been removed.
If you would like to keep using Celery for sending notification emails, have a look at: django-celery-email
Login/Password reset views renamed
It was previously possible to reverse the Wagtail login view using django.contrib.auth.views.login. This is no longer possible. Update any references to wagtailadmin_login.
Password reset view name has changed from password_reset to wagtailadmin_password_reset.
JavaScript includes in admin backend have been moved
To improve compatibility with third-party form widgets, pages within the Wagtail admin backend now output their JavaScript includes in the HTML header, rather than at the end of the page. If your project extends the admin backend (through the register_admin_menu_item hook, for example) you will need to ensure that all associated JavaScript code runs correctly from the new location. In particular, any code that accesses HTML elements will need to be contained in an ‘onload’ handler (e.g. jQuery’s $(document).ready()).
EditHandler internal API has changed
While it is not an official Wagtail API, it has been possible for Wagtail site implementers to define their own EditHandler subclasses for use in panel definitions, to customise the behaviour of the page / snippet editing forms. If you have made use of this facility, you will need to update your custom EditHandlers, as this mechanism has been refactored (to allow EditHandler classes to keep a persistent reference to their corresponding model). If you have only used Wagtail’s built-in panel types (FieldPanel, InlinePanel, PageChooserPanel and so on), you are unaffected by this change.
Previously, functions like FieldPanel acted as ‘factory’ functions, where a call such as FieldPanel('title') constructed and returned an EditHandler subclass tailored to work on a ‘title’ field. These functions now return an object with a bind_to_model method instead; the EditHandler subclass can be obtained by calling this with the model class as a parameter. As a guide to updating your custom EditHandler code, you may wish to refer to the relevant change to the Wagtail codebase.
chooser_panel templates are obsolete
If you have added your own custom admin views to the Wagtail admin (e.g. through the register_admin_urls hook), you may have used one of the following template includes to incorporate a chooser element for pages, documents, images or snippets into your forms:
wagtailadmin/edit_handlers/chooser_panel.htmlwagtailadmin/edit_handlers/page_chooser_panel.htmlwagtaildocs/edit_handlers/document_chooser_panel.htmlwagtailimages/edit_handlers/image_chooser_panel.htmlwagtailsnippets/edit_handlers/snippet_chooser_panel.html
All of these templates are now deprecated. Wagtail now provides a set of Django form widgets for this purpose - AdminPageChooser, AdminDocumentChooser, AdminImageChooser and AdminSnippetChooser - which can be used in place of the HiddenInput widget that these form fields were previously using. The field can then be rendered using the regular wagtailadmin/shared/field.html or wagtailadmin/shared/field_as_li.html template.
document_served signal arguments have changed
Previously, the document_served signal (which is fired whenever a user downloads a document) passed the document instance as the sender. This has now been changed to correspond the behaviour of Django’s built-in signals; sender is now the Document class, and the document instance is passed as the argument instance. Any existing signal listeners that expect to receive the document instance in sender must now be updated to check the instance argument instead.
Custom image models must specify an admin_form_fields list
Previously, the forms for creating and editing images followed Django’s default behaviour of showing all fields defined on the model; this would include any custom fields specific to your project that you defined by subclassing AbstractImage and setting WAGTAILIMAGES_IMAGE_MODEL. This behaviour is risky as it may lead to fields being unintentionally exposed to the user, and so Django has deprecated this, for removal in Django 1.8. Accordingly, if you create your own custom subclass of AbstractImage, you must now provide an admin_form_fields property, listing the fields that should appear on the image creation / editing form - for example:
from wagtail.wagtailimages.models import AbstractImage, Image
class MyImage(AbstractImage):
photographer = models.CharField(max_length=255)
has_legal_approval = models.BooleanField()
admin_form_fields = Image.admin_form_fields + ['photographer']
construct_wagtail_edit_bird hook has been renamed
Previously you could customize the Wagtail userbar using the construct_wagtail_edit_bird hook. The hook has been renamed to construct_wagtail_userbar.
The old hook is now deprecated; all existing construct_wagtail_edit_bird declarations should be updated to the new hook.
IMAGE_COMPRESSION_QUALITY setting has been renamed
The IMAGE_COMPRESSION_QUALITY setting, which determines the quality of saved JPEG images as a value from 1 to 100, has been renamed to WAGTAILIMAGES_JPEG_QUALITY. If you have used this setting, please update your settings file accordingly.
Wagtail 0.8.10 release notes
What’s changed
Bug fixes
- When copying a page, IDs of child objects within page revision records were not remapped to the new objects; this would cause those objects to be lost from the original page when editing the new one
- Search no longer crashes when auto-indexing a model that doesn’t have an id field (Scot Hacker)
- Resizing single pixel images with the “fill” filter no longer raises “ZeroDivisionError” or “tile cannot extend outside image”
Wagtail 0.8.8 release notes
What’s changed
Bug fixes
- Form builder no longer raises a
TypeErrorwhen submitting unchecked boolean field - Image upload form no longer breaks when using i10n thousand separators
- Multiple image uploader now escapes HTML in filenames
- Retrieving an individual item from a sliced
BaseSearchResultsobject now properly takes the slice offset into account - Removed dependency on unicodecsv which fixes a crash on Python 3
- Submitting unicode text in form builder form no longer crashes with
UnicodeEncodeErroron Python 2 - Creating a proxy model from a Page class no longer crashes in the system check
- Unrecognised embed URLs passed to the
|embedfilter no longer cause the whole page to crash with anEmbedNotFoundException - Underscores no longer get stripped from page slugs
Wagtail 0.8.7 release notes
What’s changed
Bug fixes
wagtailfrontendcacheno longer tries to purge pages that are not in a site- The contents of
<div>elements in the rich text editor were not being whitelisted - Due to the above issue, embeds/images in a rich text field would sometimes be saved into the database in their editor representation
- RoutablePage now prevents
subpage_urlsfrom being defined as a property, which would cause a memory leak - Added validation to prevent pages being created with only whitespace characters in their title fields
- Users are no longer logged out on changing password when SessionAuthenticationMiddleware (added in Django 1.7) is in use
- Added a workaround for a Python / Django issue that prevented documents with certain non-ASCII filenames from being served
Wagtail 0.8.6 release notes
What’s new
Minor features
- Translations updated, including new translations for Czech, Italian and Japanese
- The “fixtree” command can now delete orphaned pages
Bug fixes
- django-taggit library updated to 0.12.3, to fix a bug with migrations on SQLite on Django 1.7.2 and above (https://github.com/alex/django-taggit/issues/285)
- Fixed a bug that caused children of a deleted page to not be deleted if they had a different type
Upgrade considerations
Orphaned pages may need deleting
This release fixes a bug with page deletion introduced in 0.8, where deleting a page with child pages will result in those child pages being left behind in the database (unless the child pages are of the same type as the parent). This may cause errors later on when creating new pages in the same position. To identify and delete these orphaned pages, it is recommended that you run the following command (from the project root) after upgrading to 0.8.6:
$ ./manage.py fixtree
This will output a list of any orphaned pages found, and request confirmation before deleting them.
Since this now makes fixtree an interactive command, a ./manage.py fixtree --noinput option has been added to restore the previous non-interactive behaviour. With this option enabled, deleting orphaned pages is always skipped.
Wagtail 0.8.5 release notes
What’s new
Bug fixes
- On adding a new page, the available page types are ordered by the displayed verbose name
- Active admin submenus were not properly closed when activating another
get_sitemap_urlsis now called on the specific page class so it can now be overridden- (Firefox and IE) Fixed preview window hanging and not refocusing when “Preview” button is clicked again
- Storage backends that return raw ContentFile objects are now handled correctly when resizing images
- Punctuation characters are no longer stripped when performing search queries
- When adding tags where there were none before, it is now possible to save a single tag with multiple words in it
richtexttemplate tag no longer raisesTypeErrorifNoneis passed into it- Serving documents now uses a streaming HTTP response and will no longer break Django’s cache middleware
- User admin area no longer fails in the presence of negative user IDs (as used by
django-guardian‘s default settings)- Password reset emails now use the
BASE_URLsetting for the reset URLBASE_URLis now included in the project template’s default settings file
Wagtail 0.8.4 release notes
What’s new
Bug fixes
- It is no longer possible to have the explorer and settings menu open at the same time
- Page IDs in page revisions were not updated on page copy, causing subsequent edits to be committed to the original page instead
- Copying a page now creates a new page revision, ensuring that changes to the title/slug are correctly reflected in the editor (and also ensuring that the user performing the copy is logged)
- Prevent a race condition when creating Filter objects
- On adding a new page, the available page types are ordered by the displayed verbose name
Wagtail 0.8.3 release notes
What’s new
Bug fixes
- Added missing jQuery UI sprite files, causing collectstatic to throw errors (most reported on Heroku)
- Page system check for on_delete actions of ForeignKeys was throwing false positives when page class decends from an abstract class (Alejandro Giacometti)
- Page system check for on_delete actions of ForeignKeys now only raises warnings, not errors
- Fixed a regression where form builder submissions containing a number field would fail with a JSON serialisation error
- Resizing an image with a focal point equal to the image size would result in a divide-by-zero error
- Focal point indicator would sometimes be positioned incorrectly for small or thin images
- Fix: Focal point chooser background colour changed to grey to make working with transparent images easier
- Elasticsearch configuration now supports specifying HTTP authentication parameters as part of the URL, and defaults to ports 80 (HTTP) and 443 (HTTPS) if port number not specified
- Fixed a TypeError when previewing pages that use RoutablePageMixin
- Rendering image with missing file in rich text no longer crashes the entire page
- IOErrors thrown by underlying image libraries that are not reporting a missing image file are no longer caught
- Fix: Minimum Pillow version bumped to 2.6.1 to work around a crash when using images with transparency
- Fix: Images with transparency are now handled better when being used in feature detection
Upgrade considerations
Port number must be specified when running Elasticsearch on port 9200
In previous versions, an Elasticsearch connection URL in WAGTAILSEARCH_BACKENDS without an explicit port number (e.g. http://localhost/) would be treated as port 9200 (the Elasticsearch default) whereas the correct behaviour would be to use the default http/https port of 80/443. This behaviour has now been fixed, so sites running Elasticsearch on port 9200 must now specify this explicitly - e.g. http://localhost:9200. (Projects using the default settings, or the settings given in the Wagtail documentation, are unaffected.)
Wagtail 0.8.1 release notes
What’s new
Bug fixes
- Fixed a regression where images would fail to save when feature detection is active
Wagtail 0.8 release notes
What’s new
Minor features
- Page operations (creation, publishing, copying etc) are now logged via Python’s
loggingframework; to configure this, add a logger entry for'wagtail'or'wagtail.core'to theLOGGINGsetup in your settings file.- The save button on the page edit page now redirects the user back to the edit page instead of the explorer
- Signal handlers for
wagtail.wagtailsearchandwagtail.contrib.wagtailfrontendcacheare now automatically registered when using Django 1.7 or above.- Added a Django 1.7 system check to ensure that foreign keys from Page models are set to
on_delete=SET_NULL, to prevent inadvertent (and tree-breaking) page deletions- Improved error reporting on image upload, including ability to set a maximum file size via a new setting
WAGTAILIMAGES_MAX_UPLOAD_SIZE- The external image URL generator now keeps persistent image renditions, rather than regenerating them on each request, so it no longer requires a front-end cache.
- Added Dutch translation
Bug fixes
- Replaced references of .username with .get_username() on users for better custom user model support
- Unpinned dependency versions for six and requests to help prevent dependency conflicts
- Fixed TypeError when getting embed HTML with oembed on Python 3
- Made HTML whitelisting in rich text fields more robust at catching disallowed URL schemes such as
jav\tascript:created_attimestamps on page revisions were not being preserved on page copy, causing revisions to get out of sequence- When copying pages recursively, revisions of sub-pages were being copied regardless of the
copy_revisionsflag- Updated the migration dependencies within the project template to ensure that Wagtail’s own migrations consistently apply first
- The cache of site root paths is now cleared when a site is deleted
- Search indexing now prevents pages from being indexed multiple times, as both the base Page model and the specific subclass
- Search indexing now avoids trying to index abstract models
- Fixed references to “username” in login form help text for better custom user model support
- Later items in a model’s search_field list now consistently override earlier items, allowing subclasses to redefine rules from the parent
- Image uploader now accepts JPEG images that PIL reports as being in MPO format
- Multiple checkbox fields on form-builder forms did not correctly save multiple values
- Editing a page’s slug and saving it without publishing could sometimes cause the URL paths of child pages to be corrupted
latest_revision_created_atwas being cleared on page publish, causing the page to drop to the bottom of explorer listings- Searches on partial_match fields were wrongly applying prefix analysis to the search query as well as the document (causing e.g. a query for “water” to match against “wagtail”)
Upgrade considerations
Corrupted URL paths may need fixing
This release fixes a bug in Wagtail 0.7 where editing a parent page’s slug could cause the URL paths of child pages to become corrupted. To ensure that your database does not contain any corrupted URL paths, it is recommended that you run ./manage.py set_url_paths after upgrading.
Automatic registration of signal handlers (Django 1.7+)
Signal handlers for the wagtailsearch core app and wagtailfrontendcache contrib app are automatically registered when using Django 1.7. Calls to register_signal_handlers from your urls.py can be removed.
Change to search API when using database backend
When using the database backend, calling search (either through Page.objects.search() or on the backend directly) will now return a SearchResults object rather than a Django QuerySet to make the database backend work more like the Elasticsearch backend.
This change shouldn’t affect most people as SearchResults behaves very similarly to QuerySet. But it may cause issues if you are calling QuerySet specific methods after calling .search(). Eg: Page.objects.search("Hello").filter(foo="Bar") (in this case, .filter() should be moved before .search() and it would work as before).
Removal of validate_image_format from custom image model migrations (Django 1.7+)
If your project is running on Django 1.7, and you have defined a custom image model (by extending the wagtailimages.AbstractImage class), the migration that creates this model will probably have a reference to wagtail.wagtailimages.utils.validators.validate_image_format. This module has now been removed, which will cause manage.py migrate to fail with an ImportError (even if the migration has already been applied). You will need to edit the migration file to remove the line:
import wagtail.wagtailimages.utils.validators
and the validators attribute of the ‘file’ field - that is, the line:
('file', models.ImageField(upload_to=wagtail.wagtailimages.models.get_upload_to,
width_field='width', height_field='height',
validators=[wagtail.wagtailimages.utils.validators.validate_image_format],
verbose_name='File')),
should become:
- (‘file’, models.ImageField(upload_to=wagtail.wagtailimages.models.get_upload_to,
- width_field=’width’, height_field=’height’, verbose_name=’File’)),
Wagtail 0.7 release notes
What’s new
New interface for choosing image focal point
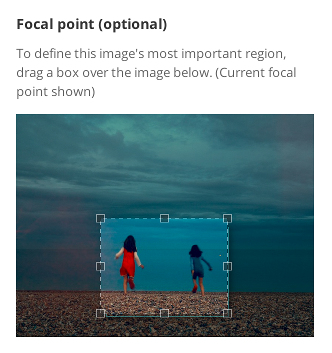
When editing images, users can now specify a ‘focal point’ region that cropped versions of the image will be centred on. Previously the focal point could only be set automatically, through image feature detection.
Groups and Sites administration interfaces
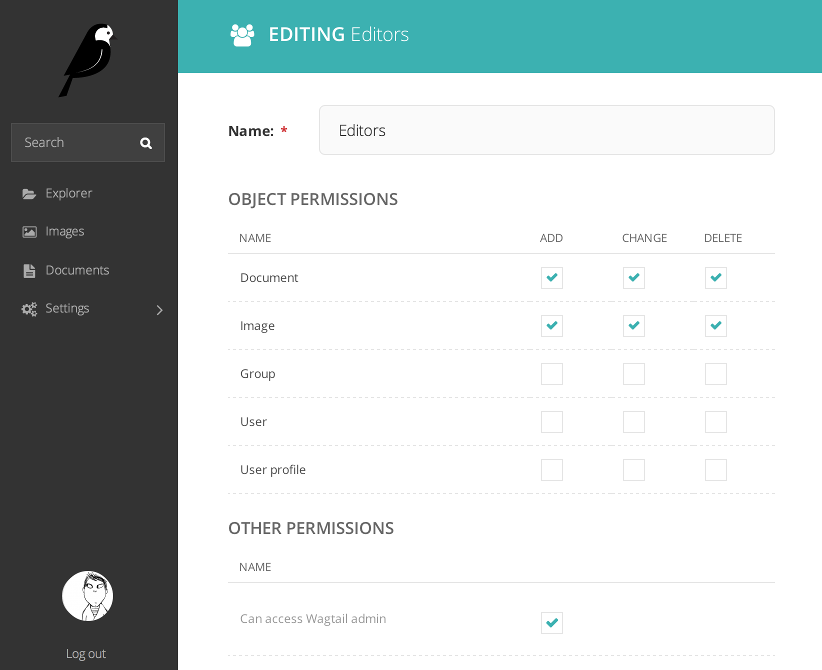
The main navigation menu has been reorganised, placing site configuration options in a ‘Settings’ submenu. This includes two new items, which were previously only available through the Django admin backend: ‘Groups’, for setting up user groups with a specific set of permissions, and ‘Sites’, for managing the list of sites served by this Wagtail instance.
Page locking

Moderators and administrators now have the ability to lock a page, preventing further edits from being made to that page until it is unlocked again.
Minor features
- The
content_typetemplate filter has been removed from the project template, as the same thing can be accomplished withself.get_verbose_name|slugify.- Page copy operations now also copy the page revision history.
- Page models now support a
parent_page_typesproperty in addition tosubpage types, to restrict the types of page they can be created under.register_snippetcan now be invoked as a decorator.- The project template (used when running
wagtail start) has been updated to Django 1.7.- The ‘boost’ applied to the title field on searches has been reduced from 100 to 2.
- The
typemethod ofPageQuerySet(used to filter the queryset to a specific page type) now includes subclasses of the given page type.- The
update_indexmanagement command now updates all backends listed inWAGTAILSEARCH_BACKENDS, or a specific one passed on the command line, rather than just the default backend.- The ‘fill’ image resize method now supports an additional parameter defining the closeness of the crop. See Using images in templates
- Added support for invalidating Cloudflare caches. See Frontend cache invalidator
- Pages in the explorer can now be ordered by last updated time.
Bug fixes
- The ‘wagtail start’ command now works on Windows and other environments where the
django-admin.pyexecutable is not readily accessible.- The external image URL generator no longer stores generated images in Django’s cache; this was an unintentional side-effect of setting cache control headers.
- The Elasticsearch backend can now search querysets that have been filtered with an ‘in’ clause of a non-list type (such as a
ValuesListQuerySet).- Logic around the
has_unpublished_changesflag has been fixed, to prevent issues with the ‘View draft’ button failing to show in some cases.- It is now easier to move pages to the beginning and end of their section
- Image rendering no longer creates erroneous duplicate Rendition records when the focal point is blank.
Upgrade considerations
Addition of wagtailsites app
The Sites administration interface is contained within a new app, wagtailsites. To enable this on an existing Wagtail project, add the line:
'wagtail.wagtailsites',
to the INSTALLED_APPS list in your project’s settings file.
Title boost on search reduced to 2
Wagtail’s search interface applies a ‘boost’ value to give extra weighting to matches on the title field. The original boost value of 100 was found to be excessive, and in Wagtail 0.7 this has been reduced to 2. If you have used comparable boost values on other fields, to give them similar weighting to title, you may now wish to reduce these accordingly. See Indexing.
Addition of locked field to Page model
The page locking mechanism adds a locked field to wagtailcore.Page, defaulting to False. Any application code working with Page objects should be unaffected, but any code that creates page records using direct SQL, or within existing South migrations using South’s frozen ORM, will fail as this code will be unaware of the new database column. To fix a South migration that fails in this way, add the following line to the 'wagtailcore.page' entry at the bottom of the migration file:
'locked': ('django.db.models.fields.BooleanField', [], {'default': 'False'}),
Update to focal_point_key field on custom Rendition models
The focal_point_key field on wagtailimages.Rendition has been changed to null=False, to fix an issue with duplicate renditions being created. If you have defined a custom Rendition model in your project (by extending the wagtailimages.AbstractRendition class), you will need to apply a migration to make the corresponding change on your custom model. Unfortunately neither South nor Django 1.7’s migration system are able to generate this automatically - you will need to customise the migration produced by ./manage.py schemamigration / ./manage.py makemigrations, using the wagtailimages migration as a guide:
Wagtail 0.6 release notes
What’s new
Project template and start project command
Wagtail now has a basic project template built in to make starting new projects much easier.
To use it, install wagtail onto your machine and run wagtail start project_name.
Django 1.7 support
Wagtail can now be used with Django 1.7.
Minor features
- A new template tag has been added for reversing URLs inside routable pages. See The routablepageurl template tag.
- RoutablePage can now be used as a mixin. See
wagtail.contrib.wagtailroutablepage.models.RoutablePageMixin.- MenuItems can now have bundled JavaScript
- Added the
register_admin_menu_itemhook for registering menu items at startup. See Hooks- Added a version indicator into the admin interface (hover over the wagtail to see it)
- Added Russian translation
Bug fixes
- Page URL generation now returns correct URLs for sites that have the main ‘serve’ view rooted somewhere other than ‘/’.
- Search results in the page chooser now respect the page_type parameter on PageChooserPanel.
- Rendition filenames are now prevented from going over 60 chars, even with a large focal_point_key.
- Child relations that are defined on a model’s superclass (such as the base Page model) are now picked up correctly by the page editing form, page copy operations and the replace_text management command.
- Tags on images and documents are now committed to the search index immediately on saving.
Upgrade considerations
All features deprecated in 0.4 have been removed
See: Deprecated features
Search signal handlers have been moved
If you have an import in your urls.py file like from wagtail.wagtailsearch import register_signal_handlers, this must now be changed to from wagtail.wagtailsearch.signal_handlers import register_signal_handlers
Deprecated features
- The
wagtail.wagtailsearch.indexedmodule has been renamed towagtail.wagtailsearch.index
Wagtail 0.5 release notes
What’s new
Multiple image uploader
The image uploader UI has been improved to allow multiple images to be uploaded at once.
Image feature detection
Wagtail can now apply face and feature detection on images using OpenCV, and use this to intelligently crop images.
Using images outside Wagtail
In normal use, Wagtail will generate resized versions of images at the point that they are referenced on a template, which means that those images are not easily accessible for use outside of Wagtail, such as displaying them on external sites. Wagtail now provides a way to obtain URLs to your images, at any size.
RoutablePage
A RoutablePage model has been added to allow embedding Django-style URL routing within a page.
Usage stats for images, documents and snippets
It’s now easier to find where a particular image, document or snippet is being used on your site.
Set the WAGTAIL_USAGE_COUNT_ENABLED setting to True and an icon will appear on the edit page showing you which pages they have been used on.
Copy Page action
The explorer interface now offers the ability to copy pages, with or without subpages.
Minor features
- Hooks can now be defined using decorator syntax:
@hooks.register('construct_main_menu') def construct_main_menu(request, menu_items): menu_items.append( MenuItem('Kittens!', '/kittens/', classnames='icon icon-folder-inverse', order=1000) )
- The lxml library (used for whitelisting and rewriting of rich text fields) has been replaced with the pure-python html5lib library, to simplify installation.
- A
page_unpublishedsignal has been added.
Explorer nav now rendered separately and fetched with AJAX when needed.
This improves the general performance of the admin interface for large sites.
Bug fixes
- Updates to tag fields are now properly committed to the database when publishing directly from the page edit interface.
Upgrade considerations
Urlconf entries for /admin/images/, /admin/embeds/ etc need to be removed
If you created a Wagtail project prior to the release of Wagtail 0.3, it is likely to contain the following entries in its urls.py:
# TODO: some way of getting wagtailimages to register itself within wagtailadmin so that we # don't have to define it separately here url(r'^admin/images/', include(wagtailimages_urls)), url(r'^admin/embeds/', include(wagtailembeds_urls)), url(r'^admin/documents/', include(wagtaildocs_admin_urls)), url(r'^admin/snippets/', include(wagtailsnippets_urls)), url(r'^admin/search/', include(wagtailsearch_admin_urls)), url(r'^admin/users/', include(wagtailusers_urls)), url(r'^admin/redirects/', include(wagtailredirects_urls)),
These entries (and the corresponding from wagtail.wagtail* import ... lines) need to be removed from urls.py. (The entry for /admin/ should be left in, however.)
Since Wagtail 0.3, the wagtailadmin module automatically takes care of registering these URL subpaths, so these entries are redundant, and these urlconf modules are not guaranteed to remain stable and backwards-compatible in future. Leaving these entries in place will now cause an ImproperlyConfigured exception to be thrown.
New fields on Image and Rendition models
Several new fields have been added to the Image and Rendition models to support Feature Detection. These will be added to the database when you run ./manage.py migrate. If you have defined a custom image model (by extending the wagtailimages.AbstractImage and wagtailimages.AbstractRendition classes and specifying WAGTAILIMAGES_IMAGE_MODEL in settings), the change needs to be applied to that model’s database table too. Running the command:
$ ./manage.py schemamigration myapp --auto add_image_focal_point_fields
(with ‘myapp’ replaced with your app name) will generate the necessary migration file.
South upgraded to 1.0
In preparation for Django 1.7 support in a future release, Wagtail now depends on South 1.0, and its migration files have been moved from migrations to south_migrations. Older versions of South will fail to find the migrations in the new location.
If your project’s requirements file (most commonly requirements.txt or requirements/base.txt) references a specific older version of South, this must be updated to South 1.0.
Wagtail 0.4.1 release notes
Bug fixes
- ElasticSearch backend now respects the backward-compatible URLS configuration setting, in addition to HOSTS
- Documentation fixes
Wagtail 0.4 release notes
What’s new
Private Pages
Wagtail now supports password protecting pages on the frontend, allowing sections of your website to be made private.
Python 3 support
Wagtail now supports Python 3.2, 3.3 and 3.4.
Scheduled publishing
Editors can now schedule pages to be published or unpublished at specified times.
A new management command has been added (publish_scheduled_pages) to publish pages that have been scheduled by an editor.
Search on QuerySet with Elasticsearch
It’s now possible to perform searches with Elasticsearch on PageQuerySet objects:
>>> from wagtail.wagtailcore.models import Page
>>> Page.objects.live().descendant_of(events_index).search("Hello")
[<Page: Event 1>, <Page: Event 2>]
Sitemap generation
A new module has been added (wagtail.contrib.wagtailsitemaps) which produces XML sitemaps for Wagtail sites.
Front-end cache invalidation
A new module has been added (wagtail.contrib.wagtailfrontendcache) which invalidates pages in a frontend cache when they are updated or deleted in Wagtail.
Notification preferences
Users can now decide which notifications they receive from Wagtail using a new “Notification preferences” section located in the account settings.
Minor features
- Any extra arguments given to
Page.serveare now passed through toget_contextandget_template- Added
in_menuandnot_in_menumethods toPageQuerySet- Added
searchmethod toPageQuerySet- Added
get_next_siblingsandget_prev_siblingstoPage- Added
page_publishedsignal- Added
copymethod toPageto allow copying of pages- Added
construct_whitelister_element_ruleshook for customising the HTML whitelist used when savingRichTextfields- Support for setting a
subpage_typesproperty onPagemodels, to define which page types are allowed as subpages
- Removed the “More” section from the menu
- Added pagination to page listings
- Added a new datetime picker widget
- Updated
hallo.jsto version 1.0.4- Aesthetic improvements to preview experience
- Login screen redirects to dashboard if user is already logged in
- Snippets are now ordered alphabetically
- Added
init_new_pagesignal
- Added a new way to configure searchable/filterable fields on models
- Added
get_indexed_objectsallowing developers to customise which objects get added to the search index- Major refactor of Elasticsearch backend
- Use
matchinstead ofquery_stringqueries- Fields are now indexed in Elasticsearch with their correct type
- Filter fields are no longer included in
_all- Fields with partial matching are now indexed together into
_partials
- Added
originalas a resizing rule supported by the{% image %}tagimagetag now accepts extra keyword arguments to be output as attributes on theimgtag- Added an
attrsproperty to image rendition objects to outputsrc,width,heightandaltattributes all in one go
- Added styleguide, for Wagtail developers
Bug fixes
- Animated GIFs are now coalesced before resizing
- The Wand backend clones images before modifying them
- The admin breadcrumb is now positioned correctly on mobile
- The page chooser breadcrumb now updates the chooser modal instead of linking to Explorer
- Embeds - fixed crash when no HTML field is sent back from the embed provider
- Multiple sites with same hostname but different ports are now allowed
- It is no longer possible to create multiple sites with
is_default_site = True
Backwards-incompatible changes
ElasticUtils replaced with elasticsearch-py
If you are using the elasticsearch backend, you must install the elasticsearch module into your environment.
Note
If you are using an older version of Elasticsearch (< 1.0) you must install elasticsearch version 0.4.x.
Addition of expired column may break old data migrations involving pages
The scheduled publishing mechanism adds an expired field to wagtailcore.Page, defaulting to False. Any application code working with Page objects should be unaffected, but any code that creates page records using direct SQL, or within existing South migrations using South’s frozen ORM, will fail as this code will be unaware of the expired database column. To fix a South migration that fails in this way, add the following line to the 'wagtailcore.page' entry at the bottom of the migration file:
'expired': ('django.db.models.fields.BooleanField', [], {'default': 'False'}),
Deprecated features
Template tag libraries renamed
The following template tag libraries have been renamed:
pageurl=>wagtailcore_tagsrich_text=>wagtailcore_tagsembed_filters=>wagtailembeds_tagsimage_tags=>wagtailimages_tags
The old names will continue to work, but output a DeprecationWarning - you are advised to update any {% load %} tags in your templates to refer to the new names.
New search field configuration format
indexed_fields is now deprecated and has been replaced by a new search field configuration format called search_fields. See Indexing for how to define a search_fields property on your models.
Page.route method should now return a RouteResult
Previously, the route method called serve and returned an HttpResponse object. This has now been split up so serve is called separately and route must now return a RouteResult object.
If you are overriding Page.route on any of your page models, you will need to update the method to return a RouteResult object. The old method of returning an HttpResponse will continue to work, but this will throw a DeprecationWarning and bypass the before_serve_page hook, which means in particular that Private pages will not work on those page types. See Adding Endpoints with Custom route() Methods.
Wagtailadmins hooks module has moved to wagtailcore
If you use any wagtail_hooks.py files in your project, you may have an import like: from wagtail.wagtailadmin import hooks
Change this to: from wagtail.wagtailcore import hooks
Miscellaneous
Page.show_as_modereplaced withPage.serve_previewPage.get_page_modesmethod replaced withPage.preview_modespropertyPage.get_other_siblingsreplaced withPage.get_siblings(inclusive=False)